Introduction
Editing and adjusting images can often be time-consuming and complex. However, with Photoshop Elements, you are provided with a powerful tool: the Quick Selection Tool. In this tutorial, you will learn how to quickly select areas and optimize masks at the same time to achieve impressive results. Let’s explore the possibilities together.
Key Insights
The Quick Selection Tool is ideal for quickly selecting areas of an image. You can adjust and optimize the selection to achieve a clean result. Smaller steps and using the Undo function are essential for working precisely. A good refinement of the masks helps make the selection appear even more professional.
Step-by-Step Guide
1. Select the Quick Selection Tool
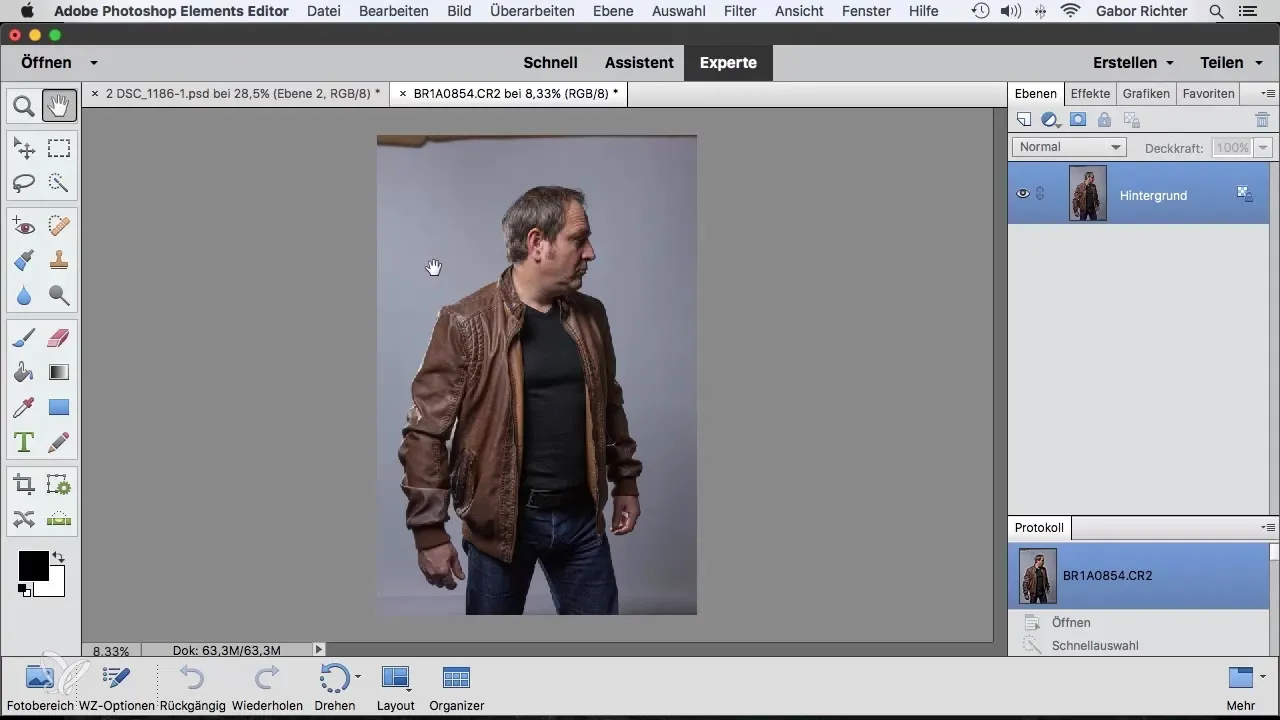
Start Adobe Photoshop Elements and find the Quick Selection Tool in the upper toolbar. A double-click on the icon allows you to adjust the size of the tool. Choose a size of approximately 85 pixels to achieve the best result.
2. Make the Initial Selection
Begin by selecting the area of the image you want to edit, such as the person's head in the picture. Slowly move along the contours, and Photoshop will automatically recognize the edges and make a selection.
3. Expand the Selection
To expand the selection, simply click on the areas you also want to select, such as the arms and legs. Be careful not to select everything at once. Dividing the selection into smaller sections gives you more control.
4. Undo Mistakes
If you accidentally select the wrong area, you can undo the last step with "Command + Z" (or "Ctrl + Z"). This keeps you flexible and allows you to work precisely. Use this option frequently to optimize your selection.
5. Create a Mask
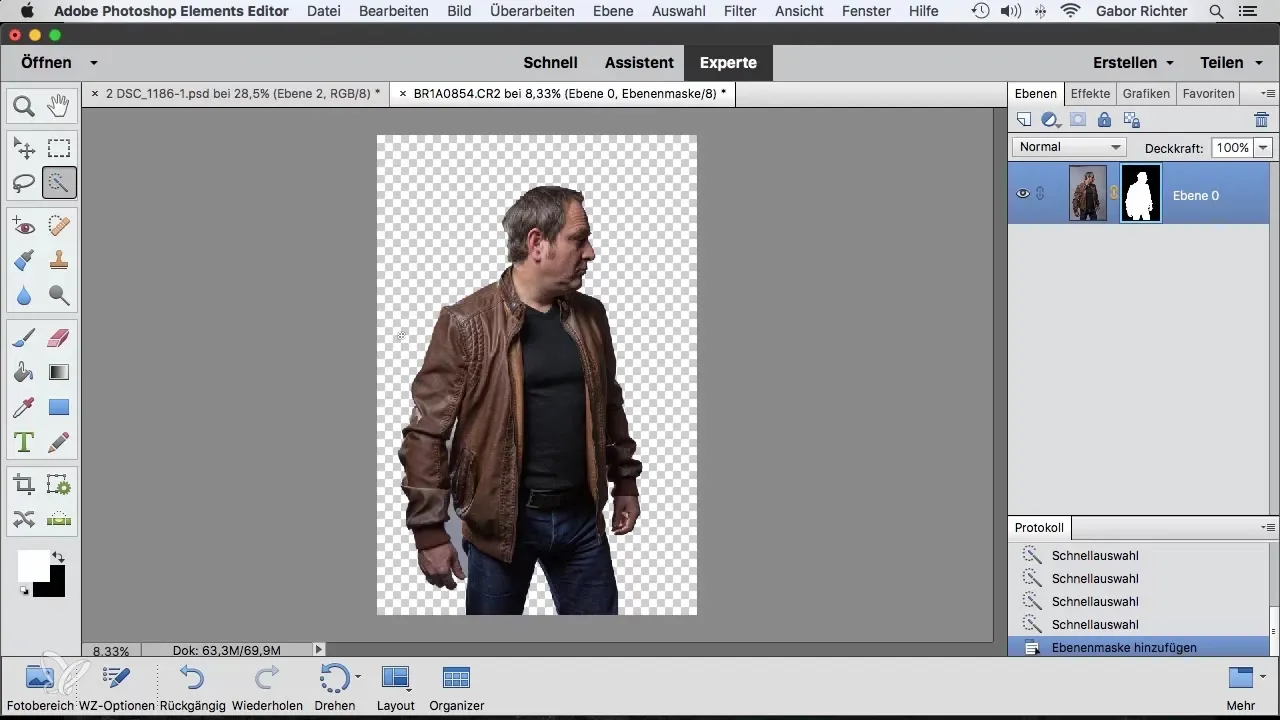
Once you have made a rough selection, navigate to your layer and activate a mask. This gives you a quick cutout. Although the edges may not be perfect yet, this is a solid foundation.
6. Optimize the Selection
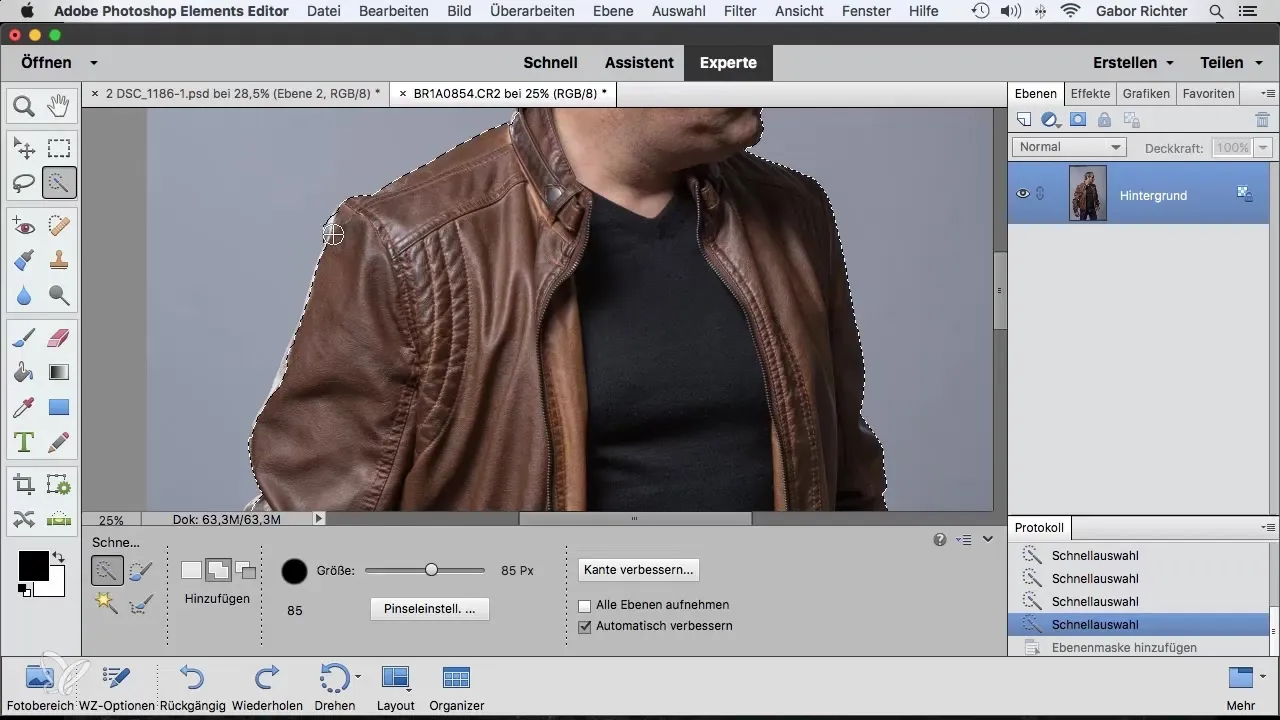
Double-click the Quick Selection Tool and enable the "Auto-Enhance" option. This function takes a little time, but it improves edge detection and provides a cleaner result.
7. Adjust the Size of the Selection
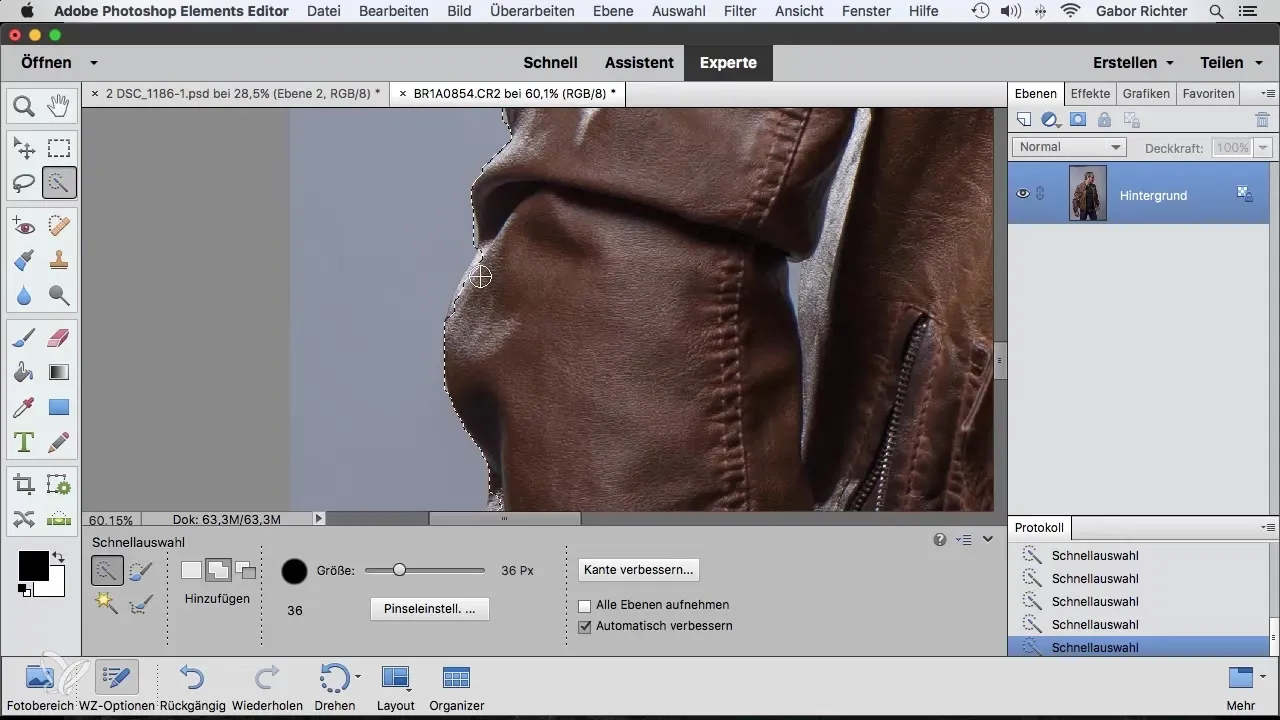
Reduce the tool size to about 36 pixels to focus on areas like the jacket. Target areas that are less precise, such as the edges of clothing or hair. Photoshop will optimize the selection during editing.
8. Subtract Areas
If you need to subtract areas, hold down the Alt key and click on the parts of the selection you want to remove. This may require precise retouching, so patience is necessary.
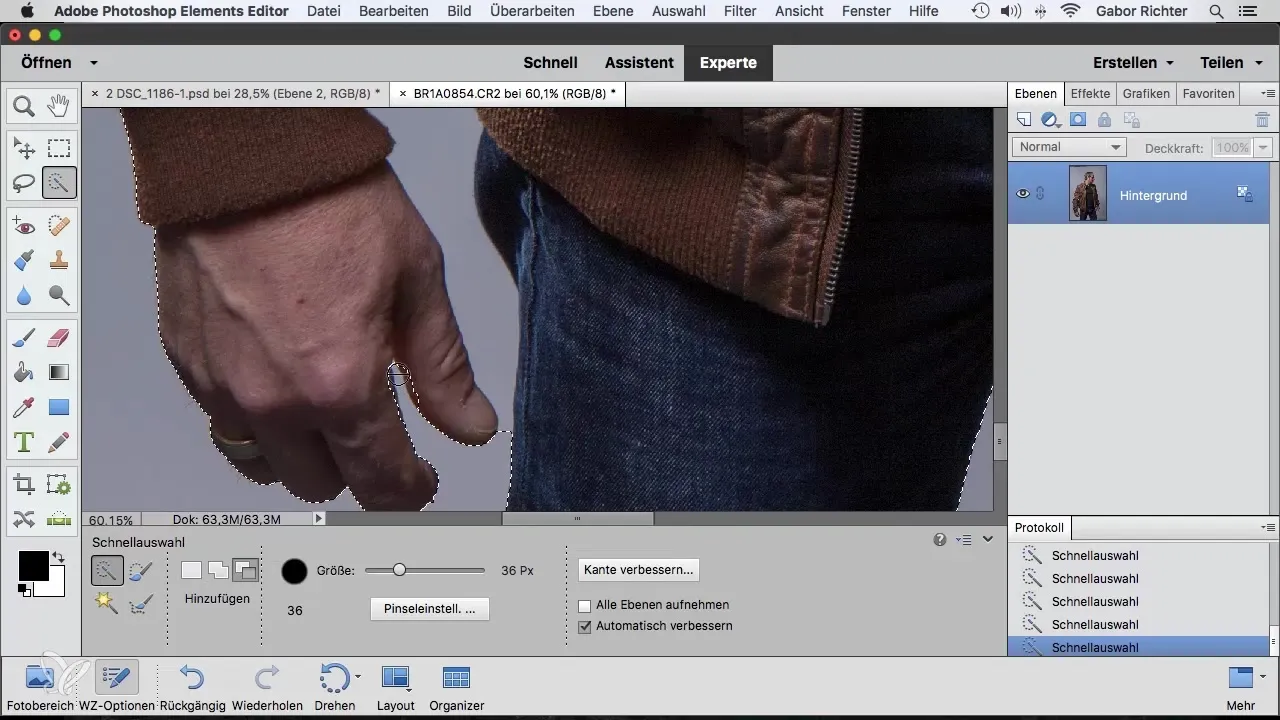
9. Check the Final Selection
After adjusting the selection, look at the overall image. If you still discover impurities, you can correct them with a brush tool in the mask.
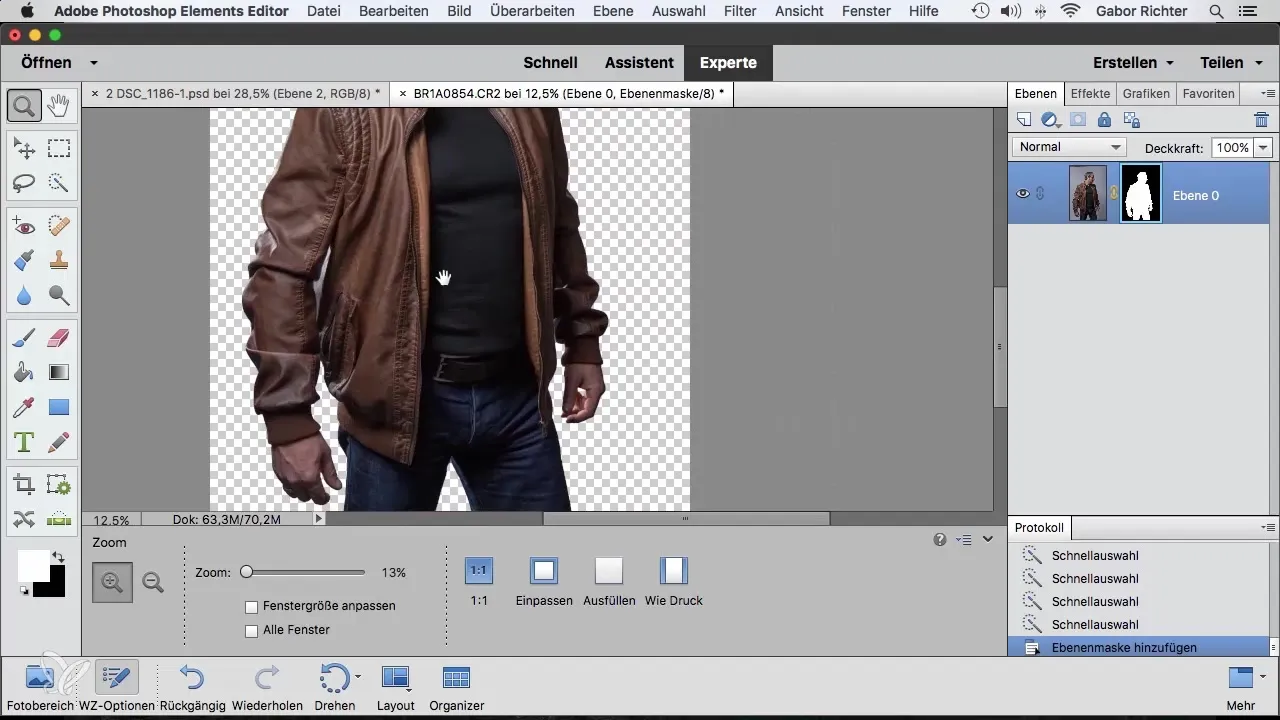
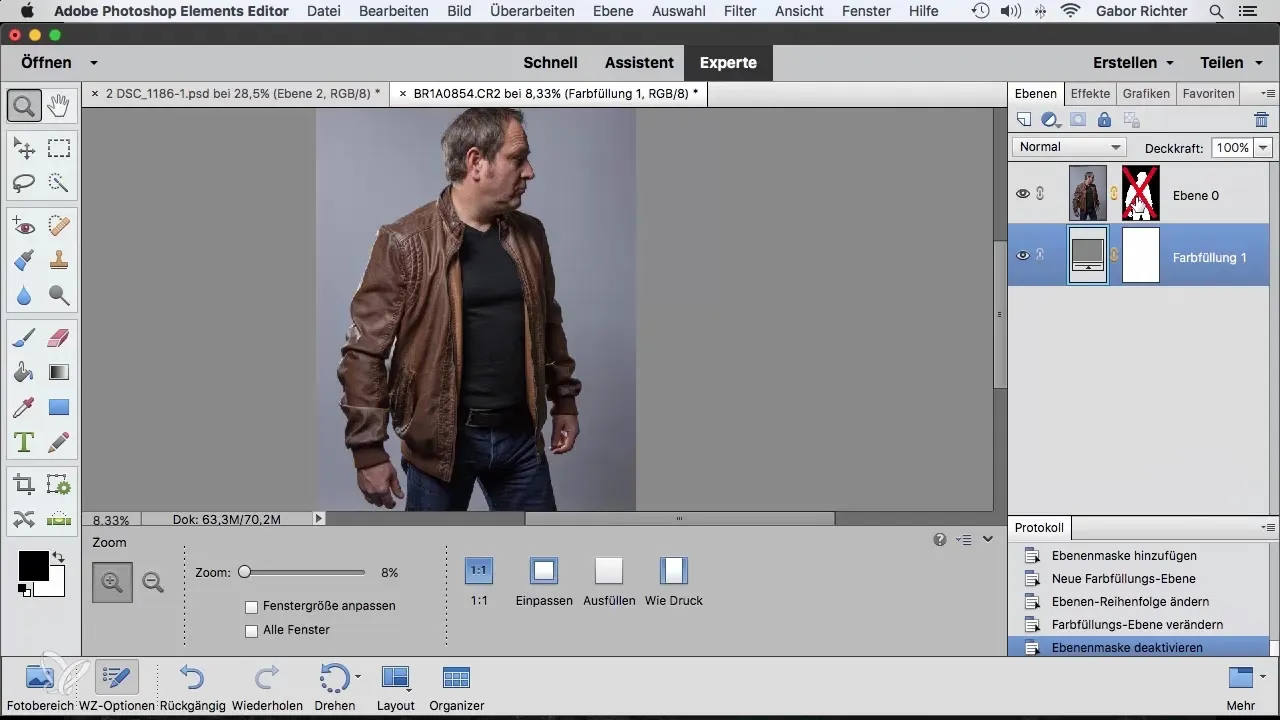
10. Change Backgrounds
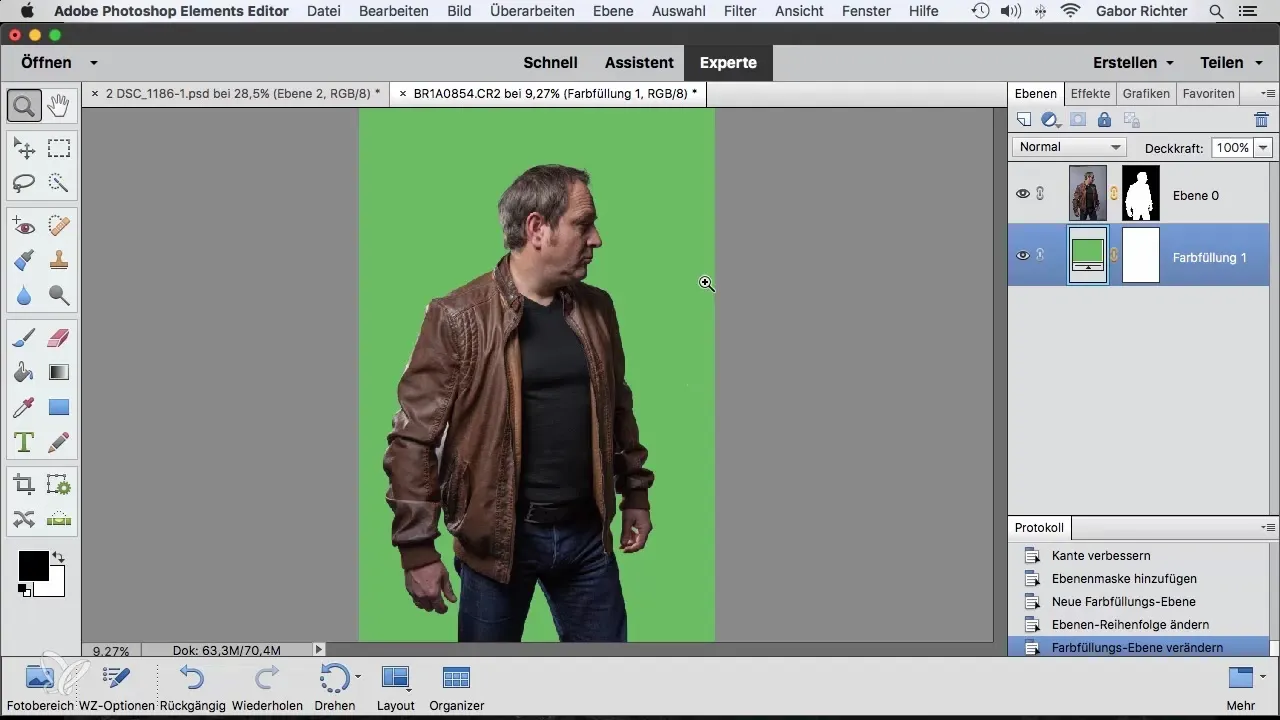
To add a new background, go to the adjustment layers and select a color fill. Fill this layer with a desired color, such as gray or blue, and place it below the selection.
11. Refine Hair
To improve the selection of hair, go back to the original selection process and enable the "Refine Edge" function. Then select the hair areas and let Photoshop optimize the edges.
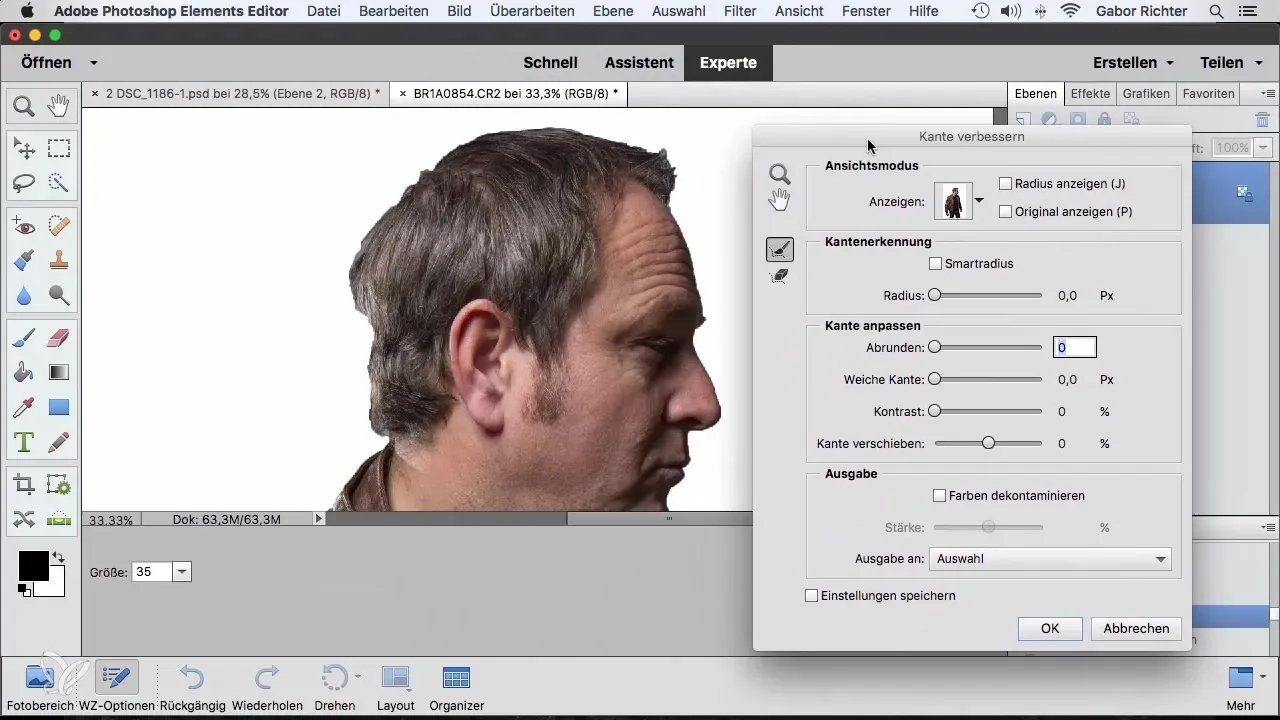
12. Finalize the Mask
Place a new color fill above your selection and check the result. Vary the background color to see how it looks. Pay attention to the details of the slightly flying hair.
Summary - Quick and Easy Selection in Photoshop Elements: Quick Selection and Mask Optimization
The Quick Selection Tool is an incredibly useful tool in Photoshop Elements that helps you quickly and accurately select areas of an image. The combination of targeted selection and subsequent refinement of masks leads to professional results that significantly enhance your image editing.
Frequently Asked Questions
How can I change the size of the Quick Selection Tool?You can adjust the size of the Quick Selection Tool in the tool menu by double-clicking on the tool icon.
What do I do if the selection isn't perfect?Use the Undo function (Command + Z) to correct and select carefully to optimize inaccurate areas.
How do I use the Refine Edge Tool?Enable the "Refine Edge" option and select the area you want to enhance, especially for hair or fine edges.
Is there a way to save the selection in Photoshop Elements?Yes, you can save the selection by creating a mask that preserves the selection made.
Can I change the background color in Photoshop Elements at any time?Yes, you can adjust the background color at any time by changing the corresponding color fill or adjustment layer.


