If you take a picture, it can happen that the subject is underexposed and many details are lost. Instead of immediately sending such pictures to the trash or sitting frustrated in front of the computer, there are effective methods to turn your underexposed photos into usable subjects. In this guide, I will show you how to specifically adjust the exposure in Photoshop Elements.
Main findings
- Underexposed images can often be salvaged with simple adjustments.
- The histogram is an important tool for analyzing the light distribution in your image.
- Adjusting exposure and shadows can help recover details without creating too much noise.
Step-by-step guide
To optimize the image, first open the photo in Photoshop Elements.
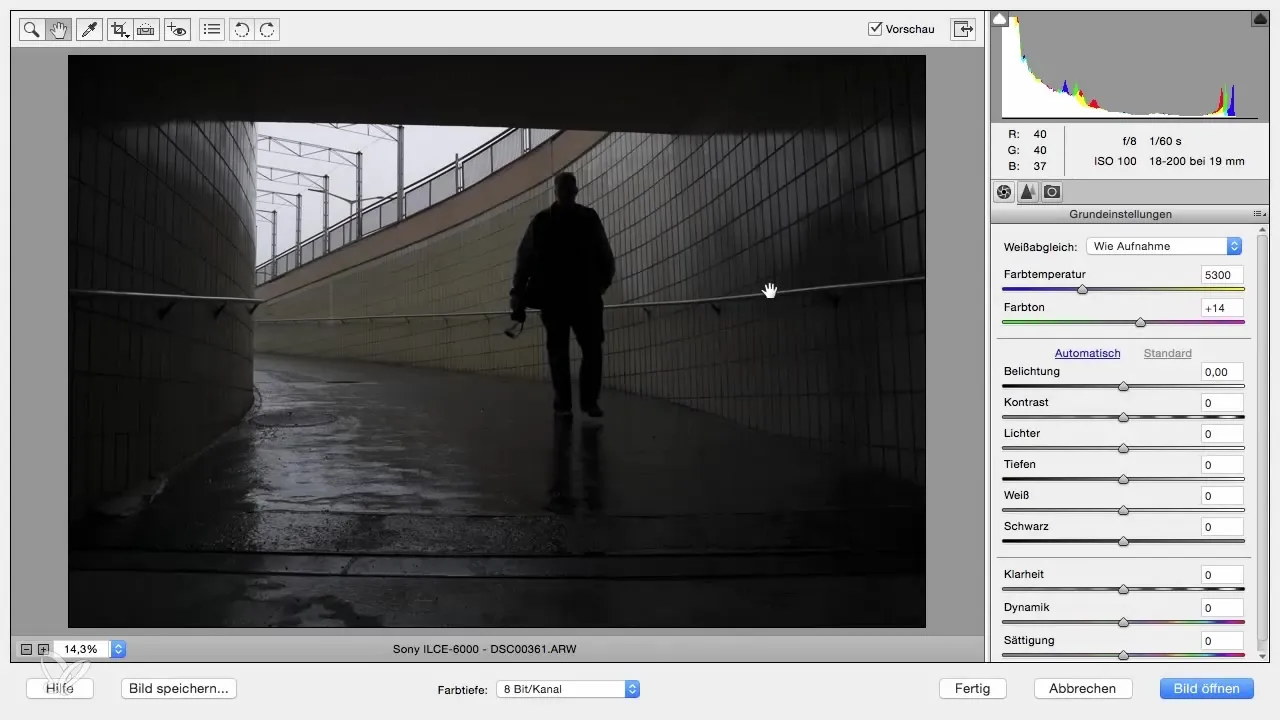
In the next step, take a closer look at the dark areas of the image. Usually, you will see that where only black is present, no details are visible anymore. This is often a sign that the image is too dark.
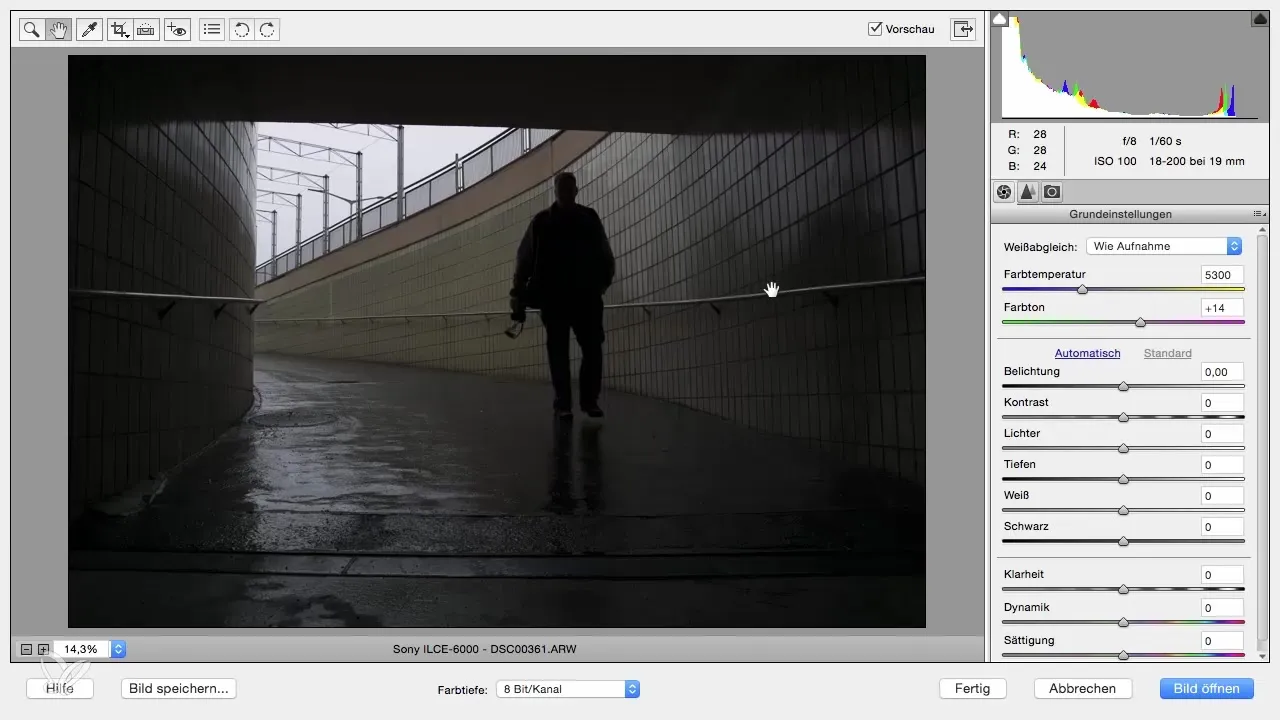
To improve the exposure, click on the histogram located in the upper left corner. The histogram shows you a graphical representation of the brightness in your image. Areas marked in blue represent pure black.
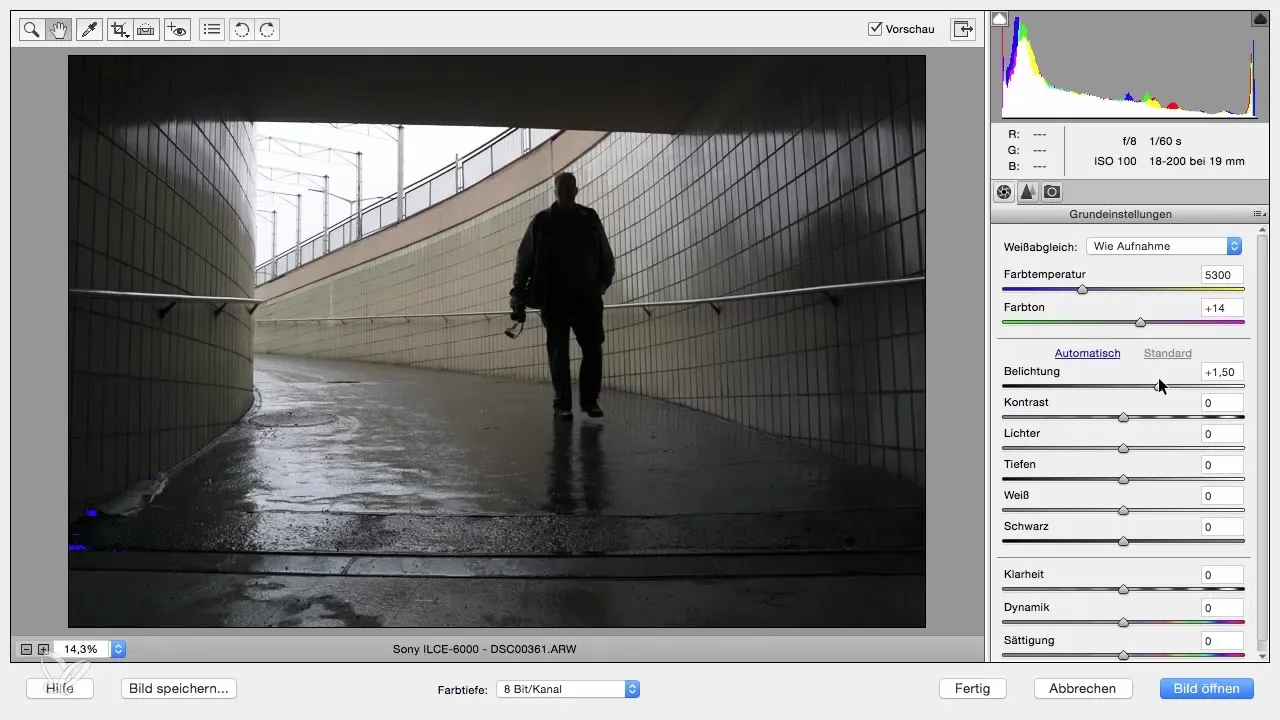
Now you can begin to correct the exposure. Move the slider to the right to brighten the entire subject. Make sure to find a balance so that the image overall becomes brighter without losing details.
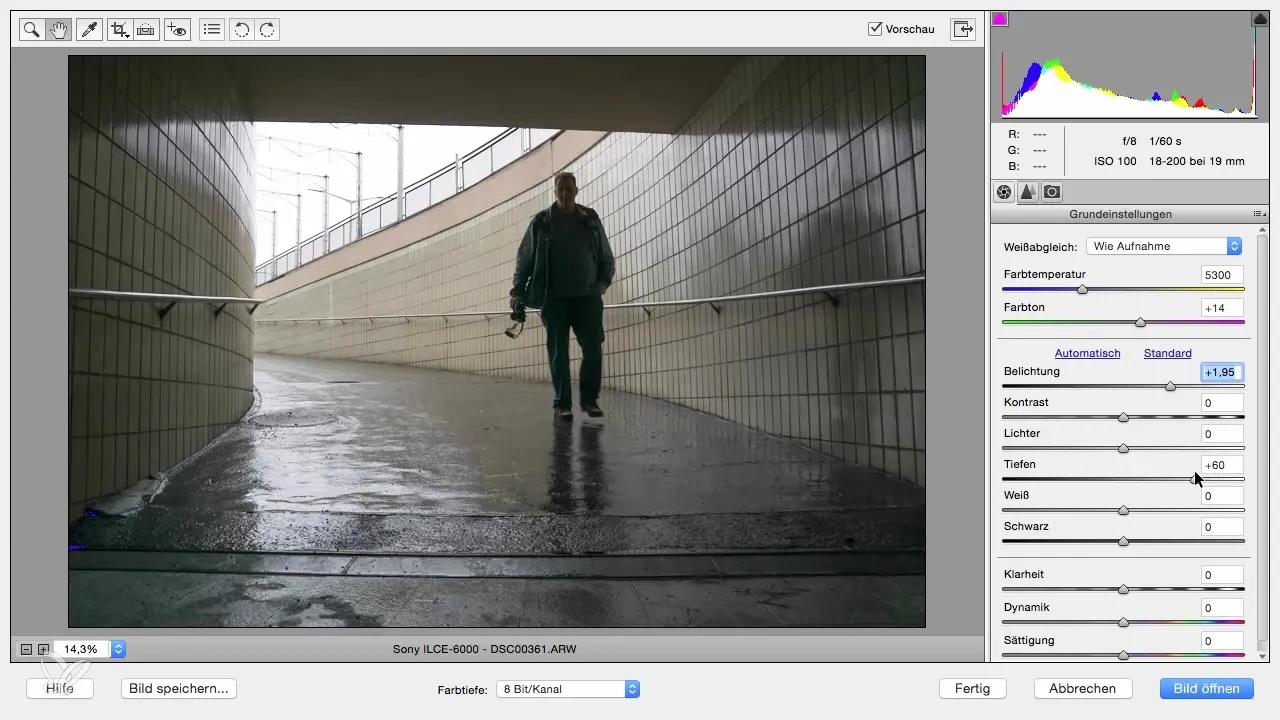
Additionally, you can adjust the shadows. This setting helps you to highlight more details from the dark areas. However, be careful, as too much can quickly lead to noise.
Note that it is less risky to edit images that are too bright, as you can still recover details in such cases. With very dark images, there is often a risk of increasing noise in the lighter areas.
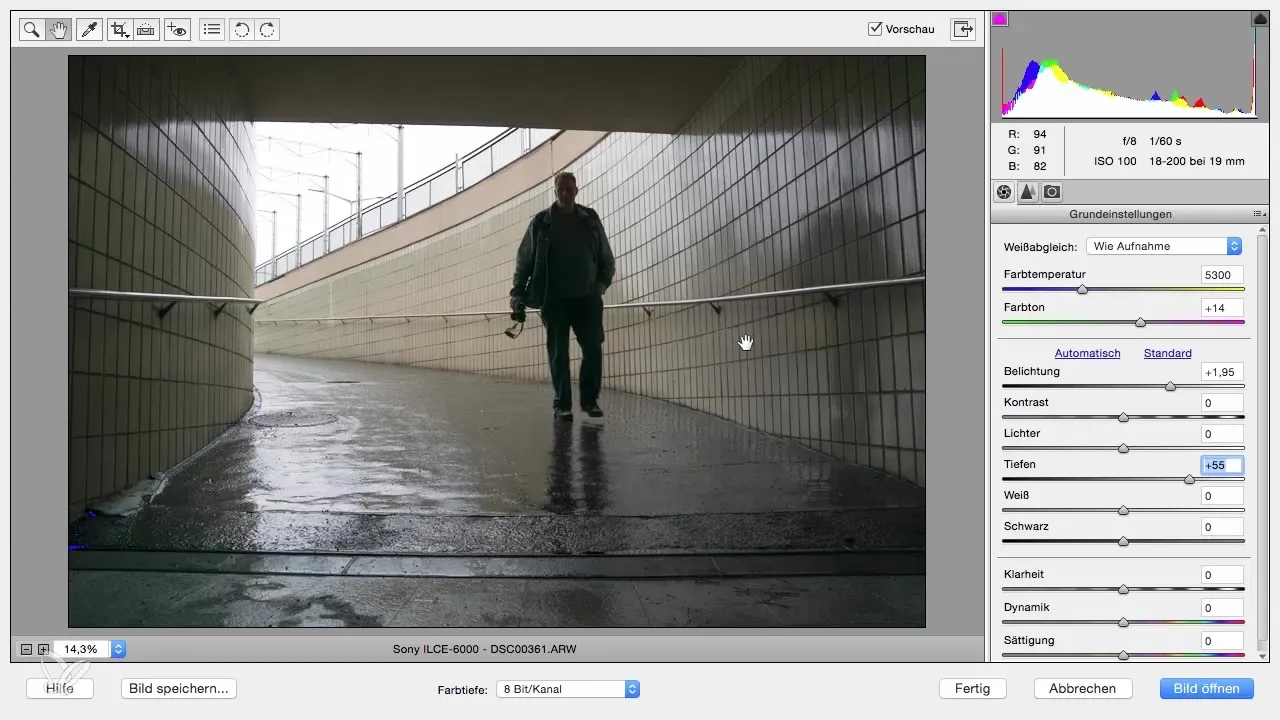
After you have made the adjustments, you should take another look at the image. Many of the previously black areas are now more visible. Pure black is often not disturbing as long as the overall image remains harmonious.
In the next step, you can either enable or disable the shadow representation if you are not satisfied with the result. After all, it is important that your image fits your style and that you are happy with the editing.
Finally, check if there are areas that might blow out. In our case, we will see if the bright spots in the image are well represented.
Summary – Optimizing too dark subjects in Photoshop Elements
With a few simple adjustments in Photoshop Elements, you can transform underexposed pictures into appealing photographs. Understanding exposure and how to work with the histogram is key to your improvements.
Frequently Asked Questions
How can I tell if my image is underexposed?An image is underexposed if many areas in the histogram show only black and hardly any details are visible.
Can I save all dark areas in my image?Not all dark areas can always be saved, especially if they are already represented as pure black.
How much can I adjust the exposure?That depends on the image. Generally, a moderate adjustment yields the best results in most cases.
What can I do if I notice noise in my image?Try not to increase the exposure too much and use the shadow settings carefully to avoid noise.


