You probably know this: You've taken some great photos, but unfortunately, they are overexposed and show overly bright areas. But don't worry, many of these shots are not lost. With Photoshop Elements in Camera Raw, you can achieve great results from overexposed images as well. This guide shows you the essential steps to turn an overexposed photo back into an appealing image.
Key Insights
- Overexposed images can be corrected with the right settings in Photoshop Elements.
- The histogram shows you the brightness distribution of colors in the image.
- With the sliders for exposure, highlights, and shadows, you can optimize the brightness of individual areas of the image to restore details.
Step-by-Step Guide
First, open your image in Camera Raw. In Photoshop Elements, you have the option to open RAW images directly for editing. The workspace offers many options for enhancement and correction.
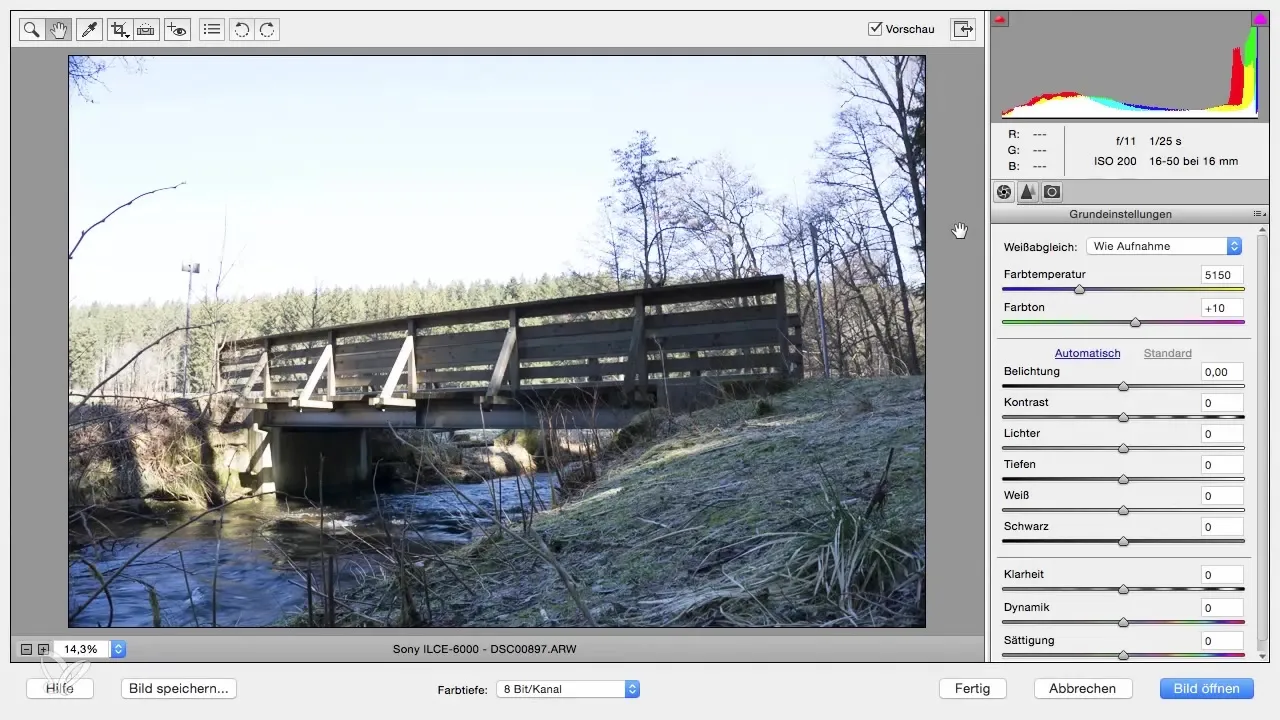
On the right side, you'll find a variety of sliders that help you adjust the image to your liking. While the tools here are simpler than in Lightroom, they still offer the basic settings for image optimization.
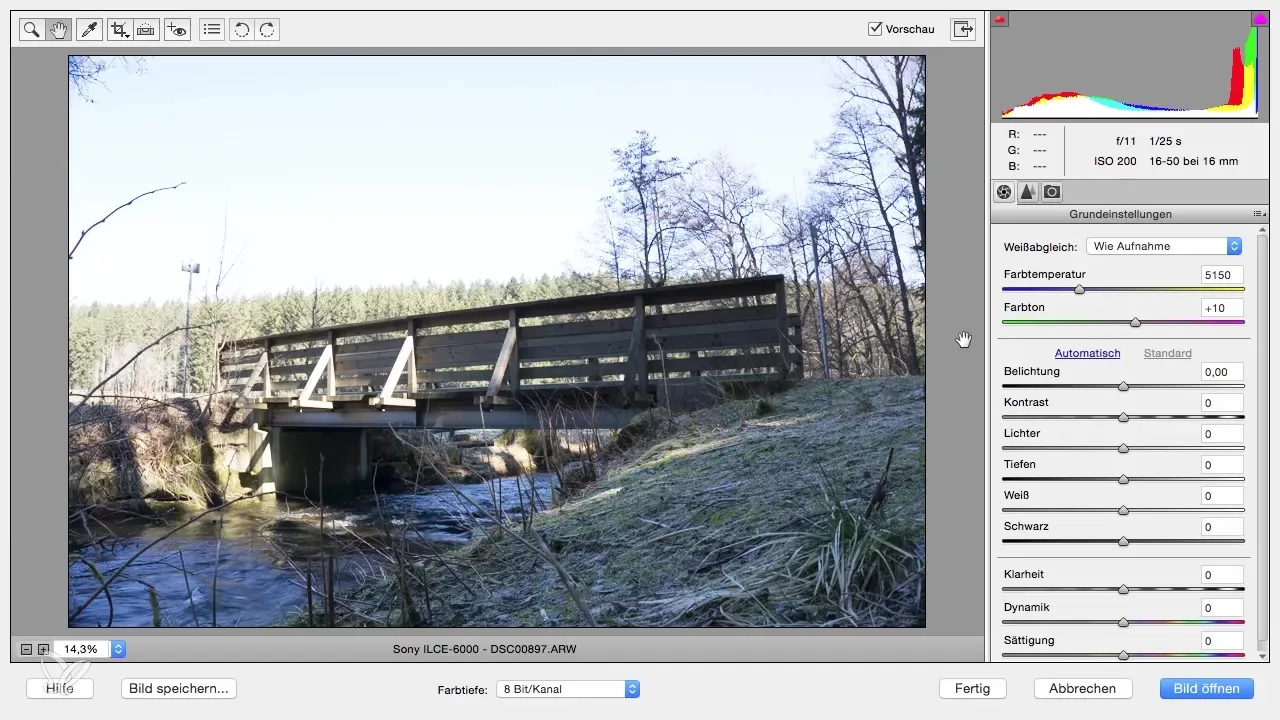
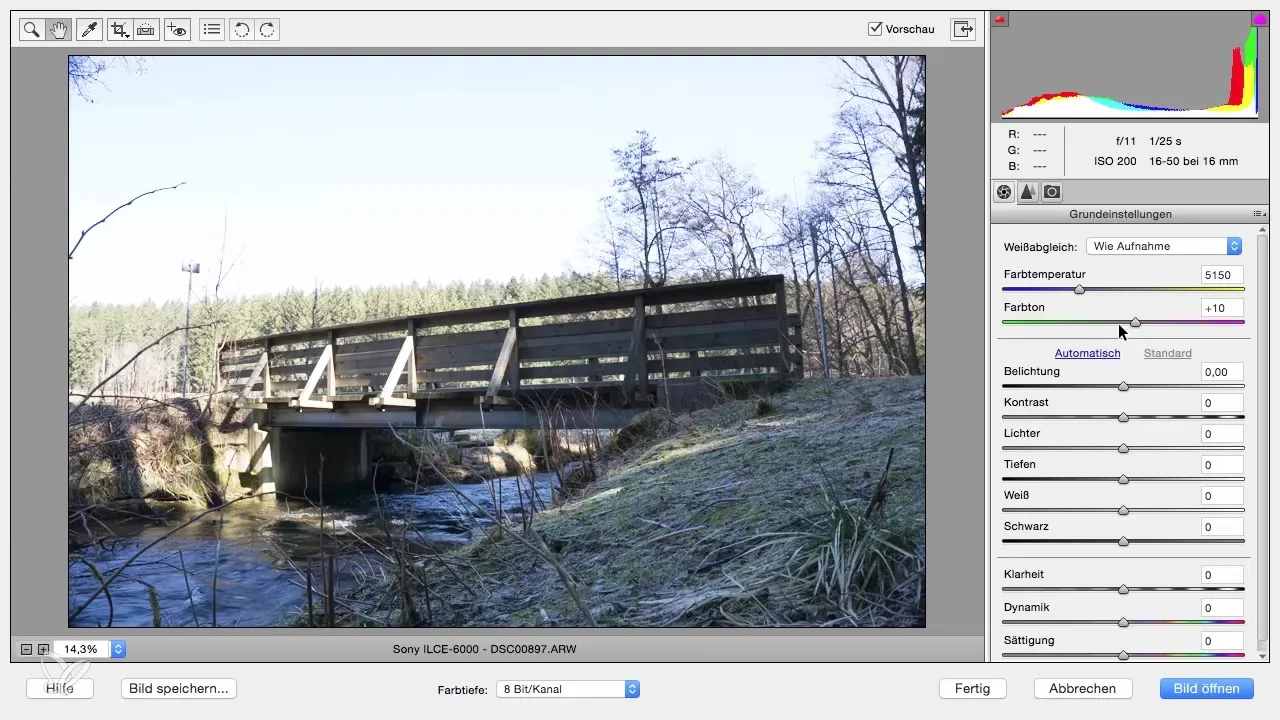
The first thing you should look at is the histogram. It shows you the brightness distribution of colors in your image. If you notice that most of the information is in the right area of the histogram, it indicates that your image may be overexposed.
You can scan the image to see which areas are overexposed. Click on the image to activate a representation that shows you all areas that represent pure white. These areas lack structure or detail, which is often an indication of overexposure.
To correct the exposure, there is a slider for exposure that you can move to the left. This has the effect of adjusting the aperture on your camera. You should see more details emerging in the image, and the white areas decrease.
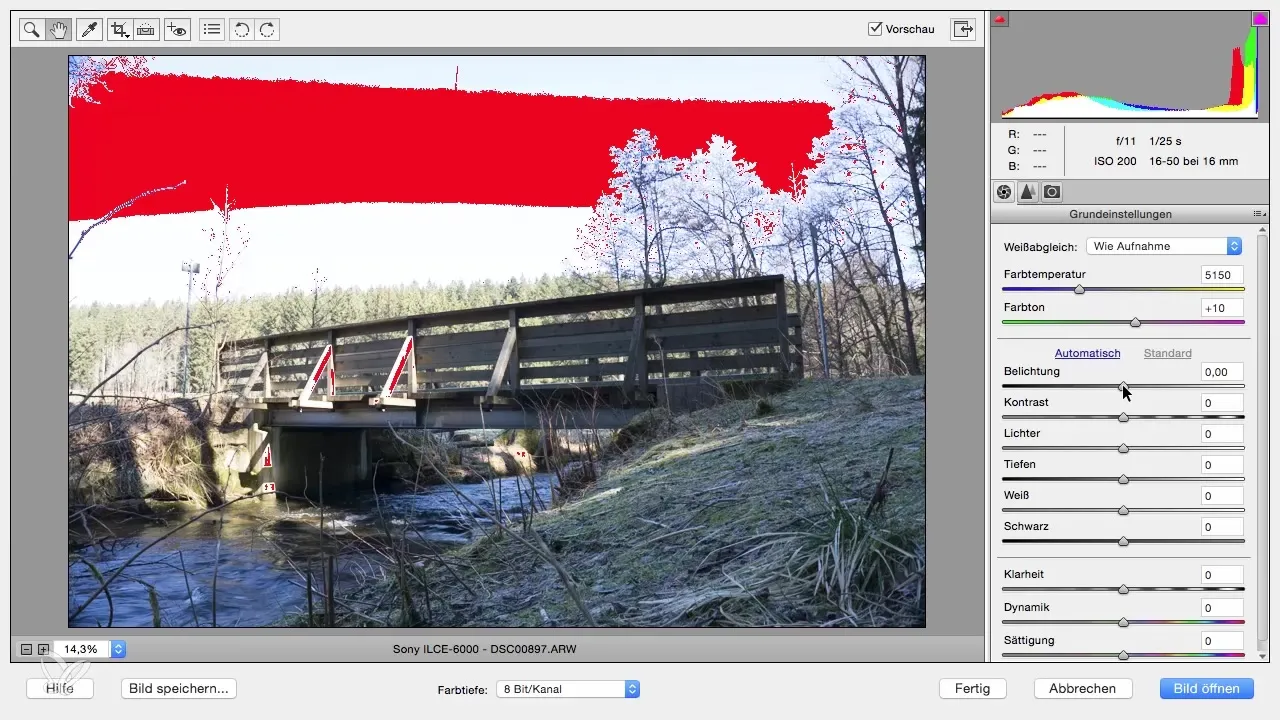
The goal is to reduce the exposure until the red areas in the image are almost gone. However, be careful not to overdo it, as the image may become too dark. A good rule of thumb is to reduce the exposure just enough to retain some of the white areas.
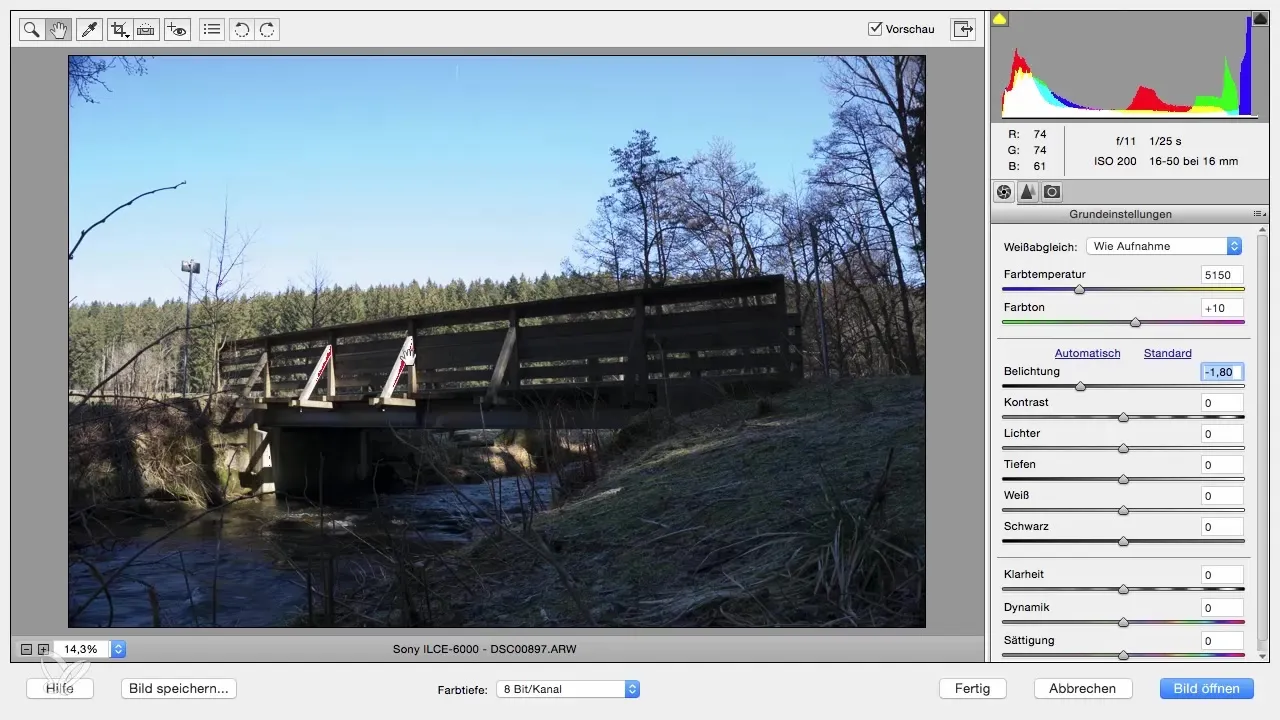
If necessary, you can brighten the dark areas of the image again to compensate for the darkness caused by reducing the exposure. Move the shadow slider to reveal more details in the dark areas.
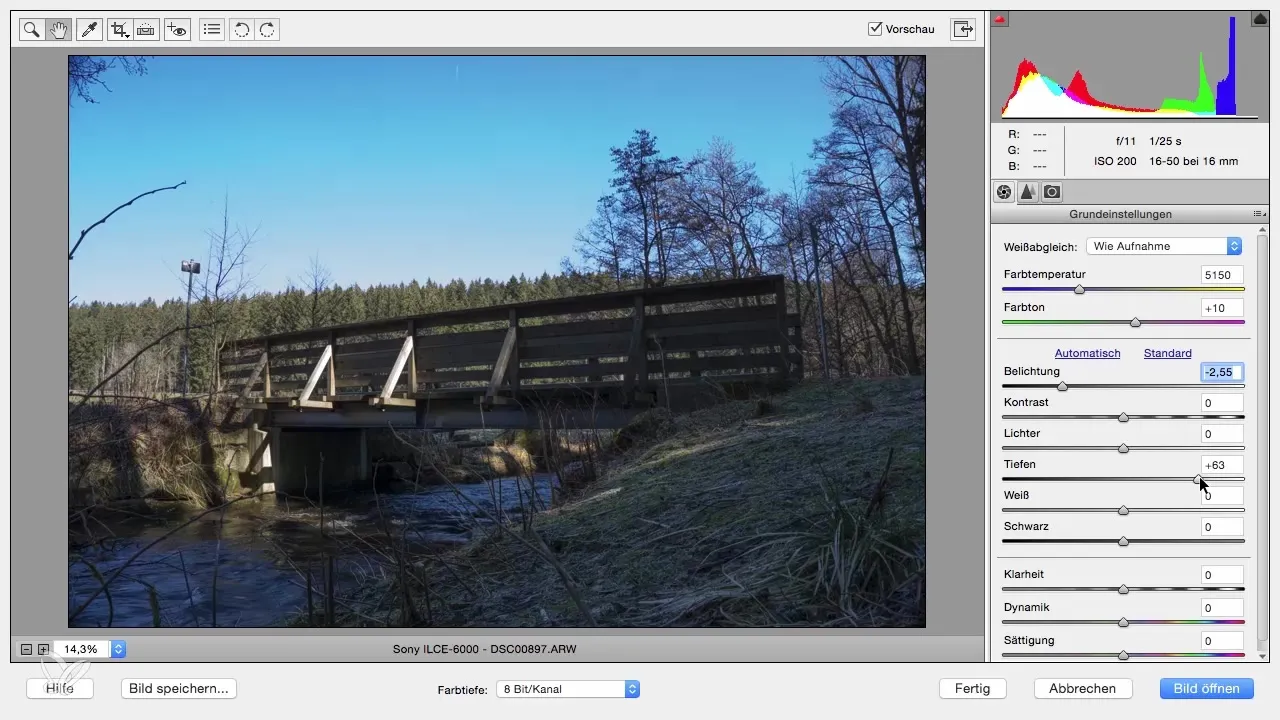
You can also make another adjustment with the highlights. Here, you can also move the slider slightly to the left to retrieve more details in the bright areas. This will further improve the overall quality of your image.
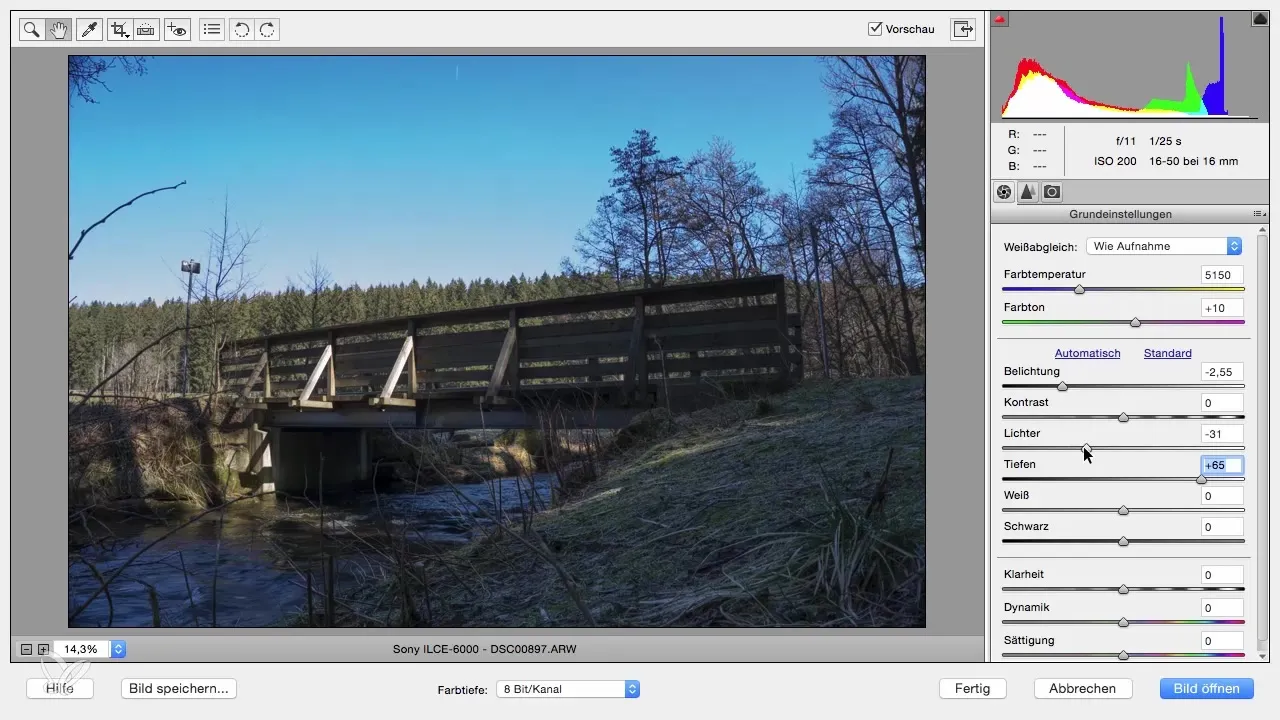
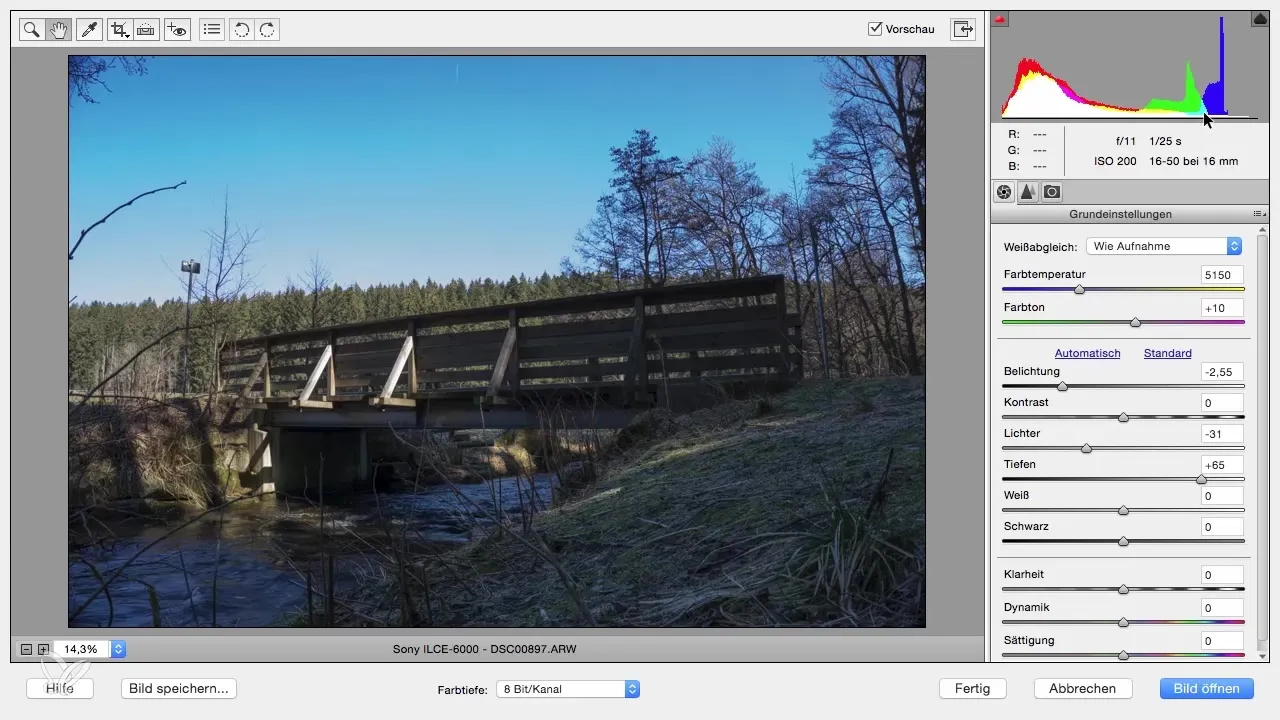
When you now compare the image with the default view, you can clearly see the difference. The brightness distribution has improved, and all original details are now more visible.
By following these steps, your image can now be more appealing and optimized. Remember: check the histogram regularly to ensure that you are not losing important details and that the brightness distribution remains balanced.
Summary - Overexposure in Raw Corrected Step by Step with Photoshop Elements
In this guide, you have learned how to effectively correct overexposed images in Photoshop Elements with Camera Raw. By specifically adjusting exposure, highlights, and shadows, you can restore beautiful details and turn a initially failed photo into an excellent image.
Frequently Asked Questions
How do I correct overexposed areas in an image?You can adjust exposure, highlights, and shadows in Camera Raw to reduce overexposed areas and restore details.
Why should I use the histogram?The histogram helps you understand the brightness distribution in the image and shows you where overexposure or underexposure is occurring.
Can I reset the settings at any time?Yes, you can adjust or reset the settings in Camera Raw at any time if you are not satisfied with the results.


