Clipping masks in Photoshop Elements are among the most powerful and versatile tools available to you for performing complex image edits. This tutorial will show you how to effectively use clipping masks to combine different layers and make specific adjustments to images. You will learn how to precisely control the visibility and coloring of individual image elements using adjustment layers.
Main insights
- Clipping masks allow targeted adjustments to individual image layers.
- You can selectively apply different settings like saturation and contrast to specific layers.
- Working with clipping masks is intuitive and can significantly improve your workflow.
Step-by-Step Guide
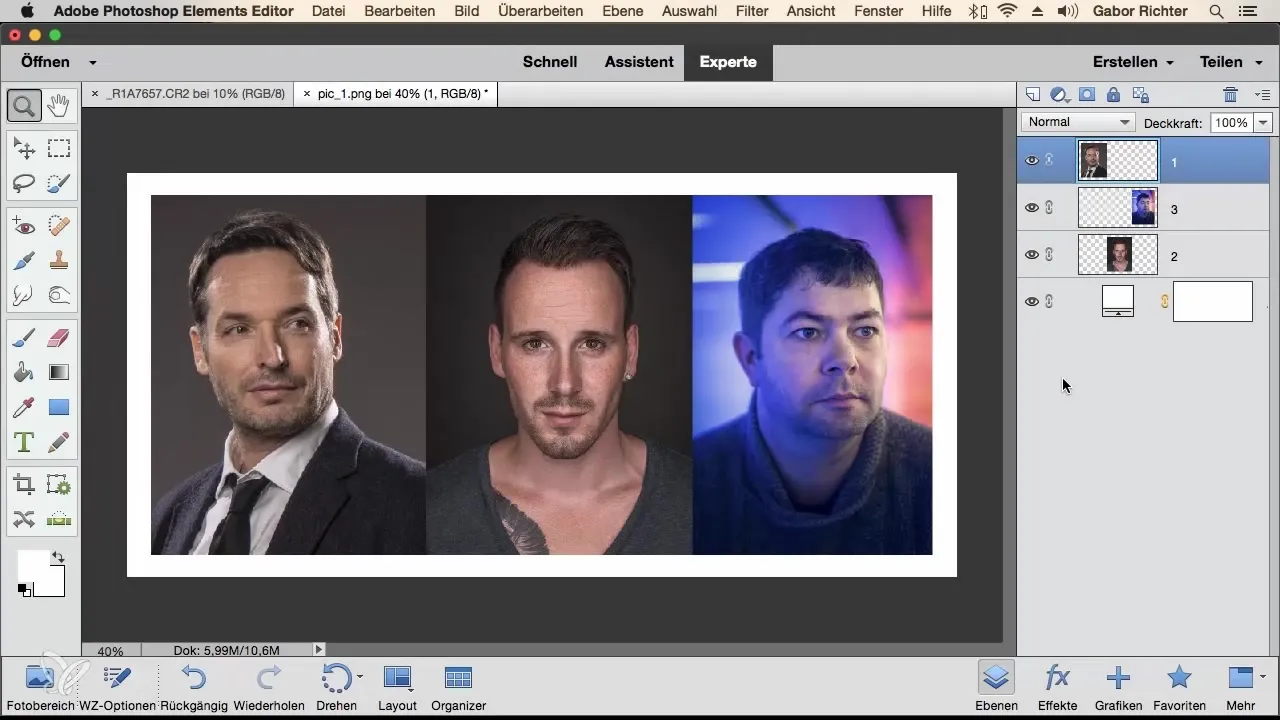
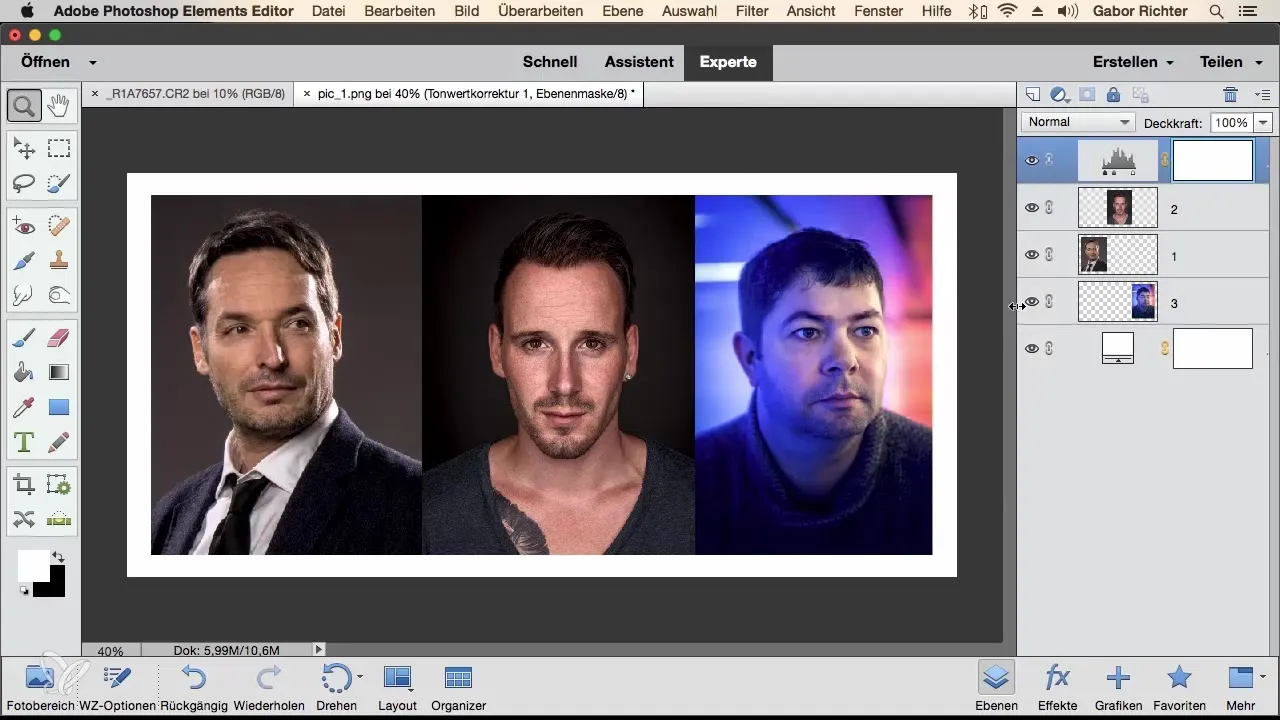
Start by opening your image file in Photoshop Elements. Make sure that all the portraits you want to work on are in separate layers in the layers palette. In this example, you have three portraits arranged side by side.
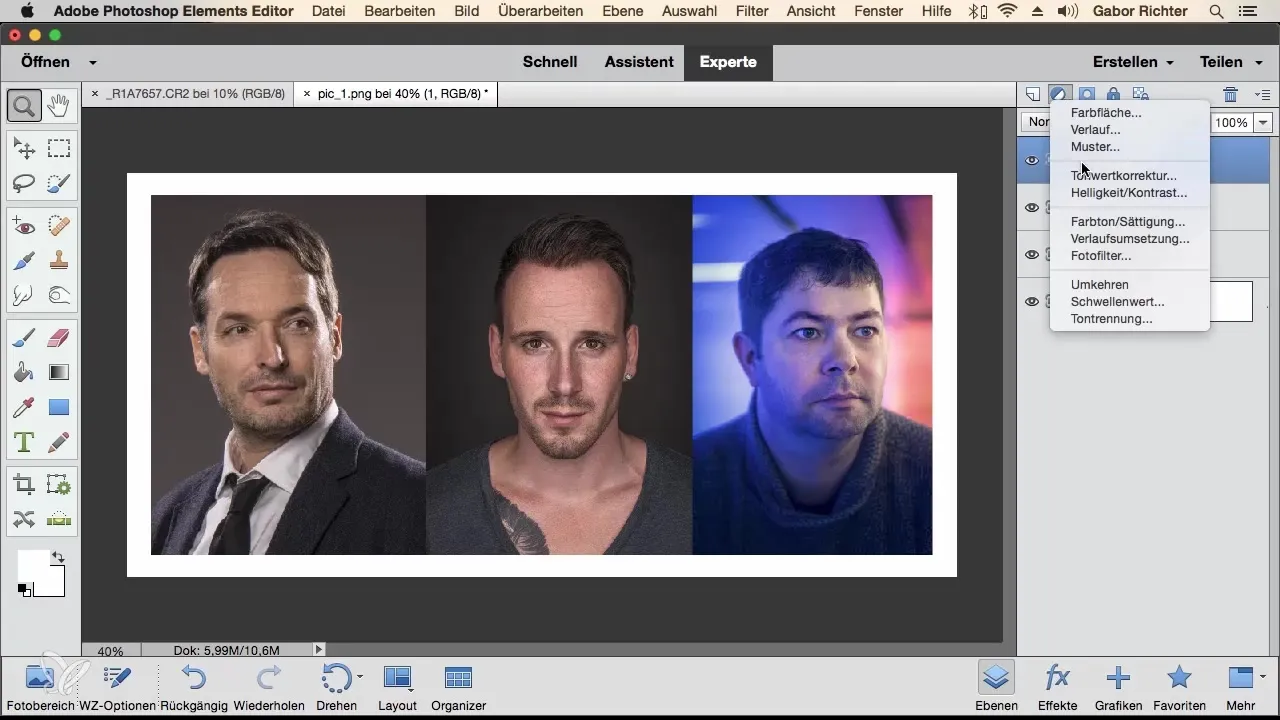
To begin applying clipping masks, first drag an adjustment layer onto the top layer. A good example is the "Hue/Saturation" adjustment layer, which allows you to adjust the saturation of the images. Reduce the saturation to zero to create a black-and-white image. You will then see that all three portraits are desaturated and displayed in black and white.
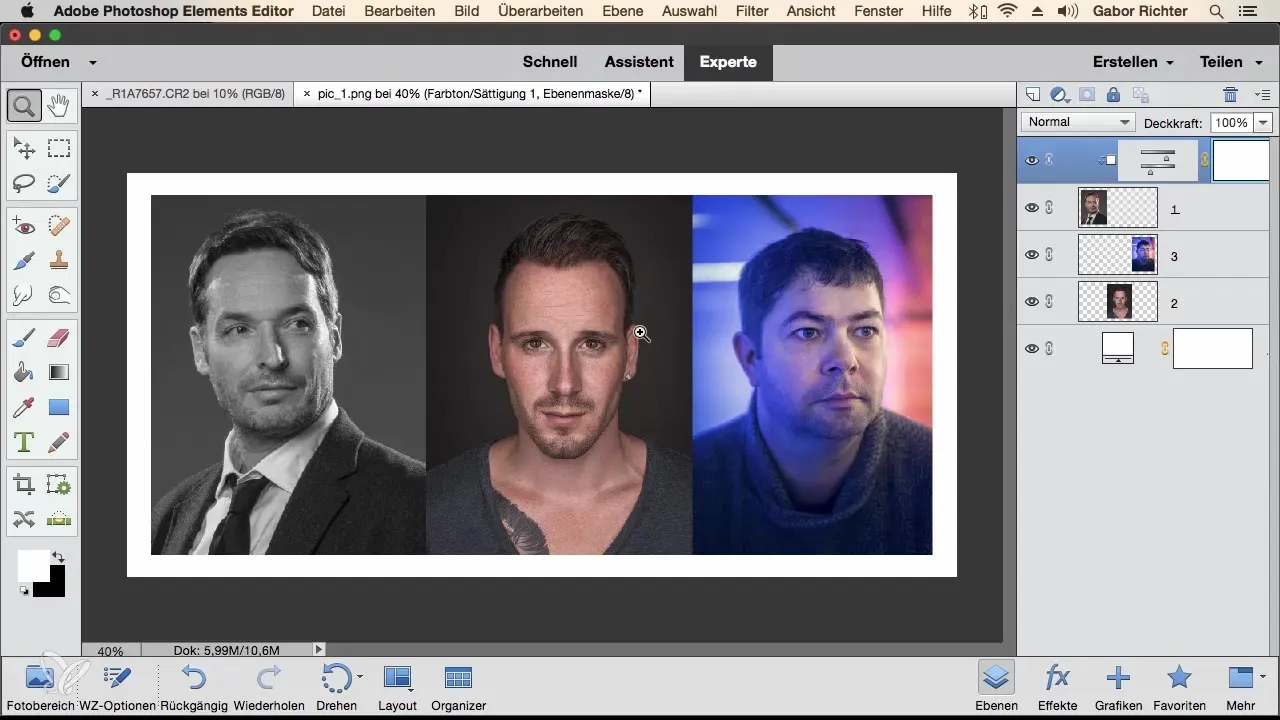
An important aspect of clipping masks is the ability to assign a specific image layer to each adjustment layer. This is achieved by dragging the adjustment layer below the layer you want to edit, in this case, the left portrait. Right-click on the adjustment layer and select "Create Clipping Mask". Now you will see that only the left portrait is black and white while the other portraits remain in color.
After creating your first clipping mask, the next step is to add another adjustment layer to create contrast. Choose "Levels" as the new adjustment layer. Darken the image slightly while also adding some brightness. This will give you a balanced contrast.
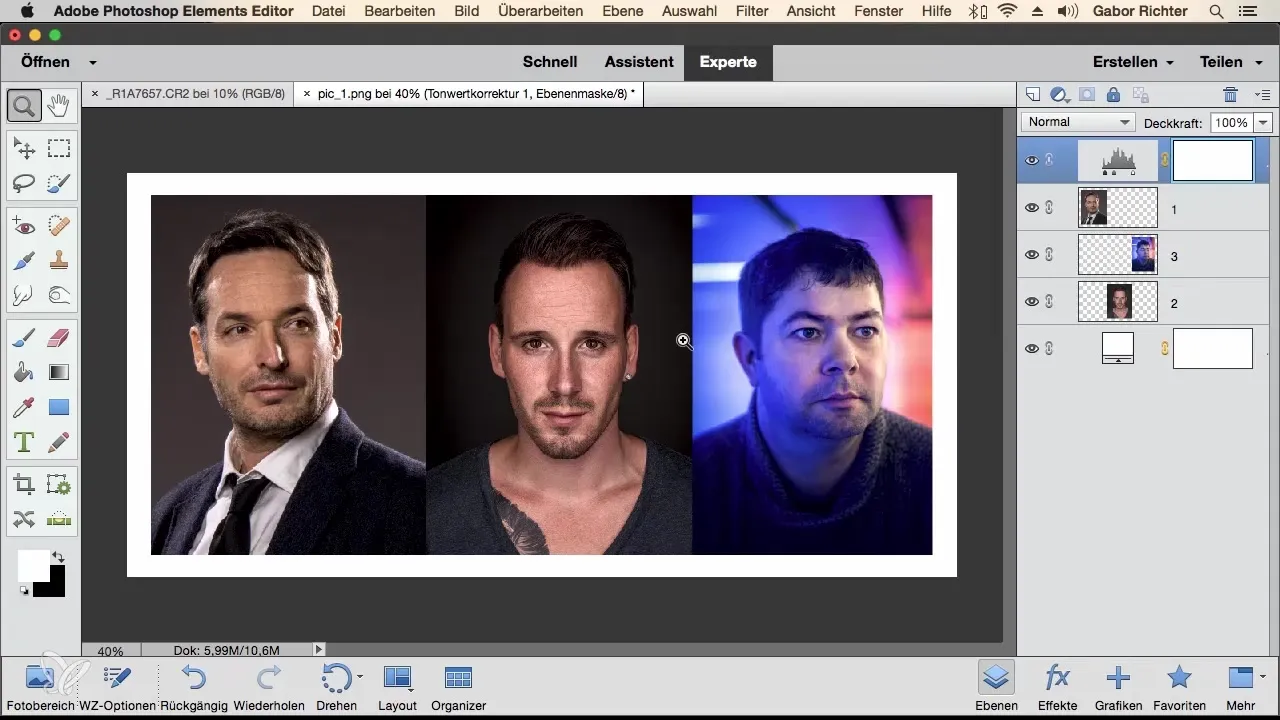
To ensure that this contrast is applied only to the middle portrait, drag the levels layer directly below the corresponding image in the layers palette. If the other portraits are also affected, it is necessary to create a clipping mask here as well. Select the adjustment layer and right-click again to create a clipping mask or press the "Alt" key while clicking between the layers.
These methods of creating clipping masks allow you very precise control over your image edits. You can remove a clipping mask at any time by right-clicking on the clipping mask and selecting "Release Clipping Mask". Alternatively, you can use the "Alt" key again to remove the masking.
With clipping masks, you will find that your possibilities in image editing are virtually limitless. This tool allows you to be creative and give your images the professional look you desire. It is a fun and enjoyable tool that integrates easily into your workflow.
Summary – Guide to Using Clipping Masks in Photoshop Elements
Clipping masks offer you an easy way to gain control over multiple layers in your photo projects. You will learn how to exclude distracting elements from the image with various adjustment layers and optimally express your creativity.
Frequently Asked Questions
What are clipping masks?Clipping masks facilitate targeted adjustments of layers using adjustment layers.
How do I create a clipping mask?Right-click on the adjustment layer and then choose "Create Clipping Mask".
Can I release a clipping mask?Yes, right-click and select "Release Clipping Mask" or use the "Alt" key.
What happens if I change the order of layers?If you change the order of layers, the effects of the clipping masks may change.
Can I use multiple clipping masks in a project?Yes, you can use as many clipping masks in an image as you like to achieve different effects.


