The conversion of RAW-files can be crucial for photographers, especially when it comes to sharing these files with others or editing them in different programs. This guide shows you how to save RAW files in Adobe's standardized DNG-format.
Key insights
- RAW files can come in different formats that may not be opened everywhere.
- The DNG format is a universal RAW format from Adobe that allows for easy handling.
- Saving RAW files as DNG is done through the RAW Converter in Photoshop Elements.
Step 1: Open RAW file
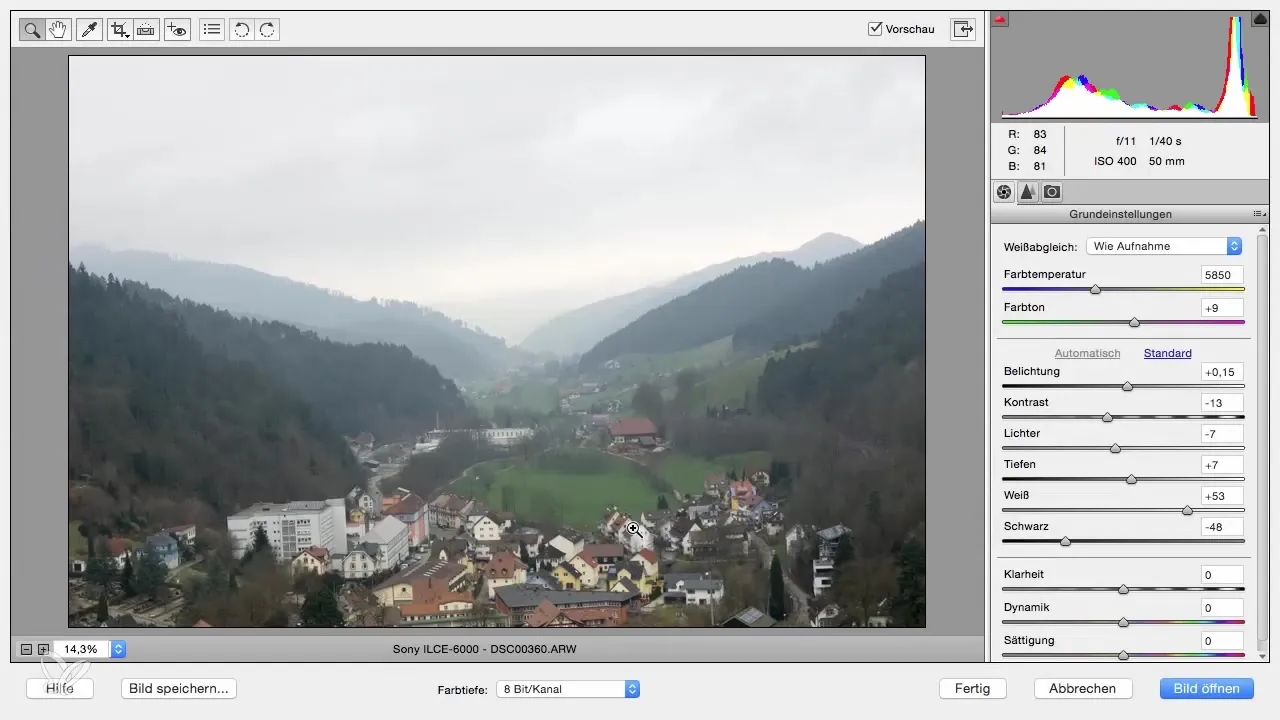
To edit your RAW file, open Photoshop Elements. Select the RAW file you want to save. If you are using a camera like Sony, the file extension might be ARW, for example. The RAW format of your camera is crucial as it leads to innovative features of the program specifically designed for that format.

Step 2: Access save options
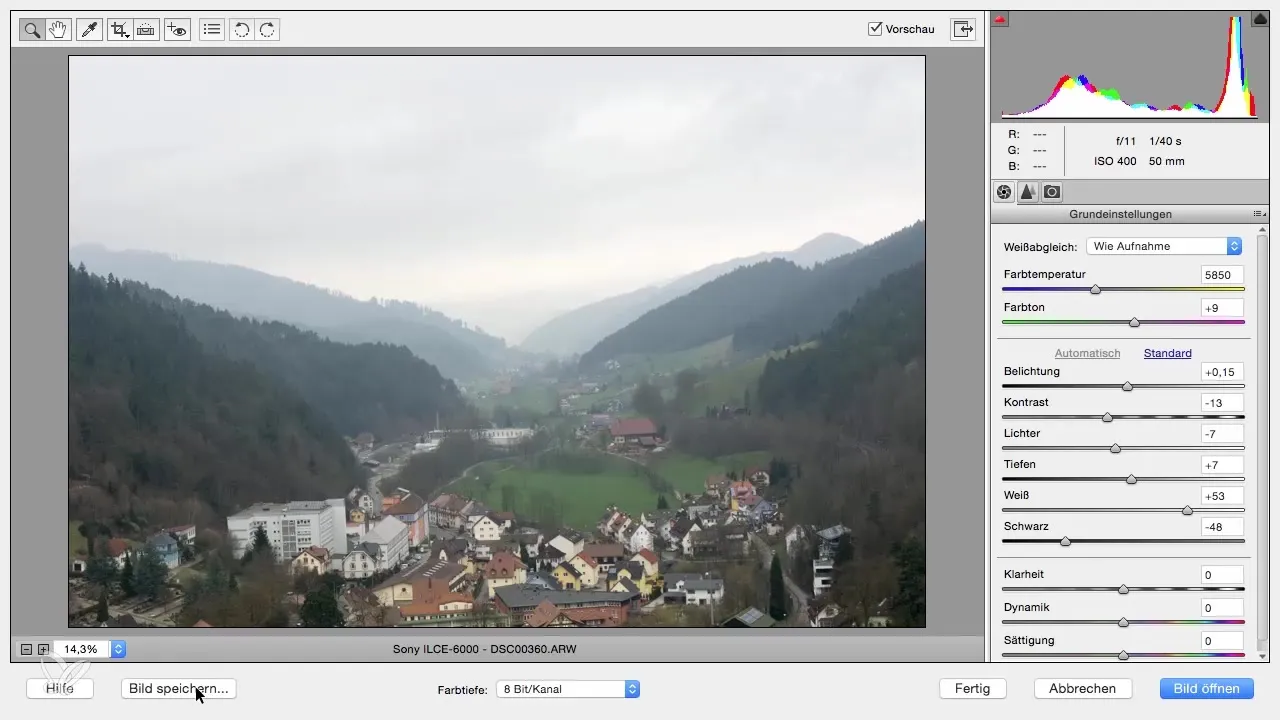
Once the RAW file is open, look for the option in the RAW Converter that allows you to save the image. Here you can select from various formats, including the DNG format provided by Adobe. The availability of these options depends on the RAW Converter you are using.

Step 3: Select target file and save DNG
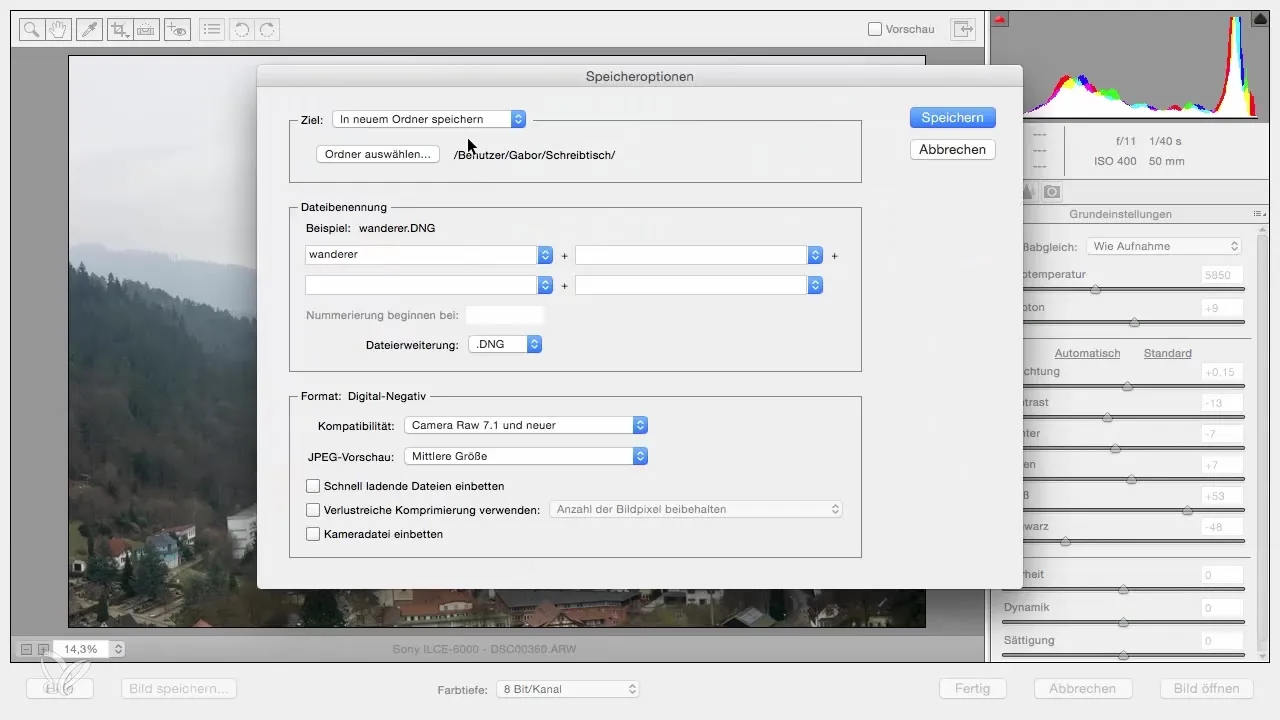
Now click on the "Save Image" button. A dialog box will open where you can choose from a list of save locations. You should be able to select the location that suits you best, such as your desktop or a specific folder.

Step 4: Set file name
Setting a name for your saved file is the next step. Change the file name from the default designation to a meaningful name like "Black Forest". This will make it easier for you to find the file again and ensure that you know exactly what is behind the name.
Step 5: Save DNG and complete process
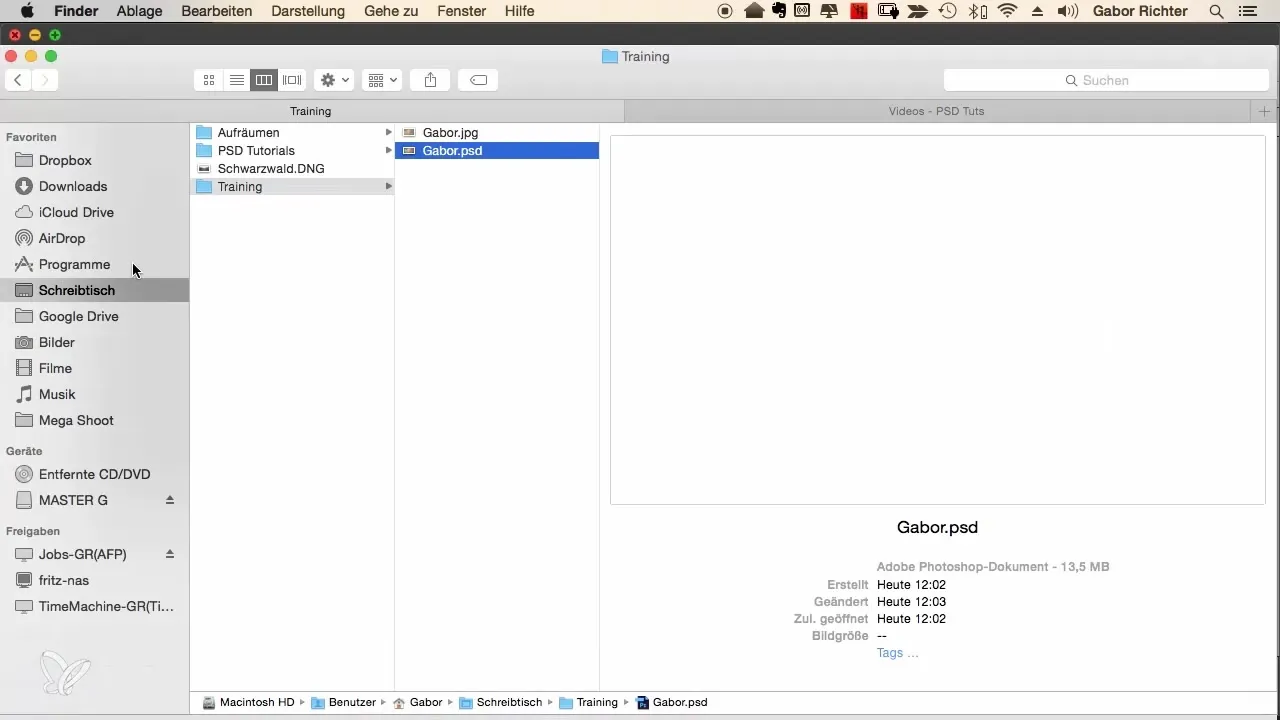
After giving the file a new name, click the "Save" button. You will see that the process completes successfully. In retrospect, you will now see the DNG file in the location you selected earlier (e.g., on your desktop). You can now easily edit and share this DNG file with others.

Summary - DNG conversion of RAW files in Photoshop Elements
Converting your RAW files to DNG format is an important skill that facilitates working with various RAW formats. This guide has shown you how simple the process is and what steps are necessary to successfully complete this conversion.
Frequently Asked Questions
What are the benefits of the DNG format?The DNG format is an open standard format from Adobe that allows greater compatibility with various software applications.
Can I edit DNG files in Photoshop Elements?Yes, DNG files can be opened and edited in Photoshop Elements just like other RAW formats.
Is image quality affected when converting to DNG format?No, converting to DNG format does not affect image quality; the file remains in its original resolution and quality.
How can I further process my DNG files?DNG files can be opened and further processed in various image editing programs, increasing their flexibility.


