The fill method "Soft Light" is an extremely effective tool in Photoshop Elements that allows you to seamlessly integrate textures into your images. Especially with gray studio backgrounds, this technique gives you the opportunity to work creatively and add a special touch to your images. In this guide, I will show you how to apply this method step by step to achieve impressive results.
Main insights
- The fill method "Soft Light" ensures a smooth integration of textures into your image.
- A gray background works optimally for texture overlays.
- With masks, you can selectively choose areas where the texture should be visible.
- The fill method "Overlay" offers a high-contrast alternative.
Step-by-step guide
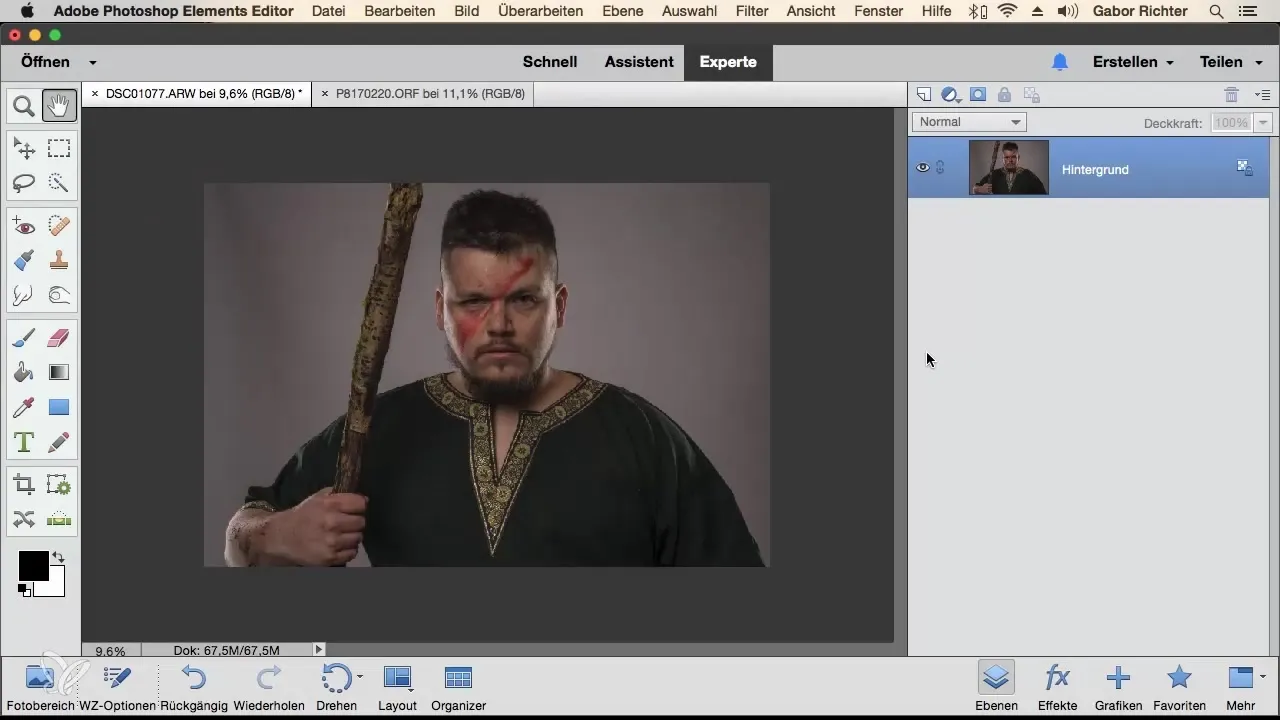
First, take care of your starting image. Choose a subject that is suitable for the overlay. A gray background is recommended here, as it provides a neutral base for the later texture. It is important that the background is not too colorful, as this can affect the impact of the fill method.
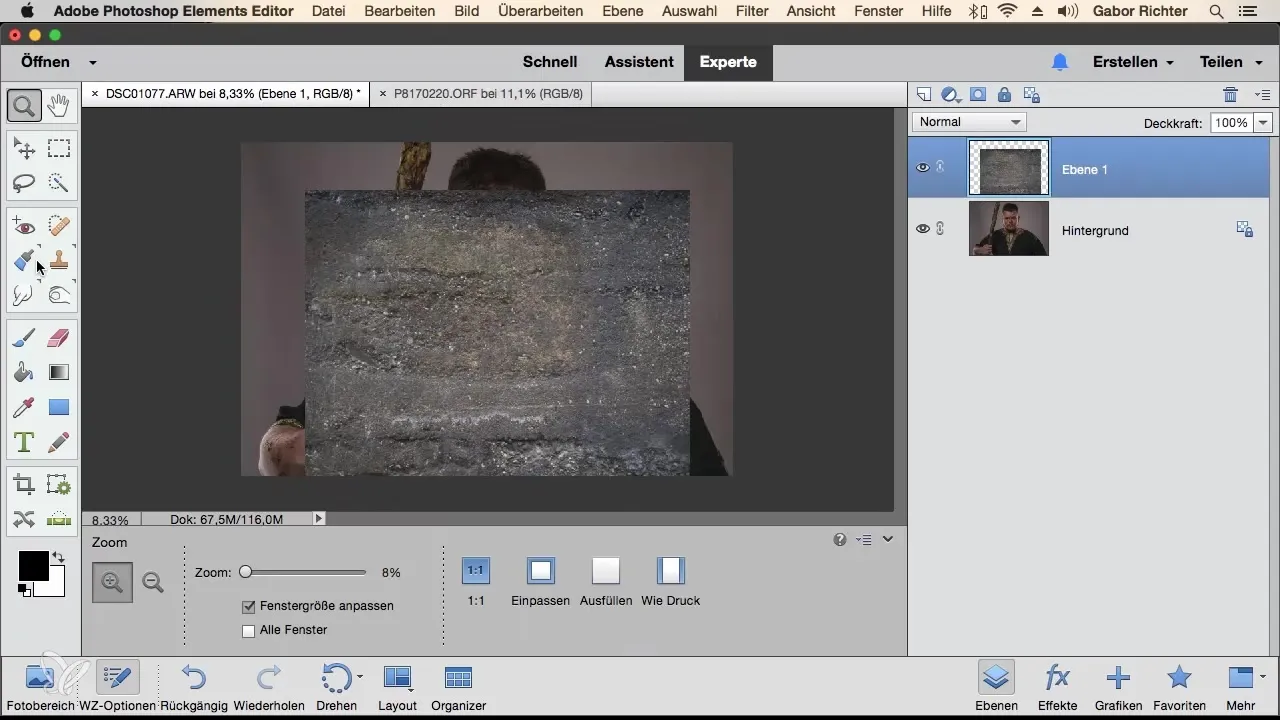
To add a texture, open it in Photoshop Elements and drag it over your subject. Make sure the texture covers the size of your subject well. If necessary, enlarge the texture to ensure it offers enough area.
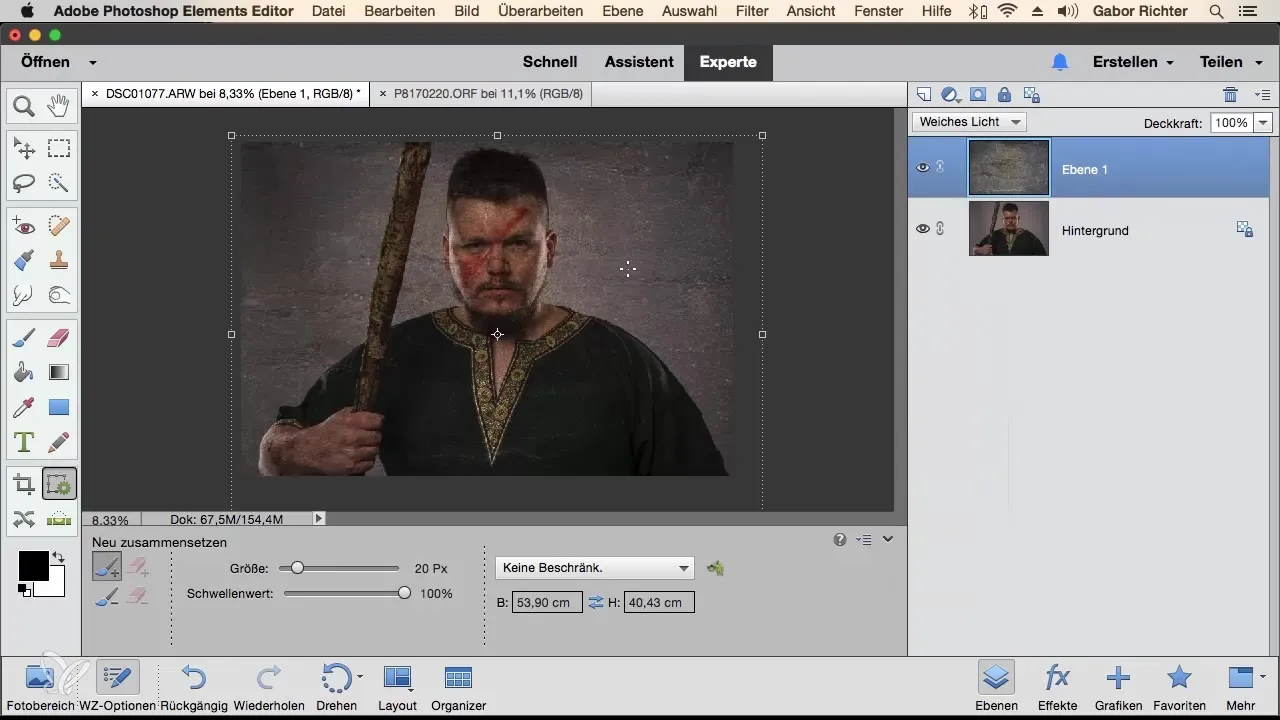
After positioning the texture, click on the corresponding fill method. This is set to "Normal" by default. Change the fill method to "Soft Light" to immediately see how the image changes. You will notice that the texture is subtly integrated into the subject.
Next, it is important that you select the areas where the texture should not be visible. This is where the mask comes into play. Choose a black brush tip and roughly mask the areas of the person that you want to free from the texture.
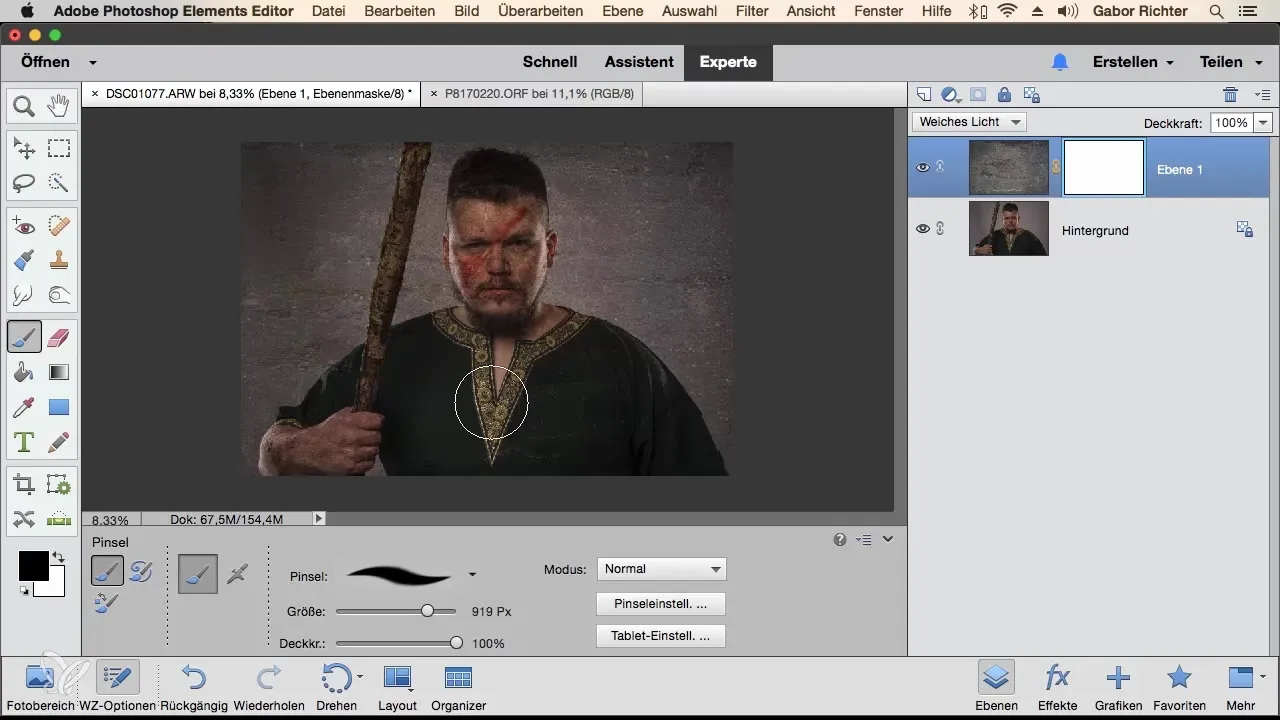
Make sure to work very meticulously here. Use zoom if needed to work more accurately. With a bit of finesse, you can now adjust the mask so that the subject is clearly and cleanly distinguishable from the texture.
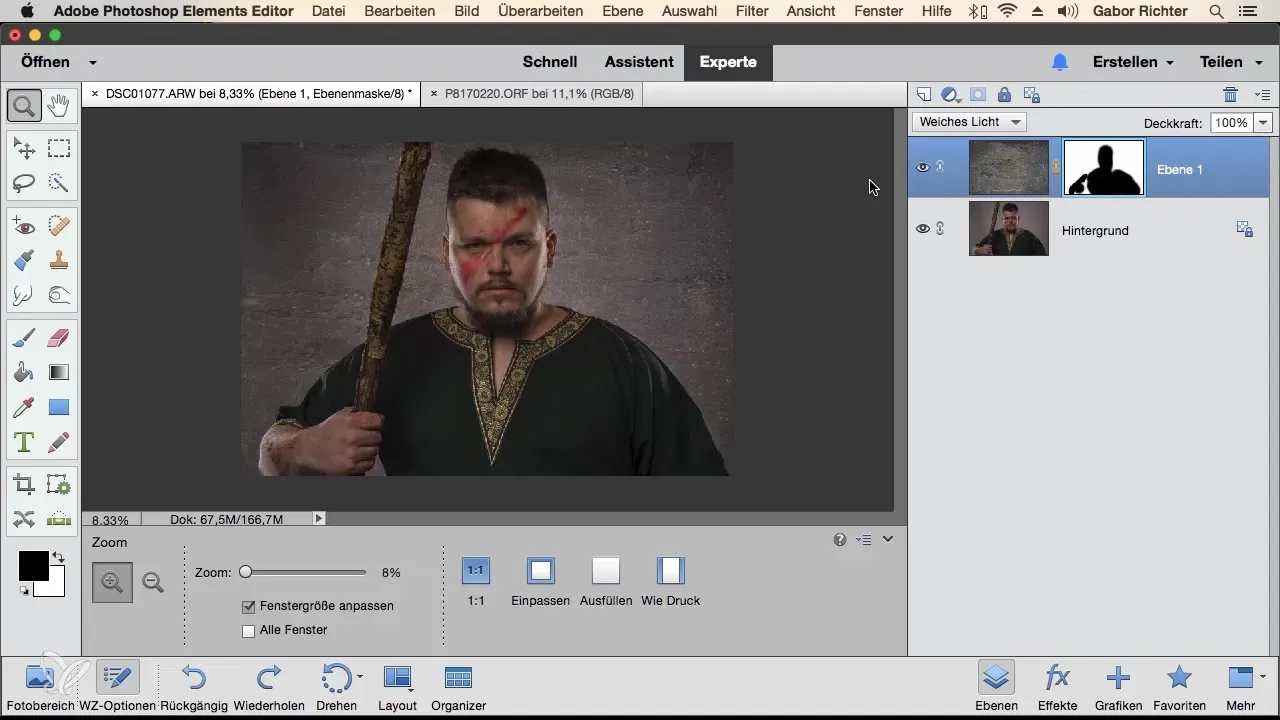
It is often helpful to check the effect of the mask by turning off the previous view. You will see how quickly your image has changed and how impressive the result can be. Be prepared to make some small corrections to ensure everything looks natural.
If you do not like the fill method "Soft Light", you can alternatively try the method "Overlay". This method creates a stronger contrast and may be better suited in certain cases. Ensure that you adapt the texture to the areas of your subject that need more emphasis.
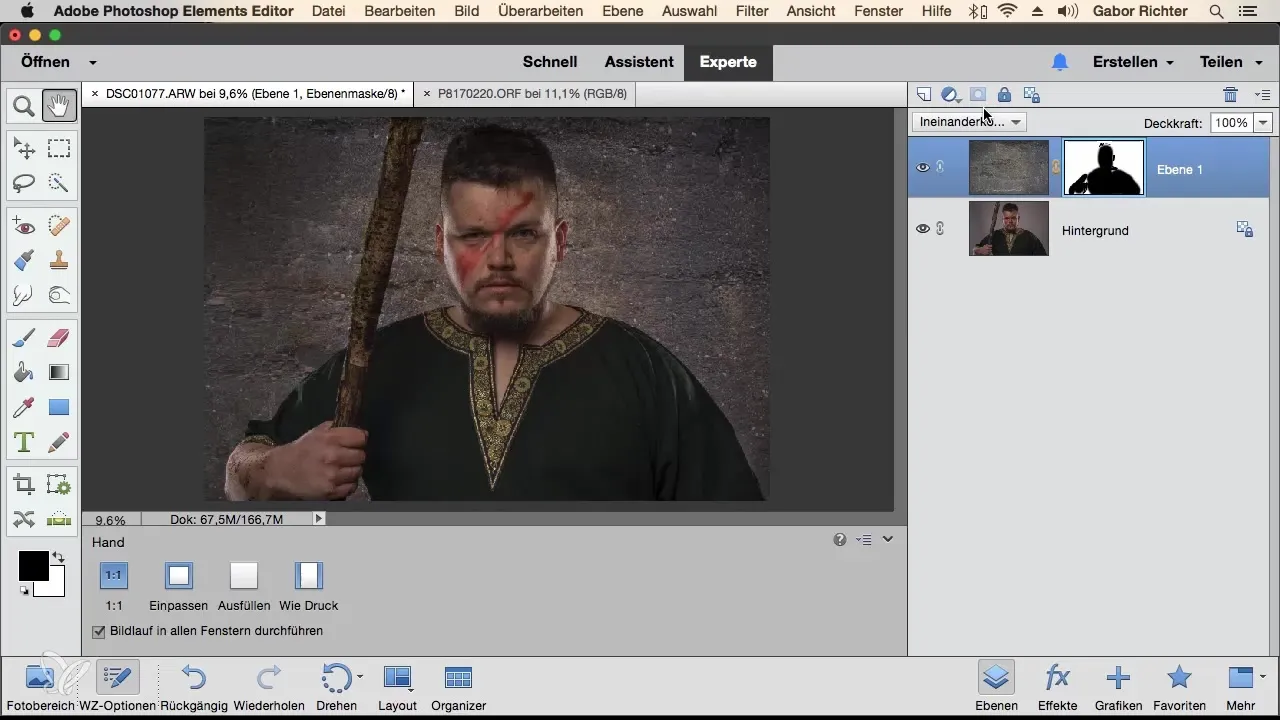
In summary, the fill method "Soft Light" offers you a quick and effective way to experiment with textures and give your image a new look. With a little practice, you can achieve impressive results and realize your creative vision.
Summary – Soft Light: Texture Overlay in Photoshop Elements
In this guide, you have learned how to effectively integrate textures into your images using the fill method "Soft Light". You will also use masks to precisely select where the textures should be visible.
Frequently Asked Questions
How do I add a texture to my image?Open the texture in Photoshop Elements and drag it over your subject.
What fill methods can I use?The most popular ones are "Soft Light" and "Overlay".
How do I work with masks?Use the brush in the mask to select areas where the texture should not be visible.
Can I change the fill method at any time?Yes, you can adjust the fill method at any time to test different effects.
How can I make corrections?Use the brush in the mask to edit specific areas.


