The next time you scroll through a portfolio, take a closer look at the images. Where did the light come from? Was it hard or soft, natural or artificial? Anyone who can answer these questions quickly has a big advantage, because from other people's photos you learn lighting setups that you can then recreate yourself.
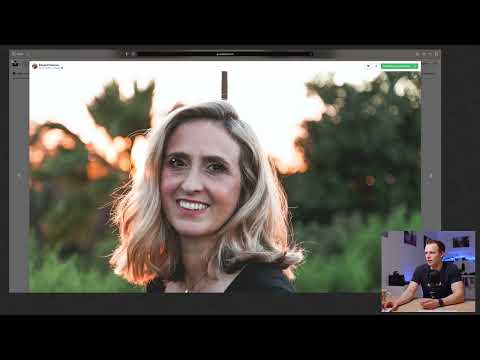
The video is only loaded from YouTube when you play it – data (including your IP address) is then transmitted to YouTube/Google. More in the privacy policy
This guide shows you how to analyze lighting situations step by step. You will learn to distinguish studio light from natural light, determine the direction of the light from the shadows, and read the approximate time of day from the length of the shadows. You will also find out how to recognize reflectors and image editing in the eyes. All you need are a few sample photos and some patience when looking closely.
Key Takeaways
Shadows reveal the direction of the light. Shadows always fall away from the light source. If you determine the direction of the shadow, you know the position of the light.
The quality of the light shows in the shadow edges. Hard shadows with sharp edges come from small light sources such as the midday sun. Soft transitions occur with large or diffused light sources.
The eyes are a reliable indicator. The reflections (catchlights) in the eyes show the shape, position, and size of the light source. If a reflection is missing, a reflector is often not in use.
Shadow length reveals the time of day. Short shadows indicate midday, long shadows indicate late afternoon or sunset.
Practice sharpens your eye. The more images you analyze, the faster you recognize lighting situations, until you assess them almost automatically.
Step-by-Step Guide
Step 1: Find Suitable References
Before you can analyze light, you need material. Search specifically for images that match your own subject. If you want to photograph portraits, search for portraits. For landscapes, search for landscape shots accordingly. Platforms like Unsplash or Pinterest are well suited for this, but the choice is secondary. All that matters is that you have a concrete reference to orient yourself by.

Step 2: Recognize Studio Light
Your first look should clarify whether the image was created in a studio or in nature. One clue is lighting conditions that would hardly occur in nature, such as a very even cone of light on the face. The eyes also often reveal that artificial light was used: the reflections are then clearly outlined and symmetrical. A particularly typical example is Rembrandt lighting, in which a triangular patch of light forms under the eye on the darker cheek. Zoom into the image to recognize such details clearly.

Step 3: Determine the Light Direction from the Shadows
The direction of the light can almost always be read from the shadows. Follow the shadow edge on the face, at the nose, at the chin, or at the neck. The shadow points away from the light source. Also pay attention to height: a slight shadow beneath the nose indicates light coming slightly from above. With these two pieces of information, you can determine the position of the light source quite precisely, even if you don't know the exact distance.

Step 4: Distinguish Hard and Soft Light Sources
Whether a light is hard or soft can be recognized by the shadow edges. Hard shadows have sharp, clearly defined edges. They occur with small light sources, such as direct sun. Soft shadows, on the other hand, blend smoothly because the light source is large or the light has been scattered. An example of hard light is the midday sun: the shadows under trees or mountains then appear sharply outlined. It is best to compare several images side by side, and the difference quickly becomes clear.

Step 5: Estimate the Time of Day from Shadow Length
The time of day can also be estimated with a bit of practice. At noon the sun is high, so the shadows are short. The closer evening gets, the lower the sun sits and the longer the shadows become. At sunset the light usually looks warm and orange. Note, however, that the season and geographic latitude affect the sun's position. An exact time can therefore usually only be determined roughly, but an estimate such as "noon," "late afternoon," or "evening" works well.

Step 6: Checking Reflectors and Image Editing in the Eyes
The eyes often provide the most important information about the light. Pay attention to the catchlights, meaning the bright dots or areas in the pupil. Their shape reveals whether a softbox, an umbrella, or the sun was used. If there is no catchlight in the lower area of the iris, usually no reflector was used to brighten from below. If the light direction and the shadow pattern do not match, for example when one half of the face looks unusually bright even though it should be in shadow, subsequent brightening in image editing may be behind it. However, not every catchlight is visible, so you should always take the overall picture into account.

Step 7: Identifying Light Modifiers
If you know that artificial light was involved, you can try to determine the light modifier. You can recognize a softbox by the rectangular or square shape of the catchlight as well as a slightly silvery material. A beauty dish, on the other hand, usually produces more even and round illumination. The exact difference is often not decisive for the overall impression, but it helps you put the setup together correctly when recreating it.

Step 8: Reading Landscapes and Cloud Shadows
The same principles apply to landscapes. Pay attention to the shadow edges on mountains, trees, and houses. Clouds can also cast hard shadows on the landscape that move across large areas. To estimate proportions, look for reference objects such as houses or people. This way you quickly notice how big a mountain actually is, and you recognize that in such cases the sunlight comes from high above.

Step 9: Recognizing Night Shots and Artificial Light
With long exposure times in the dark, almost every small light source appears very bright. Stars, car headlights, flashlights, or phone displays can then appear as the main light. Pay attention to the shadows: they often fall away behind the subject because the light source is in front of the subject. Hard shadow edges on trunks or branches reveal that the light source was small and directional. This way, the light direction can also be reconstructed in night photos.

Step 10: Trying Out What You Have Learned
In the end, practice is what counts. Analyze the images you like and think about how you can create the light yourself. Try out the setup with your own lamp, a window, or the sun. The result will rarely match the original exactly, but you learn how light direction and light quality can be changed. With every repetition, the analysis becomes easier for you.

Summary – Learning to Read Light: Recognizing Light Direction and Light Quality in Photos
You have seen that a lot about the light can be read from every photo. Pay attention to the shadows to determine the direction, and to the shadow edges to assess the quality. The eyes reveal reflectors and light modifiers, and the shadow length helps with the time of day. If you apply these observations regularly, you will soon be able to recognize lighting situations confidently and recreate them deliberately.
FAQ
How can I tell at first glance whether a photo was taken in a studio?A studio photo often shows controlled, even light with clearly defined shadows and typical catchlights in the eyes. Natural light, on the other hand, looks more irregular.
Why are shadows so important for the analysis?The shadow always falls away from the light source. From its direction, its length, and its edge, the position, height, and size of the light source can be determined.
What do the eyes tell me about the light?The catchlights in the eyes show the shape and position of the light source. If there is no catchlight in the lower area, usually no reflector was used.
How can I tell whether an image has been edited?Look for inconsistencies between shadows and brightness. If one half of the face looks bright even though it should be in shadow, it may have been brightened afterward.
Can I determine the exact time of day of a photo?An exact time is usually not possible, since the season and latitude affect the position of the sun. A rough estimate such as noon, afternoon, or evening works well, though.
Do I need expensive equipment for the analysis?No. The analysis is based on observation. You only need photos that you look at closely and some practice in recognizing light and shadow.


