
Sparks, fireworks, water splashes or whirled-up dust instantly give a subject dynamism. The problem: Such elements usually appear against a dark background, which you can't simply make transparent, because the fine transitions and the luminosity get lost in the process. In this tutorial, I'll show you two ways to cut out lights and particles in Affinity Photo so that you can reuse them as an independent shape. The first variant is suitable for light objects that you want to freely colorize or fill with images. The second variant uses the layer blend mode and works especially well when the background is already pure black.
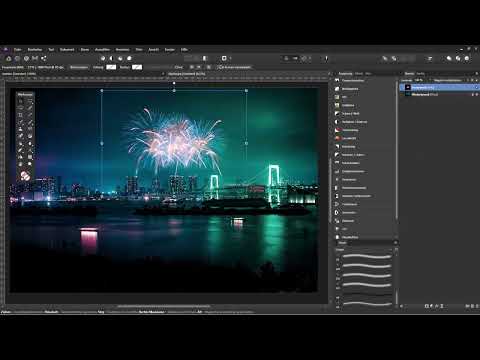
The video is only loaded from YouTube when you play it – data (including your IP address) is then transmitted to YouTube/Google. More in the privacy policy
Key Takeaways
- Bright areas can be isolated using a luminance selection, which you create either with the "Select Highlights" command or via a layer's thumbnail.
- The thumbnail method delivers the broader and cleaner selection because it also captures soft transitions.
- On a separate layer, you can apply colors, gradients or images and adjust the shape at any time.
- The "Screen" mode hides dark backgrounds, but requires that the background is truly pure black.
- With Levels and clipping masks, you can clean up backgrounds and adjust colors in a targeted way.
- Water splashes and neon text can only be edited cleanly after rasterizing.
Variant 1: Cutting out lights as an independent shape
Step 1: Select lights via the tonal range
Open your image with the sparks and look at the Layers panel. The image is present as a background layer. Go to the "Select" menu and there to the "Tonal Range" section. There you'll find the options "Select Highlights", "Select Shadows" and "Select Midtones". For sparks, you choose "Select Highlights". The bright areas are marked while the dark background remains untouched. This way is quick, but often produces hard edges because only the especially bright pixels are captured.

Step 2: Bring the selection onto its own layer
With the background layer active, press Ctrl+J to copy the selection as a new layer. Then deselect the selection with Ctrl+D. On the new layer there are now only the lights, and the background is transparent. As a test, you can place a black fill layer between the layer and the background. You'll then see immediately what the result looks like and where the edges are messy.

Step 3: Perform the test with a black fill layer
Create a black layer via "Layer", "New Fill Layer" and drag it between the layer with the lights and the original. In this test, the edges of the sparks often look frayed. This is because the selection made via "Select Highlights" is too narrow. If you're not satisfied with this result, delete the fill layer or hide it and try the next step.

Step 4: Create a broader luminance selection via the thumbnail
Hold Ctrl and Shift and click on the layer's thumbnail. This loads a luminance selection that doesn't just include the brightest pixels but takes all brightness levels into account. At first glance, the selection often looks somewhat larger and softer. That's exactly what you need for the lights to look natural. Then activate the background layer again and create a new layer from the selection with Ctrl+J. Deselect the selection with Ctrl+D.

Step 5: Edit and colorize the light shape
On the new layer, there are now the lights with a transparent background. You can hide or delete the original layer if you no longer need it. The fill layer may well be dark. If you color it blue, the shape is preserved. At the edges, a little of the original's background may still be visible. In this variant, that usually isn't a problem, because the shape is what matters. You can change the color of the fill layer at any time by double-clicking the color swatch.

Step 6: Fill the shape with pixel layers as a clipping mask
Create a new pixel layer and drag it into the light layer as a clipping mask. This way, your painting only affects the shape. Choose a brush tool with a soft tip and full opacity. With white, you color the shape completely white. Another color, such as a neon tone, works just as well. You can also use a fill layer with a gradient or an image, so that the lights are filled by the subject. The advantage of this method is full control over color and texture.

Variant 1 as a custom brush
Step 7: Save the light shape as a brush
If you want to use the shape again and again, you can turn it into a brush. To do this, hide all layers except the background and change the size via "Document", "Resize Document", for example to a width of 1000 pixels. Save the result as a PNG with transparency. Then open the Brushes panel via "View", "Studio" and "Brushes".

Step 8: Choose an image brush or an intensity brush
You set the brush type via the small menu in the Brushes panel. With "New Image Brush", the brush adopts the colors of the PNG file. A rainbow image therefore results in a rainbow brush. With "New Intensity Brush", on the other hand, you determine the color yourself, which you set beforehand in the color picker. After you have chosen the type, the program asks for the location of the PNG file. You can then paint directly on a pixel layer with the brush, and Affinity Photo creates the layer automatically.

Variant 2: Using fireworks with the layer blend mode
Step 9: Placing the fireworks into the subject
The second variant is significantly faster. Drag a fireworks image on a black background into your document. You don't have to laboriously cut it out, as long as the background is truly deep black and the lights are strong. In the Layers panel, change the blend mode from "Normal" to "Screen". The black areas disappear, and the fireworks glow in the subject. Make sure the explosions are above the buildings so that the composition looks believable.

Step 10: Creating a reflection for the water surface
To create a reflection in the water, duplicate the fireworks layer with Ctrl+J. Then choose "Arrange", "Flip Vertical" and drag the layer downward. Hold down the Shift key while moving so that the layer stays straight. You can also compress the reflection a little so that it fits the perspective.

Step 11: Blending in the reflection with blend options
So that the reflection doesn't look unnaturally laid over the image, some areas of the original should show through. To do this, open the blend options of the active layer via the gear icon. On the right side of the dialog, you drag the handles of the slider for the underlying layer. Drag the lower handle downward and place another handle in the middle, which you drag upward. A non-linear gradient ensures soft transitions. Make sure the reflection doesn't become too bright and the dark areas aren't filled with fireworks again.

Step 12: Making the water surface restless with a live filter
A water surface is rarely smooth. Select the reflection layer and add the "Scatter" filter via "Layer", "New Live Filter Layer". A value of about 1 percent is usually enough. With higher values, the fireworks disappear quickly. If the reflection then looks too strong, reduce the layer's opacity, for example to 80 percent. The layer must not become too dominant, otherwise the image looks restless.

Cutting out dust and smoke
Step 13: Checking the background for pure black
With dust or smoke, the background is crucial. Set the layer to "Screen". The result often looks good, but the smoke may have a yellow cast. Check beforehand whether the background is actually pure black. To do this, create a Levels adjustment as a clipping mask and drag the black slider to the right while holding the Alt key. Where white areas appear, the background is not completely black. If everything is correct, you can delete the Levels adjustment again.

Step 14: Removing the yellow cast with a clipping mask
To neutralize the yellow cast, you create a "Recolor" adjustment layer as a clipping mask. Drag the saturation slider all the way to the left. This turns the smoke gray or white, and you can use it again with "Screen" on a dark background. However, if you want to colorize the smoke, this approach is not enough.

Step 15: Flexibly colorizing the smoke with a luminosity selection
Load a luminosity selection with Ctrl+Shift via the thumbnail of the smoke layer. Duplicate the selection with Ctrl+J onto its own layer with a transparent background and deselect with Ctrl+D. You can now hide the smoke layer. Create a new pixel layer as a clipping mask and paint over the smoke with white. The pixels are retained depending on the opacity, and you can change the background at any time without the smoke losing color.

In this context, do not try to paint black in "Color" mode. Black is not a color in the sense of this mode, and the smoke remains unchanged.
Water Splash and Neon Text
Step 16: Correcting and rasterizing the water splash
The water splash also comes from a dark background. First set the layer to "Screen". If the background still looks too bright, open a Levels adjustment as a clipping mask and drag the black level to the right until the background disappears. By holding down the Alt key, you can see which areas are not yet black. You can also bring additional brightness into the image using the white slider.

To recolor it, you need to rasterize the layer. Duplicate it beforehand, hide the original, and right-click on the layer. Choose "Rasterize". Then set the mode to "Normal". Load the luminosity selection with Ctrl+Shift, create a new layer with Ctrl+J, and delete the old layer. Then you paint over it with a pixel layer and the desired color. A yellow tone, for example, results in a yellow water splash.

Step 17: Isolating a neon text and adjusting its color
You proceed similarly with the neon text. Set the layer to "Screen" and correct the background with a Levels adjustment as a clipping mask. With the black level, you fade out the background. The structure of the wall remains visible, which adds extra appeal. If you don't like the structure, you create a layer mask and paint away the distracting areas with a soft brush in black.

For the color look, you use a "Recolor" adjustment layer as a clipping mask and adjust the hue. This change initially affects the entire lettering. If you only want to colorize individual parts of the lettering, duplicate the layer, rasterize it, and load a luminosity selection. Then you can paint individual letters in red or yellow with a pixel layer.


If the neon text doesn't glow strongly enough yet, duplicate the neon text layer with Ctrl+J. The two layers then reinforce each other.

Summary ??? Affinity Photo: Isolating Lights, Sparks, and Smoke
With the luminosity selection, you can extract lights, sparks, dust, smoke, water splashes, and neon lettering from dark backgrounds. The thumbnail method with Ctrl and Shift usually delivers the best results. The lights then sit on their own layer, which you can design with fills, pixel layers, gradients, or images. For fireworks, the "Screen" blend mode is often enough, while with dust and smoke you should first make sure you have pure black. With blend options, live filters, and clipping masks, you integrate the elements harmoniously into your subject.
FAQ
What is a luminosity selection?A luminosity selection marks pixels based on their brightness and thus separates bright lights from the dark background.
Why does the background have to be black with Screen?The mode hides everything black. Light gray background pixels remain visible and disturb the result.
Why can't smoke be colored black with Color mode?Black does not count as a color in Color mode, so the smoke remains unchanged. For a dark coloring, a luminosity selection with other layer modes is better suited.
How do I create my own brush from lights?Save the isolated shape as a PNG with transparency, open the brush panel via View, Studio, Brushes, and choose New Image Brush or New Intensity Brush.
Why do I have to rasterize a water splash before I recolor it?Rasterized layers can be edited cleanly with a luminosity selection and painted over with pixel colors, while layers with a blend mode do not allow these steps.


