
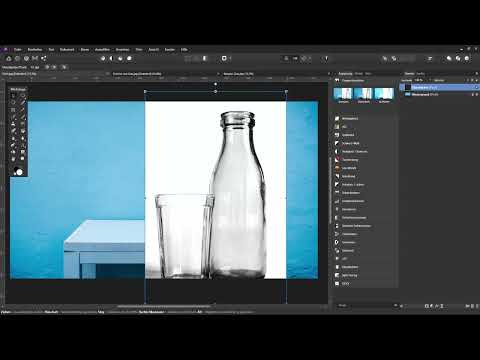
Glass is one of the most unpleasant subjects to cut out, because it is transparent, reflective and casts shadows that don't simply disappear. With the pen tool or the selection brush you quickly reach your limits here. In this tutorial you will learn a different approach that works with tonal values, blend modes and blend options. In the end you will have a bottle and a glass that look believable on a new background.
The video is only loaded from YouTube when you play it – data (including your IP address) is then transmitted to YouTube/Google. More in the privacy policy
The workflow is somewhat more involved than a classic cutout, but it gives you more control over brightness, transparency and shadows. First take a close look at the original image, because the lighting mood determines how much work you will have to invest later.
Key Takeaways
- The lighting mood of the original image determines whether a glass object will fit into a new scene at all.
- With the black level and white level in a Levels adjustment, you make the background pure white without losing the shadows completely.
- Splitting the image into highlights and shadows layers, combined with the blend modes Multiply and Screen, reconstructs the original image and makes editing flexible.
- The blend options (gear icon) control the transparency of the glass by treating light and dark tonal values differently.
- A Color Balance adjustment as a clipping mask tints only the shadows to match the new background.
- A subtle, blurred reflection gives the glass the final finishing touch.
Step-by-Step Guide
Step 1: Analyze the Lighting Mood
Before you even reach for Affinity Photo, you should look at the photo critically. In the example, the bottle and glass stand in front of a very bright background, and the shadows are rather grayish. An image with light from below or very dark objects, on the other hand, can only be placed into a similarly lit scene. So pay attention to how you photograph objects if you want to use them as cutouts later.

Step 2: Create a Levels Adjustment Layer
Open the Adjustment panel via "View", "Studio" and "Adjustment". Select Levels there. Affinity Photo creates the adjustment layer above your background layer, so the original image remains unchanged. In the dialog box you see a histogram, which in the example clearly skews to the right, meaning it contains many bright tones and hardly any dark ones. This is exactly how you can tell where to start.

Step 3: Use the Black and White Levels Deliberately
With the black level slider you pull the dark areas further down until they become pure black. Feel free to overdo it once so you understand how the slider behaves, and then pull it back. The white level slider turns the bright tones white. In doing so, however, the bottle and glass lose detail. That is intended for now, because you want to get the background as pure white as possible.
A trick helps you here: if you hold down the Alt key and drag a handle of the slider, you immediately see which areas become pure white or pure black. This way you can tell whether the floor in the image also becomes completely white.


Step 4: Bring Back the Shadows with a Mask
Now that the background is white, the Levels adjustment is too strong for the shadows and details. Therefore click "OK" in the Levels window, and the mask of this adjustment layer becomes available to you. Using the mask icon, create a white mask, with which the adjustment initially remains fully visible. Then select the Brush tool, set the opacity to about 50% and the hardness to about 10 to 15%. Then paint with black on the mask to take back the adjustment in the desired areas.
Concentrate on the areas under the glass and the bottle. The shadows should fade out softly there and not look hard-edged. You adjust the brush size by holding the Alt key and clicking with the left and right mouse buttons while moving the mouse left or right. If you move the mouse up or down, you change the hardness.

For the details in the bottle and glass, you proceed the other way around: paint with white on the mask so that the adjustment takes effect there again. At the edge, take particular care not to paint over the glass.
Step 5: Flatten the Layers and Prepare the Image
When you are happy with the result, merge all layers into a single pixel layer. To do this, click the top layer and press Ctrl, Shift, Alt and E. The new layer combines the layers below it. Then name it, for example "Glass Objects", so you keep track of things.

Step 6: Copy, Paste and Place the Glass Object
Copy the layer with Ctrl and C, switch to your target image and paste it with Ctrl and V. With the Move tool, you can enlarge or reduce the layer proportionally by dragging the selection frame. Position the object so that it fits the scene. In the example, you orient yourself by the edge of the table, over which the shadow should fall.

Pay attention to the direction of the shadow. In the background image it falls to the right, but in the glass object it falls to the left. If you flip the layer horizontally, the direction of the light matches again. You can find this under "Arrange" and "Flip Horizontal".

By holding down the space bar, you can move the image section without moving the object. Also take perspective and focal length into account: if the camera perspective of the glass does not match the background, the result looks inconsistent despite a good cutout.
Step 7: Split Highlights and Shadows into Two Layers
Duplicate the Glass Objects layer with Ctrl and J. Name one copy "Highlights" and the other "Shadows". Temporarily hide the highlights layer and set the blend mode of the shadows layer to "Multiply". This mode multiplies the color values of the active layer with the values below it. Pure black therefore stays black, and white becomes invisible. The dark areas of the glass are thus preserved.

Then show the highlights layer again and set it to "Screen". The combination of both layers gives you the original image again. The advantage: you can edit highlights and shadows separately.

Step 8: Remove the White Background from the Highlights Layer
The white background is still visible on the highlights layer. You remove it with a mask. With the highlights layer active, create it while holding down the Alt key, so that it is initially black and therefore completely hidden. Then choose a white brush with relatively high hardness and 100% opacity to make the highlights visible again in the desired places.
Work at the edges with a small brush. Inside the glass you can paint more generously, because the transitions don't bother you there. A graphics tablet helps you translate pressure directly into brush size. With the X key, you swap foreground and background color if you want to switch quickly between black and white.

A selection brush would be less suitable at this point because it easily runs into the bottle and creates messy edges. With the mask you keep more control.
Step 9: Control Transparency with the Blend Options
To make the glass look transparent, open the blend options of the highlights layer via the gear icon. On the left side you will find the source layer range, that is, the tonal values assigned to this layer. If you drag the handle down, the bright areas become more transparent. If you drag it up, they remain opaque.

A single handle quickly produces jagged edges. Therefore, click in the middle of the diagonal to set a new anchor point, and use the checkmark at "Linear" to take the curve. This makes the transitions softer. A right-click on an anchor point removes it again.
For the shadows layer, you proceed in the same way, only with reversed logic: the handle for the dark tones determines how transparently the deepest black is displayed. With a slightly curved line, the transitions stay natural.

Step 10: Adjust the Shadow Color to the Background
The background image has a bluish wall, whose color is also reflected in the table and in the shadows. Your glass objects should match it. To do this, create a "Color Balance" adjustment layer and drag it directly onto the shadow layer. This creates a clipping mask, so the color correction only affects the shadows.

In Color Balance, first select the tonal ranges "Shadows," "Midtones," and "Highlights." For the shadows, drag the sliders toward blue and slightly reduce the green. For the midtones, you can also experiment until the color looks harmonious. You usually leave the highlights unchanged. Finally, use the opacity of the shadow layer to control how strong the shadows should appear.

Step 11: Remove Protruding Shadows with a Group Mask
Select the shadow layer and the highlights layer, hold down the Control key, and group them with Ctrl and G. Name the group "Glass Objects." Then create a mask for the group. It initially appears black, so you have to work with white to bring areas back. If you hold down the Alt key and click on the mask, you can see which areas it covers.
Paint with black on the mask to remove protruding shadows, for example along the edge of the table. Reduce the hardness of the brush somewhat so that the transitions remain soft.


Step 12: Add a Subtle Reflection
For a realistic effect, you add a faint reflection on the table. Copy the group with Ctrl and J, flip the copy via "Arrange" and "Flip Vertical," and move it down with the arrow keys. Holding Shift speeds up the movement. The position doesn't have to be perfect, because you will weaken the reflection considerably in the next step.

First set the mask of the reflection to black so that it is completely hidden. Then use a soft brush with low opacity to paint back into the image the areas that should show a reflection. You remove protruding parts by switching to black. The reflection should only be hinted at.

Then reduce the opacity of the reflection group until only a slight shimmer remains visible. For softer edges, you can place a Live Filter layer with the Gaussian Blur over the group. Move the slider carefully until the blur looks natural, and check the result with and without the reflection.

Summary ??? Cutting Out Glass Objects in Affinity Photo: Step-by-Step Guide
You have learned how to cut out glass objects in Affinity Photo not via paths, but via tonal values, masks, and blend modes. You brighten the background with the Levels adjustment, separate highlights and shadows into two layers, and control the transparency via the blend options. With a color-adjusted shadow layer, a group mask, and a restrained reflection, you convincingly insert the object into a new scene. The better lit your original photos are, the less post-processing you need.

FAQ
Why shouldn't I simply use the Pen Tool for glass objects?Glass is transparent and contains fine reflections. Paths therefore often create hard edges that make the glass look unnatural. The tonal value and blend mode method preserves the transparency.
Can I still adjust the editing later?Yes. Through adjustment layers, masks, blend options, and layers, every step remains editable. Double-clicking the adjustment layer opens the settings again.
What do I do if details are missing in the glass?If the details were not captured when the photo was taken, they cannot be reliably recovered. You can only reconstruct them artificially, which usually remains visible. Good lighting during photography is therefore crucial.
Why should I flatten the layers before placing them?Merging with Ctrl, Shift, Alt, and E combines all adjustments into one pixel layer. This way you can easily copy the object and paste it into other files without taking the individual adjustment layers along.


