
Fine strands of hair are the biggest challenge in any cutout. If you preserve them cleanly, you achieve a result that looks convincing on any background. That is exactly what I will show you in this tutorial. You start with a rough selection, refine the mask with the Refinement Brush, and then correct colored edge areas on clothing and hair without destroying the structure.
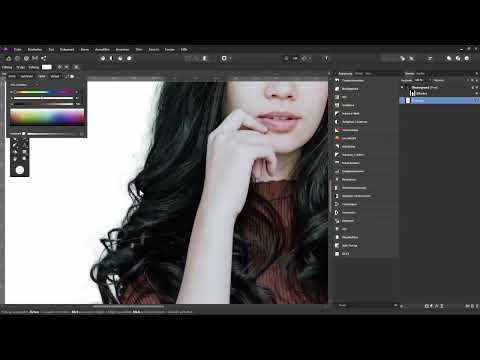
The video is only loaded from YouTube when you play it – data (including your IP address) is then transmitted to YouTube/Google. More in the privacy policy
This tutorial is suitable for subjects in front of a solid-colored or nearly textureless background. A graphics tablet is helpful, but not required.
Key Takeaways
A solid-colored background with sharp hair and no focus gradient provides the best starting point for a precise cutout.
The Selection Brush detects contours automatically. With the Alt key or the "Subtract" button, you can quickly correct mistakes.
The "Refine Mask" function with the Refinement Brush brings back fine strands of hair that were lost in the first selection.
The cleanest way to correct colored edge areas is with layers in "Color" mode as a clipping mask. The structure of fabric and hair is preserved in the process.
A fill layer at the very bottom allows you to change the background color at any time and check the result immediately.
Step-by-Step Tutorial
1. Create a Rough Selection with the Selection Brush
Open your image and select the background layer in the Layers panel. Activate the Selection Brush tool and set a large brush tip, about 110 pixels. Paint generously over all areas you want to select. Affinity Photo automatically detects contours in the image and selects the areas accordingly. You can start over at any time until the rough selection is right.

2. Correct the Selection with Add and Subtract
If you have marked too much of an area, hold down the Alt key and paint over it. Alternatively, activate the "Subtract" button in the toolbar at the top and use it to remove the selection again. With "Add" you fill in missing spots. This interplay is the most important trick for getting the rough selection clean. The very fine hairs at the edge cannot yet be captured with this tool. We will take care of that later.
3. Create a Mask and Deselect
Now select the background layer and click the mask icon in the Layers panel. This makes the background transparent. Once the mask is created, deselect the selection with Ctrl + D so it doesn't get in your way.

4. Insert a Solid-Color Fill Layer
To be able to judge the result, you need a surface beneath the subject. In the menu, choose Layer, New Fill Layer, and place the layer at the very bottom, below the background layer. Then choose a color. A slightly desaturated blue is a good choice. You can change the color at any time later and thus test different backgrounds.

5. Refine the Mask and Use the Preview
Click on the mask of the background layer again and right-click to call up the "Refine Mask" command. In the dialog box you will see a preview. Choose "Overlay" as the preview type. The normally colored areas are cut out, while the areas marked in red are still covered. Here you can see immediately where strands of hair are missing or the edge is frayed.

6. Bring Back Fine Strands of Hair with the Refinement Brush
Activate the Refinement Brush in the dialog. A width of about 31 pixels is a good starting value. You can adjust the size by holding down the Alt key while simultaneously holding the left and right mouse buttons. Now paint over the edges where you suspect hair. Affinity Photo examines the areas and adds any details it finds to the selection. Work your way forward bit by bit, zoom into the image, and move the view by holding down the spacebar. You will notice that Affinity Photo finds more hairs with each pass.

7. Refining contours on the shoulders and clothing
Stair-step transitions often appear on the shoulders and clothing edges in particular. Reduce the brush size, zoom in closer and follow the contour. This makes the transitions softer and more natural-looking. Keep in mind that Affinity Photo does not recognize where the sweater ends or which strand belongs to the hair. You make these decisions yourself by tracing the contour manually.

8. Adjusting edge sharpness and smoothing the mask
When you are satisfied with the result, adjust the edge sharpness. A value of about 0.5 pixels is often sufficient. You can also smooth the edge slightly to reduce stair-stepping. Then confirm with "Apply". Check the result by holding down the Alt key and clicking on the mask's thumbnail. The individual fine hairs should now be visible, and the edges look softer overall.

9. Preparing the edge correction: creating two new layers
Now it gets tricky. Colored edge areas appear when the subject was photographed against a bright background. These remnants become distracting as soon as you change the background. To address this, create two new empty layers above the image layer. Name the first layer "Edge correction clothing" and the second "Edge correction hair". Double-click on the layer name to change its label.

10. Setting up the Color blend mode and clipping mask
Change the blend mode of the "Edge correction clothing" layer from Normal to Color. This mode only takes on the color of your brush stroke and leaves the brightness and texture of the fabric unchanged. Then drag the layer onto the image layer so that a small blue bar appears, and release it. This creates a clipping mask. Your brush strokes now only affect the area within the cut-out person and do not extend beyond the edge.

11. Picking up color from the clothing with the brush
Select the Brush tool, increase the brush size and reduce the opacity to about 70 percent. Hold down the Alt key and click on a spot on the clothing whose color you want to pick up. Set the hardness to about 10 percent so that the brush is soft. Then paint over the distracting edge areas using only the edge of the brush. This way you change the color in a targeted manner without painting over the texture. It is important that you pick up the color of the clothing at the edge and not that of the background. Only then will the correction also match any new background later on.

12. Locking the layer and correcting the hair
Once the clothing is corrected, lock the layer by clicking the lock icon. This prevents accidental changes. Then switch to the "Edge correction hair" layer. This layer should also form a clipping mask and be set to Normal mode. With the hair, you can be a little bolder, because here the color is actually painted over. Choose a dark hair color and paint over the edges with low hardness. Work your way in slowly and take care not to destroy highlights and fine structures. A higher opacity helps with hair that has several tones, while you rework bright edge areas with darker tones.

13. Checking the result with different backgrounds
Check your result by clicking on the fill layer and choosing a different color via the fill icon. Test dark tones, light tones and highly saturated colors. Lower the saturation if necessary or adjust the brightness. If you discover individual bright spots during testing, you can touch them up with the brush on the appropriate layer. Over time you will become more practiced and will spot more quickly where corrections are needed. In the end, the cut-out should look convincing on any background, whether light or dark.

Summary ??? Cutting out hair in Affinity Photo: Step-by-step guide
You have learned how to precisely cut out a person against a solid-color background using the Selection Brush, mask and adjustment brush. The key lies in the interplay of rough selections, targeted corrections and refining the mask via the preview. Afterwards, you corrected colored edge areas with two layers in Color mode and as a clipping mask. This preserves the texture of the clothing and hair. With this method you stay flexible and can swap out the background at any time.
FAQ
Why do I still see white fine hairs at the edge after the selection?The fine hairs are not captured by the selection brush alone. Use the adjustment brush in the "Refine Mask" dialog to add them afterwards.
How do I remove an area that was selected by accident?Hold down the Alt key and paint over the area. Alternatively, activate the "Subtract" button and use it to subtract the area from the selection.
Why should I set the blend mode to Color?The Color mode only takes on the hue of your brush stroke. The brightness and texture of fabric and hair are preserved, so the correction looks natural.
What does the clipping mask do for the edge corrections?The clipping mask restricts your brush strokes to the cut-out person. This way, paint does not spill over the edge onto the background.
Which brush settings are suitable for edge correction?An opacity of about 70 percent and a hardness of around 10 percent have proven effective. Paint with the edge of the brush to adjust the color gently.
Why should I pick up the color from the edge of the clothing and not from the background?If you change the background later, a color taken from the old background would otherwise become visible again. The color of the clothing, on the other hand, suits any new background.
How can I test the cutout with different backgrounds?Click on the fill layer, open the fill icon, and choose a different color. This way you can check your result on light, dark, and colored surfaces.


