
A busy background and gradients in sharpness make any cutout difficult, and with hair it gets especially tricky. This is exactly the scenario I address in this tutorial. You will learn how to achieve a convincing result with Affinity Photo despite difficult source material. The example image has a busy environment, and the sharpness falls off unevenly across the image. One shoulder is sharp, the other is already blurred, and the hair also alternates between clear strands and soft areas in the background.
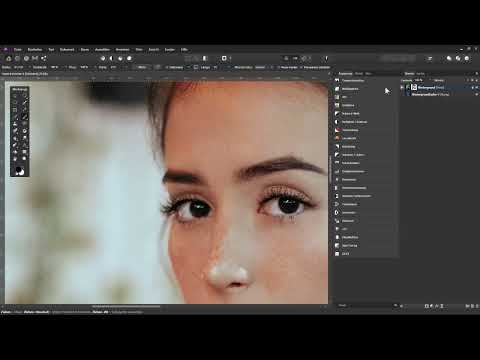
The video is only loaded from YouTube when you play it – data (including your IP address) is then transmitted to YouTube/Google. More in the privacy policy
The tutorial is based on the Selection Brush, the Quick Mask, and the Refine Mask command. At the end, I show you how to touch up the edges with clipping masks and bring the noise character of the original back into the image.
Key Takeaways
Key Takeaways
- With blurred areas and a structured background, you work with the mask in several passes instead of in a single step.
- The Quick Mask immediately shows you what is selected and makes errors in the edge area visible.
- Soft brushes in blurred areas create natural transitions; hard edges look fake there.
- With clipping masks, you correct color and edges without destroying the original image.
- Appropriately applied noise integrates the reworked areas back into the overall image.
Step-by-Step Guide
Step 1: Create a test background using a fill layer
First create a fill layer and drag it all the way to the bottom in the Layers panel, below the background layer. Rename it by double-clicking, for example to "Background Color". The color doesn't matter much at this stage. Simply choose a strong blue, because that way you can immediately see where remnants of the original background remain in the cutout.

Step 2: Rough selection with the Selection Brush
Switch to the background layer and activate the Selection Brush tool. Set the brush relatively large and paint roughly over the entire subject. With a structured background, the selection is often imprecise at first. For example, you see an edge that actually belongs to the chair back, and parts of the hand that don't belong to the subject. This is normal and will be corrected in the next steps.
Step 3: Subtract unwanted areas with the Alt key
Hold down the Alt key and paint over all areas that don't belong to the subject. Then release the key and keep painting to add areas that are missing. You repeat this back-and-forth until Affinity Photo separates the contour of the subject reasonably cleanly. Reduce the brush size in tricky spots, such as on the sleeves or at the transition between hair and background. In the end, the fine details can't be achieved with the brush alone, but through reworking the mask.

Step 4: Switch to the Quick Mask
Before you convert the selection into a mask, activate the Quick Mask. You can do this with the Q key or via the corresponding icon. Everything that is not selected then appears with a red overlay. You can see at a glance where the selection is messy at the edges. Here it also becomes apparent that the transitions in the blurred areas and at the edge of the clothing still don't fit.

Step 5: Refine edges with the soft brush
Now switch to the normal paint brush. Set the opacity to 100 percent and the hardness to relatively soft. With white you paint in areas that belong to the subject, with black you remove unwanted parts. With the X key you switch between the two colors. Work with the edge of the brush so that the edges stay soft. You don't have to make the edges perfect. What matters is that you roughly define the desired areas, because Affinity Photo takes this information into account later when refining the mask.

Step 6: Rework blurred areas selectively
The shoulder in the blurred area needs its own treatment. Set the hardness for this area to zero and paint with black over the background that nestles against the shoulder. Then switch to white and work from the inside out so that the edges become softer. In doing so, bright areas from the background can come back into the image. That's not a problem, because you will correct them later. What matters is that these areas stay soft, because they lie in the blurred region and should not have a hard edge.

Step 7: Refine the Mask and Adjust the Border Width
Exit the Quick Mask and create the mask from your selection. Press Ctrl and D to deselect again. Then right-click on the mask and choose Refine Mask. Reduce the border width so that the result does not lose material unnecessarily. Look at the mask in black-and-white view to see where details are still missing. With the brush, you can selectively touch up individual areas of hair, such as strands that still hang dark in the background.

Step 8: Adjust Edge Sharpness and Remove Obvious Errors
In the Refine Mask dialog, you can smooth the edge sharpness to about 0.5 pixels and confirm with Apply. After that, you remove obvious errors. Hold down the Shift key and click on the mask so that you can hide it. This way you can see which strands are too blurry and come from the background. You may paint these areas away with black. For the cheek, choose a low hardness so that the transition is not visible in the blur. Don't forget to switch back and forth between the mask and the image to check the result.

Step 9: Touch Up the Neck and Difficult Transitions
The neck is often the area that suffers the most because the transition to the background looks unattractive. Only manual work helps here. Paint away the distracting background with black and check the edges along the borders. Bright fringes along the contour can also be removed with the brush in the mask. You don't have to get every single hair transition perfect, because the color correction in the next steps will catch a lot of it.

Step 10: Improving the Edges of the Clothing Using a Clipping Mask
Now create a new empty layer, name it for example "Edge Improvement Clothing", and drag it onto the cut-out layer as a clipping mask. Then brush strokes only take effect within the subject. Zoom into the image, choose a brush tool, and hold down the Alt key while you pick up a color from the image. For the clothing, a dark tone taken directly from the fabric is suitable. Reduce the opacity slightly and set the hardness to zero. With the edge of the soft brush, you start anew again and again and touch up the edge areas. The blur in these areas can stay; it matches the original.

Step 11: Edge Improvement for Skin and Hair
Create another empty layer as a clipping mask, this time named "Edge Improvement Skin and Hair". Work here similarly to the clothing, but more carefully. Skin reacts more sensitively to color corrections, so make the brush smaller and pick up skin colors directly from the face. Make sure to check the correct color with every new color pick-up, because Affinity Photo sometimes reacts with a delay when selecting colors. For the hair, you work with several brown tones and reduce the opacity so that the transitions look smooth.

Step 12: Retouch the Color of Eyelashes, Eyebrows, and Hair
For eyelashes and eyebrows, you take a dark color tone from the image and carefully paint over the contours. For the hair, control is important. Use a wide brush, set the opacity low at first, and build up the color step by step. This way you avoid hard areas of color. The areas in the blur zone will be reworked later anyway, so you don't have to be overly precise here. Play with opacity and color tone until you are satisfied with the result.

Step 13: Softening Artifacts in the Blur Areas
In some places, especially on the left side, small blocks from the original image are still visible. Show the mask by holding down the Alt key to make these artifacts visible. Then choose the Lasso tool and draw a selection around the affected edge. By holding down the right mouse button, you add further areas. Then you apply the Gaussian Blur via Filter and adjust the strength until the transition looks coherent. After that, you deselect with Ctrl and D. If remnants remain dark, you can touch them up with white.

Step 14: Bringing the noise of the original back into the image
The original image is noisy, and your editing now looks too smooth at the edges. Therefore, create a new empty layer as a clipping mask, for example named "Noise". Fill it via Edit and Fill with a medium gray of 50 percent brightness and set the layer mode to Soft Light. This leaves the image unchanged at first. Then add noise via Filter, Noise, Add Noise. Drag the slider until the noise matches the original image. At around 60 percent it usually looks consistent. Repeat the process for the clothing layer and reduce the opacity of both layers to about 90 percent so that everything blends together harmoniously.

Step 15: Replacing the background and checking the result
Finally, you can change the background color to test the cutout. To do this, show the fill layer one after another with different colors, such as white, black, green, or blue. Pay attention to remnants of the old background and to bright fringes at the edges. Only when the subject looks convincing against all colors has the cutout succeeded. The combination of mask work, clipping masks, and noise then contributes to a natural result even with a busy source image.

Summary ??? Cutting out hair with Affinity Photo: Mastering a textured background
Cutting out a subject with a busy background requires patience and several passes. You start with a rough selection, refine it in the Quick Mask, and rework blurred areas with soft brushes. Afterwards, you clean up edges using clipping masks and bring back the noise of the original. With this approach, you achieve a convincing result even with difficult subjects. From a photographic perspective, it also helps to pay attention to a calmer background and a not-too-wide aperture when shooting, as this makes the later cutout significantly easier.
FAQ
Why is hair so hard to cut out against a busy background?Hair has fine structures, and in the blurred area it blends with the background, so Affinity Photo has difficulty detecting the edges.
What is the Quick Mask used for?The Quick Mask shows you, through a red overlay, which areas are not selected, and makes errors at the edge visible.
When should I use the Alt key with the Selection Brush?With the Alt key held down, you remove areas from the selection, while without it you add areas.
Why do I work with clipping masks for edge refinement?A clipping mask limits the brush strokes to the cut-out subject, so you don't alter any areas outside of it.
What does the noise at the end of the editing achieve?A matching noise blends the smoothly edited areas with the noisy original and makes the subject look more harmonious.
Can I still change the background color afterwards?Yes, since the fill layer lies beneath the subject, you can swap it out at any time and thus check the result against different colors.


