
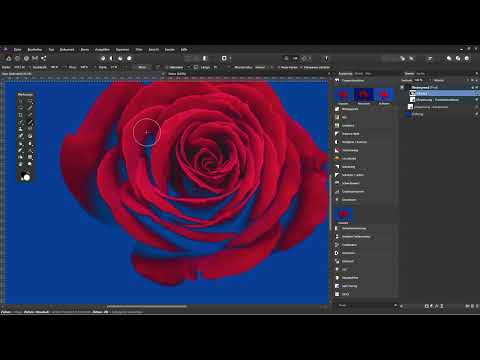
Isolating a rose blossom from a green background without laboriously tracing every petal edge with the lasso is much faster with the Channel Mixer. You use the image's color channels to calculate transparency, and create a mask from it. I'll first show you the process using the rose blossom and then apply it to a statue against a red background. This way you'll see how the method can be applied to different subjects.
The video is only loaded from YouTube when you play it – data (including your IP address) is then transmitted to YouTube/Google. More in the privacy policy
Key Takeaways
- The Channel Mixer is created as an adjustment layer above the background layer and used as a clipping mask.
- You choose "Alpha" as the output channel so that you can control transparency.
- The red is retained, while green and blue are faded out using the sliders.
- A mask can be created from the composite alpha channel via pixel selection.
- You refine the mask with a Levels adjustment that acts on the alpha channel, and with the brush.
- You remove edges with color remnants using a pixel layer in Hue or Color mode.
Step 1: Open the image and create the Channel Mixer
Open your image in Affinity Photo. In the Layers panel you see it as the background layer. Click this layer so that it is active. Then switch to the Adjustment panel and select the Channel Mixer there. Clicking it opens the dialog box, and Affinity Photo automatically creates an adjustment layer.

Drag the new Channel Mixer adjustment layer directly onto the image layer so that it acts as a clipping mask. This way it only affects the image beneath it and not the entire composition.

Step 2: Choose the alpha channel as output
In the Channel Mixer you now define what should happen in the end. As the output channel, choose not Red, Green or Blue, but "Alpha". Only this channel controls transparency. Your goal is to keep the blossom and make the background disappear.
Step 3: Control the color channels precisely
Drag the slider for Red all the way to the right so that the blossom is retained. By contrast, drag the slider for Green to the left. The green background will thereby become increasingly transparent. You should also reduce Blue, since blue components are found mainly in shadows, including those of the blossom itself.

Pay attention to the preview as you move the sliders. At around 75 percent, the haze in the background has almost disappeared. Some shaded areas of the blossom also become partially transparent in the process. This can be corrected later, so you don't have to be perfect here.

Step 4: Create a mask from the alpha channel
The Channel Mixer already delivers a mask in its result, but not yet as a usable selection. To get it, switch to the Channels panel. There you will find the composite alpha channel, whose thumbnail already shows what you want to achieve. Right-click this icon and choose "Load to Pixel Selection".

Then switch back to the Layers panel and click the layer with the blossom. With a click on the mask icon you now create a mask. You can hide the Channel Mixer for now. With Control and D you deselect the active selection again. You now have a mask that you can continue working with.

Step 5: Check with a fill layer
To assess the result properly, create a fill layer. To do so, choose the New Fill Layer option in the Layer menu and pick a shade of blue, for example. Drag the fill layer all the way to the bottom so that you can see the background. You may now still notice haze that you don't like. In addition, you may be bothered by blue shadows that contrast with the red petals.

To examine the mask more closely, hold down the Alt key and click on the mask. You will then see the mask in grayscale, where dark areas are transparent and light areas are visible.
Step 6: Refine the mask with Levels
Unfortunately, the Burn tool in Affinity Photo does not work on a mask the way you would hope. One way to still work in a targeted manner is via Levels. To do this, click on the mask and create a Levels adjustment via the Adjustments panel. Do not drag this adjustment layer below the mask, but directly between the thumbnail and the word "Mask" so that it affects the mask.

Then double-click on the Levels adjustment and be sure to select "Alpha" instead of "Master" in the dropdown menu. With "Master", the image itself would be darkened, and that is exactly what you do not want here. With the slider on Alpha, you darken the dark areas of the mask further so that the haze disappears. With white, you can correspondingly strengthen light areas. Proceed carefully, as the edges will otherwise become very frayed.

You will not see the changes directly in the mask view. They only become visible in the overall image. It is therefore useful to switch back and forth between the mask and the image and check the effect.
Step 7: Touching up with the brush
If parts of the blossom were lost during darkening, you can bring them back with the brush. To do this, paint on the mask with white and choose a fairly soft brush. Zoom into the image so that you can work precisely. By holding down the Alt key, you can display the mask at any time and check what you are currently changing.

A graphics tablet makes this work significantly more pleasant than a mouse. When you are working on critical areas, such as the edge of the blossom, reduce the brush size and proceed slowly. Paint areas that you want to be visible in white, and leave the background black.

Light gray areas on the mask can be selectively lightened with the Dodge tool without affecting the black background. This tool would be ideal on a mask, but it likewise currently does not work in Affinity Photo. You can still achieve the result with the brush. Once you have checked all areas, you can show the Channel Mixer layer again and assess the result.

To test the cutout, switch to the fill layer and choose a different color, such as white or black. The rose blossom should now stand cleanly in front of the new color.

Step 8: Second example – statue in front of a red background
The same method works with other subjects. In the second example, a statue stands in front of a red background. Here too, you first place a Channel Mixer as a clipping mask on the background layer. Switch the output channel to Alpha, keep Red and hide the rest. Then you adjust the offset until the background dissolves but the statue remains.


Afterwards, as before, create a pixel selection from the Composite Alpha, add a mask to the background layer and hide the Channel Mixer. Since the selection then contains the background, you invert it with Control and I. The statue is thus cut out.

Step 9: Cleaning up edges and removing color remnants
Now insert a background, for example via a new fill layer in a shade of blue. On close inspection, you will probably notice that the old background shows through in some places. Refine this via Levels on the alpha channel by lightening the light gray areas of the mask further. Do not overdo it, because too much correction can destroy edges.

Colored fringes from the original background often remain along the edge of the statue. You remove them by creating a pixel layer and setting it as a clipping mask on the background layer. On this layer, you paint in Hue or Color mode. Hold down the Alt key to pick up a suitable color from the image with the brush, and paint carefully over the edge. Which mode works better depends on the image. Try both variants.


At the end, check the mask once more in detail. Remove small dots or spots with black, and restore missing areas with white. Then the statue is cleanly cut out.
Summary – Cutting Out with Affinity Photo: Creating a Channel Mixer Mask
With the Channel Mixer in Affinity Photo, subjects with a solid-colored background can be cut out quickly. You create the Channel Mixer as a clipping mask, select the Alpha channel as the output, and control the transparency via the color channels. From the composite alpha, you create a pixel selection and from that a mask. You refine this with a Levels adjustment on the Alpha channel and the brush. Finally, you remove color fringes with a pixel layer in Hue or Color mode. With a bit of patience, clean results can be achieved even with subjects like the statue.
FAQ
Which output channel is important for cutting out with the Channel Mixer?You must choose "Alpha," because only this channel controls the transparency of the image.
Why are red, green, and blue set differently?Red is retained so that the subject remains visible, while green and blue make the background transparent.
How do I create a mask from the Channel Mixer?In the composite alpha, right-click and choose "Load Pixel Selection," switch to the Layers panel, and then click the mask icon.
Why should I choose "Alpha" instead of "Master" in the Levels adjustment?With "Master," the image itself would be altered, while with "Alpha" you only affect the mask.
Can I use the Burn Tool on a mask?This currently doesn't work in Affinity Photo; you can instead work with the brush in black or white.
What can I do about colored edges after cutting out?Create a pixel layer as a clipping mask and paint over the fringes in Hue or Color mode.


