
A well-chosen crop often decides whether a photo works or gets lost. That is exactly what the Crop tool in DxO PhotoLab is for. In this guide, you will learn where to find it, how to select areas freely or in fixed aspect ratios, and how to finish your crop cleanly.
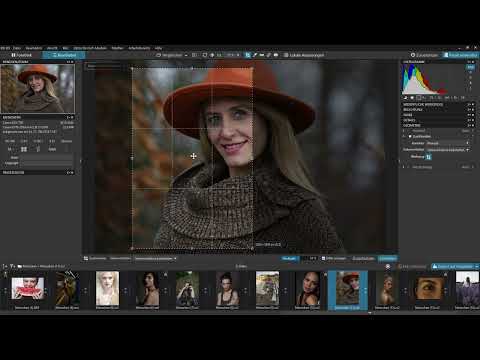
The video is only loaded from YouTube when you play it – data (including your IP address) is then transmitted to YouTube/Google. More in the privacy policy
Key Takeaways
- You can find the Crop tool at the top of the toolbar or in the Geometry palette in the "Crop" section.
- You can define a crop area by clicking and dragging with the left mouse button.
- You can keep the aspect ratio, choose it freely, or set it to fixed formats such as 1:1 (square).
- With the handles, you can also rotate the crop to portrait orientation without losing the original aspect ratio.
- Grid lines help you with image composition, and you control the opacity using the slider in the menu.
Step-by-Step Guide
Step 1: Activate the Crop Tool
Open your RAW image in PhotoLab. You can reach the Crop tool in two ways: via the icon at the top of the toolbar or via the Geometry palette, where you will find the "Crop" section. Select the tool, and it is ready for your input.

Step 2: Define a Crop Area
Now you can work directly in the image. Click at a spot with the left mouse button, hold the button down, and drag out the frame until the desired image area is marked. Everything outside the frame will be cropped away later. Initially, the original aspect ratio is retained if you do not change this option.

Step 3: Check the Original Aspect Ratio
Keep an eye on which aspect ratio is currently active. In the menu at the bottom of the tool, "Keep aspect ratio" is set by default. The frame then corresponds exactly to the original format of your image, and the darkened areas show you what will be removed. This way, you don't lose any proportions you don't want to lose when cropping.

Step 4: Freely Position and Rotate the Crop
You can move the frame as you like until the composition is right. If you want to present the subject in portrait orientation but still keep the original aspect ratio, grab one of the handles on the edge of the frame. Drag it down or up while holding the left mouse button. The frame is rotated automatically, so you can adjust the format without detours.

Step 5: Choose a Fixed Aspect Ratio
If you need a specific format, open the selection menu for the aspect ratio. Here you can choose "unrestricted" to drag out the frame completely freely. Alternatively, you can set a fixed ratio, such as 1:1 for a square. Then you drag out the frame as usual, and PhotoLab automatically maintains the chosen format. Numerous other aspect ratios are also available in the menu.

Step 6: Fine-Tune with Grid Lines
Grid lines help you achieve a balanced composition. You can show and hide them using the corresponding option. Align your subject with them, for example with the thirds lines, to make it look more harmonious. With the opacity slider at the bottom, you determine how strongly the cropped areas appear darkened. A slightly dark veil helps you clearly see the final image section without distracting you from the subject.

Step 7: Apply the Crop
If you like the result, finish the process by clicking "Close". Your image is then cropped accordingly. You can reopen this step at any time to refine the crop. The change therefore remains flexible and does not destroy your original photo.

Summary – Cropping Images Precisely in DxO PhotoLab: Explained Step by Step
The Crop tool in DxO PhotoLab is versatile. You can find it in the toolbar or in the Geometry palette, and you can use it to define crops freely or in fixed aspect ratios. With the original aspect ratio, the proportions are preserved, and by rotating via the handles you can switch to portrait format in no time. Grid lines and the opacity slider help you with composition. Then finish the process by clicking "Close", and your crop is done.
FAQ
Can I still change the crop later?Yes, you can reopen the Crop tool at any time and adjust your selection.
How do I choose a square image format?In the aspect ratio menu, set the ratio to 1:1 and then drag out the frame in the image.
How do I rotate my crop from landscape to portrait format?Grab one of the handles on the frame and drag it up or down. The frame is rotated automatically, and the original aspect ratio is preserved.
What does the opacity slider do when cropping?It determines how strongly the cropped-off areas are displayed darkened. It does not change the image itself.
Can I show and hide the grid lines?Yes, the grid lines can be shown or hidden at any time and help you align the subject.


