
When you develop your RAW images with DxO PhotoLab 3, the question quickly arises of how the software handles your files. The answer is surprisingly straightforward: PhotoLab has neither its own database nor a catalog. So you don't have to import anything before you can start working. Instead, the program accesses the folder structure of your hard drive directly. This saves time, but requires attention, because every change in PhotoLab immediately affects your original files. In this tutorial, you will learn how to delete, rename, copy and move images, how the Live Review function works, how to search quickly with indexing, and how to manage optical DxO modules.
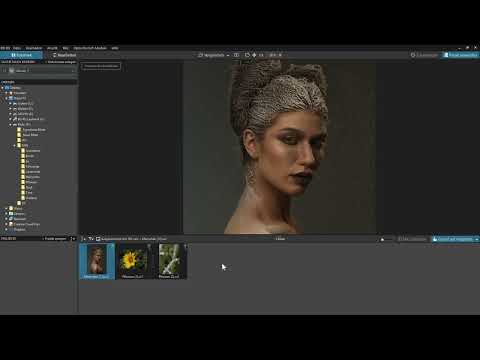
The video is only loaded from YouTube when you play it – data (including your IP address) is then transmitted to YouTube/Google. More in the privacy policy
Key Takeaways
- PhotoLab does not use a catalog, but the folder structure on your hard drive.
- Deleting, renaming and moving in PhotoLab directly affect the files on the hard drive.
- When you open a folder, the images are indexed. With "Create index" you capture a parent folder including its subfolders all at once.
- With the search function, you can find images based on ISO value, focal length, capture date or keywords.
- Optical DxO modules must be downloaded individually. They correct known image defects of a specific camera-lens combination.
Step-by-Step Guide
Step 1: Understanding the Folder Structure as the Foundation
First, you should understand how PhotoLab sees your files. A look at Windows Explorer shows you this best. There, for example, is hard drive P named "Bilder", and exactly this hard drive including all folders also appears in PhotoLab's folder list. If you open the folder RAW in Explorer and the subfolder "Menschen" within it, PhotoLab shows exactly the same images. The program interface is therefore nothing more than a view of your real folder structure.

Step 2: Deleting, Renaming or Moving Images
Caution is required here. If you delete, rename or move files directly in Explorer, they disappear or change their name instantly in PhotoLab as well. But the reverse also applies: What you remove in PhotoLab is actually deleted from your hard drive and not just removed from the display.
When you have opened a folder in PhotoLab, move the mouse over an image. A trash can icon then appears on the left. One click on it permanently removes the image from the hard drive, not just from the program. So think carefully beforehand whether you really no longer need the photo.

Step 3: Changing File Names
To rename, click directly on the file name below the image. After that, you can enter a new title. Alternatively, open the context menu with a right-click on the image and select the option "Rename file" there. Here too: The change affects the file on your hard drive, not just its display in PhotoLab.


Step 4: Copying and Pasting Images
Copying works as usual. For example, switch to the folder "Fahrzeuge", select a file and press Ctrl+C. Then open the folder "Menschen" and press Ctrl+V. The image appears immediately in the target folder, both in Explorer and in PhotoLab. If you then remove the file in the folder "Fahrzeuge" and confirm the prompt with "Yes", it also disappears from the view. The copy in the target folder remains unaffected.


Step 5: Using the Live Review Function
The "Live Review" function is particularly practical when you copy images from a camera or another program directly into a folder that PhotoLab currently has open. You activate it via the menu at the top. Outwardly, little changes at first; only a small icon appears. If you now copy a new image into the monitored folder, PhotoLab automatically switches to this most recent photo. With several new images, the one added last is always displayed. When you no longer need the function, you deactivate it again via the same menu.

Step 6: Understanding Indexing
When you open a folder in PhotoLab, all the images it contains are indexed. The program reads the metadata, that is, information such as capture date, file name, shutter speed, film speed (ISO), or keywords. Only this makes it possible to find the images quickly later via search. The downside of this method: a folder must first be clicked on so that its images are captured.

Step 7: Capturing Entire Folder Structures with "Create Index"
If you have freshly installed PhotoLab, a different approach is recommended. Click "Create Index" at the top. A dialog box opens in which you select the parent folder of your images, for example drive P. If you confirm with "OK", the entire structure with all subfolders is indexed. The message "Index is being created" briefly shows you the progress. Afterwards, all files in the structure are available to you via the search function, without having to open each folder individually.
Step 8: Finding Images with the Search Function
The search at the top is the actual tool that indexing gives you. If you enter "100", for example, PhotoLab suggests matching criteria, such as the film speed ISO 100. If you hover the mouse over the suggestion and hold it still for a moment, you can see how many images currently belong to it. If you click the suggestion, only these images are displayed. Additionally, you can display further criteria, such as a focal length of 100 mm. Filters can be removed with the small X. A search for "Menschen" also gives you all hits from the folder with this name, in this example 31 files.


Step 9: Understanding the Dialog Window for DxO Optics Modules
When switching between folders, a dialog window with available DxO optics modules sometimes appears. The reason: RAW files contain information about the camera and lens used. PhotoLab reads this data and suggests suitable modules for download. A module contains corrections for known problems of the camera and lens combination, such as chromatic aberration at the edges, vignetting, or sharpness that is not quite optimal. If you choose the appropriate module, PhotoLab automatically applies these corrections to the affected images.

Step 10: Selecting Modules Correctly
The icons on the images indicate the status. A green camera icon means that the matching module is known. Clicking on it shows you the presumed combinations. Some variants are very similar, such as lenses with an image stabilizer in an improved version. Here you have to decide for yourself which lens was actually used. If you select the module and click "Continue", it is downloaded, and the camera icon disappears.

A yellow icon indicates that PhotoLab is not sure which camera or lens was used. In this case, you have to select the appropriate variant manually. A field with a gray background means that no module exists at all for this combination. Then all that remains for you is manual optimization of the image.
Step 11: Downloading All Modules and Controlling Dialogs
There is no button with which you can load all available modules at once. Modules are sometimes several megabytes in size, so it makes sense to download only those that are actually needed. If you still want to load all modules, you have to select them individually. If the dialog window bothers you every time you change folders, you can turn it off. To do so, open "Edit", then "Preferences" and switch to the "View" section. There you will find the option to display the window for downloading DxO optics modules when images without a loaded module are found. If you deactivate it and confirm with "OK", you can switch between folders without constantly being notified about missing modules. You then download the modules manually as needed.


Summary ??? File Management in DxO PhotoLab 3: Folders, Index, and Modules
PhotoLab 3 does without its own catalog and works directly with the folder structure of your hard drive. This means that deleting, renaming, and moving always affect the real files. With indexing, ideally via "Create Index", you capture entire folder structures and can then quickly find images again via search. The DxO optics modules correct typical image defects of the camera-lens combination, but must be loaded individually. Select the appropriate module carefully and, if necessary, specify whether the download window should be displayed.
FAQ
What happens if I remove an image in PhotoLab using the trash can icon?The image is not only removed from the program, but is also actually deleted from your hard drive.
Do I have to import photos in PhotoLab first?No, PhotoLab has no catalog and works directly with the folders on your hard drive.
Why can't I find an image in the search?This is usually because the folder has not been indexed yet. Click on the folder or use "Create index" to create an index for the parent folder.
What does the Live Review function do?If you copy a new image into the open folder, PhotoLab automatically switches to the most recent image.
Why does the window with the DxO modules appear?PhotoLab identifies the camera and lens from the metadata of the RAW file and suggests suitable modules for download.
What does the yellow icon on an image mean?PhotoLab is not sure which camera or lens was used. You have to select the appropriate variant manually.
What do I do if there is no module for my combination?The field is greyed out. In that case, you have to optimize the image manually.
Can I download all DxO modules at once?There is no button for that. You download the modules individually, ideally only the ones you actually need.
How do I turn off the download window for modules?Open "Edit", then "Preferences", the "View" section, and deactivate the corresponding option.


