Exporting images from DxO PhotoLab can be a crucial step in sharing your creative works with the world, whether for social media or professional assignments. With the right understanding, you can not only optimize image quality but also save multiple formats and sizes simultaneously. This guide will walk you through the process of file exporting in DxO PhotoLab 3 and highlight all the important steps you should follow.
Key insights
- You can export images in different formats and sizes simultaneously.
- The settings for image quality and size are crucial for the final file.
- You have the option to remove metadata such as EXIF data before exporting.
Step-by-step Guide
1. Starting the Export
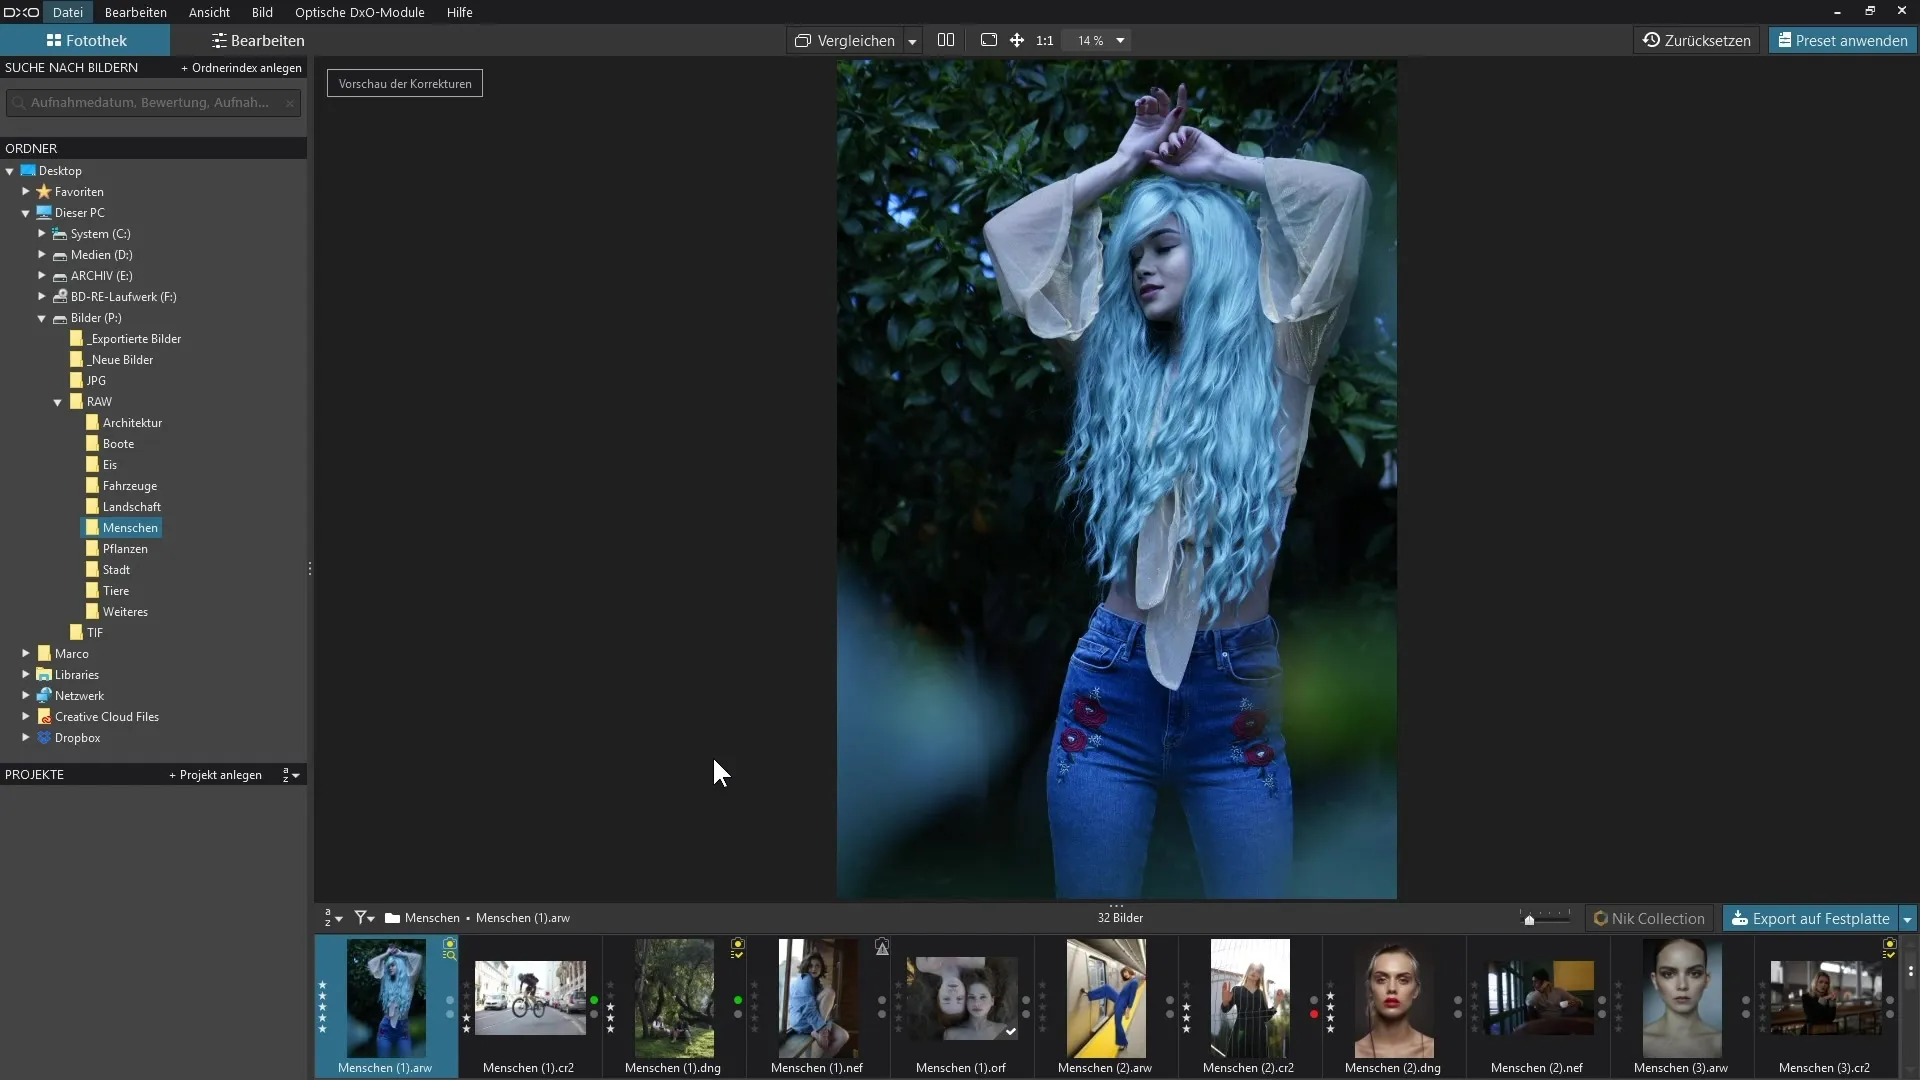
To begin the export, open the image you have edited. You should be in your project folder and have the image clearly in view.
2. Finding the Export Button
In the lower bar of DxO PhotoLab, you will find the blue button "Export to Disk". Click on it to start the export process.
3. Selecting the Destination and Format
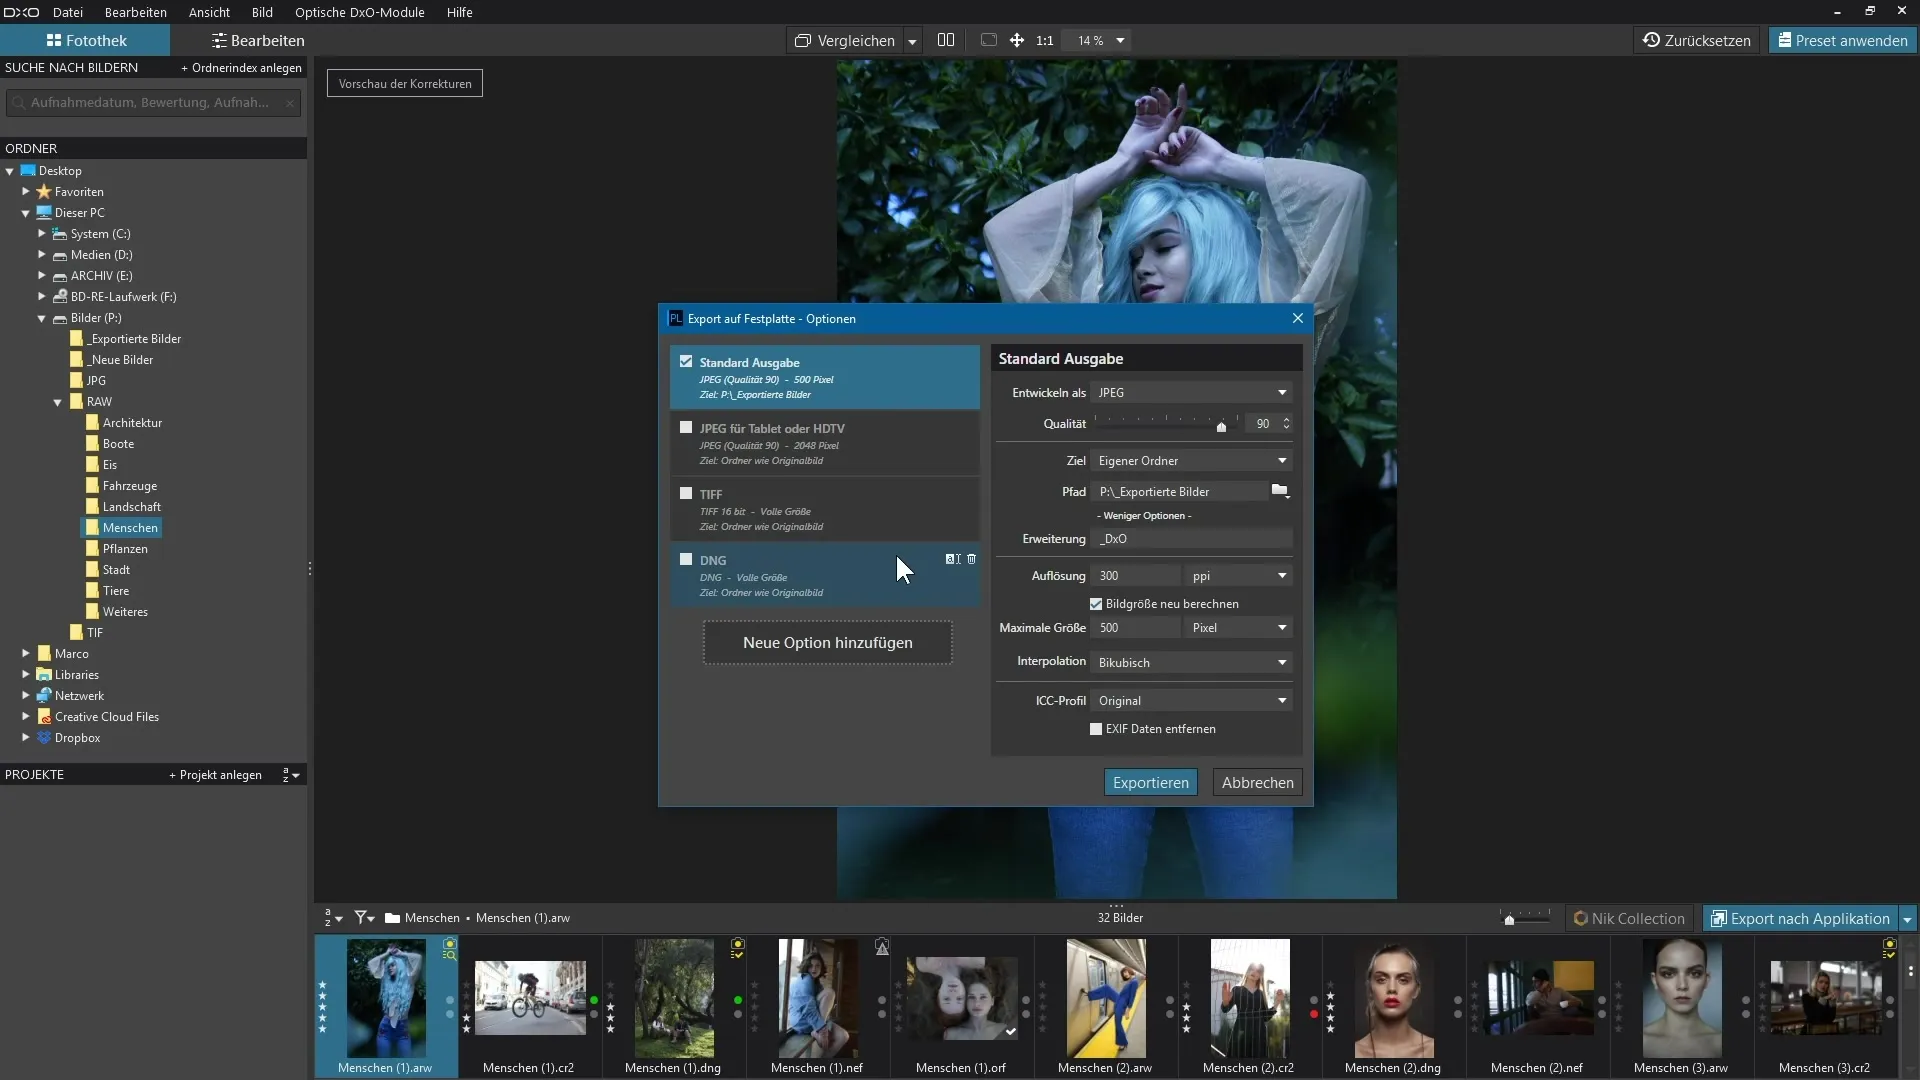
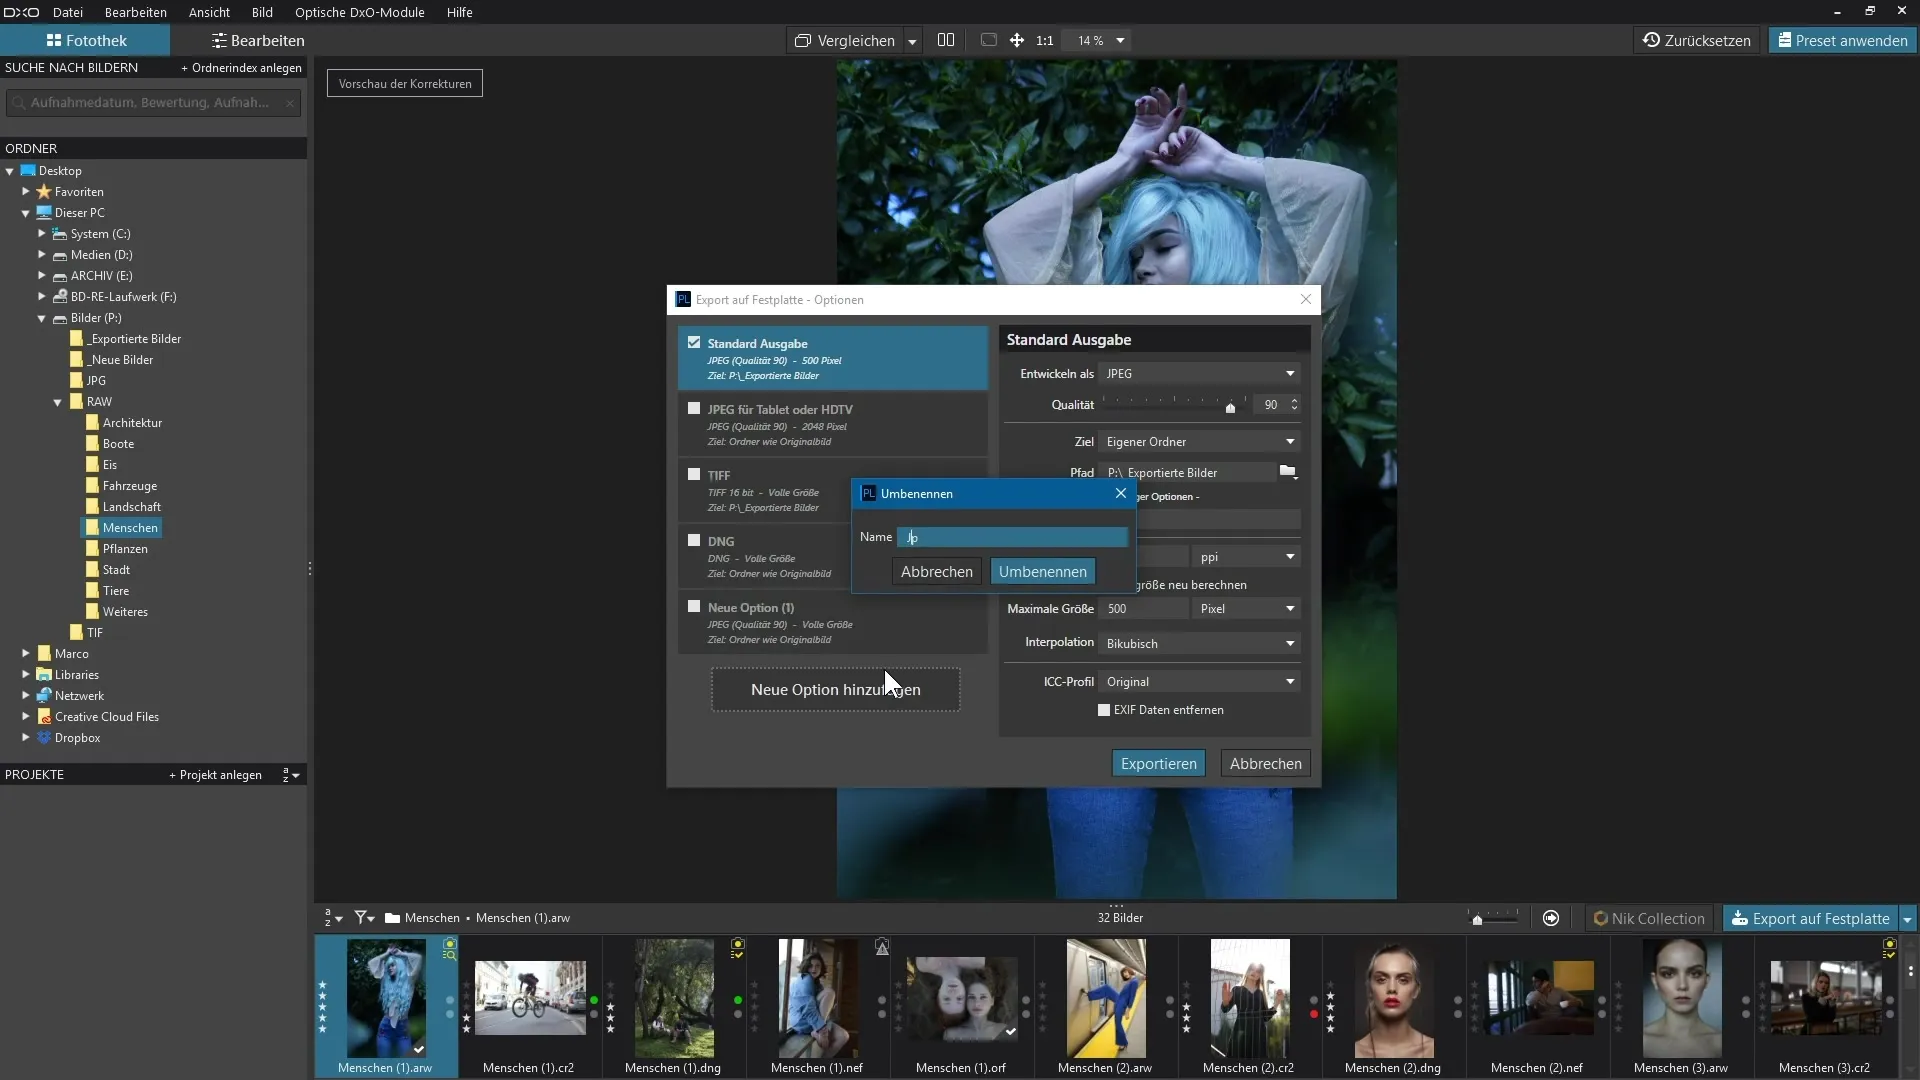
A dialog box will open. Here you have the option to choose the format in which you want to save the image. This can be JPEG, TIFF, or DNG.
4. Adjusting JPEG Options
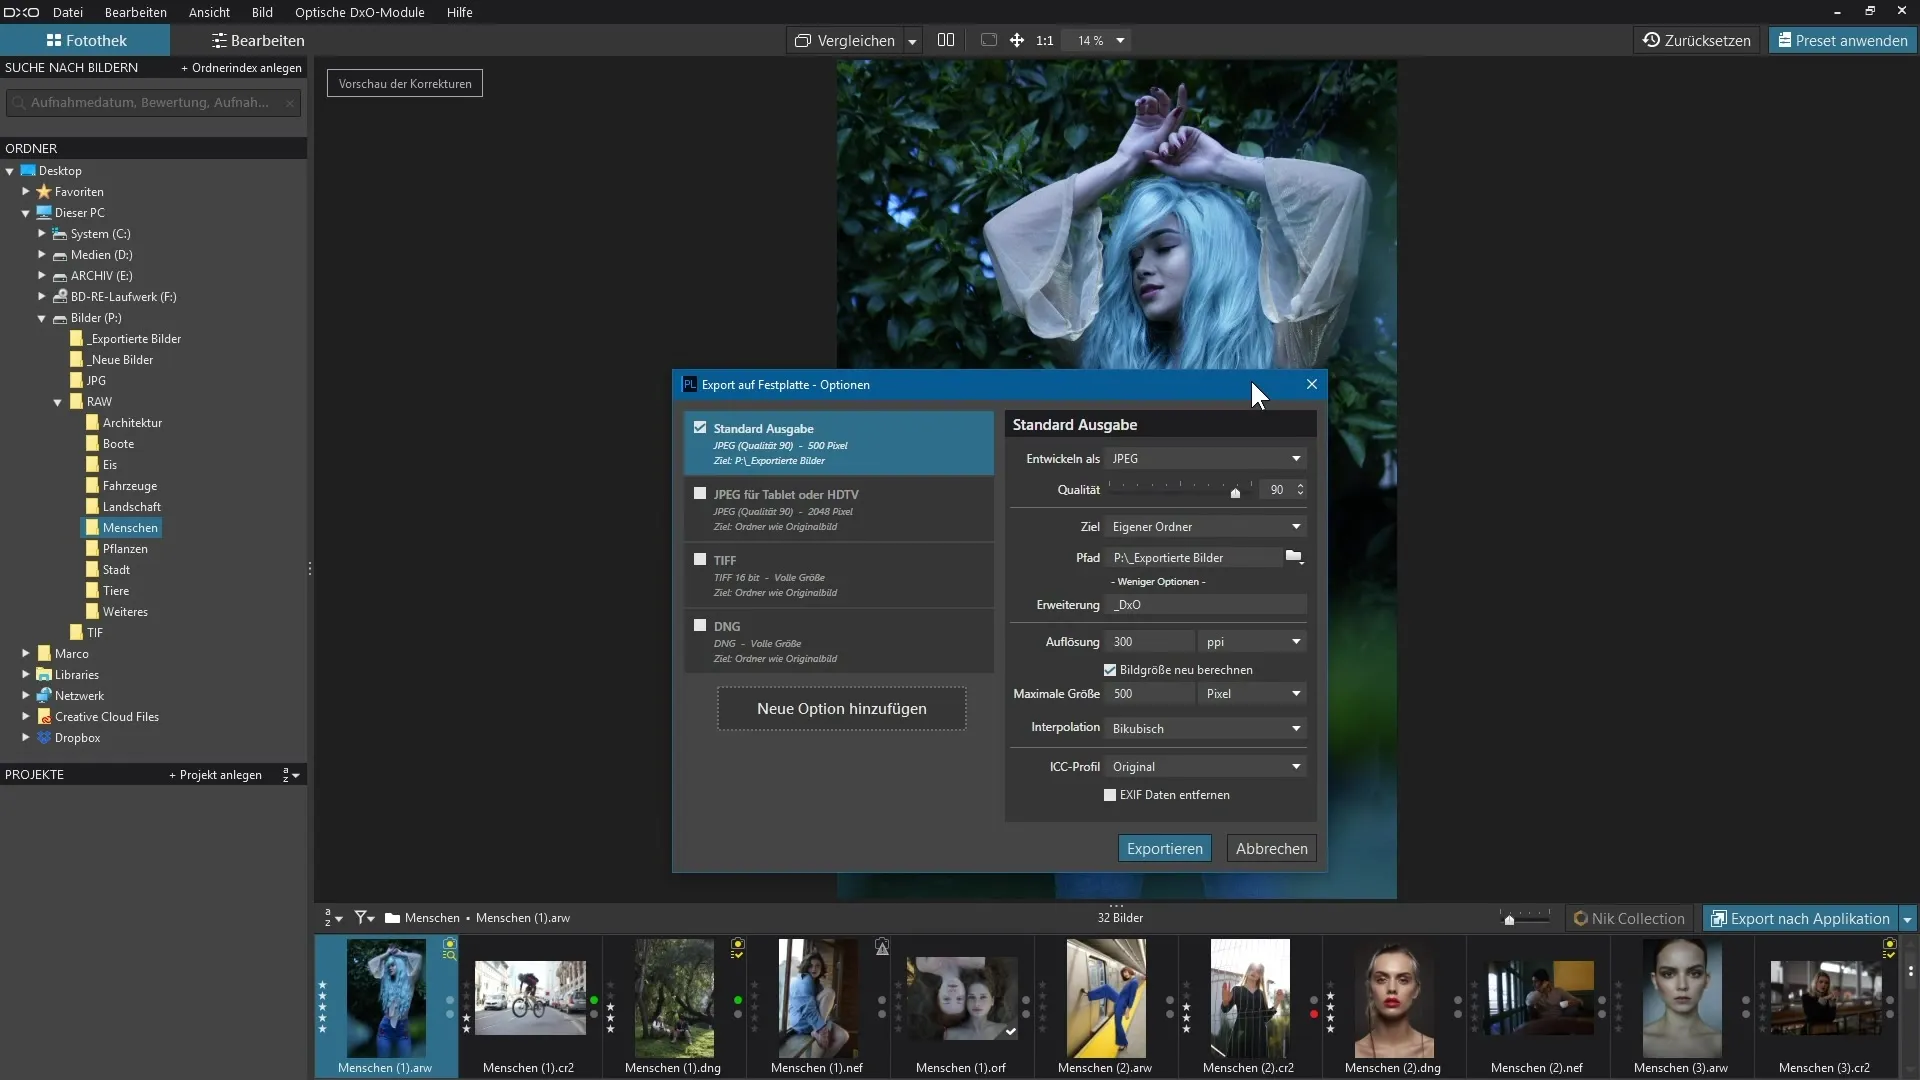
If you choose the JPEG format, you can set the quality. A value of 80 to 90% is often a good compromise between file size and image quality.
5. Choosing the Destination Folder
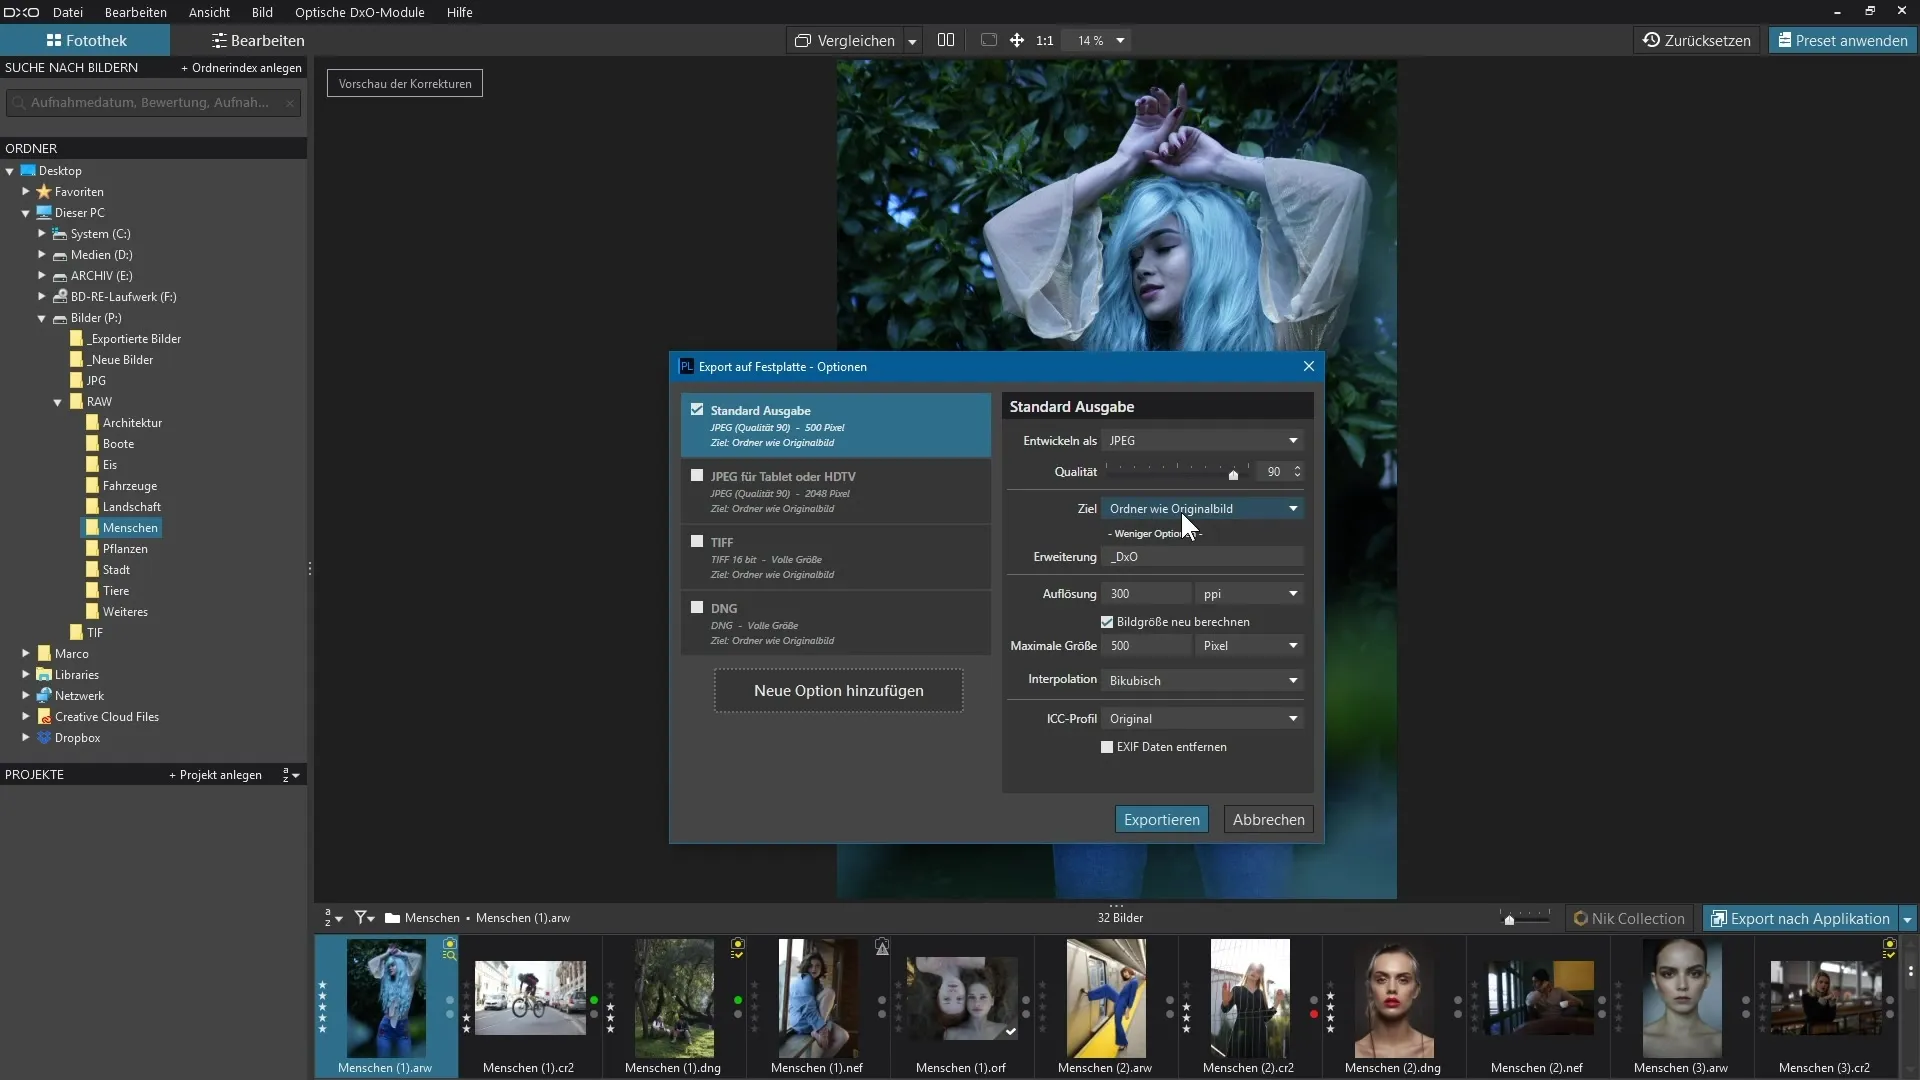
You can also select the destination folder. You can either choose the original folder where the original image is saved or create a new folder for your exported images.
6. Adjusting File Names and Extensions
You have the option to adjust the file name. For example, add a note about the type of image processing to make it easier to identify the file later.
7. Setting Image Size and PPI
Within the export settings, you can adjust the image size and set the PPI (Pixels Per Inch). Consider what size you need, for example, it may be useful to set the longest side to 500 pixels.
8. Working with Multiple Export Options
To export multiple file formats or resolutions simultaneously, you can add new export options. Click "Add New Option" and rename it to avoid confusion.
9. Exporting: The Final Confirmation
Once all settings and options are set, click "Export". The program will begin the export process, which may take a moment.
10. Checking the Exported Files
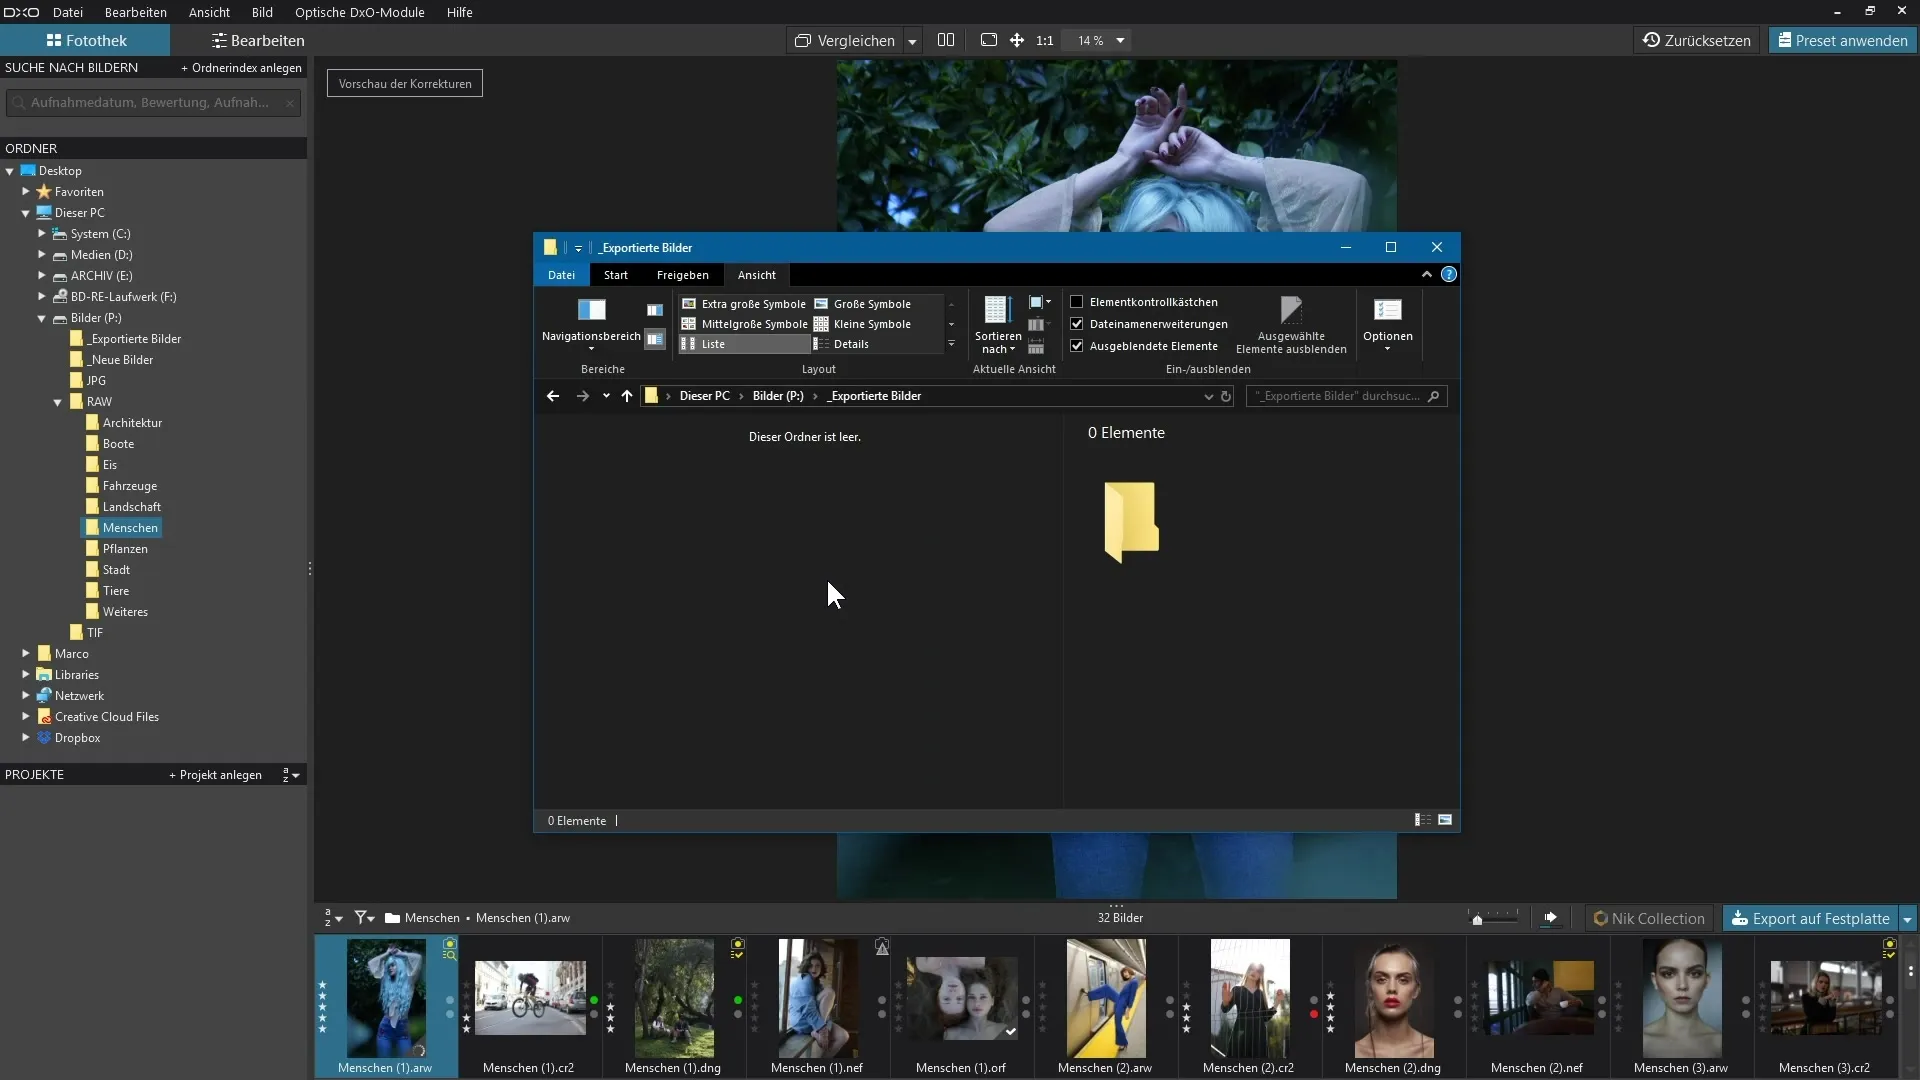
After the export, you can view the exported files. You should check the file size and image quality to ensure everything was exported to your satisfaction.
11. Handling EXIF Data
If you do not want the metadata such as EXIF to remain in the image, you can uncheck this option during export. This keeps your work "clean" and free of personal information.
Summary - DxO PhotoLab: Easy File Exporting
Exporting files in DxO PhotoLab is a simple yet important step in sharing your edited images with the world. You gain the flexibility to create multiple file formats and sizes in a single export, opening up many possibilities for presenting your work. Experiment with the options to find the best settings for you.
Frequently Asked Questions
How do I export multiple file formats simultaneously from DxO PhotoLab?Use the "Add New Option" feature in the export menu to save different formats and settings.
Can I adjust the quality when exporting JPEGs?Yes, you can set the JPEG quality to a value between 80 and 90% to find a good balance between quality and file size.
How do I remove EXIF data when exporting?Uncheck the selection for EXIF data in the export dialog to remove this information when saving.
Where can I find the export button in DxO PhotoLab?The export button is located in the lower bar labeled "Export to Disk".
How can I change the image size when exporting?The image size can be adjusted in the export dialog to set the desired length of the longest side in pixels.


