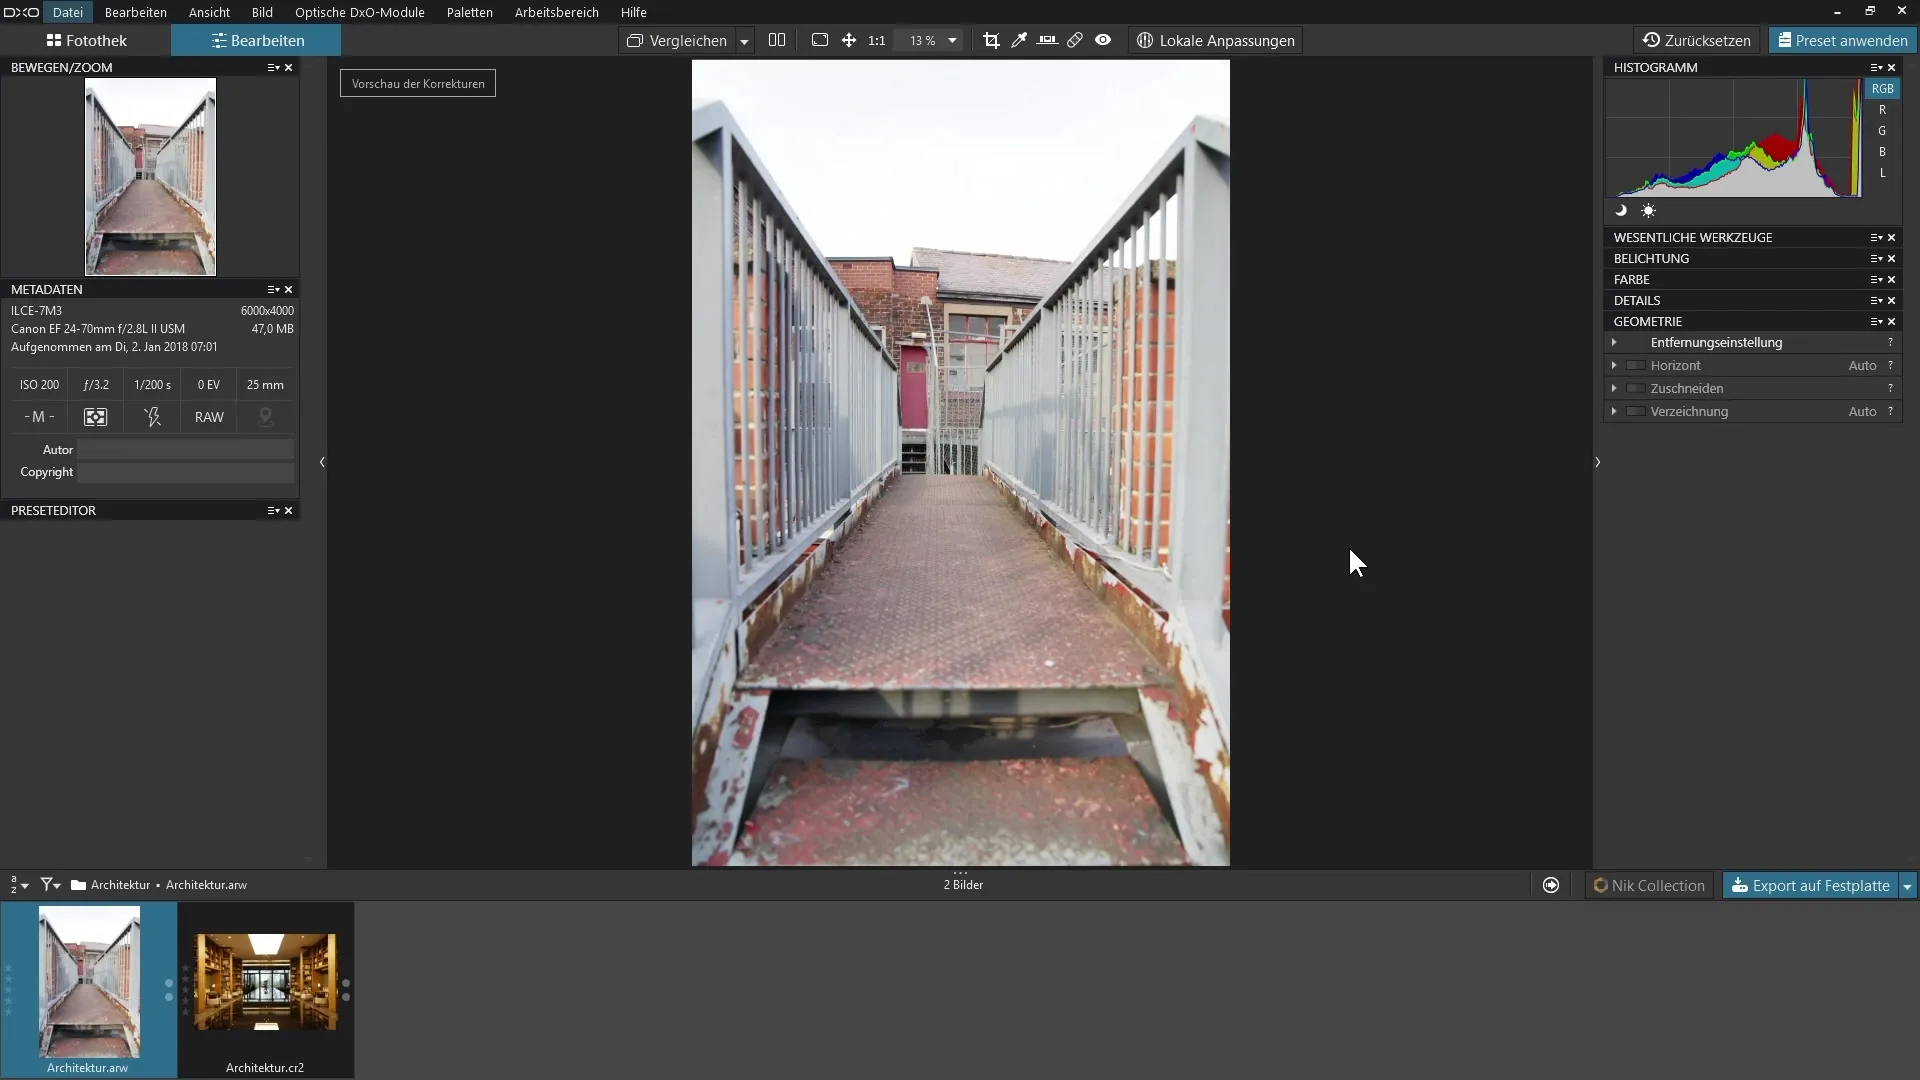
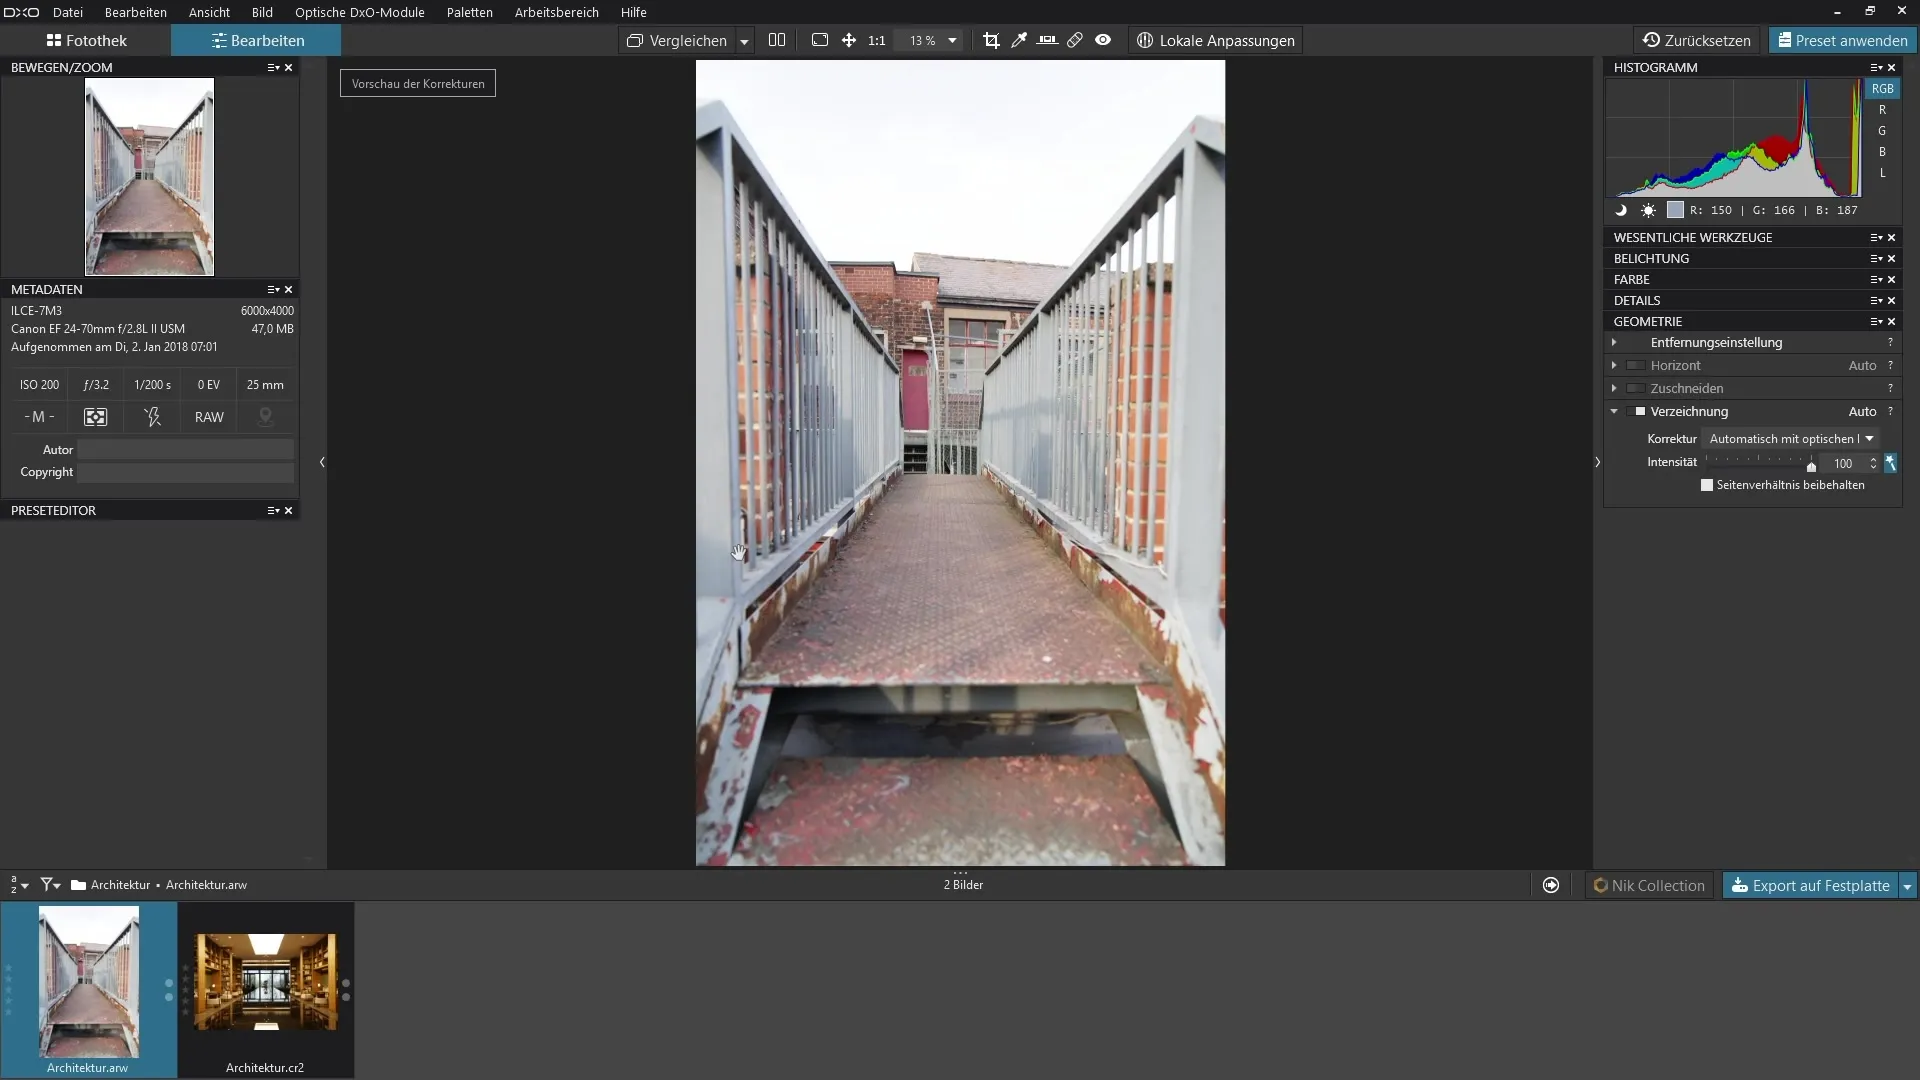
The image processing of digital photography requires the precise adjustment of various image elements in order to achieve the best possible result from your RAW images. The correction of distortion caused by lenses is particularly important. This guide will show you how to effectively use the Distortion filter in DxO PhotoLab to eliminate these unwanted distortions in your images.
Key findings
- The distortion filter in DxO PhotoLab allows you to automatically and manually correct lens distortion errors.
- Using a DxO module increases the effectiveness of the correction.
- You can choose between different types of correction, depending on the nature of the distortion.
Step-by-step instructions
To use the distortion filter, first open your image editing software and load the relevant image. It is advisable to make sure that you have the necessary modules for your camera and lens.

Step 1: Access the geometry palette
Navigate to the "Geometry" palette within DxO PhotoLab. This section is specifically designed for adjusting various geometric distortions in your images.
Step 2: Activate the distortion filter
Activate the distortion filter to initiate the correction of lens distortions. This should happen automatically if the appropriate DxO module is installed for your camera and lens. The filter will then correct the distortion based on this information.
Step 3: Automatic correction
Once the distortion filter is activated, you will immediately see the change in your image. Check to see if the edges of your shot appear square or if they have a curvature that needs to be corrected.
Step 4: Fine-tune the correction intensity
If necessary, you can adjust the intensity of the correction. Experiment with the intensity slider to see which setting works best for your image. This adjustment gives you more control over the final image.

Step 5: Manual adjustment
If no DxO module is available or you have a specific distortion that is not optimally corrected, you can make manual adjustments. Choose from three main types of distortion: barrel, pincushion or fish-eye.
Step 6: Fine-tune the manual correction
Use the intensity slider to progressively remove or intensify the distortion. Be careful not to exaggerate in the opposite direction, which can lead to unwanted distortion.
Step 7: Look back at the original image
Compare the original image with the edited version to ensure that the corrections result in a more realistic and appealing image. You should be able to clearly see the improvements thanks to the original shots.
Summary - Optimal use of the distortion filter in DxO PhotoLab 3
By using the distortion filter in DxO PhotoLab, you can efficiently correct distortions caused by lenses. Whether you use automatic corrections or make manual adjustments, the process is simple and leads to remarkable results.
Frequently asked questions
How do I activate the distortion filter in DxO PhotoLab? The distortion filter can be activated in the "Geometry" palette.
Can I correct distortions manually?Yes, you can choose between different distortion types such as barrel, pincushion or fish-eye.
What happens if no DxO module is available?In this case, you can adjust the corrections manually.


