Editing photos can be a major challenge, especially when it comes to adjusting lighting conditions. With the DxO Smart Lighting filter in DxO PhotoLab 3, you get an effective tool to quickly and precisely optimize your RAW images. This guide will help you make the most of all the features of this filter. Let's get started right away and go through the basics!
Key takeaways
- DxO Smart Lighting offers two main exposure modes: homogeneous and selective.
- The homogeneous mode processes the entire image, while the selective mode protects specific areas.
- It is possible to select defined areas for processing if faces are not automatically detected.
Step-by-step instructions
1. access the DxO Smart Lighting Filter
To start editing, first open the "Exposure" category in DxO PhotoLab. There you will find the DxO Smart Lighting filter. When you activate this filter, you will find the two options: homogeneous and selective.
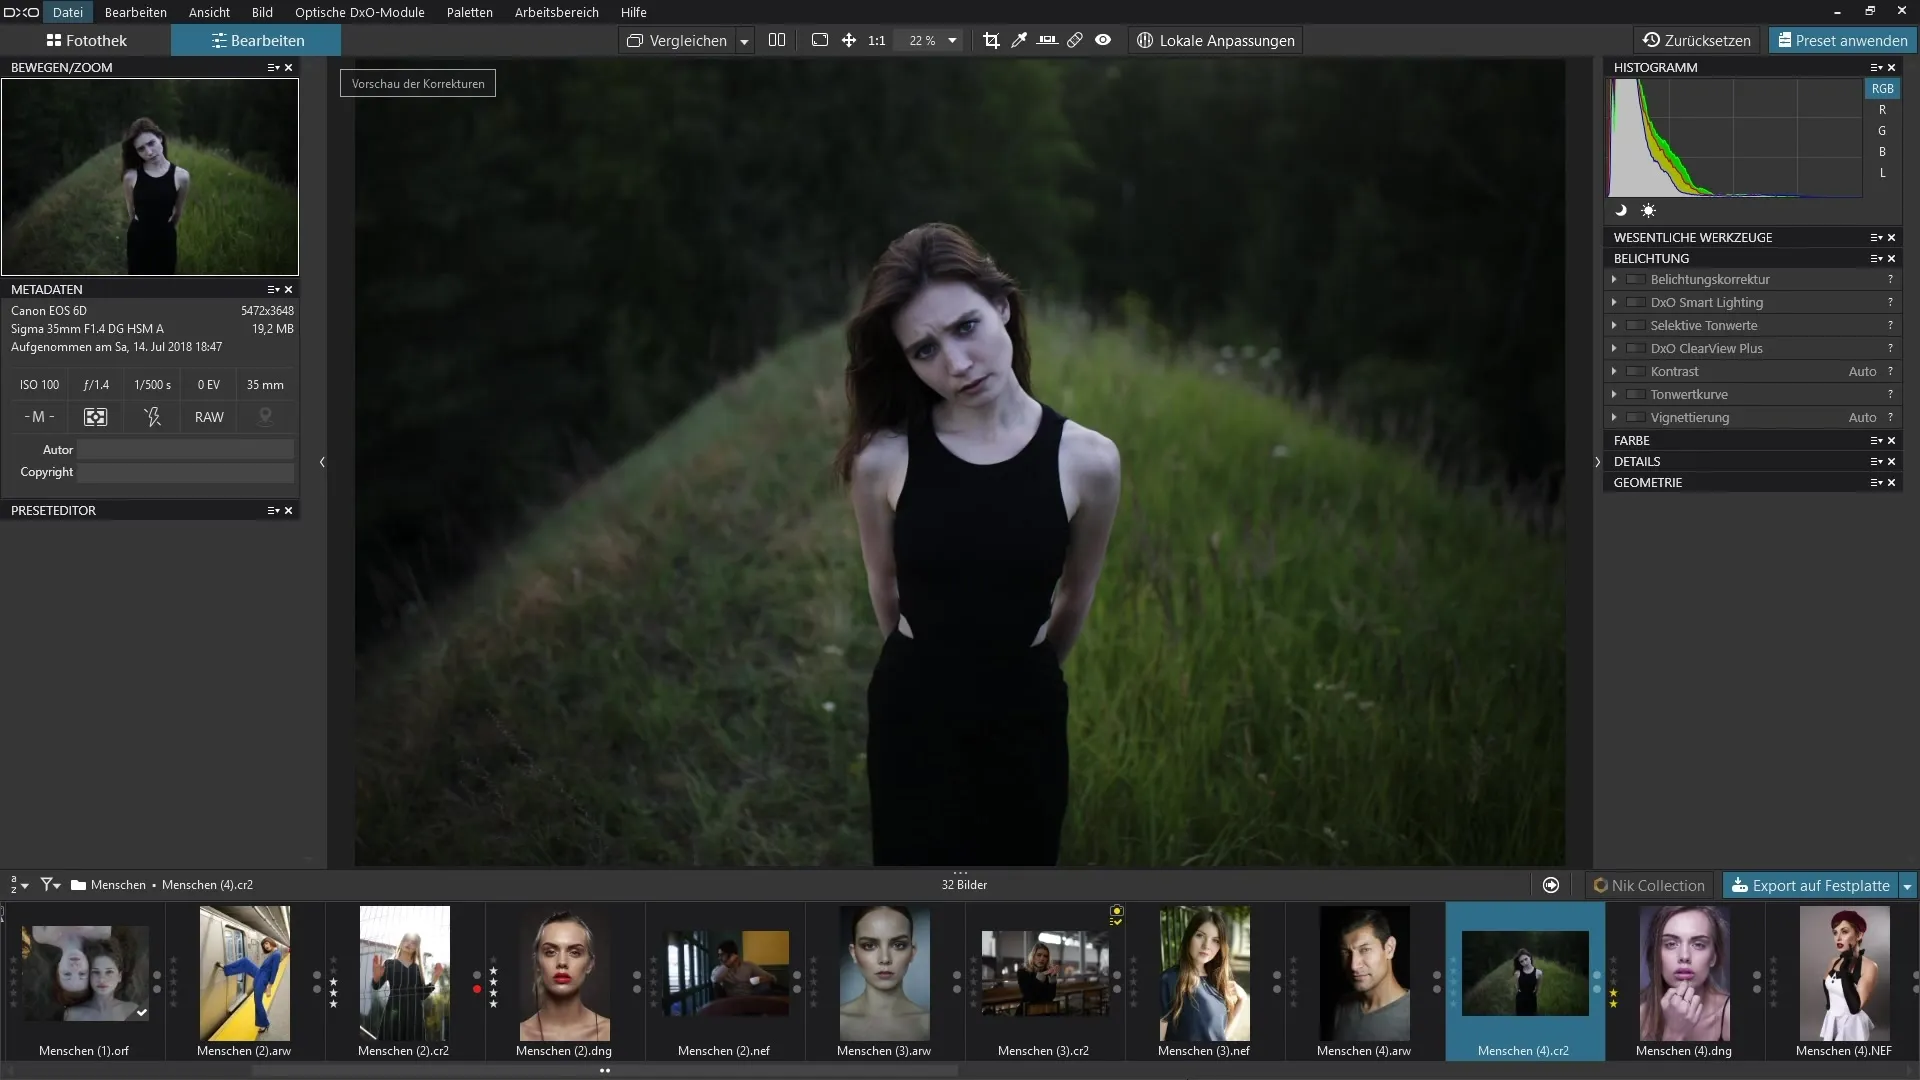
2. application of the homogeneous mode
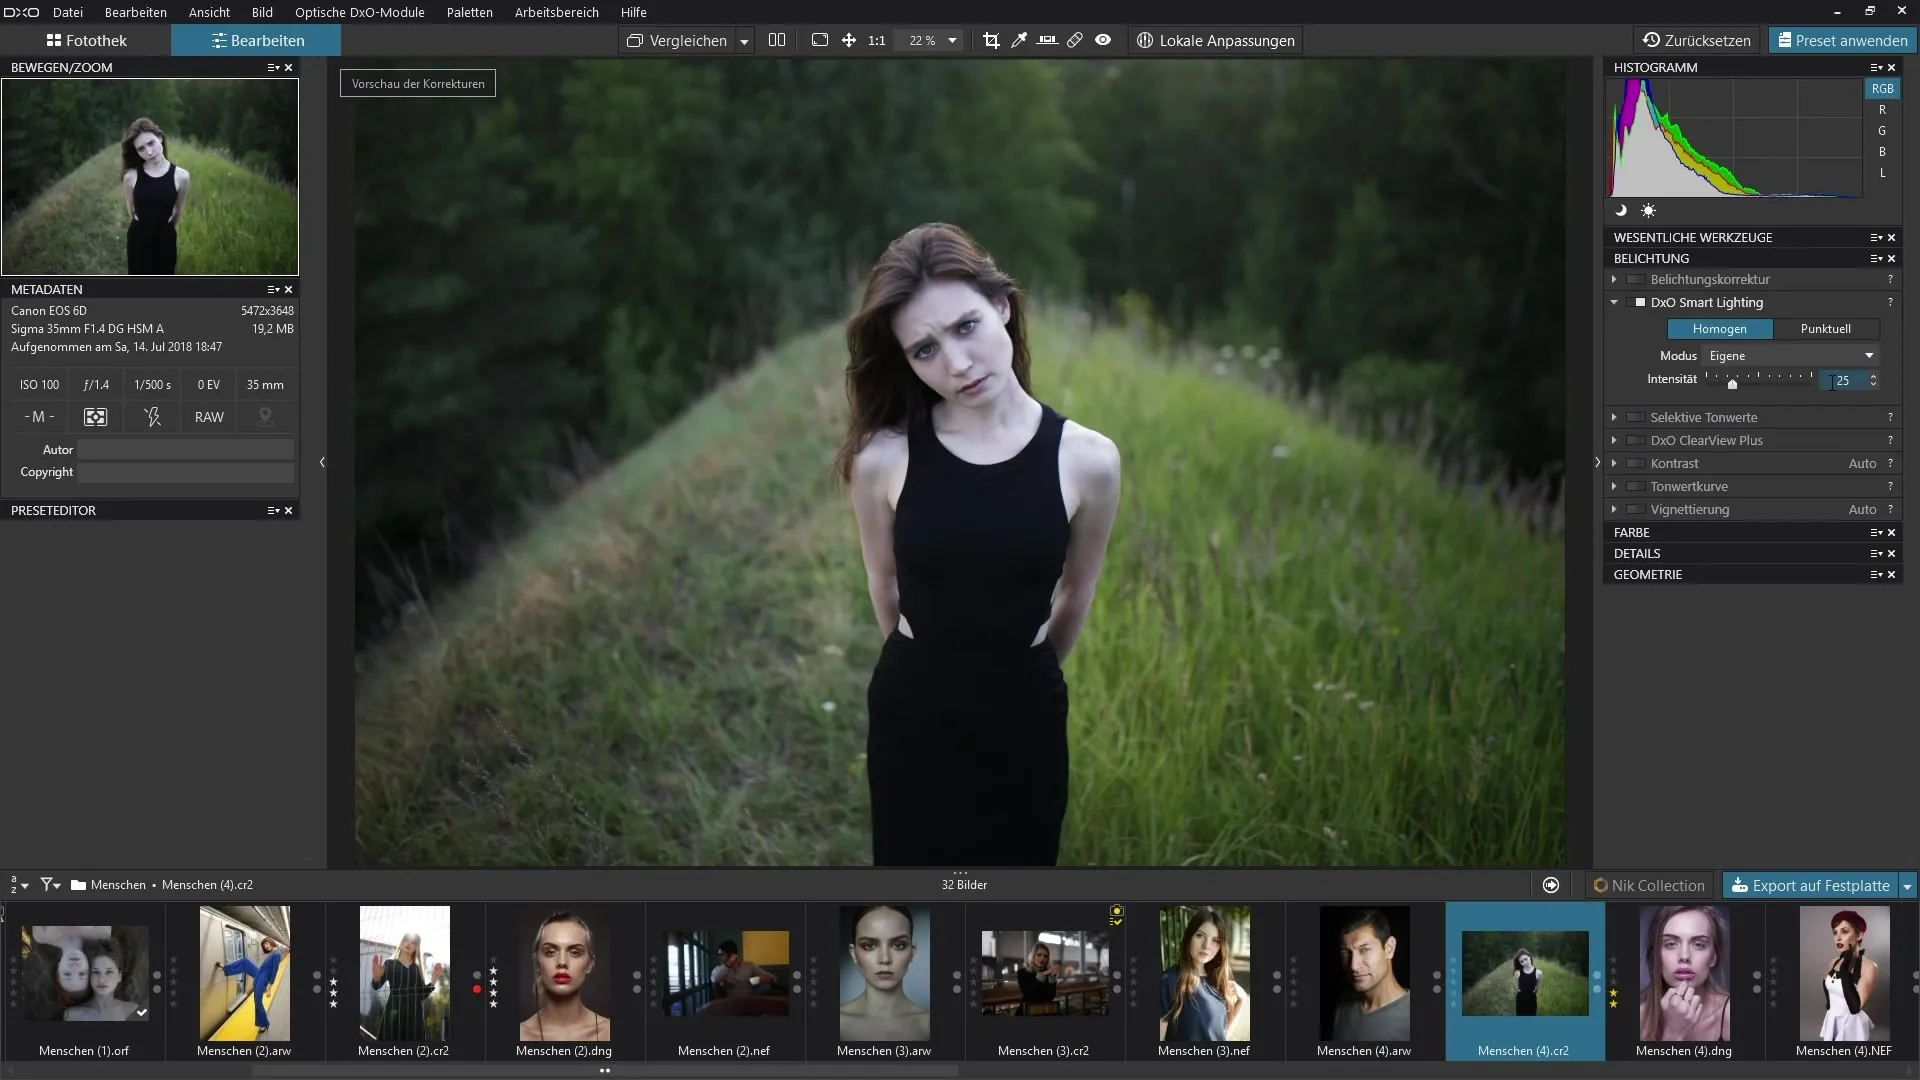
Select the homogeneous mode to process the entire image evenly. This mode automatically analyzes the image details to determine whether the image is too light or too dark. You can adjust the intensity of the effect using the slider. If you set the slider to 25, the image will be brightened, allowing dark areas to show more detail.
3. make fine adjustments
If the image appears too bright, you can set the slider back to zero and slowly work your way up to the optimum intensity. Experiment with the various presets to achieve the best effect for your image. The background will become more visible and details in the dark areas will emerge.
4. use the selective mode
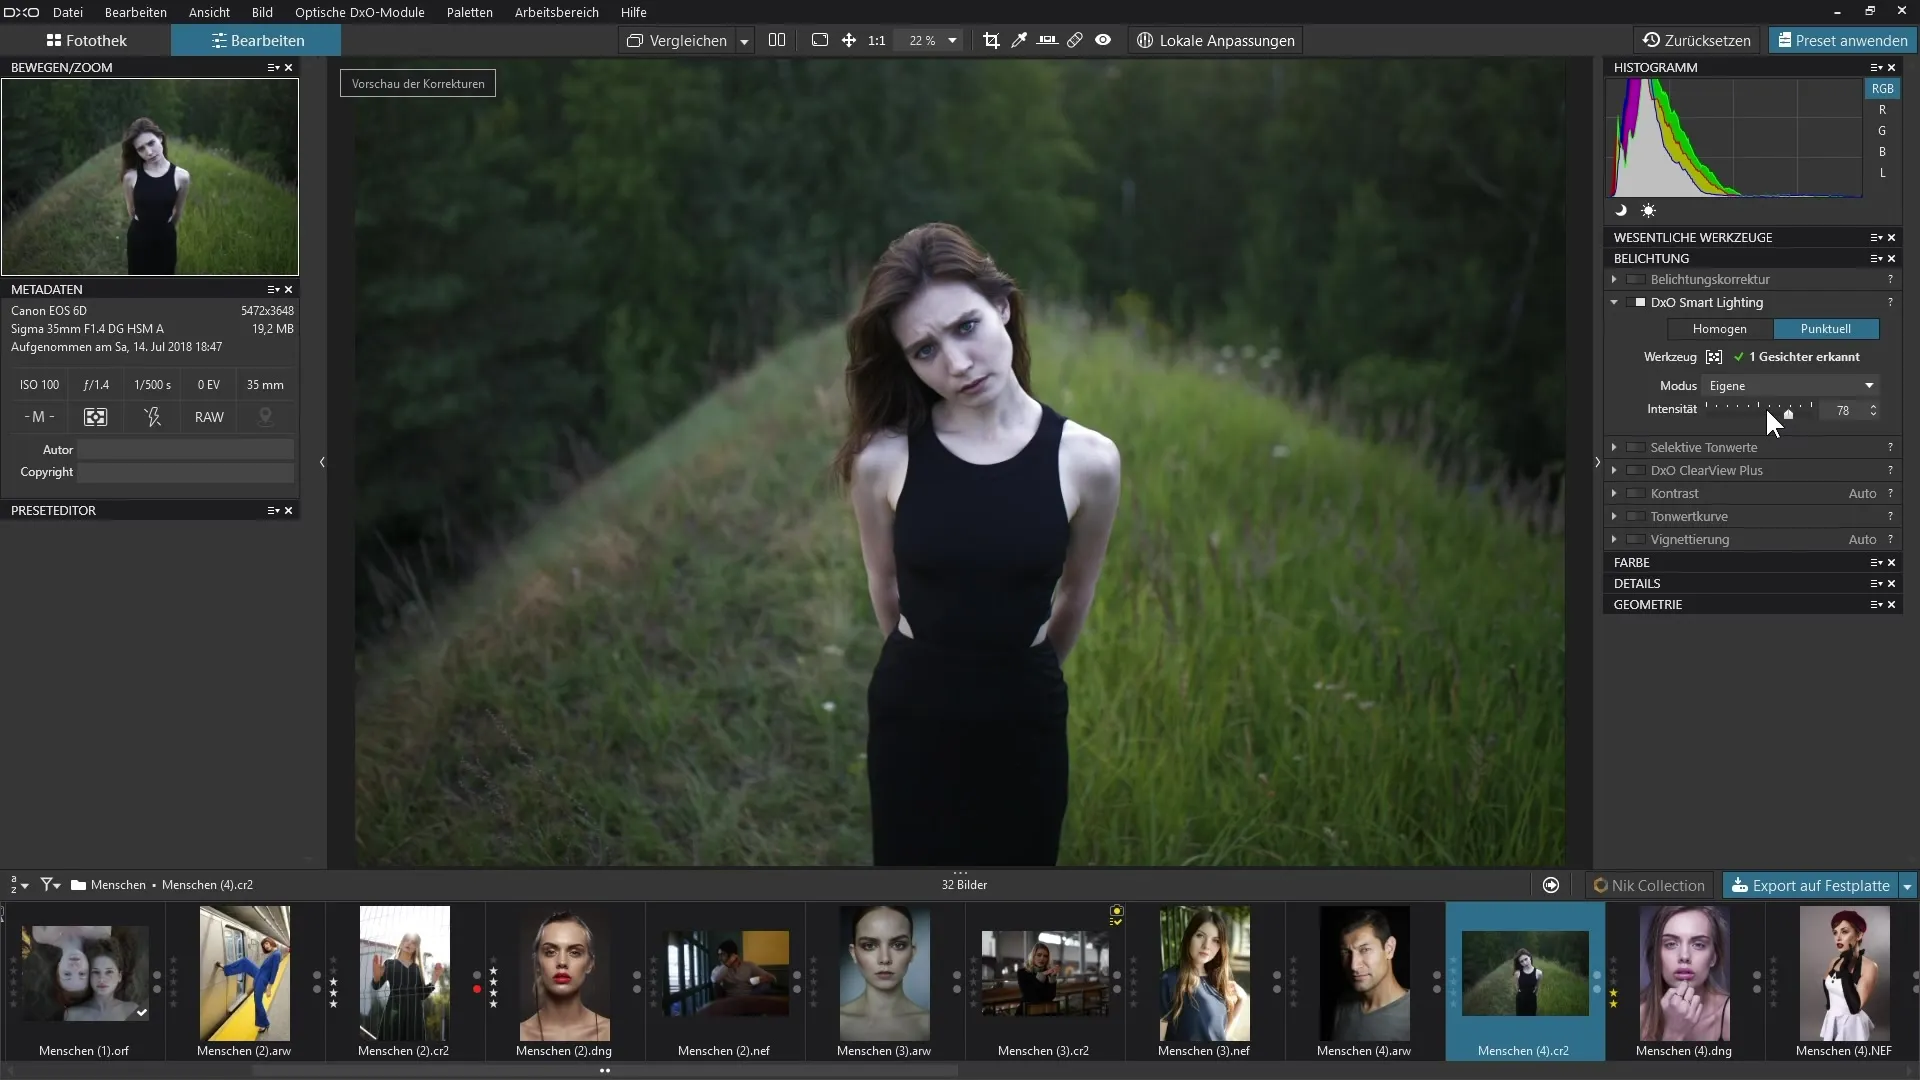
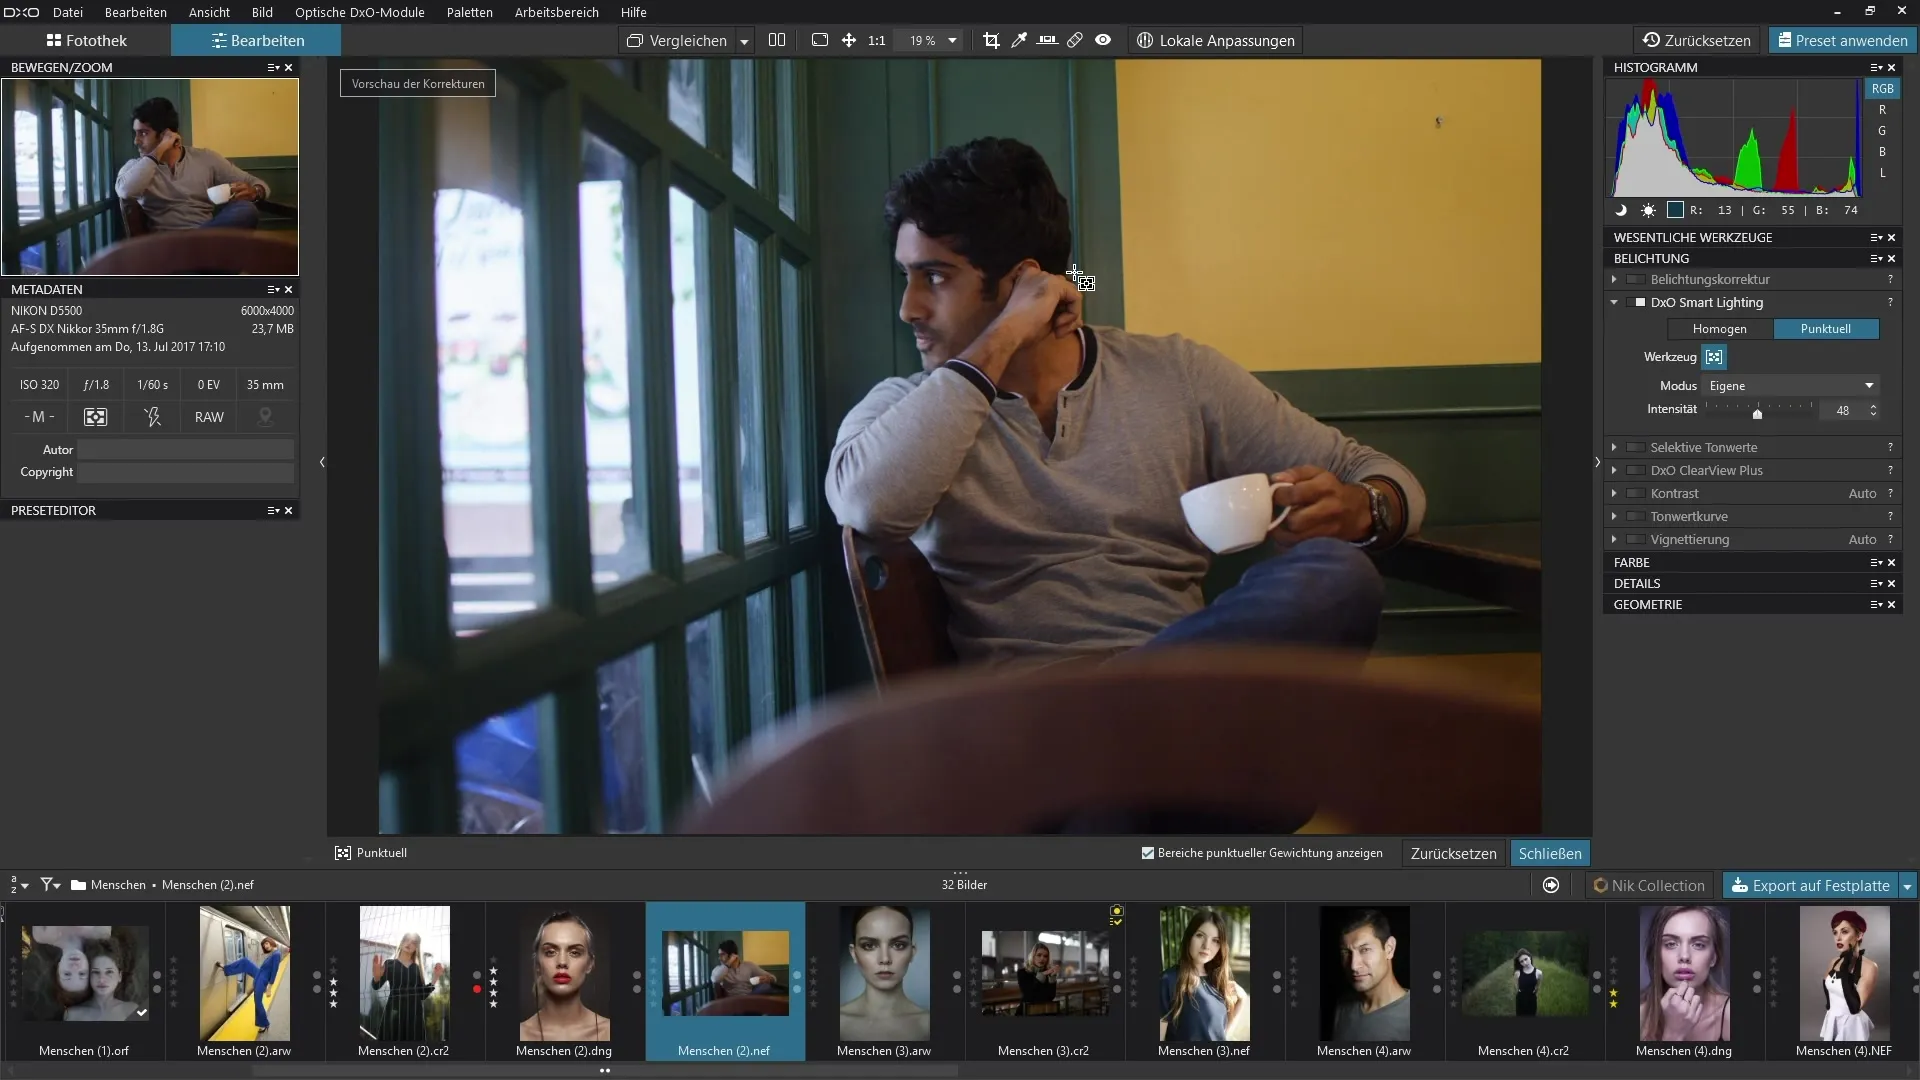
If you feel that the homogeneous mode is not working optimally, you can switch to selective mode. Double-click on the slider to reset the default value of 25. In spot mode, the software automatically recognizes faces in the image, allowing you to highlight specific areas without overexposing the face.
5 Adjusting the spot exposure
In spot mode, move the slider to the right to lighten the shadows in the background while leaving the brightness of the face largely unchanged. You can use the different settings to adjust the exposure in the background while protecting the areas of the face.
6. further customization options
To refine the edit, you can further adjust the intensity as needed. You may want to emphasize some details in the background without overexposing the face. This is a balancing act that you can easily learn by trying out the different intensities.
7. define individual areas
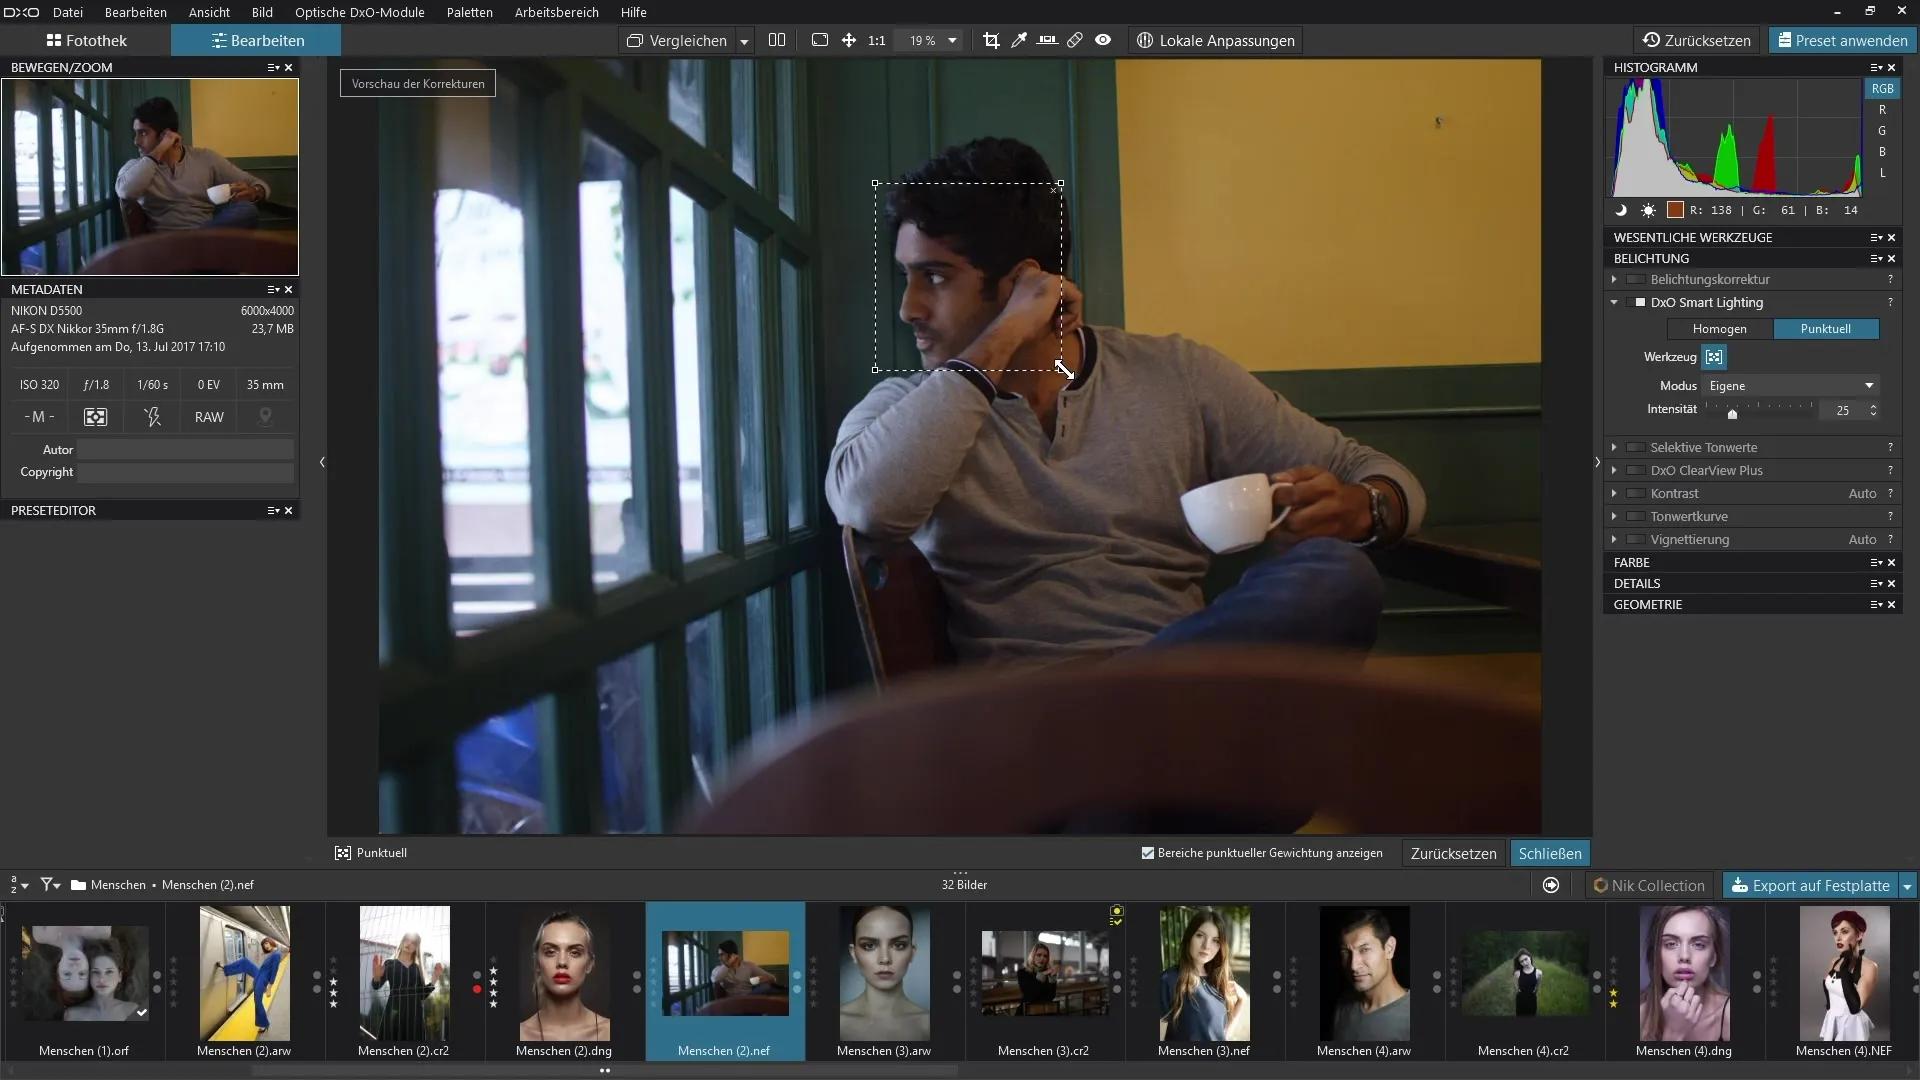
If the automatic face recognition does not work optimally for an image, you have the option of defining your own areas. Click on the corresponding icon to make specific adjustments. You can position the protected areas as you wish and use the slider to adjust the exposure in these specific zones.
8. removing defined areas
If you have created several areas for editing, you can also delete them again if required. Simply click on the corresponding "X" within the rectangle to remove the selection and reset your changes.
Summary - How to use DxO Smart Lighting in DxO PhotoLab
You have now learned the basics of the DxO Smart Lighting filter. From using the homogeneous mode to the selective mode to custom adjustments, this guide will give you the tools you need to effectively edit your image while protecting important details. With a little practice, you'll be able to illuminate your photos to perfection.
Frequently asked questions
How do I switch between homogeneous and spot mode in DxO Smart Lighting?Simply select the desired mode in the Smart Lighting filter.
What can I do if faces are not recognized?You can define your own areas to adjust the exposure.
How can I reset the slider?Double-clicking on the slider resets the value to the default.
Can I define several protected areas in one image?Yes, it is possible to create several areas and control their effects separately.
Do I have to adjust the slider in selective mode?Yes, an adjustment is necessary to achieve the desired exposure for the protected areas.


