Adjusting your workspace in DxO PhotoLab 3 is an excellent way to enhance your efficiency when editing photos. By customizing the user interface, you can ensure that the tools you use most frequently are always within reach. In this guide, I will show you step by step how to customize and save your personal workspace so you can always access it quickly.
Key Insights
- You can customize your workspace in DxO PhotoLab 3 to suit your needs.
- Saving and switching workspaces is simple and allows for flexible working.
- You can easily delete workspaces and create new ones to always work at your best.
Step-by-Step Guide
Customize the User Interface
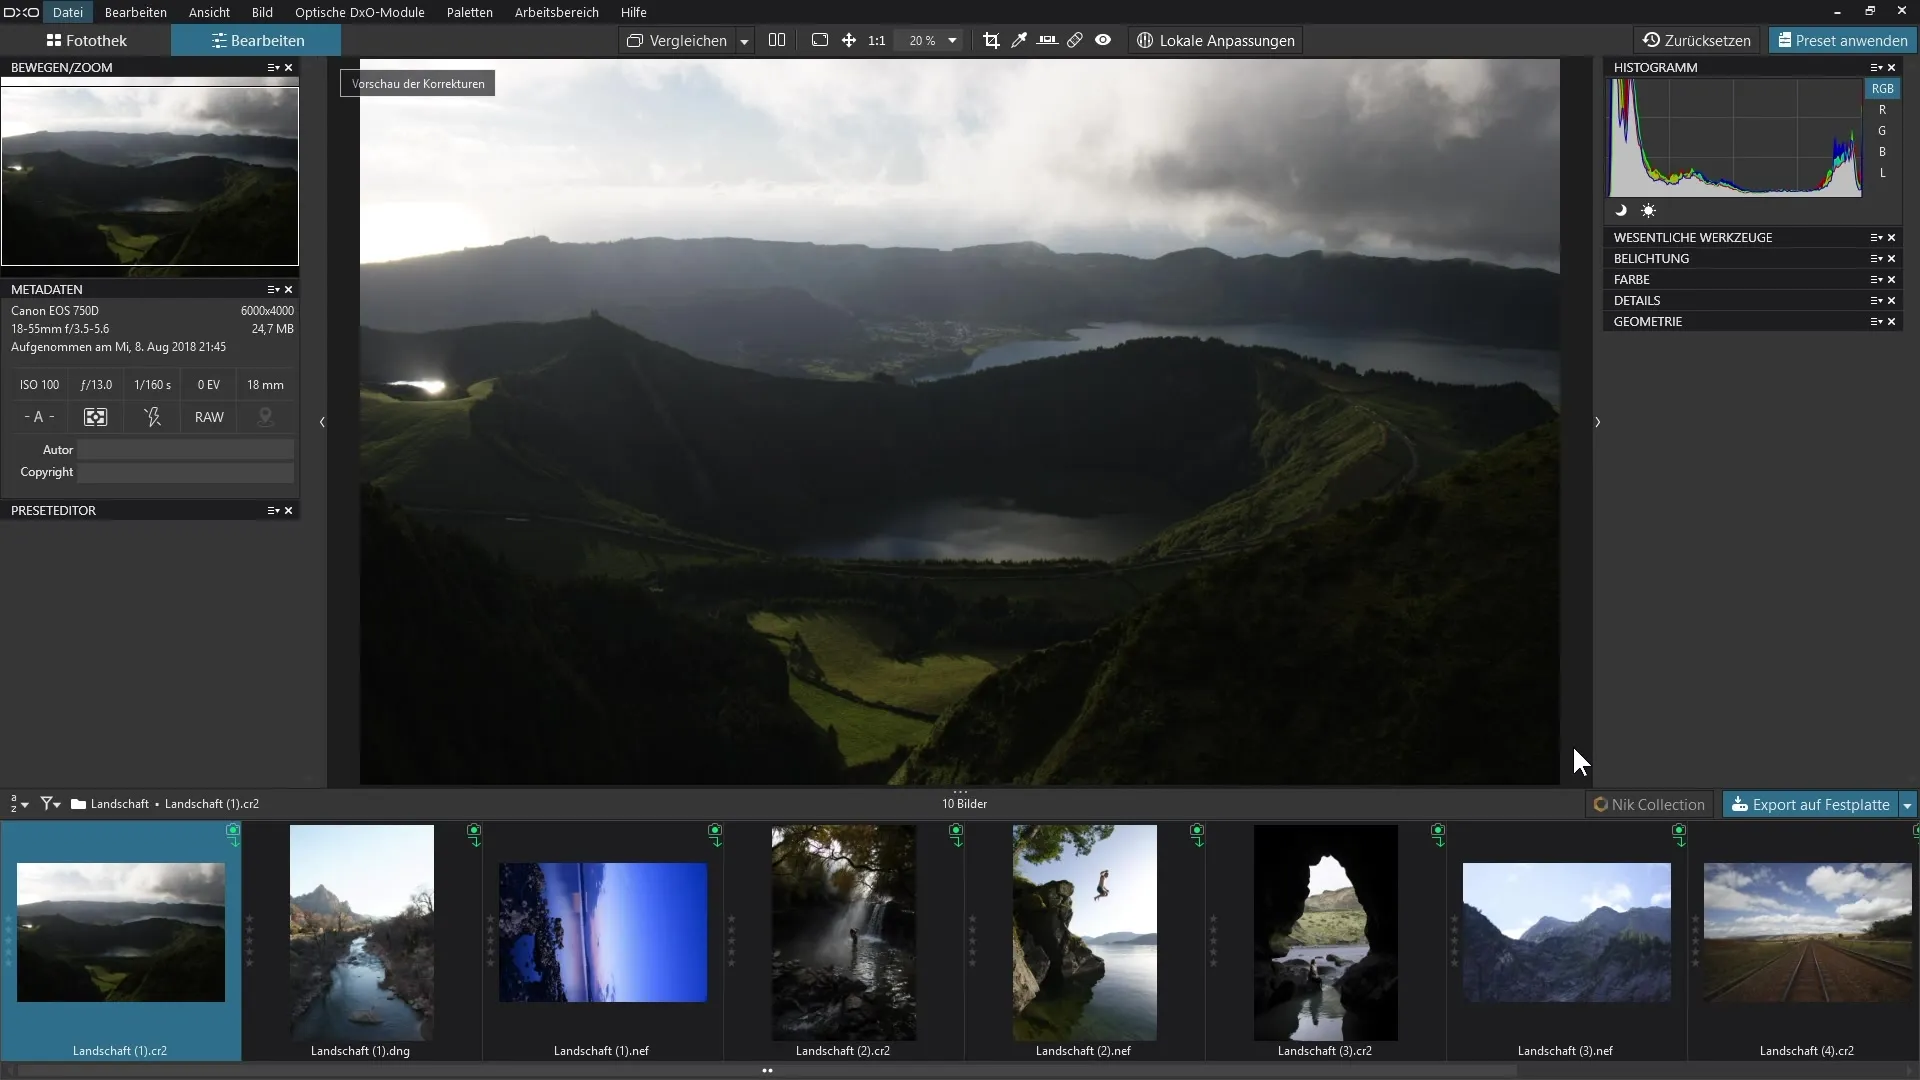
First of all, it is important to know that you can customize the user interface of DxO PhotoLab 3 to your liking. Open the program and identify the various palettes that are available. These palettes give you access to essential editing tools and information.

Move and Adjust Palettes
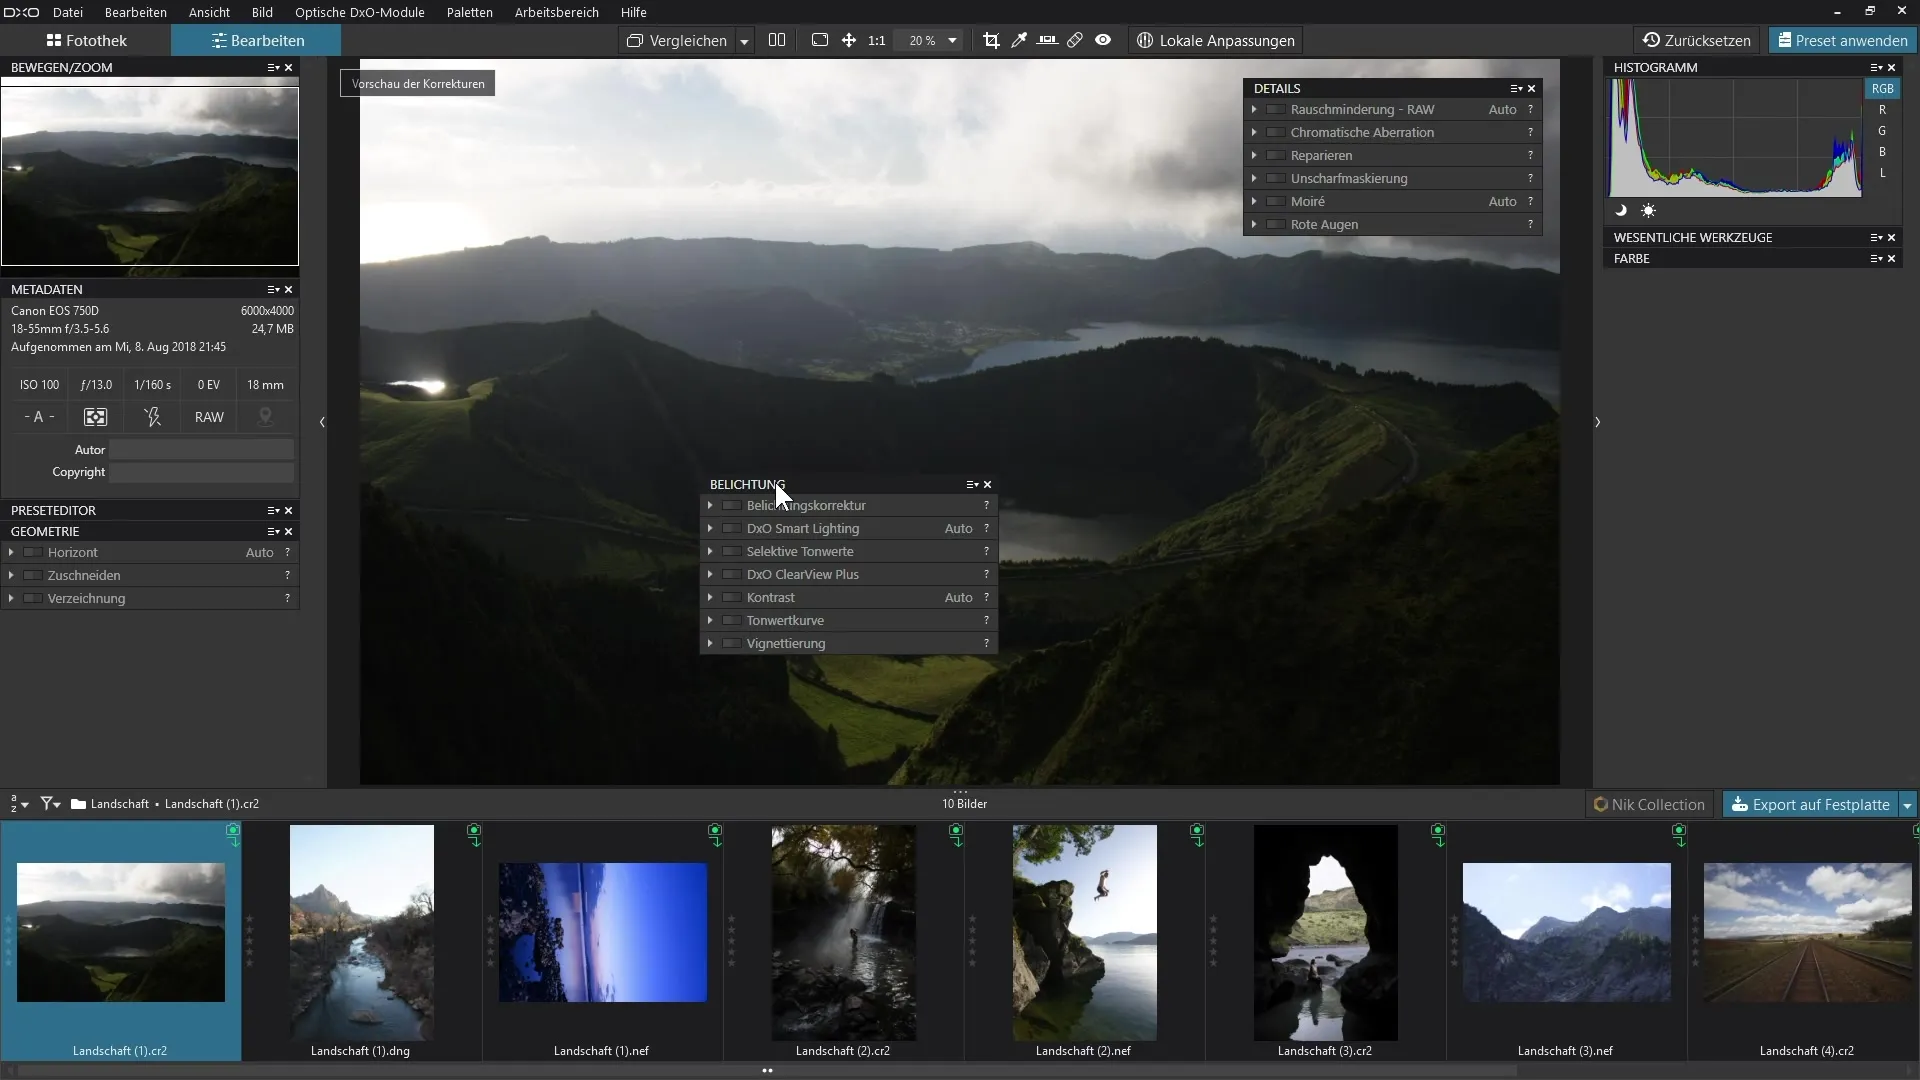
To move your palettes, select a palette by clicking on it and holding it down while dragging it to the desired position. You can arrange the palettes either as floating windows or docked to the sides of the program window.
For example, you can drag the Geometry palette to the right side and position the Detail palette in the upper right corner if you need it more often. This way, you can place all the tools exactly where you want to access them quickly.

Close and Restore Individual Palettes
You may want to temporarily close a palette. To do this, simply click the “x” at the top of the palette. You can restore this palette at any time by selecting the appropriate palette from the “Palettes” menu.
If you have closed the Geometry palette, go back to the “Palettes” menu and select “Geometry”. It will appear where it was last used.
Save Workspace
Once you have customized your workspace to your liking, the next step is to save it. To do this, click on “Workspace” in the menu bar and select the option “Save Workspace”.
Give your new workspace a name, for example “Chaos”, and click “save”. Your workspace will now be saved and available at any time. You can create multiple workspaces, each tailored to different working styles or projects.
Switch Between Workspaces
Switching between workspaces is also straightforward. To return to your previously saved workspace, simply click on “Workspace” and select “Default” or the name of your saved workspace.
This way, you can quickly and easily switch between different configurations depending on the project or working style you are currently focused on.
Delete Workspace
If you no longer need a workspace, you can easily delete it. Select the workspace you want to remove and click “Workspace” again. Choose the option “Delete Workspace”.

Confirm the deletion when prompted. The workspace will be removed, and you will automatically switch to the default workspace.
Summary – Securing and Customizing Your Own Workspace in DxO PhotoLab
Customizing and securing your workspace in DxO PhotoLab 3 allows for flexible and efficient working. You can tailor your user interface, switch between different workspaces, and delete them when needed. This way, you always have control over your working environment.
Frequently Asked Questions
How do I save my workspace in DxO PhotoLab 3?Click on “Workspace” and select “Save Workspace”.
Can I switch between different workspaces?Yes, click on “Workspace” and select the desired workspace.
How do I delete a saved workspace?Select the workspace and click on “Delete Workspace”, and confirm the deletion.
How can I restore a palette that I have closed?Go back to the “Palettes” menu and select the closed palette.


