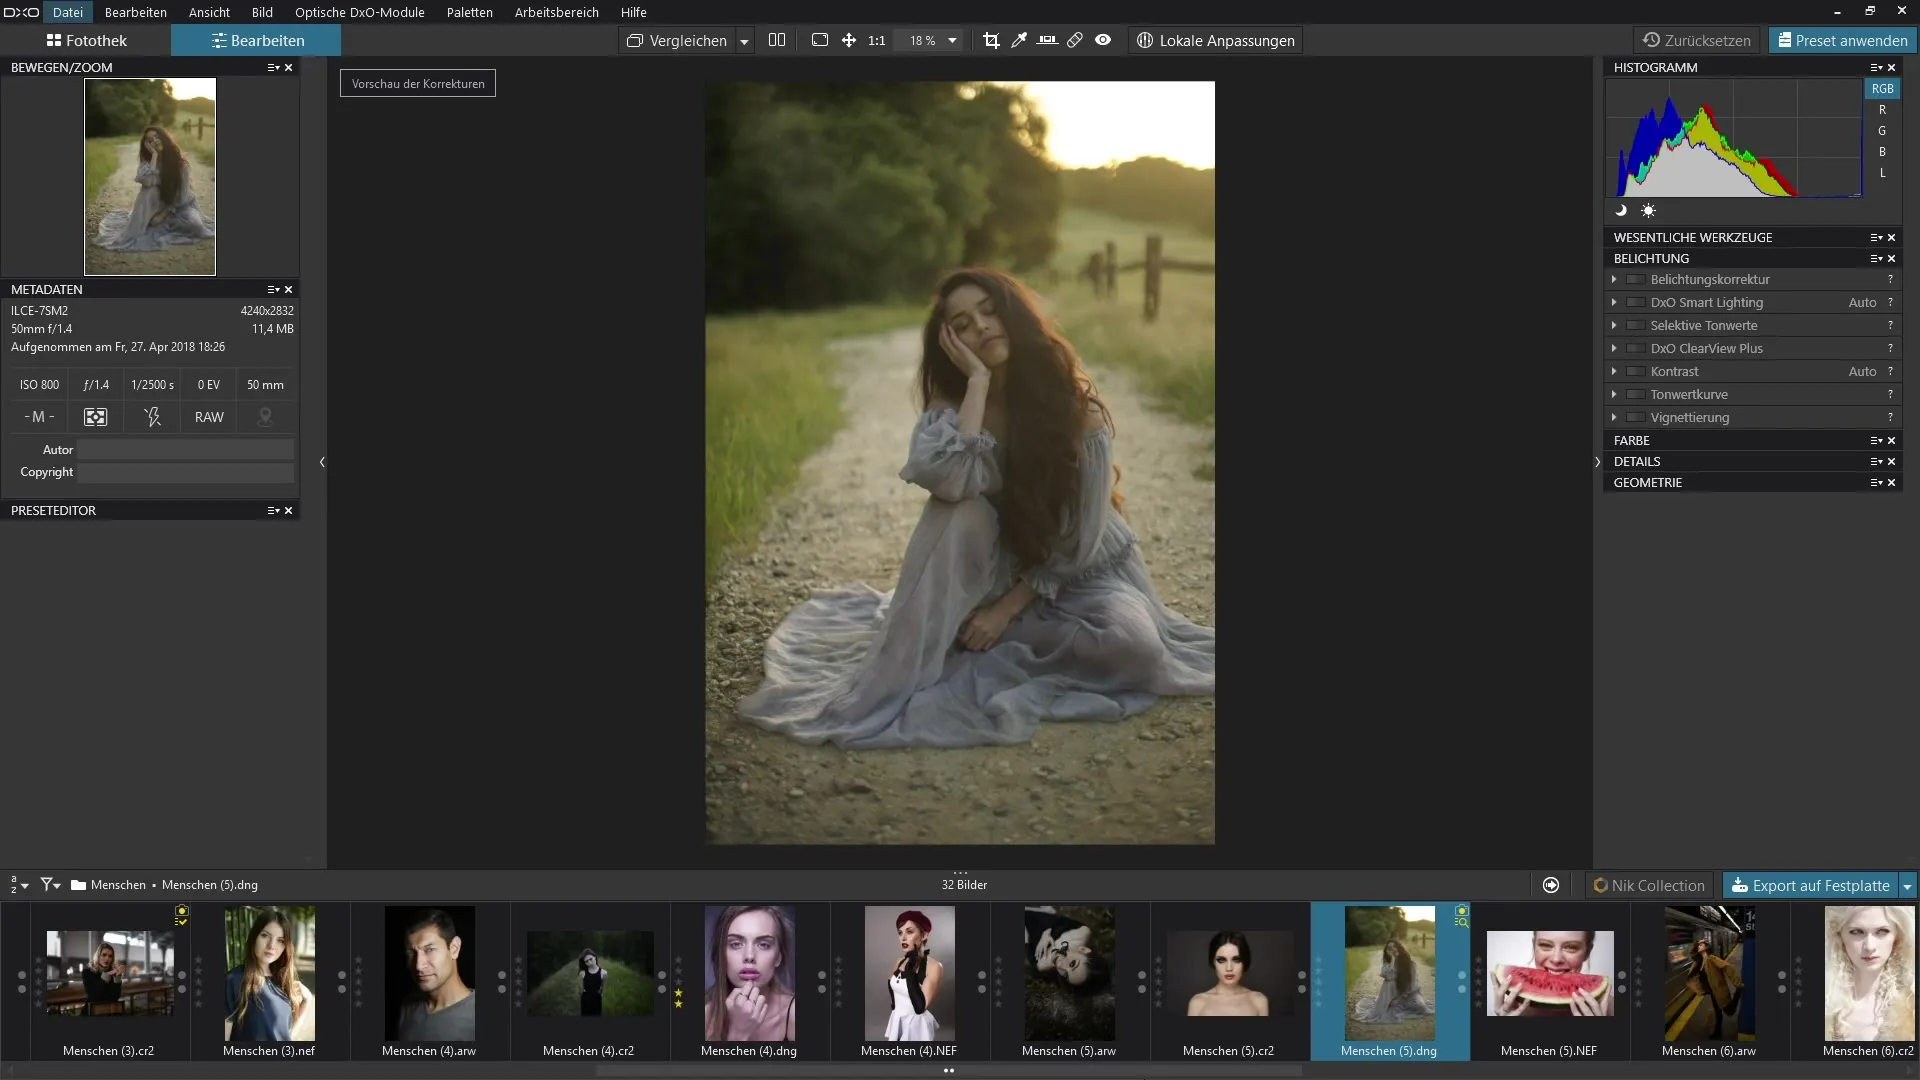
The editing of images includes many important aspects, but one of the central points is the adjustment of contrast and possibly colors. With the tone curvein DxOPhotoLab3, you have a powerful tool at your disposal to precisely control both the contrast and the colors of your images. This guide takes you step by step through the application of the tone curve to achieve an image editing process tailored exactly to your needs.
Key insights
- The tone curve allows for precise adjustment of contrasts and colors.
- Any change to the curve affects the input and output values of tones in the image.
- You can use the curve to specifically influence dark and light areas.
Step-by-step guide to using the tone curve
To use the tone curve effectively, it is helpful to understand the structure and functionality of this curve. First, you will find the tone curve in the "Exposure Palette" section.

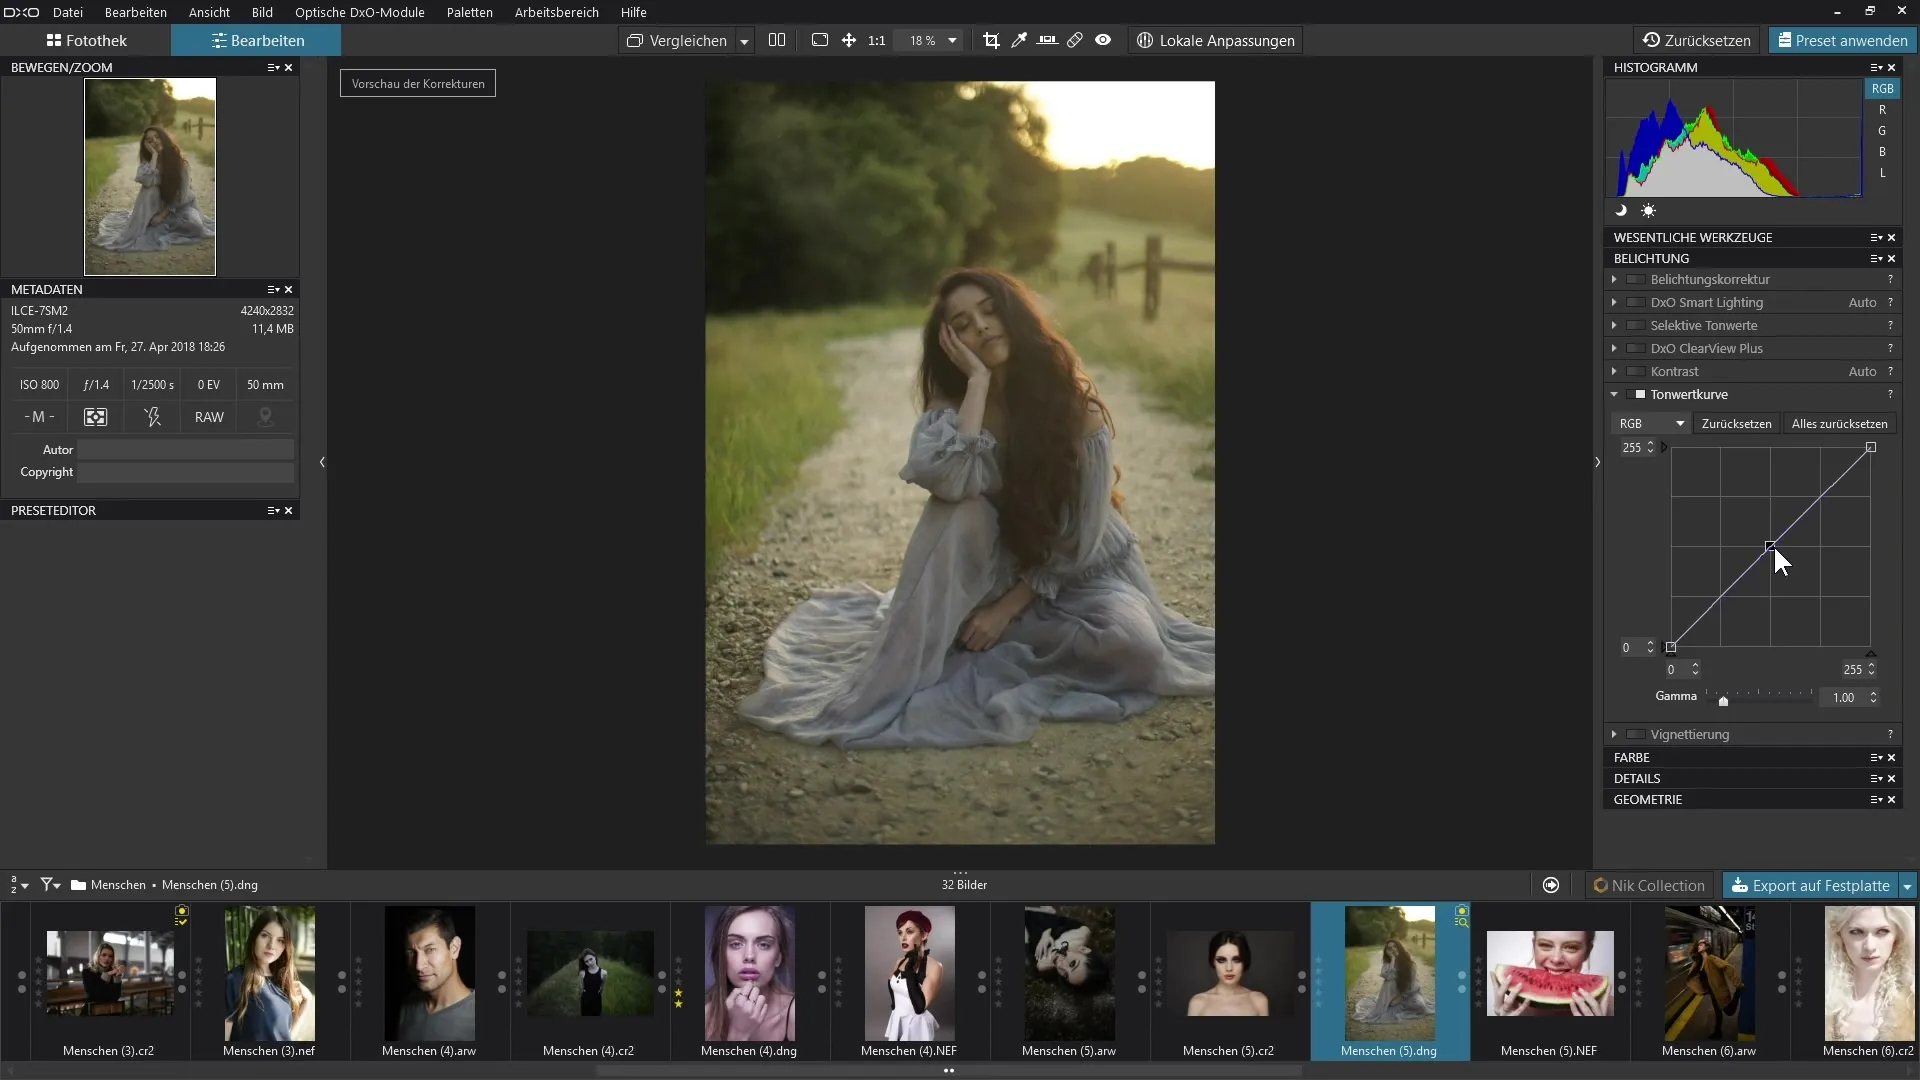
- Open the tone curve: When you open the tone curve, you will see a diagonal line in the curve field. This design resembles a gradation curve, which helps you influence the different tone values of the image.
- Understand the axes of the curve: The horizontal axis represents the input tone values that depict the current state of your image. The vertical axis shows the output tone values that affect how the image looks. Dark areas are on the left side, light areas on the right.
- Edit the dark areas: By pulling the lower handle of the curve upwards, you will lighten the dark areas of the image. This means that the deepest black values (tone value 0) are converted to a higher value – for example, to tone value 62. It is important to proceed gently, as excessive lightening can quickly destroy details in the shadows.
- Adjust the light areas: Similarly, you can darken the light areas by moving the upper handle of the curve downwards. This will affect the brightest parts of the image (tone value 255). Be careful not to darken too much, as this can cause the image to lose overall vibrancy.
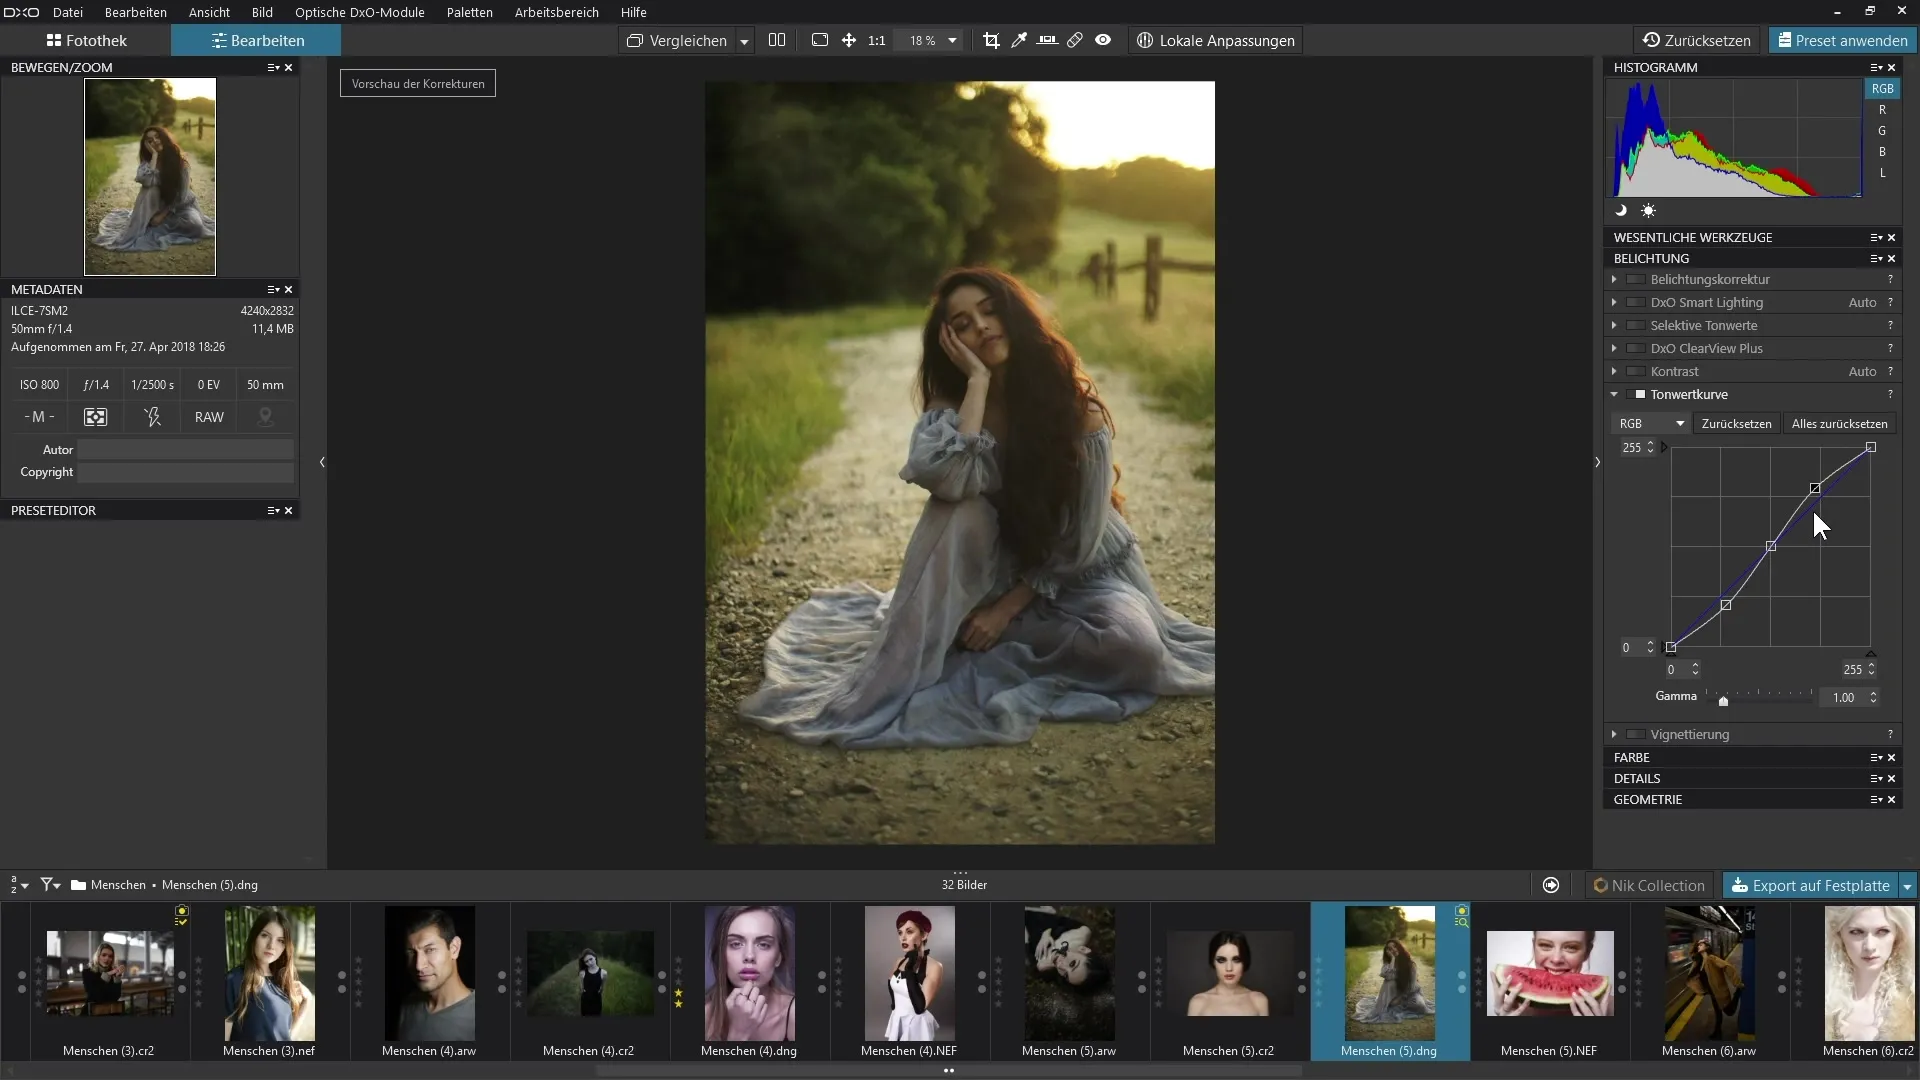
- Insert a handle: You can also add a handle in the middle of the curve to control the midtones separately. This is done by clicking in the curve field. If you pull this handle upwards, the midtones will lighten, and if you pull it downwards, they will darken – thus you can specifically enhance the contrast in the image.

- Improve contrast: To increase the contrast in your image, click once in the middle of the curve to set the midvalues. Pull one point upwards for the light areas and another point downwards for the dark areas. This will make the image more vibrant and show more details across various tone values.

- Reset the curve: If you are dissatisfied with your changes, you can reset them. To do this, select the "Reset" option to revert to the original image.
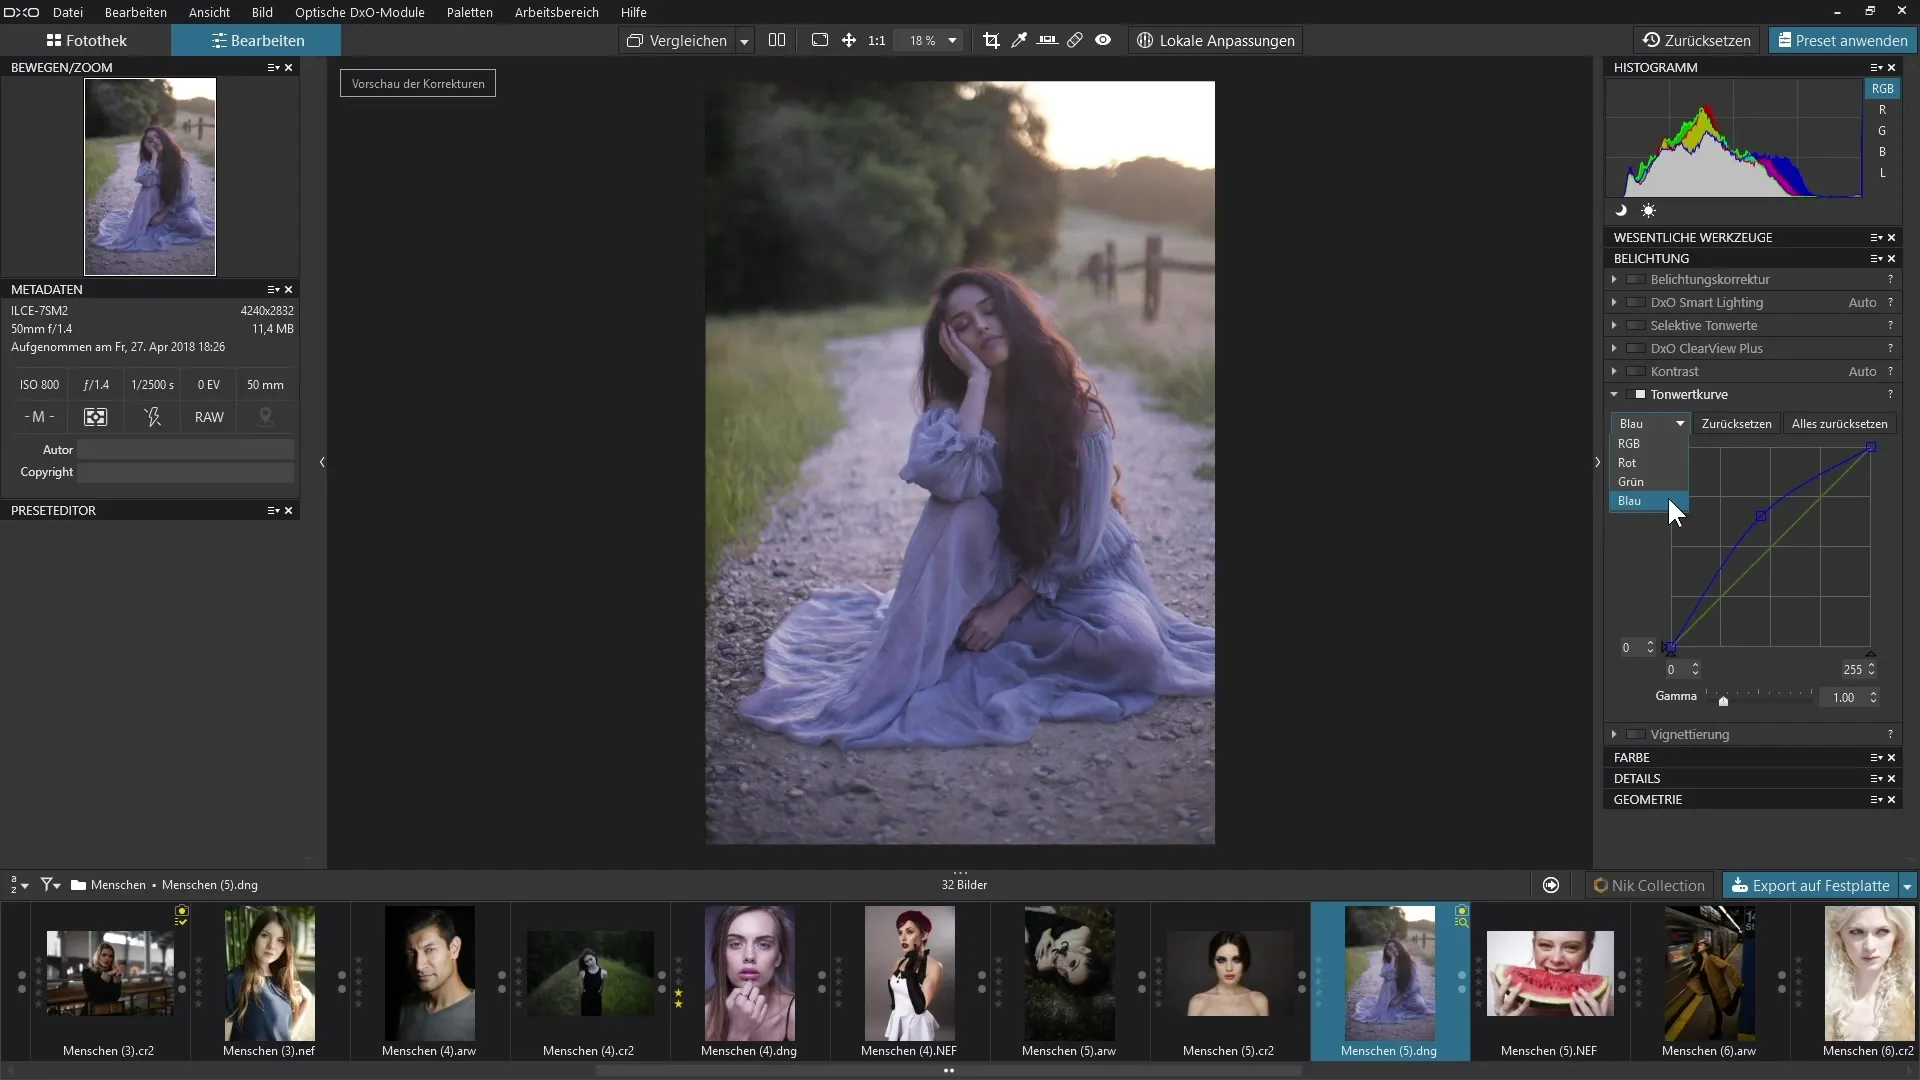
- Targeted color adjustment: The tone curve also provides the ability to edit the individual color channels (red, green, blue) independently. You can use the RGB color modes to specifically influence the hues of an image. For example, if you select the red channel and pull the handle upwards, your image will add red tones.
- Experiment with colors: When using the color channels, you need to be aware of the interactions between colors. Changing one color can also affect the perceived brightness and contrast of other colors in the image. For instance, raising the green handle will make your shot greener.

- Final adjustments: After making all the desired changes to the tone curve, it is advisable to review all adjustments again. Make sure not to enter overexposure or underexposure, which can result from excessive curve adjustments.
Summary – Using the tone curve effectively in DxO PhotoLab 3
If you follow the steps described above, you will be able to use the tone curve in DxO PhotoLab 3 effectivelyto shape both the contrast and the colors of your images according to your preferences. The precise adjustment of various tone values allows images to appear more vibrant and engaging.
FAQ
How do I find the tone curve in DxO PhotoLab?You will find the tone curve in the Exposure Palette.
Can I reset the tone curve?Yes, you can reset the changes using the reset option.
What happens if I remove a handle?If you remove a handle with the right mouse button, it will be removed from the curve and the curve will return to the diagonal.
How can I adjust the color in my images?You can edit the red, green, and blue channels independently to adjust the colors in your image.
Could I lose image details when editing?Yes, be careful when adjusting the curve, as excessive changes in highlights or shadows can lead to loss of detail.


