Editing photos can often be a challenging task, especially when it comes to finding the right tonal values for a harmonious end result. With the "Selective Tonal Values" filter in DxOPhotoLab3, you have a powerful tool at your disposal that allows you to specifically edit different tonal values in your images. This feature helps you control highlights, midtones, shadows, and depths of your image independently, resulting in a more dynamic picture. Let’s dive into the function together and learn how to use it effectively.
Key Insights
- With selective tonal values, you can edit different areas of your image independently.
- The various sliders allow you to influence highlights, midtones, shadows, and depths.
- Paying attention to the right ratio and balance between tonal values is crucial for a harmonious image.
Step-by-Step Guide
1. Accessing the Editing Filter
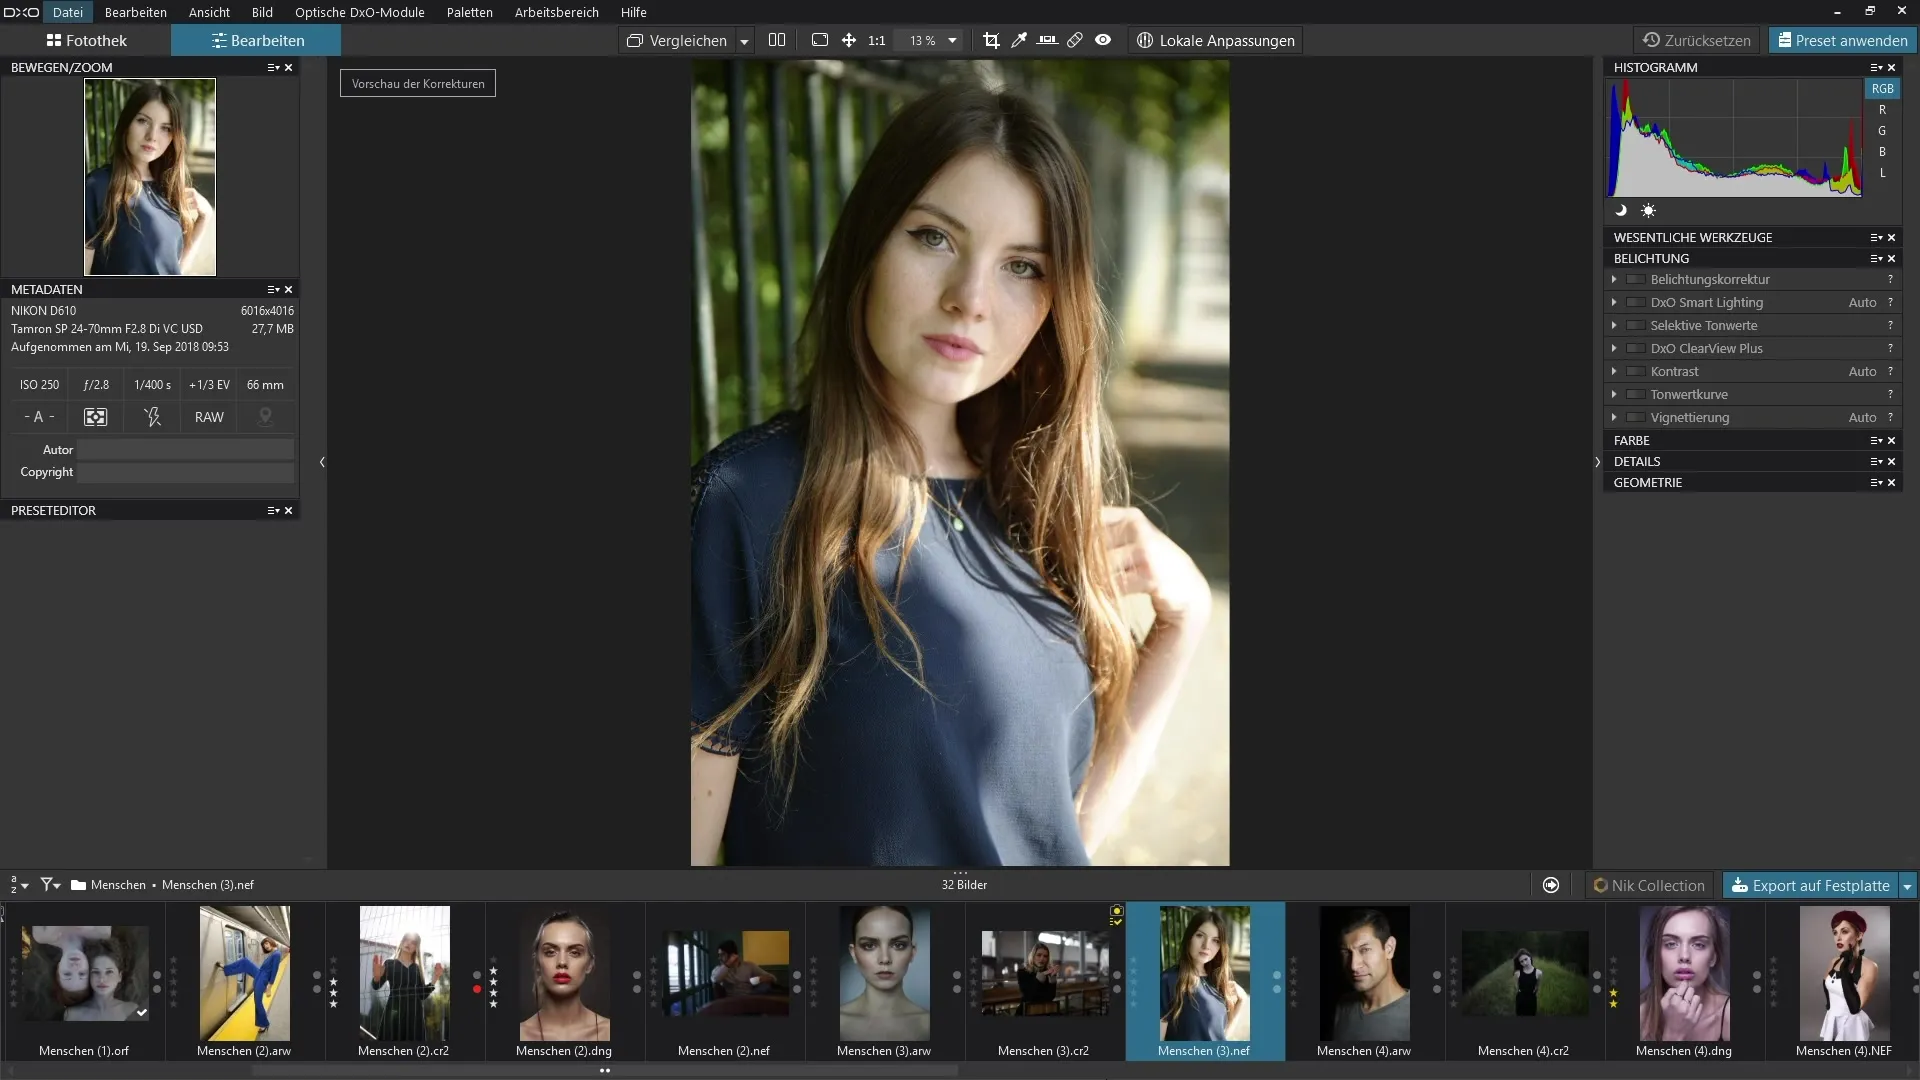
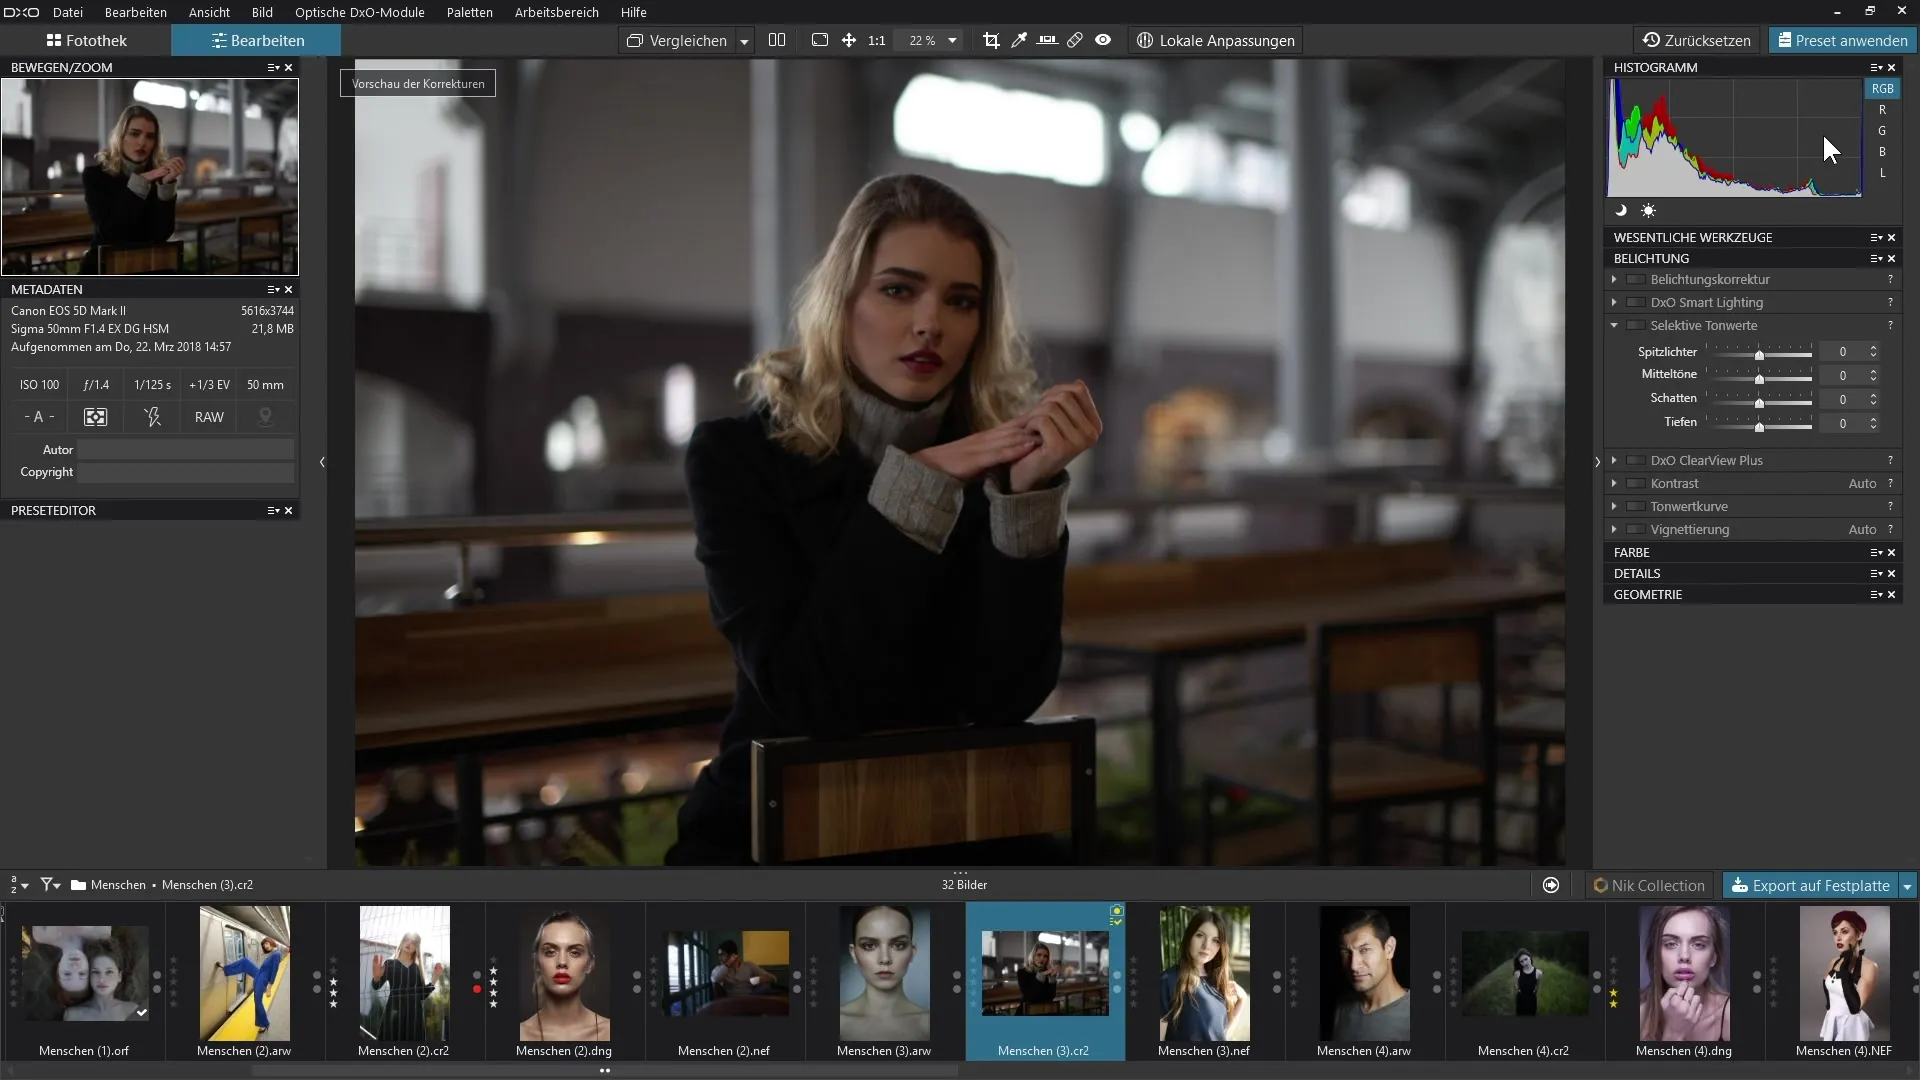
First, you need to access the "Selective Tonal Values" filter in the "Exposure" palette. You can find this palette in the DxO PhotoLab interface. Expand the palette, and you will see the four sliders for tonal value editing.
2. Working with Highlights
The first slider you can use is for highlights. By moving this slider to the right, the bright areas of your image will be brightened. This editing is particularly useful to avoid overexposure and to reveal details in bright areas.
3. Adjusting Midtones
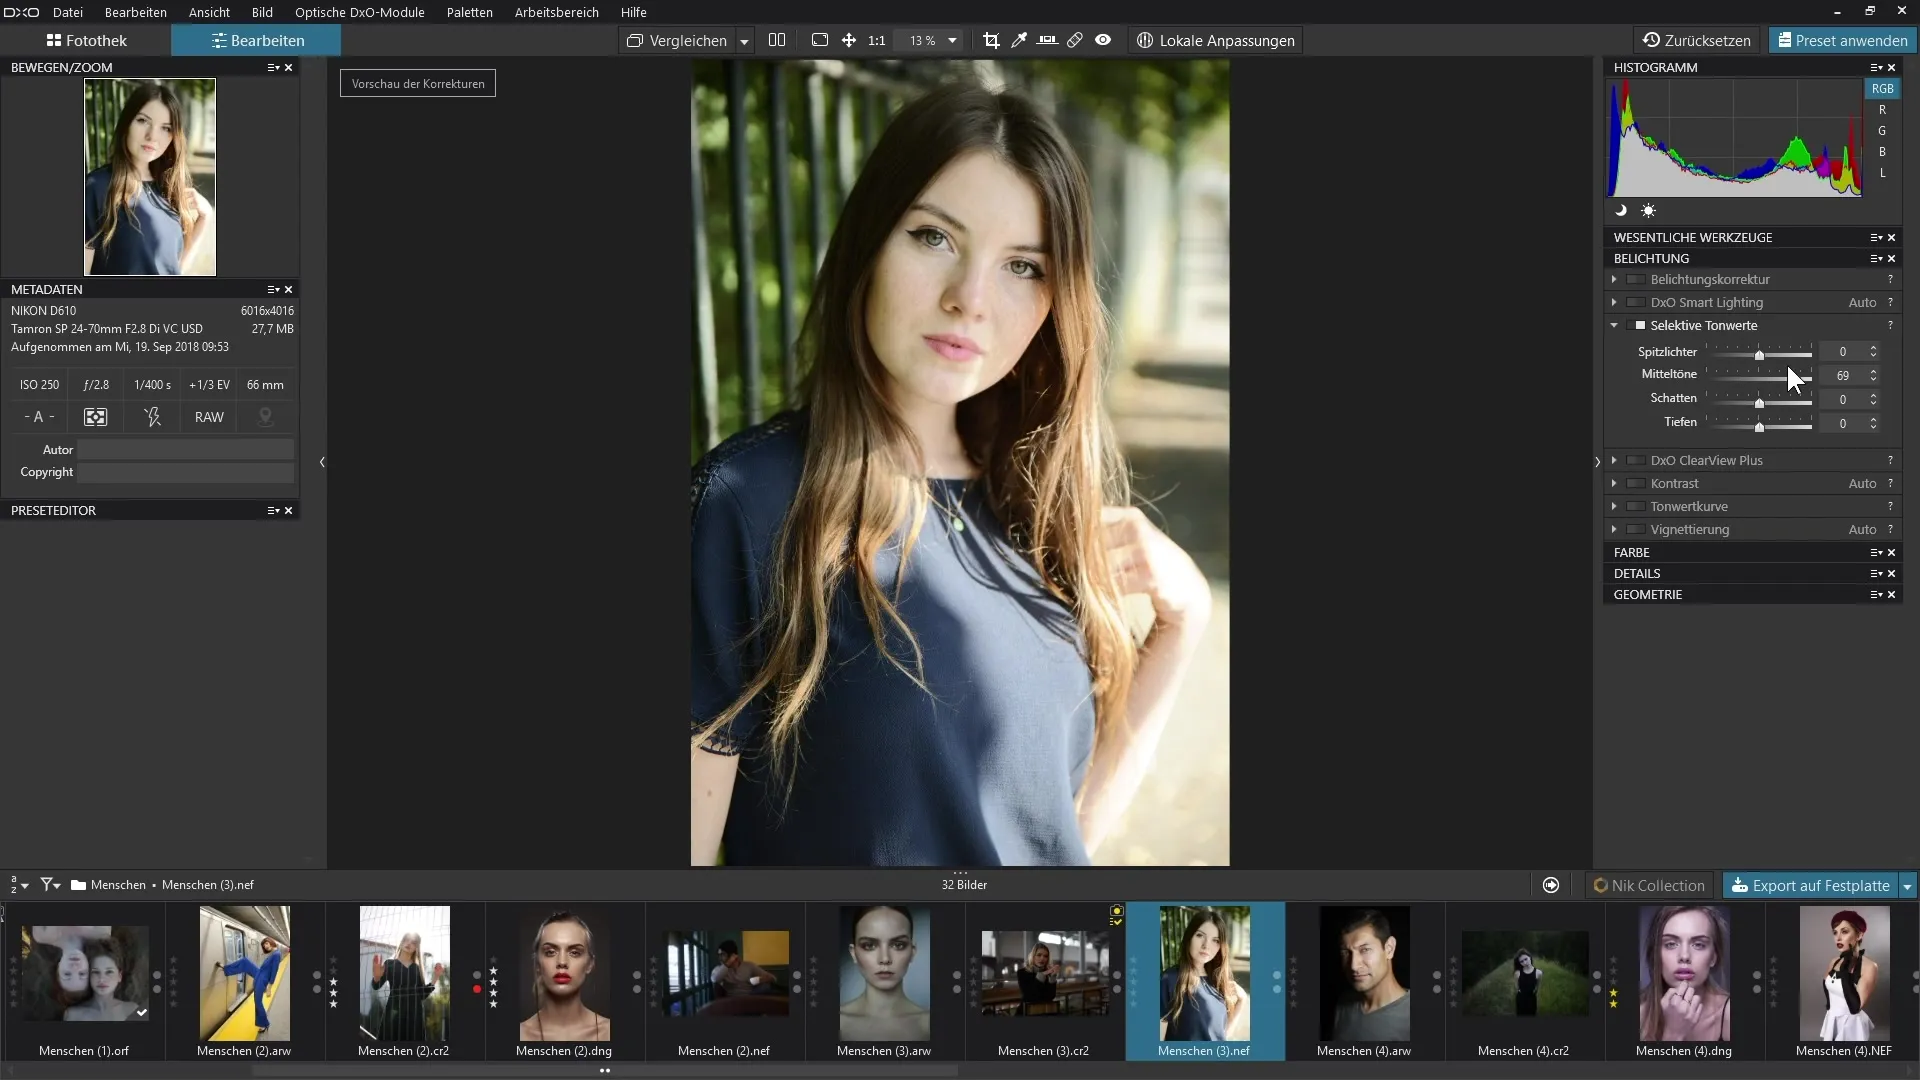
Now let's move to the slider for midtones. When you move this slider to the right, the middle tonal values of your image become brighter. This adjustment mainly affects the center of the image, which often leads to better balance. Experiment here to find what works best for your image.
4. Editing Shadows
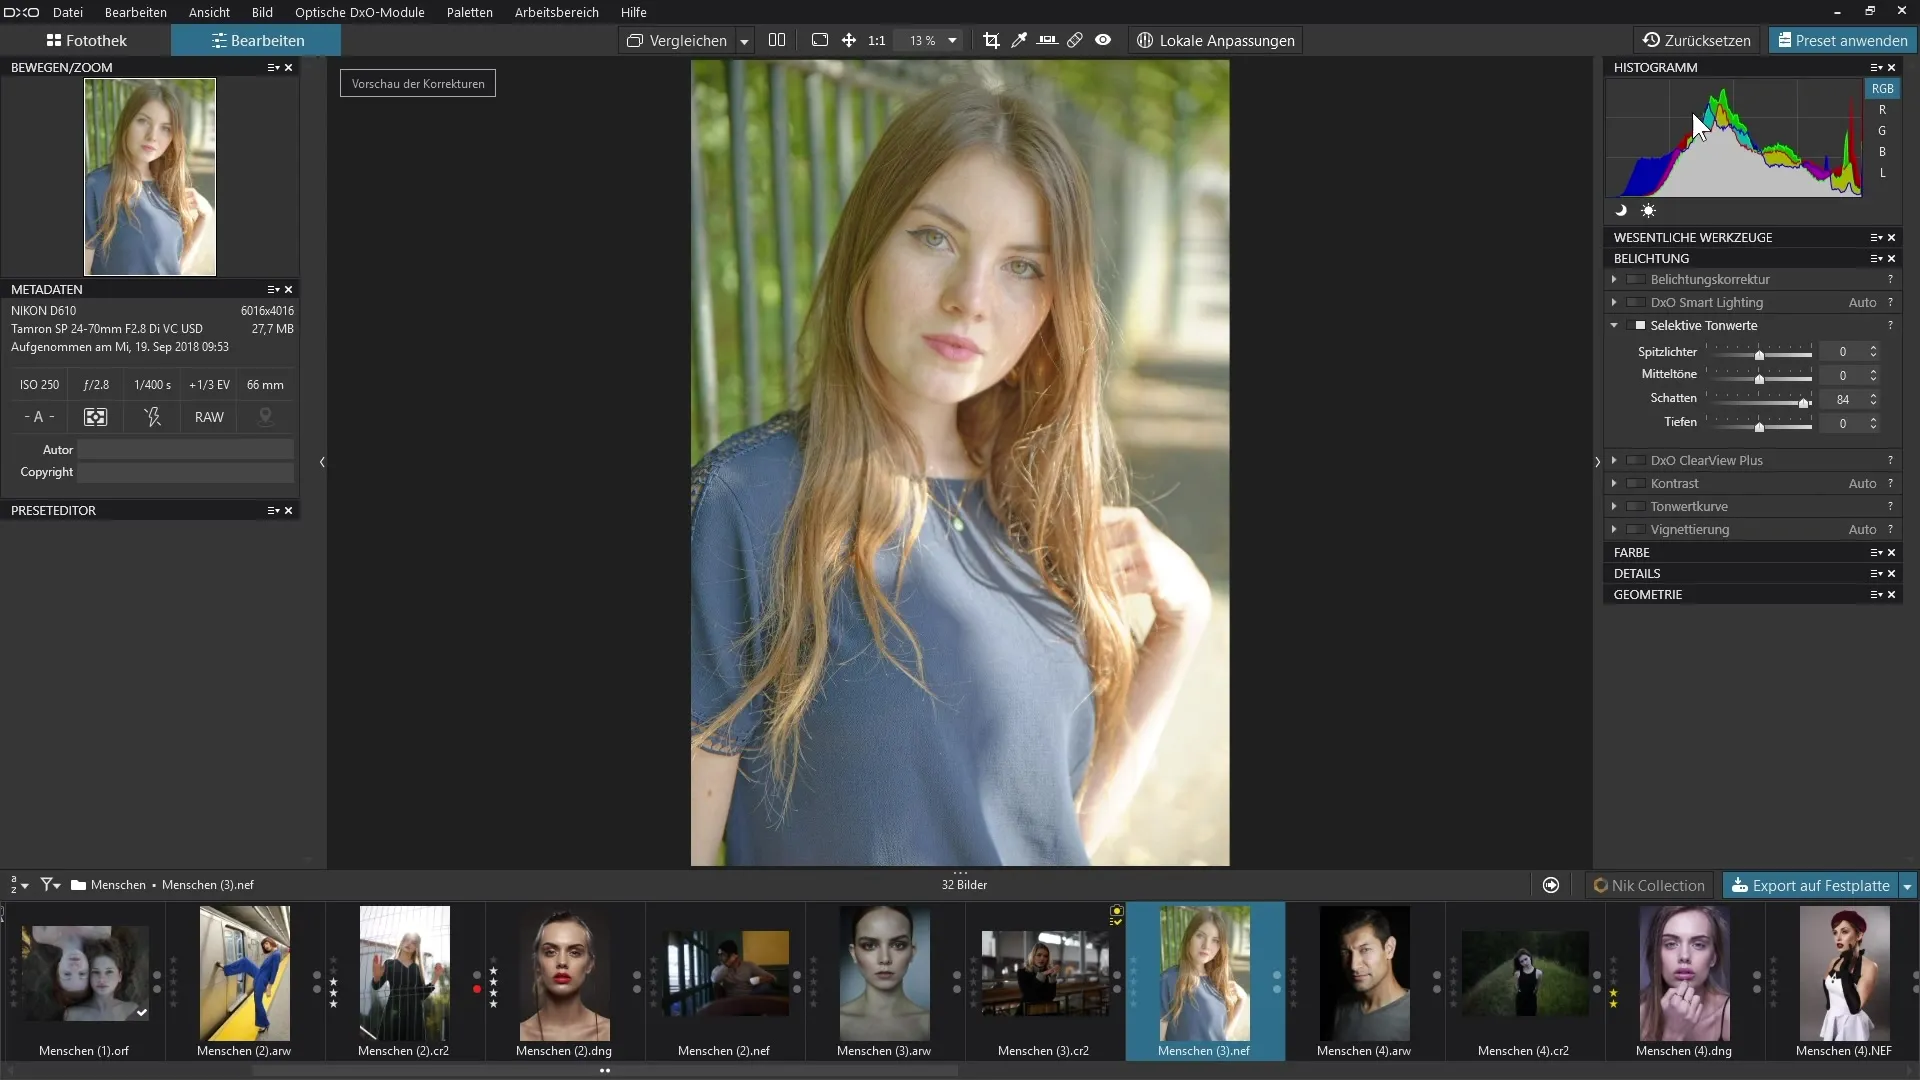
The next area is shadows. With the corresponding slider, you can lighten or darken the dark tonal values. This is especially important to increase or reduce depth and detail in shaded areas.
5. The Depths in the Image
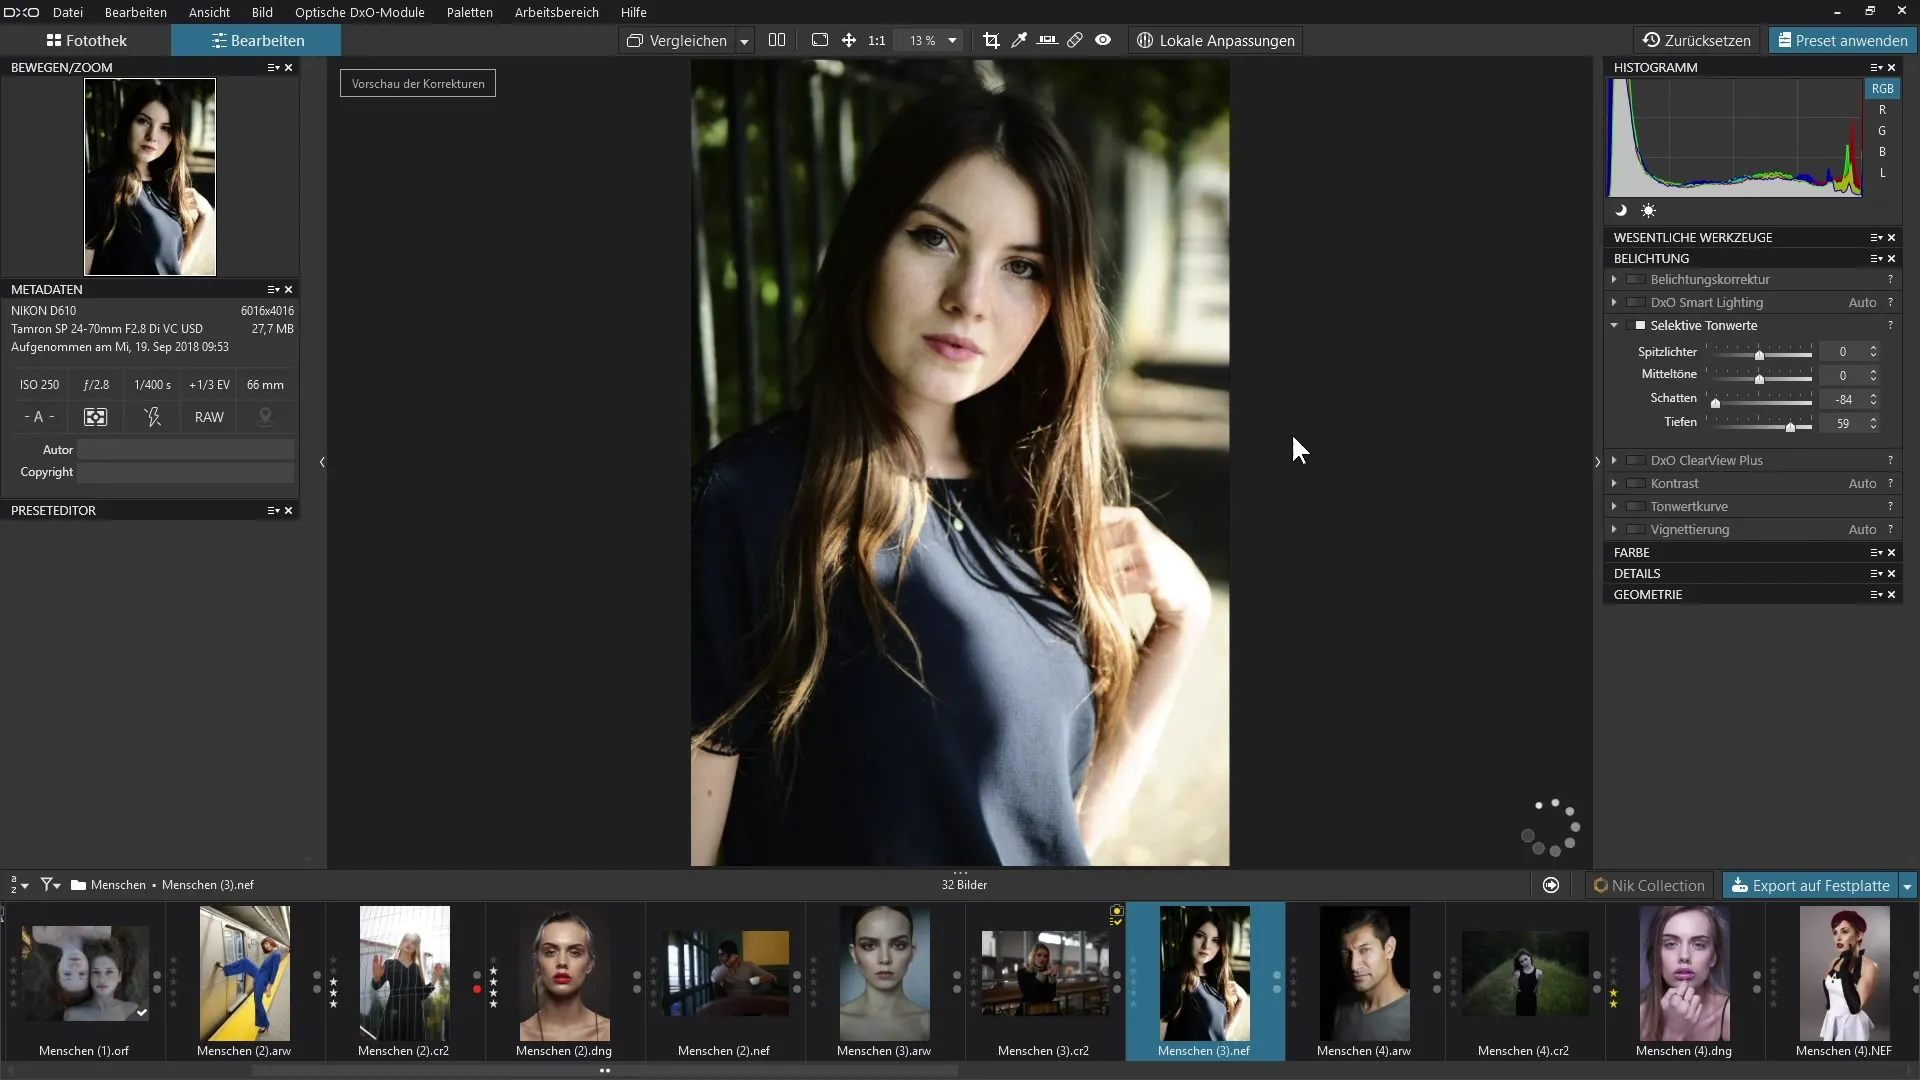
Now let’s look at the depths. This slider differs slightly from the others, as it allows you to edit the deepest blacks in your image. By lightening the depths, you give the darkest areas a lighter structure, which is particularly helpful when you want to highlight details in very dark areas.
6. Histogram Analysis
To better understand the effect of your adjustments, it's helpful to keep an eye on the histogram. Before you begin editing, check the histogram of your images to see where the tonal values are and how much leeway you have. Make sure not to overdo the tonal values during editing so that the image remains natural.
7. Making Fine Adjustments
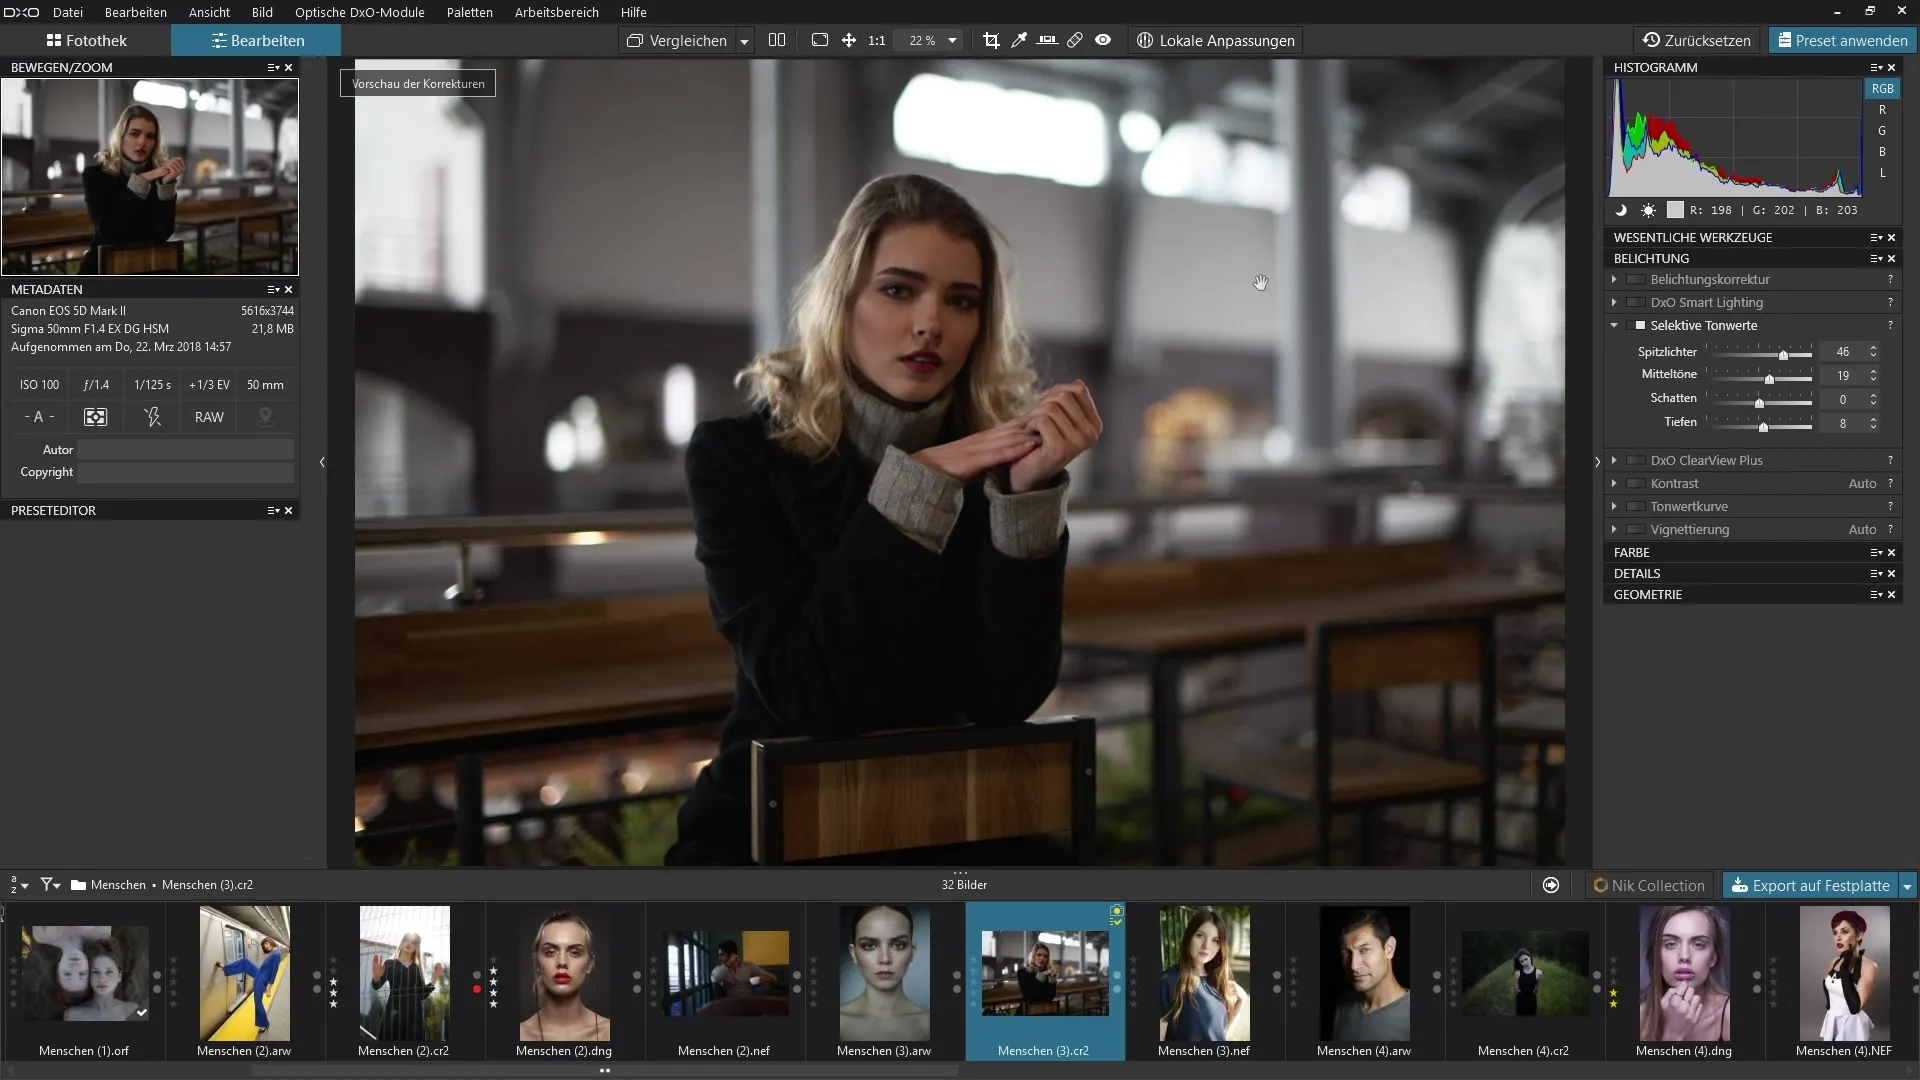
After making the major adjustments, it's important to consider the finer differences and details. Here, you can easily switch between the various tonal ranges and adjust the sliders accordingly to achieve a cohesive overall image.
8. Before-After Comparison
After making your adjustments, you can see the changes in your image through a before-and-after comparison. This method helps you better assess the effect of your edits and make further adjustments if necessary.
9. Conclusion
After working with all four tonal ranges, you should have an image that looks balanced and vibrant in its exposure. Use your newfound knowledge to apply the selectivetonal values to your next projects and experience the effects for yourself. Be careful not to work in extreme areas to avoid unnatural results.
Summary – A Guide to the Selective Tonal Values Editing Filter in DxO PhotoLab
With the "Selective Tonal Values" filter of DxO PhotoLab 3, you gain the opportunity to work purposefully on the different areas of your image. The correct application of the sliders for highlights, midtones, shadows, and depths increases detail accuracy and ensures a harmonious image composition.
FAQ
How do I find the "Selective Tonal Values" filter in DxO PhotoLab?The filter is located in the "Exposure" palette.
Can I edit all tonal values at once?Yes, but it is advisable to edit the individual areas one by one to achieve better results.
How harmful are extreme tonal adjustments?Extreme adjustments can cause the image to look unnatural and result in loss of detail.
Is it useful to use the histogram during editing?Yes, the histogram helps you better understand tonal distribution and avoid over-editing.
What tone settings are ideal for portrait photography?You should always ensure that skin tones remain natural while also providing structure and detail in the shadows.


