
If your RAW image looks too dark, but you don't want the bright areas to blow out, exposure correction in DxO PhotoLab 3 is your most important tool. This guide shows you how to use the Exposure palette, control highlights, and use local adjustments to edit only the areas that really need it.
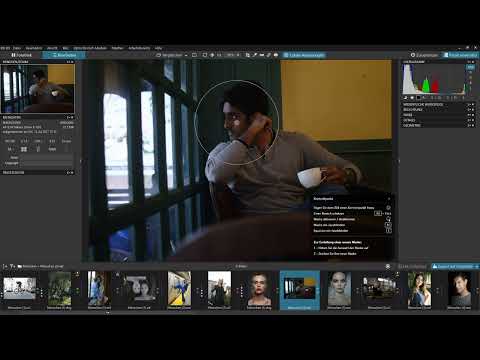
The video is only loaded from YouTube when you play it – data (including your IP address) is then transmitted to YouTube/Google. More in the privacy policy
Key Takeaways
Exposure correction affects the entire image evenly; the presets only shift the emphasis toward highlights or shadows. The histogram with clipped highlights shows you when you are going too far. For areas that should be brightened selectively, local adjustments with control points and graduated filters are the better solution. All steps can be undone with Ctrl+Z.
Activating Exposure Correction
Open your RAW image and look for the exposure correction at the very top of the Exposure palette. Clicking the small triangle expands the options. First activate the function so you can see the effects. At the beginning nothing visibly happens, because the slider is at its default value of zero.

Using the Slider Correctly
The exposure sits at zero in the middle. If you drag the slider to the left, the entire image is darkened; to the right, you brighten every pixel evenly. The scale ranges from about minus four to plus four stops. With a double-click on the handle, you can reset the value to zero at any time.
When brightening, pay particular attention to the bright areas. In the example, the person looks better, but the highlights on the left of the image quickly become too bright. So you have to weigh up which area is more important to you.
Controlling Highlights with the Histogram
Before you rely on your eyes, take a look at the histogram. There you can see whether highlights are being clipped, meaning they blow out completely to white and no longer contain any detail. The further you drag the slider to the right, the worse this problem gets. A double-click on the handle quickly takes you back to a value where the highlights are still preserved.

Using the Correction Presets
In the Correction menu you will find several presets. They correspond to different positions on the slider. The Highlight Priority preset moves the slider so that the image becomes darker overall, but the highlights show more detail. The result is useful when bright areas are important, but people and rooms may become too dark in the process. If you don't want that, reset with a double-click and adjust the values manually.

Using Local Adjustments
Sometimes only part of the image should become brighter, such as the face, while the highlights in the background remain unchanged. This is what local adjustments are for. First deactivate the global exposure correction and click Local Adjustment in the bar at the top.

A click on the image places a control point, in this example on the face. A menu opens that looks complicated at first glance but quickly makes sense.
Defining the Area of Effect
The control point consists of two circles. The inner circle determines the position, and you can move it with the mouse. The outer circle determines how far the adjustment reaches. If you drag it, you enlarge or reduce the area of effect. This way you restrict the editing precisely to the desired area.
Understanding the Categories in the Menu
On the right side you will find the settings of the control point. They are divided into the categories Exposure, Color, and Details. As soon as you move the mouse outside the circle, the overlay disappears so that you can assess the result undisturbed. If you move back into the image, the tools appear again.
Managing the Control Points
If you want to keep track of all the control points you have placed, click the icon for essential tools. There you can see the active local adjustments. A click on the triangle shows the details of a point. You can reduce its opacity, hide it, or delete it completely.

Selectively brightening the area
In the Exposure section, you adjust the slider for exposure. If you drag it upward, you brighten the area within the circle; if you drag it downward, you darken it. In the example, you drag the slider upward until the area is suitably brightened.
However, the result can look unattractive if only the face is bright while the surroundings remain dark. The light should work from the outside in, not the other way around. In this case, you remove the control point again using the trash can.
Working with the graduated filter
An elegant alternative is the graduated filter. You select it, click in the image at the top right, hold down the left mouse button, and drag the gradient toward the bottom left. You can move the filter at any time and adjust its strength.

Then drag the exposure slider upward. The sky and the highlights are largely preserved, while the area in the foreground becomes visibly brighter. Compare your result with the original image to assess the difference.

Setting and correcting additional control points
You can set as many control points as you like. If you want to darken a cup in the image, for example, you set a new point, shrink the circle, and drag the exposure downward. The graduated filter and control points remain editable independently of each other.
With Ctrl+Z you undo a step, and with Ctrl+Y you restore it. If an effect seems too strong, simply reduce the opacity of the graduated filter. At zero, you see the original image again. From there, adjust the values step by step until the result is right.


Conclusion for your editing
Exposure correction is a good tool for basic exposure, and the palettes are ideal for global adjustments. As soon as individual areas need to be edited selectively, you turn to local adjustments with control points or graduated filters. This way you keep full control over your image and avoid over-correcting in one spot just because something is lacking in another.
Summary – DxO PhotoLab 3: Using exposure correction properly
The exposure correction in DxO PhotoLab 3 brightens or darkens the entire image evenly. Keep an eye on the histogram so that the highlights don't blow out. The presets shift the focus to highlights or shadows. For targeted corrections, you use local adjustments with control points or graduated filters. With Ctrl+Z and Ctrl+Y, you stay in control of your steps at all times.
FAQ
When should I use exposure correction instead of local adjustment?Exposure correction is suitable for even adjustments to the entire image. As soon as only certain areas should become brighter or darker, local adjustments are the better choice.
How do I know that I am overexposing the highlights?Look at the histogram. If highlights are clipped, you will see a pronounced spike at that point, indicating lost detail.
How do I quickly reset the exposure correction?Double-clicking the handle of the slider resets the value to zero.
What do the inner and outer circles of a control point mean?The inner circle determines the position of the adjustment in the image. The outer circle determines how far the area of effect extends.
How do I undo a change to a control point?With Ctrl+Z you undo a step and with Ctrl+Y you restore it. You can also delete a control point using the trash can.
How do I reduce the effect of a graduated filter?Select the graduated filter and reduce the opacity. At zero, the image matches the original again.


