
Imagine the sun sitting low behind a branch with fresh green leaves. Your eye takes in the scene effortlessly, while the camera, on the other hand, has to decide which area of the image determines the brightness. This is exactly where metering modes come into play. They determine how the sensor evaluates the incoming light before shutter speed, aperture, and ISO are calculated.
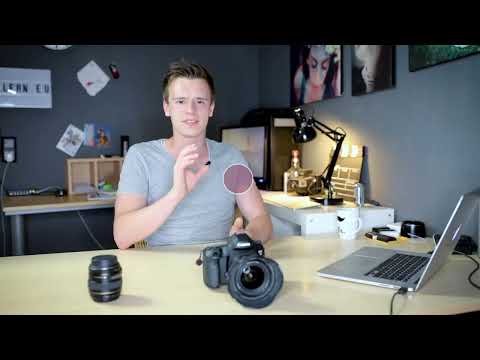
The video is only loaded from YouTube when you play it – data (including your IP address) is then transmitted to YouTube/Google. More in the privacy policy
This guide introduces you to the four common metering modes: evaluative metering (also called matrix metering on some cameras, while Canon calls it evaluative), partial metering, spot metering, and center-weighted metering. You will learn what strengths and weaknesses they have, how they differ in automatic and manual mode, and how you can use a practical backlight example to test for yourself what they do. The video was made with a Canon 5D Mark III, but the principles apply to most cameras.
Key Takeaways
- Evaluative metering is the most reliable starting point for most subjects.
- Partial and spot metering focus on small areas. They allow targeted control but require attention.
- Center-weighted metering evaluates the image evenly and is mainly suited to landscapes.
- In automatic mode, the metering mode directly affects the image; in manual mode, the exposure scale shows you the deviation.
- With exposure compensation, you can adjust a measured value afterward.
Step-by-Step Guide
Step 1: The camera measures brightness, not your subject
Your camera does not see the scene the way you perceive it. It merely measures how bright the light is in different areas of the image and derives an exposure from that. Which areas count is decided by the metering mode. Especially with backlight or strong differences in brightness, it is worth paying conscious attention to this setting, because the camera cannot tell whether you want to emphasize the main subject or the background.

Step 2: Use evaluative metering as a reliable standard
Evaluative metering includes the entire image in the exposure measurement. The autofocus point is also taken into account, that is, the area where you place the focus. In addition, partially sharp autofocus points are factored in, so the camera recognizes where a subject might be, even if it is not completely in focus. For most everyday situations, this gives you a good intermediate result that you can continue working with.

Step 3: Recognize the limits in strong backlight
With very strong light falling on the subject from behind, even evaluative metering can reach its limits. The bright light source pulls the measurement strongly upward, and your main subject quickly appears too dark. When photographing against the sun, therefore, watch the light source in the viewfinder. If it appears large in the frame, you should try a different metering mode or check the result particularly critically.

Step 4: Use partial metering deliberately
Partial metering concentrates on a large central circle in the viewfinder. According to the video, around 75 percent of the exposure information comes from this area, while the remaining 25 percent is influenced by the background. This is helpful for portraits or large subjects that take up most of the image area. The catch: the metering area is fixed in the center. If your subject is on the left or right, the camera measures next to it. Therefore, bring the subject to the center, check the exposure there, and then recompose the frame. With moving subjects, this quickly becomes cumbersome.

Step 5: Control exposure precisely with spot metering
Spot metering works with the smallest metering area, which covers only a tiny part of the viewfinder. You place it exactly on a detail, such as the face in a portrait or a particular leaf. This enables very targeted exposure, but it has a downside: if the metering point accidentally hits the background or an unevenly lit spot, the main subject quickly becomes too bright or too dark. Therefore, always check the result on the display.

Step 6: Center-weighted metering for even brightness
Center-weighted metering evaluates the entire image, but places an emphasis on the center and aims for a balanced average. It focuses neither on the main subject nor on the background. This can lead to a very good result with landscapes. Compared to evaluative metering, however, the sharp main subject often turns out somewhat darker. For most situations, evaluative metering therefore remains the better starting position.

Step 7: Apply Exposure Compensation Afterwards
With multi-zone metering, you usually get a solid starting result that you can fine-tune with exposure compensation if needed. If the image looks too dark, set a positive compensation; if it is too bright, set a negative one. This way you keep the proven metering method and only adjust the result. Exposure compensation is covered in more detail in a later episode of the video.

Step 8: In Automatic Mode, the Metering Method Has a Direct Effect
In automatic modes, the camera calculates shutter speed, aperture, and ISO based on the measured value of the selected metering method. The metering method therefore directly determines how your image looks. If you choose a method that evaluates the wrong area, you may end up shooting the image too bright or too dark. So consciously check which metering method is active before you press the shutter button.

Step 9: Work with the Exposure Scale in Manual Mode
In manual mode, you set shutter speed, aperture, and ISO yourself. The camera still keeps measuring and shows you via the exposure scale in the viewfinder whether the image will be too bright or too dark. If the pointer is in the minus range, the image is too dark; in the plus range, too bright. Adjust the shutter speed until the display is at zero. Then, according to the camera, the setting corresponds to a correct exposure.

Step 10: Prepare the Practical Example with Backlight
A scene in which branches with green leaves are in the foreground and the sun shines from behind is well suited for the practical test. The leaves should be sharp, while the background may be blurred. This subject shows very clearly what a metering method does. Start with multi-zone metering, as it takes the autofocus point into account and thus moves the sharp leaves to the center of the measurement.

Step 11: Check the Result of Multi-Zone Metering
With multi-zone metering, the leaves are correctly exposed and the background is slightly overexposed. For this backlit subject, that is a good result, because the blown-out look here comes across more like an intentional effect. In your own shots, pay attention to whether the main subject in the foreground is exposed harmoniously.

Step 12: Test Selective Metering in Backlight
If you switch to selective metering, the image changes noticeably. If the sun is in the central area, the metering concentrates on the backlight, and the image becomes too dark. This behavior can look harmonious with wide landscapes or be helpful with very large subjects. In this example, however, it leads to incorrect exposure of the leaves, which are actually the important part.

Step 13: Aim Spot Metering at the Leaf
With spot metering, you place the small metering area exactly on a leaf. The exposure is then based precisely on this point. The result is similar to that of multi-zone metering; the difference lies in control: you decide for yourself which spot determines the exposure. This method is worthwhile when you want to reliably expose a specific detail correctly.

Step 14: Evaluate Center-Weighted Metering in Comparison
Center-weighted metering produces an overall balanced image in which no area clearly dominates. However, the sharp main subject, that is, the leaves, looks somewhat darker than with matrix or spot metering. Compare the results side by side on the display to develop a feel for how much each method changes the image.

Step 15: Find Your Own Metering Method
There is no metering method that is the best for every situation. Test your camera on different subjects, observe the result, and note down when which method works. If you want to save yourself the effort, initially stick with multi-zone metering and work with exposure compensation. Over time, you will then recognize on your own when it is worth switching.

Summary ??? Understanding Exposure Metering: Which Metering Method Fits When
The metering method determines which area of the image controls the exposure. Multi-zone metering is a reliable standard, selective metering and spot metering allow targeted control at the expense of flexibility, and center-weighted metering ensures a balanced overall effect. In automatic mode, the chosen method directly affects the result, while in manual mode the exposure scale helps you with fine-tuning. Test the methods on your own subjects, and you will develop a confident sense of which setting is the best choice in which situation.
FAQ
Which metering method should I use as a beginner?Multi-zone metering, because it delivers a good basic result for most subjects and takes the autofocus point into account.
What does matrix metering mean?Matrix metering is Canon's name for multi-zone metering. Both terms refer to the same method.
When is spot metering useful?Spot metering is suitable when you want to control the exposure precisely for a very small detail, such as in portraits.
What does the exposure scale show me?In manual mode, the exposure scale shows whether the image will be too bright or too dark. If it is at zero, the setting corresponds to the correct exposure according to the camera.
Can I ignore the metering method in manual mode?In manual mode, the metering method is largely unimportant for the settings. The exposure scale still gives you guidance, and exposure compensation helps you if needed.


