
You're standing in the midday sun, the subject is perfect, and everything looks good on the display. At home on the computer, the face is suddenly black or the sky is completely blown out. Almost always, exposure is behind it. This guide explains how a camera captures light, where its limits lie, and how you can use those limits deliberately for your images.
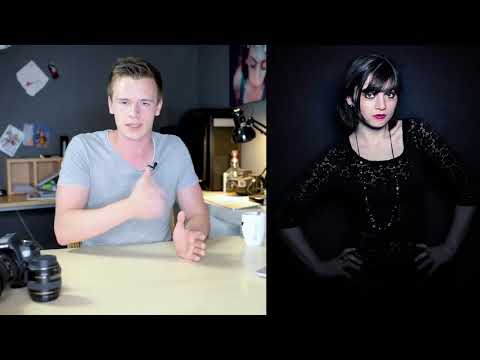
The video is only loaded from YouTube when you play it – data (including your IP address) is then transmitted to YouTube/Google. More in the privacy policy
Key Takeaways
- The camera can only capture a limited amount of light. That's why you have to decide on a main subject that should be correctly exposed.
- Your eye perceives brightness differently than your camera's sensor. This explains many disappointments with photos.
- Overexposure and underexposure describe whether an image is brighter or darker than the camera would measure it. The time of day plays no role here.
- High key and low key are deliberately used stylistic devices and not mistakes.
- There is no single correct combination of aperture, shutter speed, and ISO.
- When filming, brightness values must remain constant; with photos, you have more leeway.
- Image editing and the RAW format can compensate for small exposure errors, but only within narrow limits.
Step-by-Step Guide
Step 1: Understanding the Limited Amount of Light
The camera can only capture a certain amount of light. This is precisely the core of exposure. You can't depict every detail perfectly at the same time, so you decide on a main subject. This can be a landscape, a macro flower, an animal, or a person. Set focus and exposure on this subject and check whether it is correctly bright.

Step 2: Consciously Choosing Foreground or Background
The typical problem looks like this: The foreground is too dark while the background is right. Or the background is too bright, and the subject in the foreground is fine. In midday sun or when photographing in shade, the contrast becomes so great that you can't get both perfect at the same time. So consciously decide which area is more important, and expose for that one.

Step 3: Distinguishing Between Eye and Camera
Your eye adapts constantly. You look from bright to dark areas, and your brain continuously blends the brightness into a coherent impression. The sensor, by contrast, measures a fixed image without this interpretation. That's why a scene that you perceive as balanced often looks too dark or too bright in the photo. When shooting, therefore, trust your impression less and the display more.

Step 4: Using High Key and Low Key Deliberately
With high key, the image consists predominantly of bright areas. A common mistake is simply to expose the whole shot too brightly, which causes details to be lost. The better way is to bring many bright elements into the image. An example from a milk bar shoot shows this: The face is bright, the milk in the background is too, and apart from the skin tone there is hardly any color. With black-and-white conversion, only white remains with few contrasts.
Low key is the opposite. Here dark elements dominate, and some areas look almost black. Make sure the camera doesn't expose such scenes too brightly, otherwise the image loses its mood.

Step 5: Telling Overexposure and Underexposure Apart
Overexposure means that you shoot brighter than the camera actually would. This usually results in an image that is too bright. Underexposure is the opposite: The image becomes darker than measured. The time of day doesn't determine this. Even at night you can produce a far too bright image, and in glaring sunlight one that is too dark.

Step 6: Using the Camera's Measuring Tools
Cameras offer you aids with which you can check whether an image is correctly exposed. These include the exposure meter and often a histogram. Looking at the display is also a good check. Many photographers, including experienced ones, rely heavily on this display for their assessment before turning to numerical values.

Step 7: Question Fixed Rules
You often hear that you should always shoot at ISO 100 because then no noise appears. That is not necessarily true. Many good pictures are also taken at ISO 640, because the setting suits the situation at hand. The same applies to exposure time: for a long exposure you don't have to go to 30 or 60 seconds, sometimes a single second is enough. Try out intermediate values and learn over time which combination suits your situation.

Step 8: Shoot Manually and Keep Brightness Constant
If you set your camera completely manually, you keep full control over your image. This noticeably changes your approach to photography. However, keep in mind that the light outdoors can change constantly, for example when a cloud passes in front of the sun. Indoors with constant light, for example with a video light, the brightness stays the same. When filming, this consistency is especially important, because constant changes to the values lead to jerky jumps in brightness that irritate the viewer.

Step 9: Backlight and Deliberate Overexposure
With backlight, it may be necessary to expose slightly brighter so that the model doesn't disappear into the shadows. This deliberate overexposure looks natural in the finished image. The image then doesn't look too bright, but correctly exposed. What remains crucial is that the correct brightness is on your main subject. If the person is correctly exposed and the background is a little too bright, that is generally better than a person who is too dark.

Step 10: Correct Small Mistakes Afterwards
If you are off by just a little, you can compensate for the mistake in image editing. However, this doesn't work indefinitely. A photo taken in pitch darkness can't be brightened arbitrarily without noise and loss of quality becoming visible. How much leeway you have also depends on your camera. The RAW format offers significantly more headroom here than JPEG and is therefore a good choice for exposure-critical shots.

Summary – Understanding Exposure: How to Use the Limits of Your Camera to Your Advantage
Exposure determines how bright or dark your image turns out. The camera can only capture a limited amount of light, and your eye sees the scene differently than the sensor does. When you decide on a main subject, expose it correctly and use your camera's measuring tools, you gain control over your image. You don't have to blindly follow fixed rules for ISO or exposure time. Bright and dark styles such as High Key and Low Key are deliberate creative tools. With a bit of experience and the RAW format, you can sensibly compensate for mistakes.
FAQ
What is the difference between overexposure and underexposure?With overexposure, the image is brighter than the camera would measure it; with underexposure, it is darker.
Do I always have to shoot at ISO 100?No. Low ISO does reduce noise, but many good pictures are also taken at higher values such as ISO 640.
How can I tell whether an image is correctly exposed?Use your camera's exposure indicator and display. A histogram additionally helps you assess the distribution of brightness.
Can I rescue photos that are too dark in image editing?Only to a limited extent. Small mistakes can be compensated for, but heavily underexposed images quickly lose quality in the process. The RAW format offers more headroom here.
Why shouldn't I constantly change the exposure when filming?Constant changes lead to jerky differences in brightness in the video, which disturb the viewer. The camera often can't keep up cleanly when readjusting.


