
Do you know the problem with the blown-out sky and a foreground that is far too dark? A single photo quickly reaches its limits with high contrast. With an HDR shot, meaning several exposures of the same subject, you get significantly more dynamic range out of the scene. So that you can then merge these images cleanly and edit them creatively, I will show you two ways in this tutorial: first, merging directly in Lightroom, then the detour via the free program HDR Efex Pro, which now belongs to the Google Nik Collection.
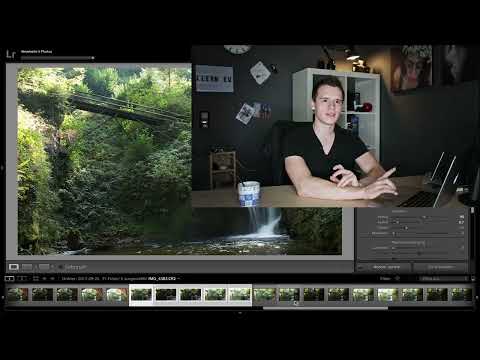
The video is only loaded from YouTube when you play it – data (including your IP address) is then transmitted to YouTube/Google. More in the privacy policy
Key Takeaways
- For an HDR you need several shots with different exposures, ideally taken on a tripod.
- Lightroom creates a new RAW file from the individual images with full editing freedom, which you can then develop as usual.
- Ghost removal (ghosting reduction) helps with moving subjects, but should not be overdone, as otherwise new artifacts appear.
- HDR Efex Pro does not work with RAW files, but requires JPEG or TIFF files. Therefore, make sure to use a consistent white balance and clean sharpening before merging.
- An HDR quickly looks flat. Therefore, set contrast deliberately, and don't overdo the style.
Step-by-Step Guide
Step 1: Select the exposure series in Lightroom
Open Lightroom and import your shots. For the example, you need one normally exposed shot, two darker images and two brighter images. Select all images of the series in your catalog by selecting them while holding down the Shift key or the Ctrl key.

Step 2: Start the HDR merge
Go to "Photo" in the top menu bar and choose "Photo Merge" and then "HDR". On a Mac, you can reach the dialog directly with the key combination Control and H; on Windows it works similarly. Lightroom then opens a window in which it calculates a preview of the HDR result.

Step 3: Set alignment and auto tone
Activate the "Auto Align" option. Lightroom then adjusts the source images to one another, which is especially helpful if you shot handheld. For a steady composition, I still recommend using a tripod. The checkmark at "Auto Tone" is also useful. It applies a tonal correction based on the entire dynamic range of the HDR. You can undo the checkmark at any time later.

Step 4: Set the ghost removal correctly
If something in the image moves, such as a person, branches in the wind or a waterfall, ghosting effects occur. The subject then looks like a double exposure. With ghost removal you can regulate the strength: none, low, medium or high. In most cases the low setting is sufficient. A setting that is too high can produce strange cut edges that look like an incorrectly stitched panorama. So try out all levels and compare the result.

Step 5: Make movement areas visible
With the overlay switch, you can display where Lightroom has detected movement. In the example, this was a hand at the upper right edge of the image that accidentally got into the frame. A strong sun flare also could not be completely prevented despite a lens hood. You simply crop such areas away later. So pay attention to the surroundings of the subject when shooting.

Step 6: Use auto tone deliberately
Without auto tone, the preview image looks like the normal exposure and at first seems disappointing. Only with the option activated does the full dynamic range become visible. You will see the difference immediately if you tick the checkbox once and then remove it again.

Step 7: Merge the HDR
Click "Merge". Lightroom calculates for a moment and then places a new RAW file next to your original images, usually in DNG format. This file contains full editing freedom. So you do not have to make any editing adjustments to the individual images before merging.

Step 8: Post-process the HDR in the Develop module
Switch to the Develop module. Here you will find the automatic tonal correction, which you can now adjust freely. For example, adjust the highlights if they look too dark or too bright. You can also crop the image to remove distracting areas such as the hand or the sun flare. Note: a crop can still be corrected at this stage, but no longer in HDR Efex Pro.

Step 9: Set the contrast for the HDR
With strong slider adjustments, an HDR image quickly looks lacking in contrast. This is because the gained dynamic range can appear flat. You can counteract this with the Blacks slider by lowering the black tones, or you can use the Contrast slider. An HDR always needs a certain amount of contrast, regardless of how extreme the dynamic range is.

Step 10: Prepare the export for HDR Efex Pro
For the second approach you need the program HDR Efex Pro. Since it cannot process RAW files, you must export the images first. In Lightroom, choose an export preset for HDR Efex Pro that saves the images as 16-bit TIFF. Alternatively, you can convert the RAW files to JPEG beforehand. Then you open the images directly in HDR Efex Pro.

Step 11: Match the white balance
Make sure that all images have the same white balance. With automatic white balance, individual shots can look noticeably bluish or reddish. Select all images and activate the "Auto Sync" option. Then set the white balance uniformly, for example to 5200 Kelvin. Alternatively, you can use the neutrally exposed image as a reference.

Step 12: Sharpen the images before merging
Sharpen the individual images before export if you want to control the sharpening yourself. That way the decision is left to you and you don't have to rely on the sharpening function of the HDR software. A moderate value is usually enough.

Step 13: Check the preview in HDR Efex Pro
After loading the images, a preview appears in which you can activate alignment. You can also check the ghost removal with a magnifier. If needed, adjust the brightness of the preview image. Then click "Create HDR". The software calculates the image, and you can then begin developing it. By the way, the crop from Lightroom is carried over.

Step 14: Choose a suitable style
HDR Efex Pro offers ready-made presets, for example for a more balanced or a more striking result. Click through the presets and decide which looks best. Afterwards you can modify each preset using the sliders, for example reducing the saturation if the image seems too colorful to you.

Step 15: Dose the tone compression
The tone compression slider is crucial, as it determines how strongly the image moves toward the HDR look. If you pull it to zero, the image looks almost like the original. The further you go to the right, the more exaggerated the rendering becomes. Look for a middle ground, because too strong an effect quickly looks unnatural. You should also not pull the structure too far to the right, as otherwise everything appears oversharpened.

Step 16: Save the finished HDR
When you are satisfied with the result, click "Save" at the bottom right. The software fully calculates the HDR and saves it either in the Lightroom library or in a location of your choice. You make that decision at that moment, depending on how you want to continue working.

Summary ??? Merging HDR Images with Lightroom and HDR Efex Pro
You can merge HDR images directly in Lightroom and then edit the result as a full-fledged RAW file. Alternatively, HDR Efex Pro offers its own interface with numerous style presets, but it requires JPEG or TIFF files. With both approaches, pay attention to alignment, ghost removal, a consistent white balance, and deliberately set contrast. With a bit of patience, you will find the style that suits your subjects and avoid the exaggerated HDR look.
FAQ
Do I absolutely need a tripod for HDR shots?No, with the "Auto Align" option in Lightroom, handheld shots can also be merged. However, a tripod ensures the best results.
Which ghost removal setting should I choose?In most cases, the low level is sufficient. Too high a strength can create cut edges that look unnatural.
Why does my HDR look so unremarkable without the auto tone?The preview then only shows the dynamic range of a single exposure. Only the automatic tone correction makes the full dynamic range of the HDR visible.
Can I still edit everything in Lightroom after merging?Yes, the new file is a full-fledged RAW file with complete editing freedom.
Can HDR Efex Pro process RAW files?No, HDR Efex Pro requires JPEG or TIFF files. You have to export the RAW files beforehand.
Why should I match the white balance?With automatic white balance, the individual images can look different. A consistent white balance prevents color casts in the finished HDR.
What happens to the crop if I do it in Lightroom?The crop is carried over into HDR Efex Pro. Correcting it afterward is no longer possible there, so you should set it carefully.
How do I avoid an exaggerated HDR look?Don't push the sliders all the way to the limit, reduce the saturation if necessary, and use tone compression in moderation. Orient yourself by what the human eye actually perceives.


