
At first glance, a modern camera looks like a cockpit full of buttons, dials, and symbols. Most of them are clearly defined, however, and once you have understood their logic, you will quickly find your way around other models too. In this guide, I go through all the important controls once: from the mode dial and continuous shooting function through ISO and shutter speed to depth-of-field preview, image rating, and lock functions. I am using the Canon EOS 5D Mark III as a reference. On your model, the position and labeling may differ, but the principle almost always remains the same.
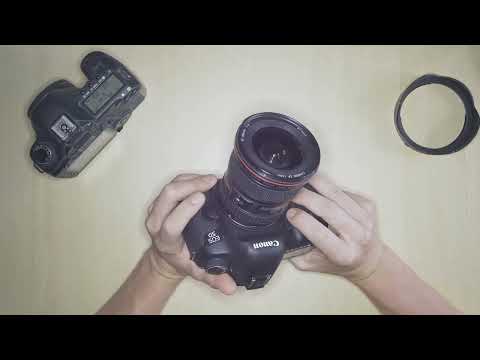
The video is only loaded from YouTube when you play it – data (including your IP address) is then transmitted to YouTube/Google. More in the privacy policy
Key Takeaways
The most important points at a glance:
- The mode dial determines how much control you take over exposure and settings yourself.
- You can access many settings via quick buttons that are shown on the display or in the viewfinder. Press the button and turn the dial.
- The continuous shooting function, the autofocus mode, and the drive mode can be controlled via the Drive button. Depending on the manufacturer, there are also quiet variants.
- ISO, shutter speed, and aperture form the foundation of exposure and should become second nature to you.
- The depth-of-field preview shows you the actual depth of field before you press the shutter.
- With the Lock button, you prevent yourself from accidentally changing the aperture.
Step-by-Step Guide
Step 1: The On/Off Switch and the Mode Dial
The on/off switch is usually clearly marked and is typically located on the top of the camera. Directly above it, you will find the mode dial on the side. Here you select the shooting mode. When you turn the dial, you switch between automatic scene modes, the semi-automatic modes, and the manual mode. You can also reach your custom modes, which you can save yourself, via this dial.


Step 2: The Quick Buttons and the Settings Menu
On the back and on the top of your camera, you will find quick buttons for the most important shooting settings. On Canon, you press one of these buttons, after which the top display and the viewfinder show which function you can currently change. One example is white balance, which is labeled WB. You adjust the value with one of the dials. White balance determines how the colors in the image look, and can thus be quickly corrected depending on the lighting situation.
On Nikon, the principle works a little differently: here you hold the button down and turn the dial at the same time. This takes a little practice, but becomes second nature surprisingly quickly.

Step 3: Autofocus and Drive Mode (Drive Button)
You set the autofocus mode using a separate button. The Drive button, on the other hand, controls how the shutter is released: as a single shot, as continuous shooting, with the self-timer, or with another delayed release. On the 5D Mark III, several continuous shooting variants are also available.
High-speed continuous shooting captures a great many frames per second and is clearly audible. Low-speed continuous shooting works more leisurely and is suitable for situations in which you need time to check. Finally, quiet continuous shooting is particularly useful when you need to remain unobtrusive, for example at a wedding in a church. You can usually tell the difference by the sound of the shutter.
Not every camera offers all of these levels. Older models like the 5D Mark II often only have continuous shooting that can be switched on and off. The speed is then somewhat lower, but the operation remains basically the same.


Step 4: ISO Button and Flash Exposure Compensation
The ISO button sets the light sensitivity of the sensor. Low values deliver clean images with little noise, while high values are intended for dark environments but bring more noise with them. You set the value by pressing the button and turning the dial. On some cameras, the ISO button is also located on the side of the body, but it is always labeled accordingly.
Flash exposure compensation is often located on the same button. It helps you set the flash brighter or darker. The flash itself is attached to the hot shoe on top of the camera. Once it is mounted, it is triggered automatically by the camera.

Step 5: Using the Display Backlight
With a dedicated button, you activate the backlight of the display. This is especially helpful in the dark so that you can read values without any trouble. By default, the backlight is switched off and goes out by itself after a few seconds. If you press the button again, it turns off immediately.

Step 6: Switching Between Shutter Speed and Aperture
On many models, the dial on top of the camera controls the shutter speed. You can tell because the value on the display changes immediately when you turn it. On simpler cameras, there is only one dial, which adjusts either aperture or shutter speed depending on the mode. In this case, you have to switch between the two functions. On Canon models, this is usually done with a button in combination with the dial. After a little practice, switching works without any problem.

Step 7: Understanding the Multifunction Button and the Shutter Release
The multifunction button is located on the top. You can freely define its function: for example, you assign a spirit level to it, which shows you in the viewfinder whether the camera is currently level. This is especially helpful for landscape shots where the horizon should be straight.
The shutter release works in two stages. A light press activates the autofocus, a firm press takes the picture. You probably already know this principle, but it is worth using it consciously because it significantly improves sharpness.


Step 8: The Depth-of-Field Preview
On the front of the camera, next to the lens, you will find the button for the depth-of-field preview. Normally, the aperture in the lens is wide open, so you see a bright image through the viewfinder. If you press the depth-of-field preview, the aperture closes to the set value. This way you can see which areas will later be rendered sharp. The effect is often only slightly visible in the viewfinder, but at heavily stopped-down values the image becomes noticeably darker and the depth of field is easier to recognize. You don't use this function constantly, but it is useful for checking sharpness and background blur in advance.

Step 9: AF-ON, Exposure Lock, and Autofocus Point
On the back there are several buttons that are important for autofocus and exposure. The AF-ON button starts the autofocus without you having to half-press the shutter release. This is practical if you want to control focus independently of releasing the shutter.
The AE lock button holds the measured exposure. This is especially helpful in automatic modes, for example when you have a bright background that would fool the camera. You lock the exposure and then pan to your actual subject.
The button on the far right is used to select the autofocus point. This works via the display with the multifunction joystick or in the viewfinder, since the same preview is displayed there.

Step 10: Menu, Info Button, and Live View
The menu button opens the camera menu, which I will go into in more detail in the next lesson. Next to it is the Info button. It turns off the display or switches between different display views. I recommend the standard view, in which all important settings are clearly displayed. A view with the spirit level shown can also be useful.
With the switch for photo and video, you change to live view mode. On some cameras, this works via a lever or a button on the mode dial. Live view mode shows you the image directly on the display, which is practical for videos and shots from unusual perspectives.


Step 11: Picture Style, Playback, Zoom, and Rating
On the left side of the camera there are additional buttons for viewing images. With the Picture Style button, you determine how your photos should look in general, for example natural or monochrome. With the playback button, you view your images. The magnifier button enlarges an image so that you can check it at one hundred percent. On some cameras the magnifier is a separate button, on others it is part of a dial.
The rating button on the 5D Mark III allows you to mark images with one to five stars. This rating is carried over when importing into software such as Lightroom. It is a practical helper for selecting important shots. At the very bottom you will find the delete button. One press is enough, after which you confirm the action.


Step 12: The Joystick, the Q Menu, and the Lock Button
The multi-function joystick is used for navigation. With the Q button you open the quick menu, select the desired setting with the joystick, and confirm it with Set. Then you adjust the value with the dial and confirm again.
If you have not opened the quick menu, the dial directly changes the aperture. To keep you from doing this accidentally, there is the Lock button. It locks the aperture so that the value cannot be changed. The display then shows Lock. To unlock it, press the button again. Note that a lens must be mounted on the camera for this.


Summary ??? Operating the Camera: All Buttons and Functions Explained Step by Step
You now have a complete overview of the most important controls of a DSLR or mirrorless camera. The mode dial, the quick buttons, the drive and ISO buttons, the exposure dial, the depth-of-field preview, the rear buttons, and the lock function all work together. If you proceed step by step while trying things out and consciously press each button once, you will feel confident operating the camera after a short time. This makes your camera not more complicated, but more understandable.
FAQ
How do I find the most important buttons if my camera looks different from the one in the video?The position and labeling can differ with every manufacturer and model. However, the principle usually stays the same. Check your camera's user manual, where you will find an overview of all the buttons.
Why do I see hardly any difference in the viewfinder when using the depth-of-field preview?With the aperture wide open, the image in the viewfinder is very bright. The effect is mainly noticeable at strongly stopped-down values. In addition, the image changes only slightly, which is why the function sometimes seems inconspicuous.
Can I also lock other settings with the Lock button?The Lock button mainly prevents you from accidentally changing the aperture with the dial. Which settings exactly are locked depends on the model.
Why does operation work differently on Nikon than on Canon?On Canon, you press the quick button and then turn the dial. On Nikon, you hold the button down and turn at the same time. Both variants lead to the same result.
Do I need the rating function on the camera?It is not strictly necessary. However, it helps you quickly mark important images. The rating is later carried over in image editing programs such as Lightroom.


