The exposure metering is an essential part of photography that is often overlooked. It is important to understand how your camera perceives light and how this perception can influence your photos. In the following sections, you will learn why exposure is sometimes not optimal and how you can counteract it. This will elevate your photography to a new level.
Key Insights
- Cameras measure light in black and white and aim to calculate an average brightness of 50% gray.
- Exposure errors often occur when the camera misinterprets a scene.
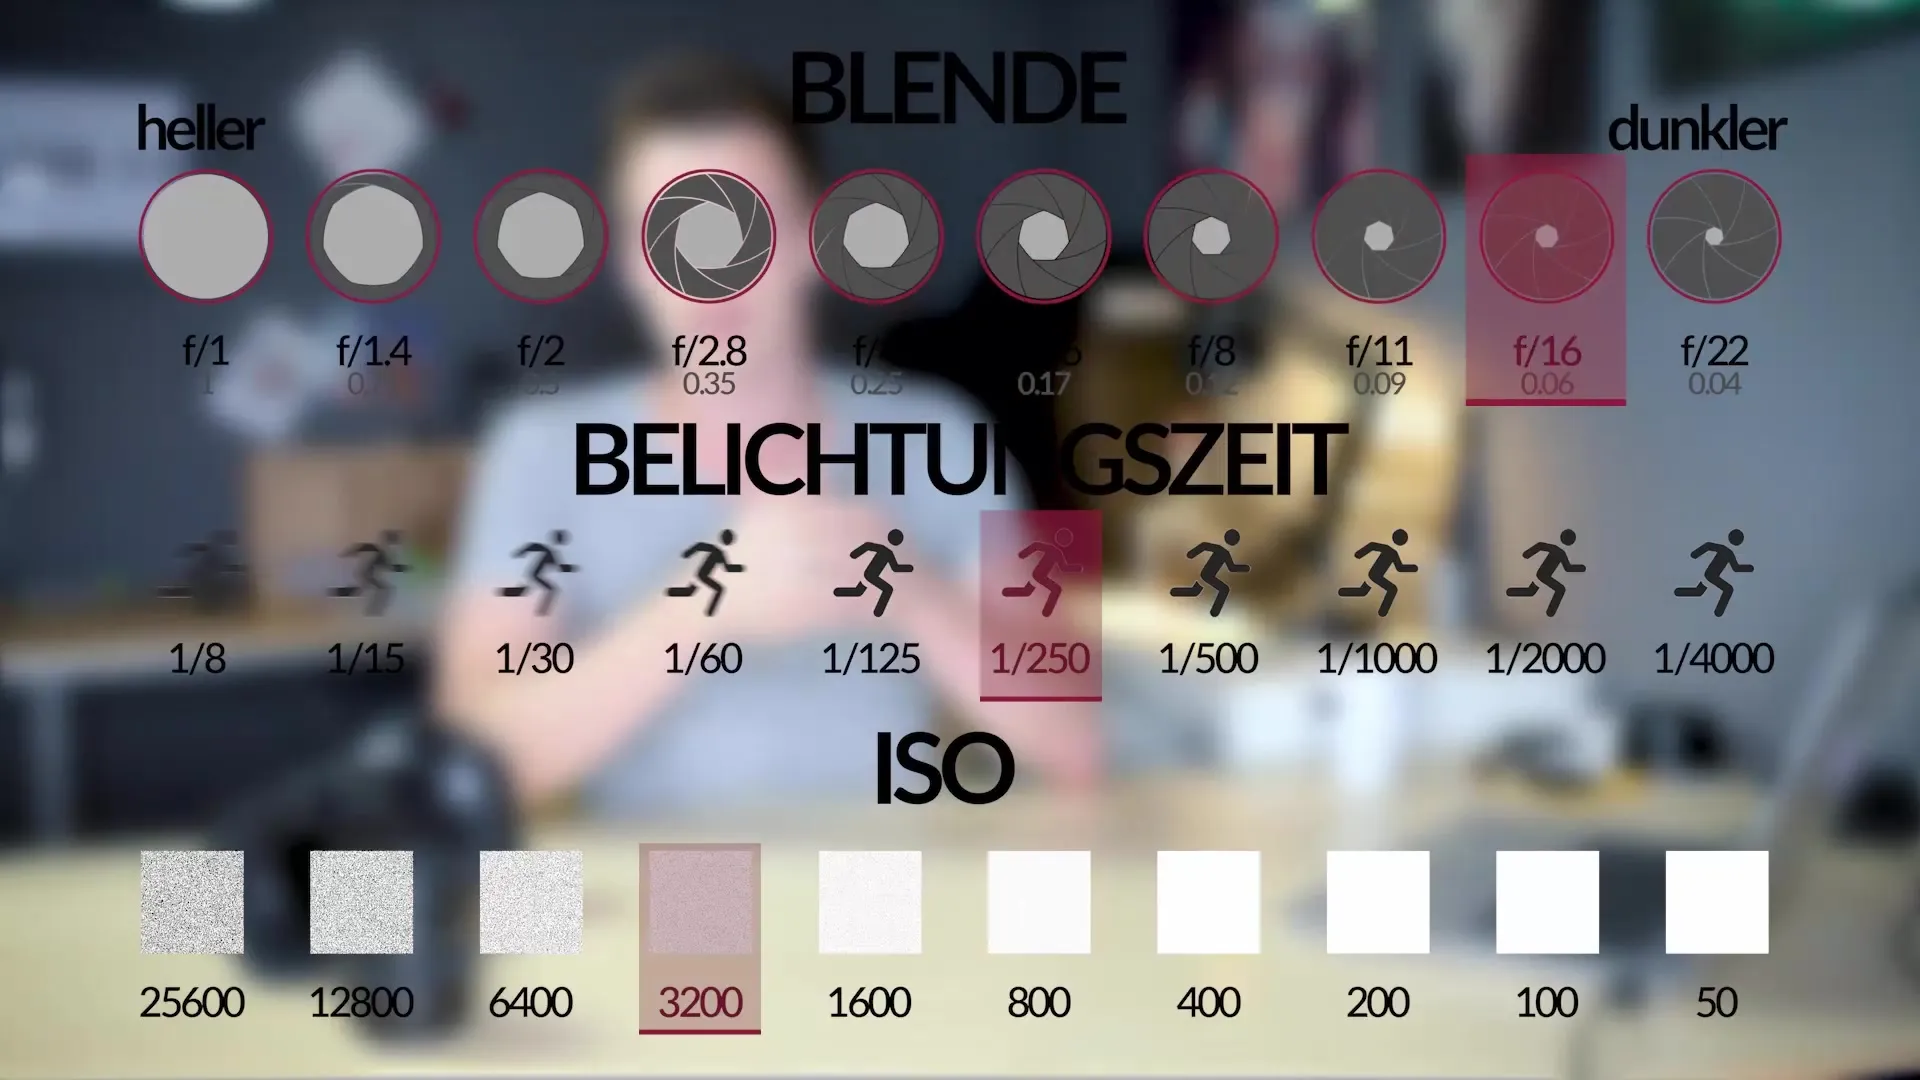
- Aperture stops (f-stops) significantly influence the brightness of the image and are crucial for exposure control.
Step-by-Step Guide to Exposure Metering
1. Understanding how light is perceived
The camera sees light differently than the human eye. It first conducts an exposure measurement to perceive brightness. The camera takes into account all the light falling on the sensor and evaluates it solely in shades of gray. This means that your camera sees everything in black and white.

2. The goal of exposure metering: 50% gray
The camera aims to calibrate this monochrome light to a value of 50% gray. This is often considered the perfect base for correct exposure. If you take a picture of something gray or close to 50% gray, it will typically be well-exposed.
3. Challenges with different surfaces
However, if you photograph a dark or light surface that lacks a gray tone, it can lead to exposure errors. For example, a light gray wall may be perceived by the camera as nearly white, resulting in overexposure of the image.
4. Example of exposure errors
A concrete example is photographing a white wall. If this wall lacks textures and appears purely white, the camera may perceive it as too dark, leading to an disproportionately dark image.
5. Taking corrective measures
To avoid such exposure errors, it's important to occasionally make manual adjustments. Start by switching to the manual mode of your camera. Although it may be challenging at first, gradually use corrections within automatic exposure metering to achieve better results.
6. Understanding f-stops
An important aspect of exposure metering is the f-stop. This is a unit that is responsible for brightness. One f-stop doubles the brightness or reduces it to half the current value.
7. The significance of f-stops
The values for aperture, shutter speed, and ISO all work together. One step up (increase) doubles the brightness, while one step down (decrease) halves it. This may seem complicated at first, but it quickly becomes clearer as you try it out.
8. Applying f-stops
For example, if you adjust the shutter speed to make it one step faster, the image becomes darker. Conversely, if you extend the shutter speed, it becomes brighter. The same is true for the aperture: opening the aperture lets more light into the camera, while closing it makes it darker.

Summary – Measuring light and exposing correctly: How exposure metering works in your camera
In this guide, you have learned how exposure metering works in your camera. You have recognized the challenges that arise when the camera attempts to measure light and how you can manually intervene to achieve a correct exposure.
Frequently Asked Questions
How does exposure metering work in a camera?The camera measures the light and attempts to achieve an average brightness of 50% gray.
Why do exposure errors occur?Exposure errors occur when the scene is not correctly perceived by the camera, such as with bright or dark surfaces.
What are f-stops?F-stops are units that determine how much light enters the camera through the aperture and affect brightness.
How can I manually adjust my exposure?You can work in the manual mode of your camera and actively adjust the shutter speed and aperture to regulate brightness.
Can all cameras manage exposure metering?Most modern cameras have basic exposure metering functions, but accuracy may vary.


