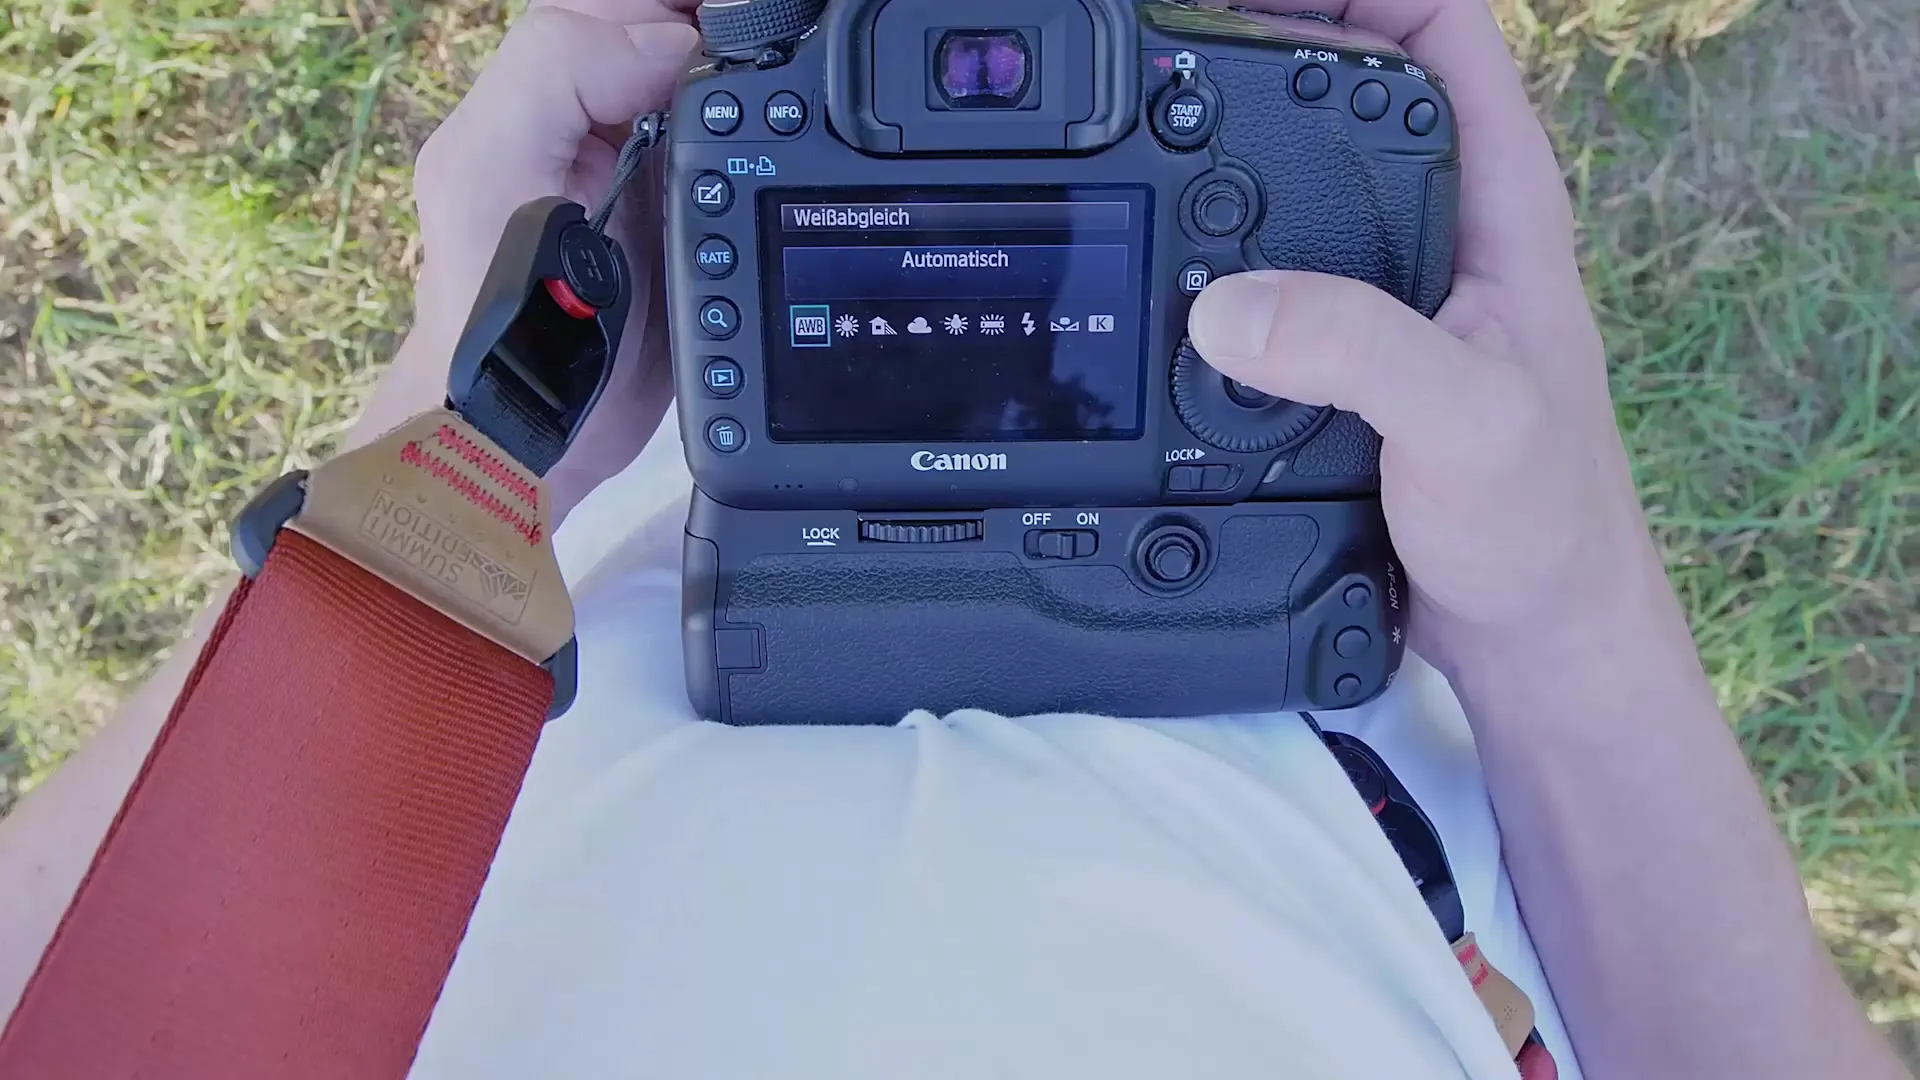
The white balance is one of the crucial settings in photography that can make the difference between ordinary and outstanding images. When you consider the various light sources, you quickly notice that light does not always look the same. A neon tube provides cool, bluish light, while a light bulb emits a warm, orange color. To recognize these differences and respond accordingly, it is important to set the white balance correctly.
Key Insights
- The white balance significantly affects the color temperature of your images.
- Automatic white balance is reliable, but it can fail in certain situations.
- The Kelvin scale helps you determine the color temperature of light.
- Manual settings allow for creative control over the light.
- RAW photography offers you greater flexibility in post-processing.
Step-by-Step Guide
Step 1: Understand what white balance means
First, it is important to understand what white balance actually means. Essentially, it is about balancing the color of light in the image so that white really looks white. Different light sources affect color representation—from orange light bulbs to bright blue neon tubes. These differences must be taken into account in photography.
Step 2: The automatic white balance
Most modern cameras are equipped with automatic white balance that works excellently in many cases. This feature detects the lighting conditions and adjusts the white balance accordingly. Despite its reliability, there are moments when automatic white balance does not deliver the desired results. Caution is advised here.

Step 3: Choose presets
In addition to automatic white balance, your camera offers various presets for different lighting conditions, such as sunlight, shade, and artificial light. These modes are based on predefined Kelvin values. This way, you can adjust the camera for the current lighting conditions without having to worry about complicated calculations.

Step 4: Make manual adjustments
Some cameras allow you to set the white balance manually. This method can be very beneficial as you can try out different Kelvin values. A value of about 5500° Kelvin is ideal for sunlight and provides a more natural color rendition. Although it takes a bit more time, it does not limit your creativity if you want to experiment with the white balance.
Step 5: Understand the Kelvin value
The Kelvin scale is crucial for understanding light temperature. Higher Kelvin values produce a redder light, while lower values create cooler, bluer tones. Here, you can experiment with different settings to achieve the desired mood or atmosphere. The right manipulation of these values can elevate your photography to the next level.
Step 6: Utilize creative possibilities
If you want to get creative, you can play with the Kelvin values. A low value creates cold, mysterious images, while higher values can leave a warm, summery impression. These techniques are particularly useful for special subjects like abandoned places or portraits in sunlight. Experiment and discover which effects you like best.
Step 7: Use automatic settings when necessary
If you feel too unsure with manual settings, automatic white balance can often be a very good solution. You can simply set the camera to that and leave the rest of the work to it. If the result is not satisfying, there is still the possibility for manual adjustments—either during photography or when post-processing RAW files.
Step 8: RAW shots for more flexibility
Shooting in RAW format gives you the greatest flexibility when it comes to white balance. Even if the white balance is preset in the camera, you can adjust it afterwards in an editing program without suffering any loss of quality. This flexibility is particularly advantageous if you are unsure about the lighting conditions or simply want more control over the final result.
Summary – White Balance in Photography: A Guide for Better Images
The white balance is an essential setting in photography that ensures the color accuracy of your shots. With a solid understanding of the various light sources and the Kelvin scale, you can learn how to set the white balance both automatically and manually to create impressive photos. Experiment with the settings, and dare to try out the RAW format for maximum creative control.
Frequently Asked Questions
How does white balance affect color representation?White balance corrects the light color in photos so that white appears real and colors are rendered accurately.
When should I use automatic white balance?Automatic white balance is ideal for most situations, especially with changing lighting conditions.
How can I set the Kelvin value on my camera?Depending on your camera model, you will find the option to set the Kelvin value in the menu under the white balance options.
What is the advantage of RAW photography?With RAW shots, you can adjust the white balance in post-processing without degrading the image quality.
Can white balance be corrected in post-processing?Yes, with RAW files, white balance can be optimized later without quality loss.


