
A portrait doesn't end at the chin or the collarbone. As soon as you want to show a person's posture, clothing or surroundings, the full-body shot is the strongest tool. It tells you more about the person than a tight crop, but it also demands more care from you. Framing, perspective, light and the model's movement decide whether the image works or merely documents.
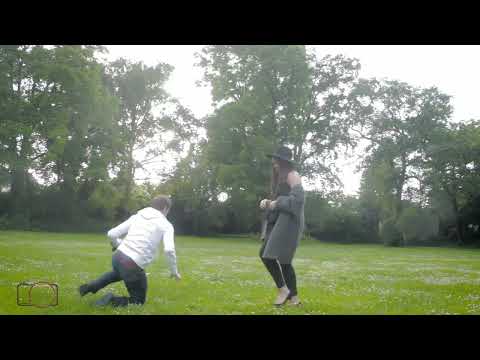
The video is only loaded from YouTube when you play it – data (including your IP address) is then transmitted to YouTube/Google. More in the privacy policy
Below, I'll show you the complete workflow: from choosing the framing, through the camera settings and working with the model, to editing in Lightroom and Color Efex Pro.
Key Takeaways
- A full-body portrait needs a deliberately chosen framing. Cropped feet look like an oversight unless they are clearly left out or clearly shown.
- A lower camera position brings background into the image and prevents you from seeing only sky and ground.
- Backlight changes the brightness drastically. Exposure compensation is your most important tool here.
- Movement and facial expressions look more authentic when the model actually performs them and doesn't just hint at them.
- With continuous autofocus and burst mode, a moving subject stays sharp.
- In Lightroom, the whites slider, shadows, white balance and straightening with the Transform tool help before you start working with filters.
Step-by-Step Guide
Step 1: Deliberately Define the Framing
Many photographers place the person in the center of the frame and press the shutter. The result is often lacking tension, because the eye finds no path through the image. Before you press the shutter, think about what the image should tell, and align the framing accordingly.

Pay particular attention to the feet. A crop at the joints looks unintentional and is distracting. So decide either on a framing in which the feet are completely in the image, or on a clear crop, for example around the middle of the thigh. This difference is clearly recognizable and looks deliberately chosen.

Step 2: Shift the Perspective Downward
If you keep the camera at eye level for a full-body shot, you often have too much sky and too little background in the image. So go lower with the camera. This shifts the framing, and the surroundings move more strongly into the foreground of the image.

You can also push the perspective even further. To do this, lie on the ground and shoot from there. It's strenuous, but it clearly changes the effect of the person. The model looks bigger and more present.

Step 3: Deal with Backlight Deliberately
Backlight creates a completely different image effect, because the light falls on the subject from behind. As a result, the subject can quickly become too dark or too bright. Check your result on the display and correct the exposure. Exposure compensation is the quickest way to restore the balance between subject and background.

If you shoot in portrait orientation, you often have to get a bit closer to the model so that the person comes across well in the image. Don't go quite so low to the ground, but look for a middle path between perspective and image effect.

Step 4: Create Dynamics with the Model
After the first series, the image quickly looks static. Then ask the model to move. In the example shown, the person walks directly toward the camera. This creates depth, tension and a sense of direction.

With emotions, make sure they look genuine. If a person is supposed to look angry, they also have to behave that way. A feigned face and feigned gestures are immediately noticeable in photos. Talk with the model about the desired mood and give them time to settle into it.
Step 5: Setting the camera for moving subjects
For a subject that is moving toward you, you need a tracking autofocus. On Canon, this mode is called AI Servo; with other manufacturers you will usually find it as AF-C. The camera then keeps the focus on the subject and continuously readjusts for as long as it is moving.
In addition, you activate the continuous shooting function. For each image in the series, the camera briefly refocuses. This way, ideally, you get consistently sharp shots. Do not choose an aperture that is too wide open, because the smaller the area of sharpness, the harder it is for the camera to accurately hit the moving subject.

Step 6: Readjusting between shots
With full-body shots, photography is teamwork. Look at the images together with the model on the display. Often the other person notices details that you missed. Suggestions such as different shoes or a changed posture can also noticeably improve the image.
A good example is the head: if the model raises their head slightly, more light falls on the face, and the shot looks less dark. Also pay attention to the arms and the overall posture before you trigger the next series.

Step 7: Starting the basic editing in Lightroom
After the shoot, the editing begins. In an image with backlighting, the sky is often heavily overexposed. Therefore, pull the Whites slider down until details in the clouds and the trees come back. Make sure that no areas turn completely white. Lightroom cannot recover information that is not present in the image.

Then raise the shadows slightly so that the image gets a bit more structure. You then bring the contrast back with the Blacks slider. Also adjust the white balance so that the skin tones look natural. In the example, temperature and tint are at about 5500 Kelvin and 0, respectively.
Step 8: Straightening the horizon
A crooked horizon is immediately noticeable. In the Transform section, you can use the angle tool. Drag it along the horizon line, and Lightroom aligns the image. Alternatively, you rotate the image by hand until it looks straight.
With the Auto button in the Transform tool, Lightroom performs the correction automatically. The function delivers a good result for most photos, but crops the image slightly. Therefore, always compare the versions with and without Auto.

One final note: Tilted shots can be a deliberate stylistic device. In that case, however, the tilt should be so pronounced that nobody thinks it was an oversight. A slight angle, by contrast, quickly looks like a mistake.
Step 9: Handing the image over to Color Efex Pro
For further filters, you use the Color Efex Pro plug-in from the Nik Collection. According to the video, this is available for free. In Lightroom, right-click the image, select "Edit In" and then Color Efex Pro.
Lightroom creates a copy with your previous settings. The original remains untouched. The filters in Color Efex Pro work destructively, which means you can no longer edit them directly in Lightroom.

Step 10: Using filters purposefully and with restraint
In Color Efex Pro, numerous filters are available to you. Sort them by purpose, for example by portrait, and try them out at your leisure. The Contrast Only filter provides pleasant contrast. However, reduce the strength until the image remains natural.
The Dynamic Skin Softener seems helpful at first glance, but it softens the face heavily. As a result, the skin texture disappears. So use it only very sparingly.

Step 11: Adding a vignette to guide the eye
A vignette draws the eye to the model and strengthens the impact of the image. You can choose the shape, for example round or square, and adjust the size. Also reduce the opacity so that the vignette does not look too extreme.

Step 12: Adjusting the Color Mood with the Color Stylizer
The Color Stylizer is well suited for a sunset look. Select the desired color from the image, for example a warm yellow tone, and apply it as a color style. Since the color can quickly dominate the image, reduce the strength of the effect until the look appears harmonious. Also check the saturation so that colors in the image don't disappear.

Step 13: Saving the Edit and Bringing It Back into Lightroom
Once the result is satisfactory, click Save at the bottom right. Color Efex Pro briefly processes the image and hands it back to Lightroom. There you will find the finished version next to your original. Finally, compare both versions side by side to consciously assess the changes.

Summary ??? Photographing Full-Body Portraits: Framing, Perspective, and Editing in Lightroom
A good full-body portrait is the result of deliberate decisions. Choose the framing so that the feet are either clearly in the picture or clearly cropped. Get lower with the camera to include the background. In backlit situations, use exposure compensation and bring the model into the picture with movement and genuine facial expressions. With tracking autofocus and burst mode, you ensure sharp shots. In Lightroom, you correct brightness, white balance, and horizon before adding mood and color in a targeted way with Color Efex Pro. The path from the shoot to the finished image is easy to plan, and with a little practice you'll succeed faster than you think.
FAQ
How do I avoid cut-off feet in full-body shots?Either include the feet completely in the picture or crop clearly, for example around the middle of the thigh, but not tightly at the joints.
Why should I change the perspective for full-body shots?A lower perspective brings more background into the picture and prevents only sky and ground from being visible.
Which camera setting do I need for moving subjects?Use tracking autofocus, called AI Servo on Canon, and activate the burst mode function.
What should I do if the subject is too dark or too bright in backlight?Correct the exposure directly on the camera or later in editing using exposure compensation.
How do I straighten a crooked horizon?In Lightroom, you can use the angle tool in the Transform section or use the Auto function.
Does a deliberately tilted image make sense?Yes, but the tilt should be pronounced enough to be recognizable as a deliberate stylistic device.
Where do I find the Upright function if I use an older Lightroom version?In older versions, you will find the Upright function under Lens Corrections.
How do I transfer an image from Lightroom to Color Efex Pro?Right-click on the image, select Edit In, and then choose Color Efex Pro.
Does Color Efex Pro change my original image in Lightroom?No, Lightroom creates a copy with your previous settings; the original remains unchanged.


