
Many photographers only use the buttons on the camera body and ignore the camera menu. Yet it contains a large part of the possibilities your camera offers. Here you will find image quality, flash control, white balance, picture styles and Live View. If you know where to find what, you will save a lot of time in the field.
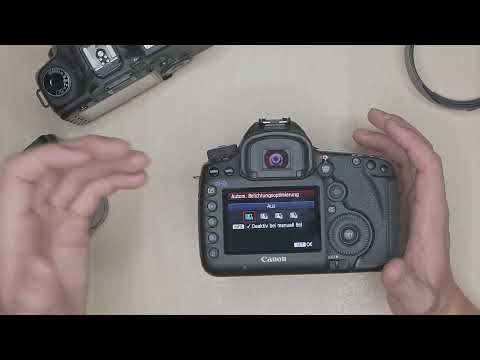
The video is only loaded from YouTube when you play it – data (including your IP address) is then transmitted to YouTube/Google. More in the privacy policy
This guide takes you through the most important menu items. You will learn how to move around the menu, why some options appear grayed out, and which settings you can sensibly adjust for your work.
Key Takeaways
The camera menu is organized into tabs and can be operated with the Q button and the SET button. Which options are available depends on the shooting mode. In automatic mode, the menu remains heavily restricted. For serious work, image quality should be set to RAW. The review time and the beep are convenience functions that you can set according to your preferences. Lens correction only applies to JPEG files. For RAW files, it changes nothing. Mirror lock-up is suitable for landscape shots, but it is rather a hindrance for portraits. You should preferably control noise reduction and highlight tone priority in image editing so that you keep full control.
Step-by-Step Guide
1. Opening and Navigating the Menu
You reach the camera menu via the menu button. Navigation is done with the multi-controller or the arrow keys. With the Q button, you go directly to a quick menu. There you see the most important settings at a glance, and at the bottom of the screen an explanation is shown of what the currently highlighted option does. With the SET button, you open the submenu in which you change the setting.
The menus are divided into tabs, which, depending on the model, are located at the top or on the left of the display. Each tab contains several options with their own sub-items. Once you have clicked through everything, you will quickly find everything again.

2. Understanding Restrictions Depending on the Shooting Mode
Not every option is available in every mode. In shutter priority mode, the aperture setting is missing because the camera calculates the aperture automatically. It is similar in program auto mode, where you cannot change the exposure values directly. The most restricted is fully automatic mode, also called Green mode. There, apart from the continuous/single shooting function, hardly any settings can be made. Grayed-out options therefore indicate that the current mode does not allow the function. However, via the menu button you can access the basic settings in any mode.

3. Setting the Image Quality
In the Image Quality tab, you set the file format. You can choose between RAW and JPEG. RAW files contain the unprocessed sensor data and give you the greatest latitude for later image editing. In addition, there are smaller RAW sizes with fewer megapixels. With JPEG, various quality levels and resolutions are available to you. You can also save RAW and JPEG at the same time. If you want to work carefully, RAW remains the best choice.

4. Adjusting Review Time and Beep
The review time determines how long the camera shows your image on the display after the shot. You can turn it off so that the camera returns directly to shooting. But you can also choose 2, 4 or 8 seconds or set the display to Hold. Then the image remains visible until you press another button. In practice, two seconds are usually enough to assess the exposure. To check sharpness, you are better off looking at the image more closely in playback.
The beep tells you when the autofocus has focused on a point. This is handy when you are working with the camera in your hand. At events such as weddings, where noises are disruptive, you can turn the sound off.

5. Controlling Shutter Release Without a Memory Card
With this option, you determine whether the camera may release the shutter without a memory card inserted. If you set it to On, the shutter button works even without a card. However, the image is then not created, and you often only find out after the shot. That is why I recommend setting the option to Off. The camera then blocks the shutter release and shows you a warning that no memory card is inserted. This way you avoid annoying failed shots.

6. Activating Lens Corrections
Lens aberration correction sounds complicated, but it is actually a fairly simple function. It corrects lens distortion, meaning warped lines, vignetting, meaning darkened image corners, and chromatic aberration, meaning color fringes. Whether correction data is available depends on the lens. These errors occur more frequently with wide-angle lenses and in backlit situations. For JPEG files, the correction is applied directly in the camera. RAW files remain unchanged, which is why the setting has no effect there. If you shoot JPEG, you should definitely activate the correction.

7. Controlling an External Flash via the Camera
If you mount a Speedlight or another TTL flash on the hot shoe, you can configure it directly via the camera menu. In the menu External Speedlight Control, you switch the flash firing on or off. You also determine the TTL metering, for example multi-zone metering, and the zoom of the flash. On Auto, the flash head automatically adapts to the focal length.
You also decide whether the flash fires on the first or the second shutter curtain. With movement, for example when a subject is walking, the second curtain is usually the more natural choice, because the flash then fires at the end of the exposure. In addition, there is high-speed sync, with which you can use flash even with short shutter speeds. Flash compensation makes the flash brighter or darker. In manual mode, you control the power entirely yourself.

8. Using Mirror Lock-Up for Landscape Shots
Mirror lock-up flips the mirror up before the actual shot. This reduces vibrations that can be caused by the mirror movement and lead to camera shake. This function is especially helpful for landscape and long-exposure shots. You also set a delay, for example two seconds, so that the vibration subsides before the shutter opens.
For portraits or spontaneous shots, the function quickly becomes annoying because you first have to wait for the mirror. Remember to switch the option off again when you no longer need it.

9. Setting Exposure Compensation and ISO Sensitivity
You make the image brighter or darker with exposure compensation, either from the menu or via the second page of the quick menu. This is especially useful when the automatic mode misjudges a subject in snow or in a very dark environment.
For ISO sensitivity, you can choose a fixed value or define an Auto ISO range. If you set, for example, 100 to 400, the camera stays within this range and does not raise the ISO value so far that image noise occurs. In addition, you can set a minimum shutter speed. The camera then follows this value in automatic mode and raises the ISO value so that the shutter speed does not become too long. Depending on the model, the camera can also determine the minimum speed automatically based on the focal length.


10. Setting Automatic Exposure Optimization, White Balance, and Color Space
Automatic exposure optimization makes subsequent brightness corrections to your image. I recommend turning it off and doing the editing yourself on the computer. That way you keep control over the result.
White balance works similarly to the camera's basic setting. You choose a preset such as Daylight, Cloudy, or Artificial Light. The Custom White Balance function allows you to use a reference photo of a neutral surface, from which the camera calculates a value. However, this is time-consuming. To get started, the presets are enough, and you handle the final correction in post-processing. With white balance correction, you can additionally shift toward green, blue, magenta, or red. This function has a very strong effect, so you should approach it carefully. With the Delete function, you reset it back to zero.
For color space, sRGB is the right choice for most applications, especially for images that are published online. Adobe RGB offers a larger color space and only makes sense if you are working specifically for print and adapt your workflow accordingly.


11. Choosing Picture Styles and Creating Your Own Styles
Picture Styles determine how the camera renders colors, contrast, sharpness, and saturation in JPEG images. With RAW files, they only affect the preview on the display. The file itself remains unchanged. With the Monochrome style, you see the preview in black and white, but the RAW file still contains color. So you can freely convert it to black and white later on the computer.
The standard styles Portrait, Landscape, and Neutral give you a quick start. However, you can also create your own styles, for example with more sharpness and contrast if you shoot high-contrast scenes. If you want maximum flexibility in grading when filming, you choose a flat style with low sharpness, contrast, and saturation.


You will also find noise reduction in this section. You can activate it automatically or permanently for long exposures and high ISO values and choose the strength. The same applies to Highlight Tone Priority, which affects brightness gradations in the image. Both functions work directly in the camera. If you want to keep control, you turn them off and handle this in image editing.


12. Setting Up Live View and Shooting via the Display
Live View shows you the subject directly on the display. The autofocus often works more slowly than through the viewfinder, and reflections on the display are more disruptive. That is why I recommend using the viewfinder for most shots.
In autofocus mode, you choose between Live mode, Live mode with face detection, and Quick mode. Quick mode uses the classic phase-detection autofocus and is significantly faster, but you do not see a live image while focusing. Under grid display, you can overlay guidelines for composition, such as a rule-of-thirds grid or diagonals. The 3:2 aspect ratio uses the full sensor. With this setting, you keep the most options for cropping later.
With exposure simulation, you can see in manual mode how bright the image will be. Leave it switched on at the beginning so that you can assess your settings directly. Silent live shooting reduces shutter noise, and the metering timer determines how long the exposure is stored. It ranges from 4 seconds to 30 minutes.


Summary ??? Understanding the Camera Menu: Settings and Functions at a Glance
The camera menu offers you many ways to control your photography in a targeted manner. You now know how to navigate using the Menu, Q, and SET buttons and understand why some options are not available in certain modes. Image quality set to RAW, lens correction for JPEG, targeted flash control, and mirror lock-up for landscape shots are among the most important adjustments. With ISO, exposure compensation, and white balance, you have seen how to set limits and avoid mistakes. Picture Styles, noise reduction, and Live View round out the picture. Try out the settings at your leisure, and you will quickly find out which combination suits your style.
FAQ
Why are some menu options grayed out?They are not available in the current shooting mode, for example the aperture in Aperture Priority or almost all options in Full Auto.
Should I set the image quality to RAW or JPEG?For later editing, RAW is better because it offers more latitude for brightness, color, and white balance. JPEG is suitable when you need finished images quickly.
Why doesn't lens correction work on my RAW images?The correction is not applied directly to RAW files, only to JPEG shots. The RAW file remains unchanged, but you can apply the correction later in image editing.
Should I activate noise reduction in the camera?If you want to keep control over the result, it is better to leave it switched off and handle noise reduction in image editing with targeted tools.


