A photo is basically a single moment. A video, on the other hand, consists of many moments one after another, and that is exactly where the difference in lighting lies. What works when photographing with a studio flash can quickly lead to jumping brightness, flickering, and unsteady transitions in moving images. If you are dealing with video lighting, you therefore have to think differently than in photography.
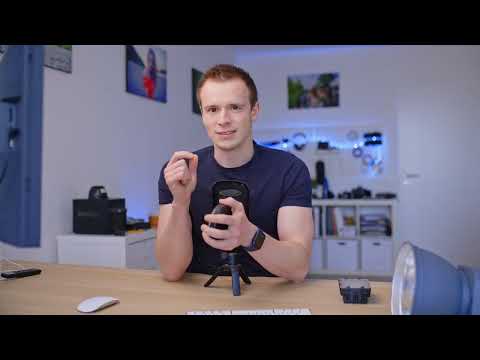
The video is only loaded from YouTube when you play it – data (including your IP address) is then transmitted to YouTube/Google. More in the privacy policy
In this guide, you will learn why you should rely on constant continuous light, how frame rate and exposure time are related, when an ND filter is the right choice, and how to avoid flickering light sources. You do not need any prior knowledge of camera controls, just the willingness to consciously plan your lighting situation before the shoot.
Key Takeaways
- The light when filming must remain as constant as possible, otherwise brightness and light direction change during the recording.
- Flash is unsuitable for video because it lights up for far too short a time. You need continuous light.
- The exposure time depends on the frame rate, typically 1/50 second at 25 fps and 1/60 second at 30 fps.
- ND filters reduce the amount of light without you having to change the exposure time. In strong daylight, they are indispensable.
- Flickering is caused by the alternating current power grid. A suitable exposure time, video lights, and, if necessary, post-processing help you avoid it.
Step-by-Step Guide
1. Ensure Consistent Light
Start by asking whether the light changes during your recording. Even a passing cloud or a step into the shade can make your video get darker or brighter over time. Even if you have set the camera manually, the result will then not remain constant. In photography, something like this is hardly noticeable in a single image, but in film it is noticeable immediately.
Also pay attention to the direction of the light. If your light source is fixed and you move around your subject with the camera, the shadows change constantly. A fixed setup with a consistent light direction makes your work much easier.

2. Use Continuous Light Instead of Flash
A classic studio flash fires for only a tiny fraction of a second, often around 1/3000 second. For a photo that is completely sufficient, but for a video it is too little, because the camera exposes continuously during recording. Therefore, rely on continuous light, that is, video lights or other light sources that shine evenly throughout the entire recording.
Continuous light is the first major difference from photography and the actual reason why video lamps exist in the first place.

3. Set the Frame Rate
Before you work with exposure, you need to set the frame rate. 24, 25, or 30 frames per second are common. Which one you choose depends on your project. Many creators prefer 30 fps unless something special is planned, such as slow motion or a cinematic look at 24 fps.
It is best to decide during the planning phase. The frame rate directly determines which exposure time you have to work with, and this decision in turn affects the amount of light and the flicker behavior.

4. Choose the Exposure Time to Match the Frame Rate
For natural-looking motion, there is a simple rule of thumb: The exposure time should be about half as long as the frame rate. At 30 fps, you therefore work with 1/60 second, and at 24 or 25 fps with 1/50 second. The reason is that the human eye also perceives fast movements as slightly blurred. A small amount of motion blur therefore ensures smooth and natural moving images.
Do not choose the exposure time arbitrarily, but deliberately, because it affects not only the look but also the question of how much light you need.

5. Adjust the Light Intensity to the Exposure Time
Since you are filming with a relatively long exposure time, much less light reaches the sensor than with a short shutter speed. That is why video lamps are generally not as powerful as studio flashes. A very powerful lamp does little for you if it forces you to shorten your exposure time or to screw on a filter that reduces the light again.
Dim the light or adjust the distance so that you get a correctly exposed image with your desired shutter speed and aperture, without your subject being overexposed.

6. Working with an ND filter in strong daylight
Outdoors, it can happen that even with the aperture closed to f/22, too much light reaches the image. Then you have no choice but to shorten the shutter speed, which, however, looks unappealing. The solution is the ND filter, also called a neutral density filter. You can think of it as sunglasses for the camera: it darkens the image without changing the colors.
Make sure you choose a neutral filter. Many classic sunglasses tint the image, and that is exactly what you usually want to avoid when filming. A good ND filter ensures that you can film with your desired shutter speed, even when it is very bright outside.

7. Choosing the right type of filter
ND filters come in different variants. Some cameras have an internal ND filter that can be slid in front of the image sensor, regardless of the lens used. However, this convenience is mostly found in high-priced cinema cameras, which often cost around 5,000 euros and more.
For most cameras, you will opt for screw-on filters that are attached to the front of the lens. There are fixed strengths such as ND2, ND4 or ND8. A variable ND filter is practical because you can adjust the darkening continuously with a rotating ring. This is especially helpful when the lighting conditions change over the course of the shoot.

8. Assessing the quality of the filter
Cheap and expensive filters differ noticeably. Pay attention to several points: How strongly does the filter shift the colors? Do reflections or light spots, so-called flares, occur? Is the image darkened evenly, or do the corners become darker than the center of the image? High-quality filters usually deliver better results here, similar to lenses, where more expensive models generally produce sharper images.
You don't have to buy the most expensive filter right away, but you should make a conscious decision, because a bad filter can significantly degrade your footage.

9. Combining filter, aperture and shutter speed
The ND filter only shows its strength in combination with your other settings. In bright light, you can screw on the filter, leave the shutter speed at 1/50 or 1/60 of a second and open the aperture to achieve a shallow depth of field. Especially for wide-open shots, this is a big advantage.
If it is still too bright despite the filter, you will eventually reach the limit of f/22. Then you must either use a stronger ND filter or change the lighting situation through shade and other measures. A sun sail is an option, but in everyday practice it is usually hard to implement, for example when shooting a wedding report.

10. Recognizing and avoiding flicker
Many light sources flicker when filmed with an unfavorable shutter speed. The reason lies in the alternating current grid, which makes the brightness of lamps fluctuate at a certain frequency. Depending on the shutter speed, the camera perceives this fluctuation to different degrees. Standard LEDs are particularly susceptible, as they are often intended more for decoration and were not designed for filming.
The most important adjustment is the correct shutter speed. With 30 fps and 1/60 of a second, or with 24 or 25 fps and 1/50 of a second, flicker is avoided with most light sources. This doesn't work for slow-motion footage; there, only a flicker-free video light helps.

11. Emergency solutions for difficult lighting situations
You can't always swap out lamps. When shooting a report on location, it is often impossible to switch off the existing light sources. Then a small experiment is worthwhile: switch between 1/50 and 1/60 of a second or play slightly with the shutter speed, without straying too far from this value. Sometimes the flicker disappears that way.
In the worst case, programs for post-production correction can help, but this is laborious and does not always work reliably. Even for slow motion under artificial light, this is a demanding task. A flicker-free video light therefore remains the safest solution.

Summary ??? Setting Up Video Lighting Correctly: Continuous Light, Shutter Speed, and ND Filters
When filming, what matters most is that your light stays constant and matches your camera settings. Continuous light replaces the flash, the shutter speed depends on the frame rate, and the ND filter protects you from too much daylight. Also pay attention to flicker, because it can be brought under control with the right shutter speed, suitable video lights, or, as a last resort, through post-processing. If you keep these points in mind, your videos will look more professional and significantly smoother.
FAQ
Why isn't a studio flash enough for videos?A flash fires for only a tiny fraction of a second, while the camera exposes continuously when filming, which is why you need permanently lit light.
What shutter speed should I use at 30 fps?At 30 frames per second, you usually work with 1/60 second, and at 24 or 25 fps with 1/50 second.
What exactly does an ND filter do?An ND filter reduces the amount of incoming light without changing the colors, so you can film with the desired shutter speed even in very bright daylight.
Where does the flickering of lamps come from?The flickering is caused by the alternating current grid, which makes the brightness of light sources fluctuate, and the camera makes this visible depending on the shutter speed.
Can I avoid flicker without new lamps?Yes, it often helps to adjust the shutter speed slightly, for example by switching between 1/50 and 1/60 second.
Why are standard LEDs often unsuitable for filming?Many LEDs are intended more for decoration and therefore flicker heavily, while video lights are specially developed for filming.


