A beautiful background and a good camera are of little use if the lighting in the video isn't right. Many beginners switch on the camera and start filming right away without thinking about lighting. But that's exactly where most problems arise. This guide shows you how to weigh daylight against artificial light, which rules from photography also apply when filming, and how to build a usable setup with your budget.
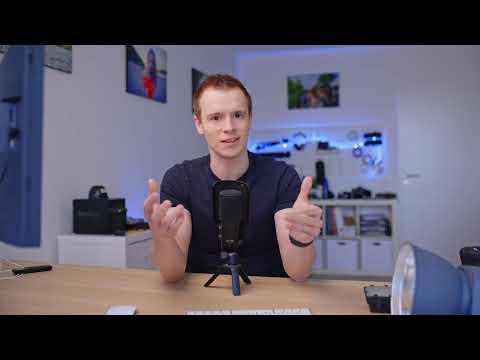
The video is only loaded from YouTube when you play it – data (including your IP address) is then transmitted to YouTube/Google. More in the privacy policy
This guide builds on the video "Lighting Videos" and deepens the fundamentals. You don't need any prior knowledge of video production, but you should know the basic terms of photo lighting, such as key light, fill light and background light.
Key Takeaways
- Natural light usually looks better, but it changes constantly and is therefore hard to control.
- Controllable artificial light delivers consistent results, no matter what time of day you film.
- The rules of photography apply to filming largely in the same way.
- Video footage can only be corrected to a limited extent in post-production. The lighting has to be right during the shoot.
- A setup doesn't have to be expensive. What matters is that you build it deliberately.
Step-by-Step Guide
Step 1: Choose Daylight or Artificial Light
First consider what you want to film and under what conditions. In most cases, natural light looks softer and more pleasant than many lamps. Its biggest drawback, however, is its variability. The sun moves, clouds roll in, and eventually it gets dark. If you want to keep a shot consistent over several minutes or across several days, that quickly becomes a problem.
Artificial light, on the other hand, has the advantage that you control it completely. Brightness, direction and color temperature stay the same as long as you don't change them. For repeatable results, such as in tutorials or interviews, that is a clear plus.
My tip: If you work with daylight, plan fixed time windows and monitor the brightness during the shoot. If you want to be independent of weather and time of day, rely on artificial light.

Step 2: Adopt the Rules of Photography
Many beginners believe video works according to entirely different laws. That isn't true. The same principles from photography also apply when filming. As a rule, you can directly adopt lighting setups from portrait photography or from flash setups. I basically shoot portraits the same way I light my own video setup when I need to be quick.
The difference lies mainly in continuous lighting technique. With continuous light, you see the result directly in the image, which makes your work easier. So feel free to take a look at the theory on lighting and the flash setups. You can use the arrangements almost one-to-one for videos.

Step 3: Select Suitable Light Sources
Not every light suits every situation. Effect lighting such as light strips standing beside a person may look spectacular, but in an explainer video it quickly looks odd and distracts from the content. So make sure the lighting fits the message of your video. For tutorials and conversations, soft, even light sources are usually the better choice.
Also make sure to use a consistent color temperature. If you mix daylight from the window with a warm lamp, color casts appear that are difficult to fix in post-production. Decide on one type of light or consistently block out disruptive daylight.

Step 4: Set the Lighting While Filming
The most important point is this: light belongs in the shot, not in the editing. Many people just start filming and only think about lighting later. With video especially, that is a mistake, because the options for post-processing are limited. With photos, you can mask backgrounds, darken them and adjust the white balance much more significantly. With video footage, that is considerably harder.
Even new cameras that film in 10-bit or RAW don't change that. A video image that is lit too dark or too unevenly during recording remains a problem even with modern technology. So create a suitable lighting setup during the shoot itself.

Step 5: Test the Difference Yourself
The best thing is to convince yourself. Shoot one recording with your lighting setup and a second recording without light. In the test, I turned off the lamp and only used the available ambient light. To achieve a similar brightness, I had to raise the ISO value from 1250 to 3200. This leads to noticeable image noise and looks worse overall.
On top of that, without a lighting setup I simply sat down somewhere and let the camera run. The result didn't look anything like it did with the video lamp. Compare your recordings directly side by side. You will quickly see where the face, background, and brightness differ.

Step 6: Choose a Setup That Fits Your Budget
You don't have to spend a lot of money right away. A video lamp from Aperture or similar manufacturers costing several thousand euros is not strictly necessary. What matters is that you understand what is possible with a small budget and what is possible with a larger one. A good lighting setup begins with the right arrangement and not with the most expensive device.
In the following examples, I present three variants: a setup with no budget, one with a small budget, and one with a somewhat larger budget. All three can be implemented with one or more light sources. This way you can judge for yourself what makes sense for your situation.

Step 7: Optimize Your Existing Setup
Even with a simple setup, you can get a lot out of it. Often the potential lies in the positioning. Move the light source, try out different distances, and observe the result in the camera image. If you notice that the shot isn't yet fully optimized, it's worth readjusting step by step. This way you slowly feel your way toward a good result.

Summary – Lighting Videos: Natural vs. Artificial Light Compared
Natural light looks beautiful but is unpredictable. Artificial light gives you control and consistent results. The rules of photography also apply when filming, and the lighting should be right during recording, because video footage can only be edited in post to a limited extent. Test your setup yourself, choose light sources that fit your content, and align your setup with your budget. Even with simple means, the quality can be improved significantly.
FAQ
Do I absolutely have to buy an expensive video lamp?No, an expensive video lamp is not strictly necessary. What matters is the right arrangement and a deliberately chosen setup.
Can I use daylight and artificial light at the same time?It's possible, but risky. Different color temperatures often lead to color casts. Block out the daylight or adjust the artificial light to match it.
Why shouldn't I just increase the ISO when it's too dark?A higher ISO does make the image brighter, but it creates image noise and noticeably worsens the image quality.
Can bad lighting be fixed in editing?Only to a limited extent. With photos you have more room to work, for example when masking or darkening. With videos, the options for correction are much more limited.
Which type of light is suitable for tutorials?Soft, even light sources are usually suitable for tutorials. Effect lighting, on the other hand, is often distracting.
How do I know if my lighting is right?Film a short test recording and compare it with a recording without light. Pay attention to brightness, shadows, colors, and image noise.


