An expensive lighting kit is not a requirement for good videos. The window in your room can do more than you might expect, if you know how to coordinate position, distance, and viewing direction with it. In this guide, you'll learn how to light a subject cleanly using pure daylight and no additional equipment. I'll also show you the limits of this method, because window light has clear weaknesses that you should know about so you can work around them deliberately.
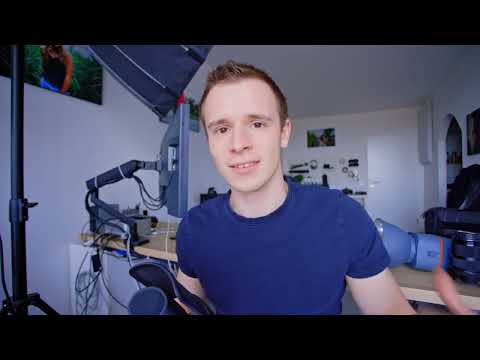
The video is only loaded from YouTube when you play it – data (including your IP address) is then transmitted to YouTube/Google. More in the privacy policy
Key Takeaways
- Window light is free, directional, and pleasantly soft.
- You can't adjust the brightness of window light, but you control it through your distance from the window.
- The closer your subject is to the window, the more light reaches it.
- A side position creates zones of light and shadow that give the image depth.
- A background without additional windows ensures a calm, even look to the lighting.
Step-by-Step Guide
Step 1: Turn Off Artificial Light Sources
First, turn off all the lamps in the room. Only then can you see what the daylight actually does and judge its effect. Also set your camera to automatic ISO sensitivity. That way you can see the difference between the light with and without additional lighting directly on the monitor.

Step 2: Observe Changes Throughout the Day
As time passes, it gets darker outside, and this has a direct effect on your image. The difference in brightness between you and the background shrinks. This is not a fault of your camera, but a sign that your subject loses contrast as soon as the light gets weaker. Keep an eye on this development before you start recording.

Step 3: Assess the Strengths and Weaknesses of Window Light
Window light has two faces. The big advantage lies in its direction: the light comes from a fixed direction. It is also soft, because it is spread over a large area. When the sky is overcast or away from sunset, hardly any direct sunlight comes in, and the image looks pleasantly toned down. The downside is the small amount of light. If the sun is in an unfavorable position, only the light reflected from outside arrives, and that is significantly less.

Step 4: Take the Position of the Sun and Changing Light Conditions into Account
The sun moves, and that is exactly what makes shooting difficult. If it's in an unfavorable position, little light is left. At sunrise or sunset, the situation often can't be turned around in any meaningful way. Also make sure the brightness stays as even as possible. If the light constantly alternates between bright and dark, it looks restless in the finished video. Therefore, plan your recordings for times with stable conditions.

Step 5: Sit Directly in Front of the Window
If you don't have your own studio, the window is your best light source. Sit or place your subject directly in front of it. In this way, you can, so to speak, borrow the daylight. This method also works in other people's apartments or on the go, as long as there is a window with enough daylight.

Step 6: Move Closer to the Window
Since you can't control the strength of window light, distance is your most important tool. The closer you stand to the window, the brighter your subject becomes. Note that at a short distance you usually have to choose a wider frame so that everything stays in the picture. Use a wide-angle lens for this if you have one. Also check the focus, because with some lenses the sharpness shifts during recording.

Step 7: Choose the Background Deliberately
The background helps determine how good your light looks. Make sure that as few additional windows as possible are visible in the background. The ideal is a situation in which the light comes from a single direction. Otherwise, restless patches of light and conflicting shadows arise, which distract from the subject.

Step 8: Position yourself to the side and use shadows deliberately
If you want a bit more creative control, sit to the side of the window. The light then falls on only one side of the subject, while the other side remains in shadow. With large windows, this effect is less harsh, but it is still clearly visible and can be put to use. You don't necessarily have to brighten the darker side. This very act of deliberately allowing shadows is the principle behind Negative Fill: you increase the contrast by not brightening the shadow side.

Step 9: Try out different positions and viewing directions
Experiment with small changes. Move a bit to the left or right and compare the results on the monitor. Pay attention to how the background and the person look overall. Only a direct comparison shows you which position best suits your composition. Trying things out beats theory here, because every room is different.

Step 10: Apply the method to other subjects
You don't have to film yourself. The principle works just as well with other people or with objects. Product shots also benefit enormously when they are taken close to the window. The rule stays the same in all cases: get close to the window, use light from one direction, and keep the background calm.

Summary – Video Lighting on No Budget: Using Window Light Deliberately for Better Videos
With a window, a camera, and a bit of thought, you can shoot decent videos today. The key is to regard the light source not as chance, but as a creative element. You control the brightness through distance, determine the direction of the light through your position, and decide the calmness of the image with the background. The method has clear limits, especially with changing light conditions and a low sun position. Nevertheless, window light is an excellent starting point before you invest in additional equipment.
FAQ
Do I really need no equipment at all to get started?No, a window with daylight and a camera are enough to get started. You should simply turn off all other lamps so that the window light takes center stage.
Why should I set the camera to automatic ISO?The automatic ISO setting shows you directly how much the light changes when you adjust your position. This way you see the difference immediately on the monitor, without having to readjust manually.
What should I do if too little light reaches the subject?Move closer to the window. Also pay attention to the position of the sun and plan your shoot, if possible, for times when more daylight is available.
What does Negative Fill mean?Negative Fill means that you deliberately do not brighten the shadow side of a subject. This increases the contrast and creates more depth in the image.
Do I always have to use the window light from the side?No, the side position is an option for more creative control. You can also face the subject directly toward the window if you prefer an even, soft light.
When is it worth investing in additional lighting?An investment is worthwhile if you want to shoot independently of daylight and weather conditions. Even small additions can then significantly improve the light quality.


