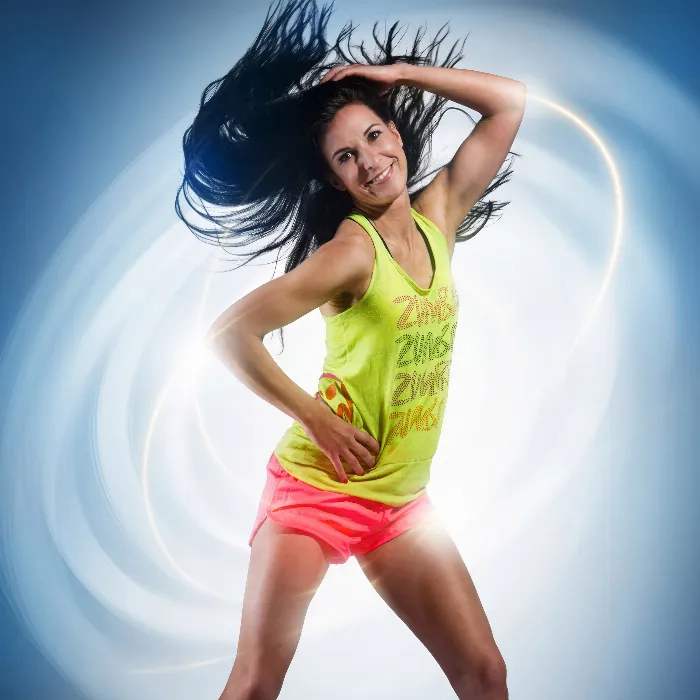
Light Effects can take your Sports Portraits to the next level. By incorporating different light effects and adjusting them effectively, you convey a sense of movement and dynamism. In this guide, you will learn how to work with light effects and use the layer mode “Negative Multiply.” We will also show you how to hide unwanted areas using layer masks.
Key Insights
- By incorporating light effects, you can enhance the expressiveness of your sports portraits.
- The layer mode “Negative Multiply” allows the light effects to blend harmoniously into the image.
- With layer masks, you can selectively cover areas and thus remove distracting elements.
Inserting Light Effects
To emphasize the movement of your model, it is important to use different light effects. Here’s how you can implement that.
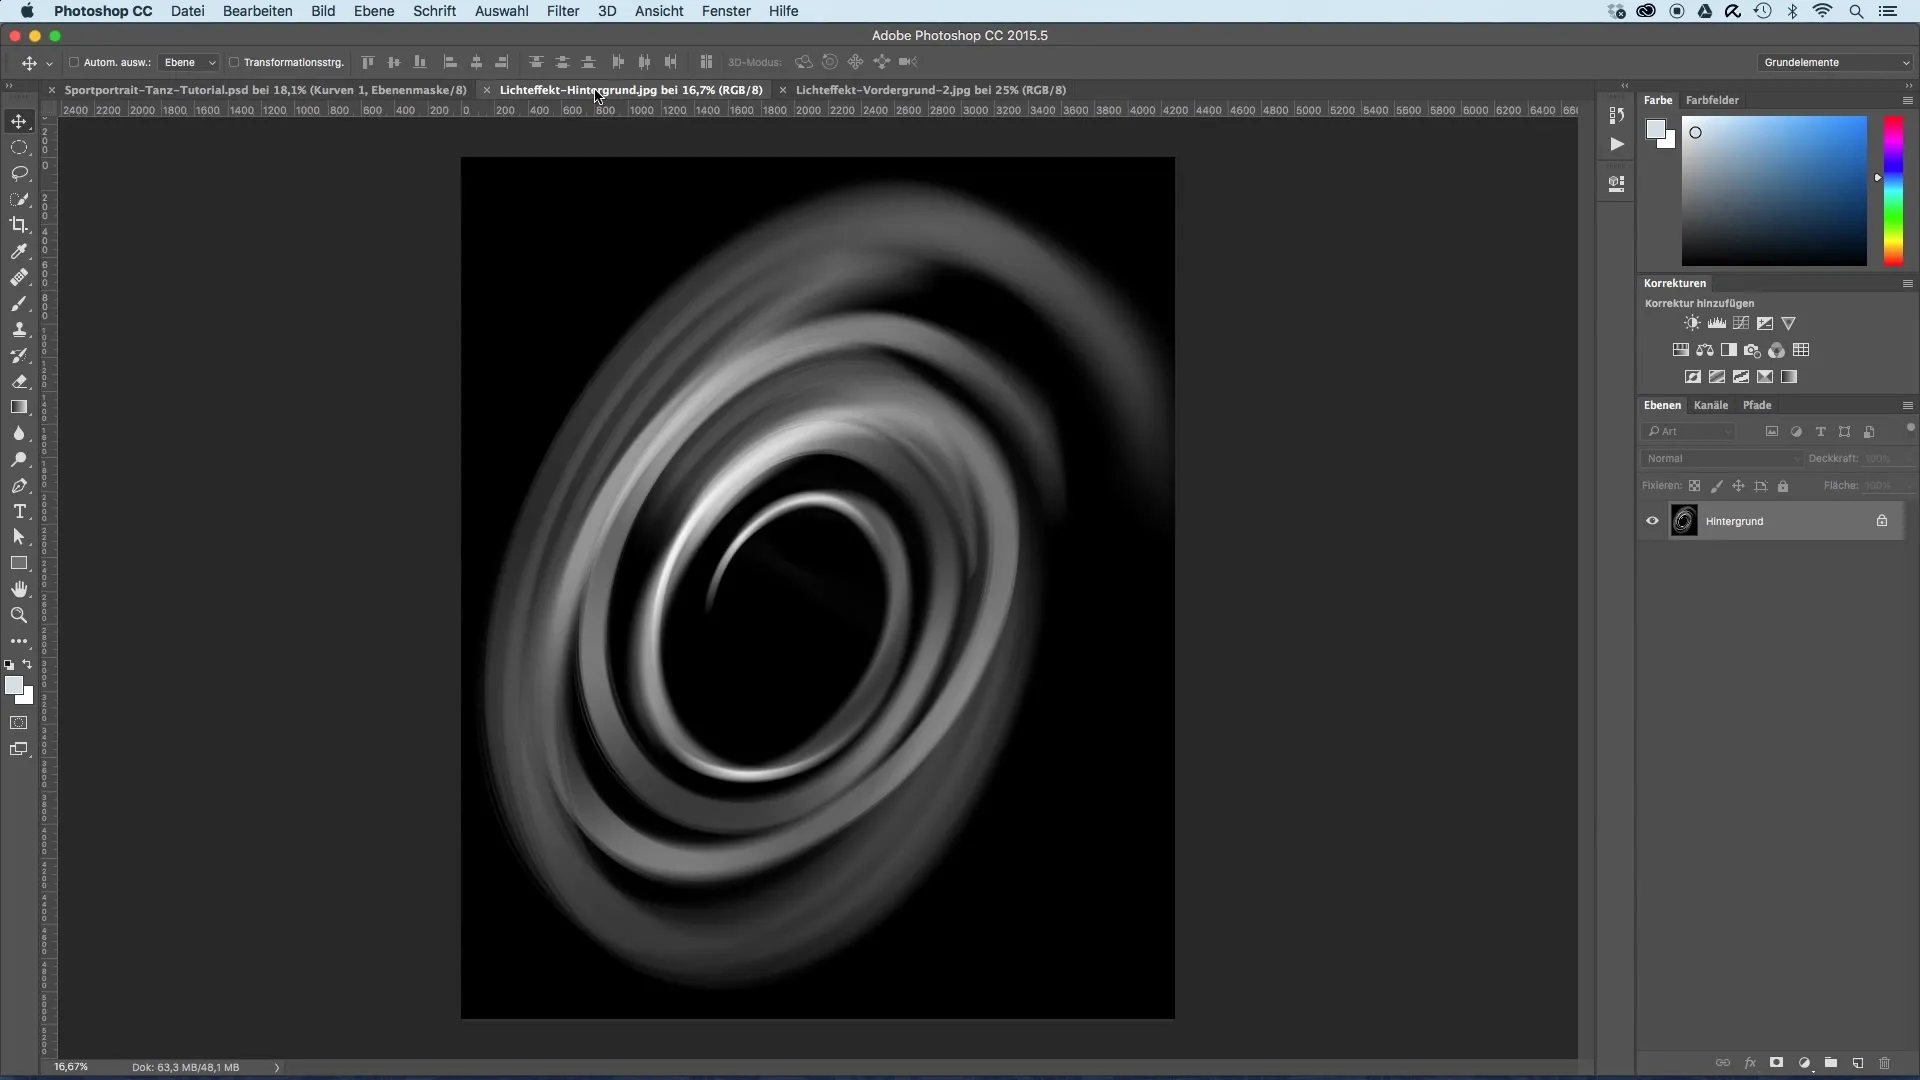
First, you need the light effects you want to use. In my example, I created a spiral that I will use for the image design. You will drag these light effects into your opened image using the move tool. Initially, position the effect in the center of the image.
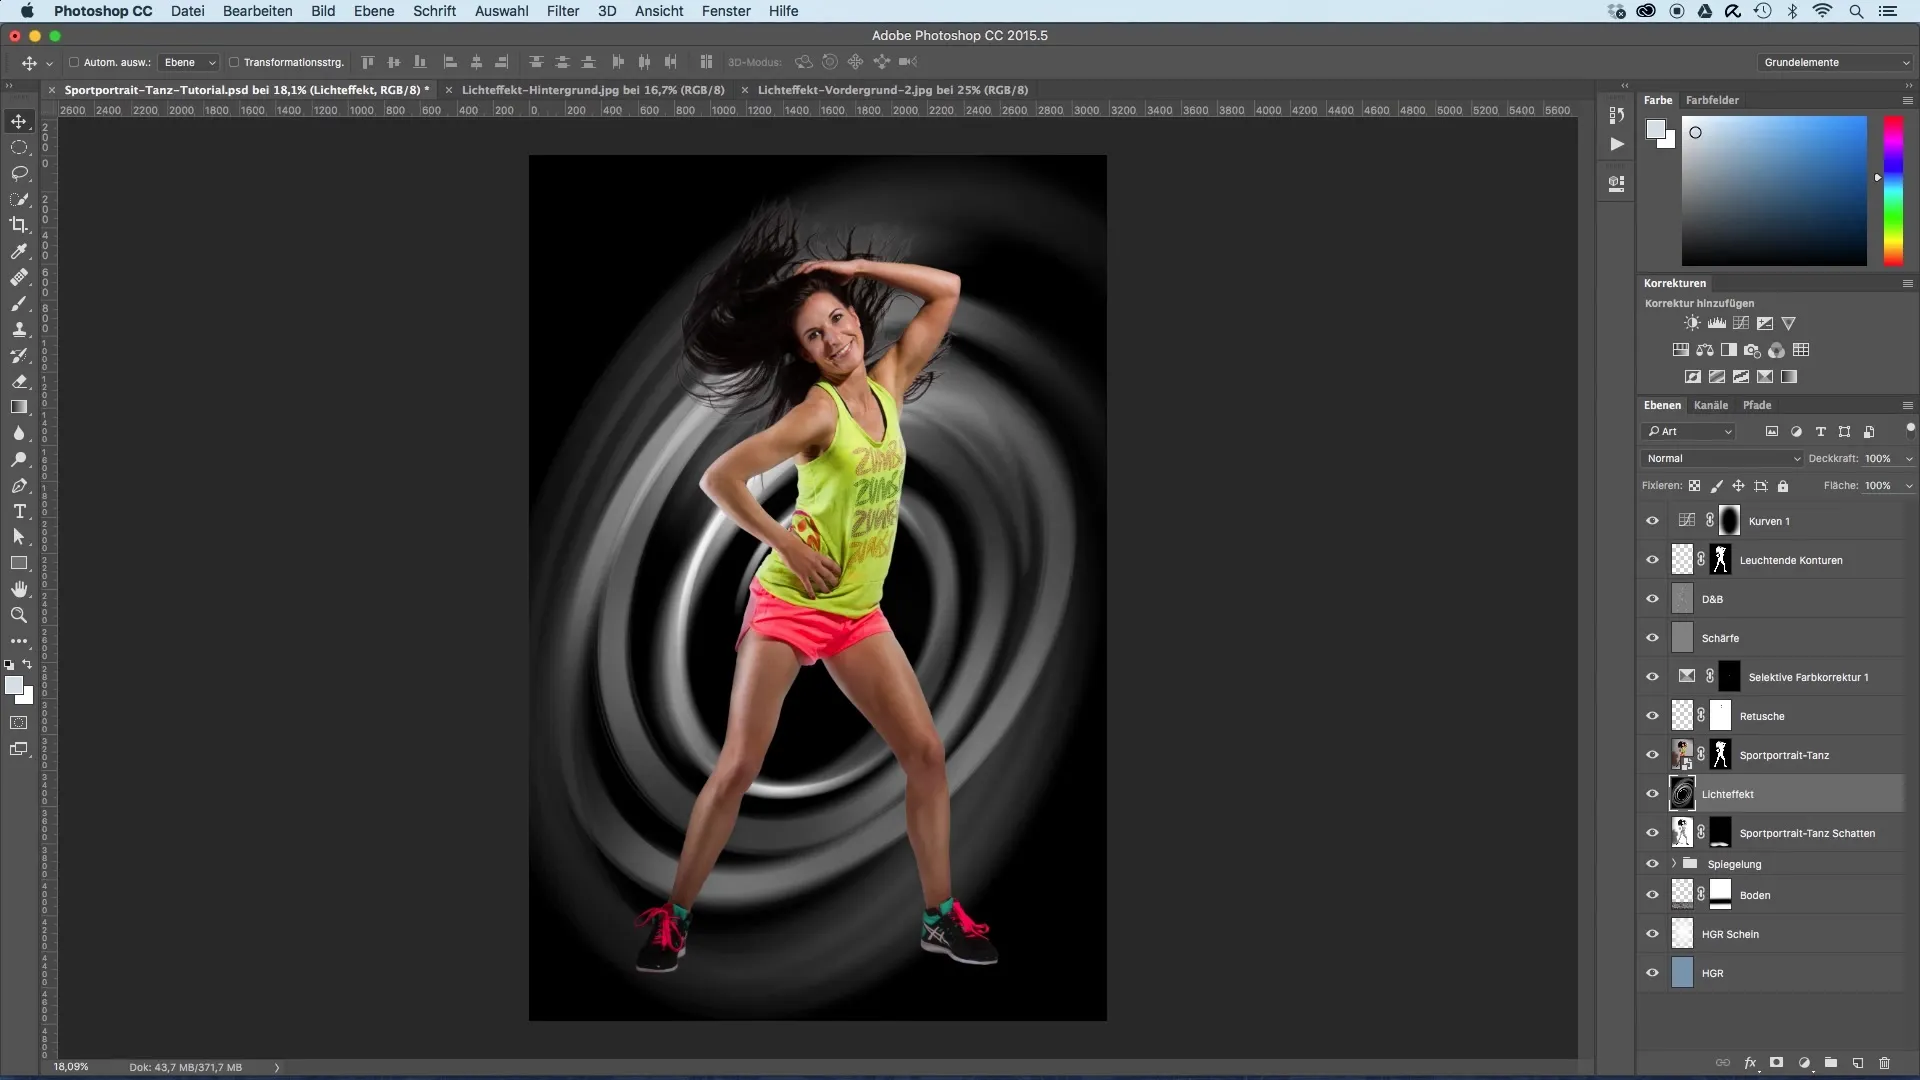
Next, rename the layer of the light effect. This will help you keep track of the different layers you are using in your image.
Now that the light effect has found its place, it still appears a bit too large. Transform the layer to make the effect smaller. Note that you can also slightly distort or rotate the spiral to optimally match the movement of your model.
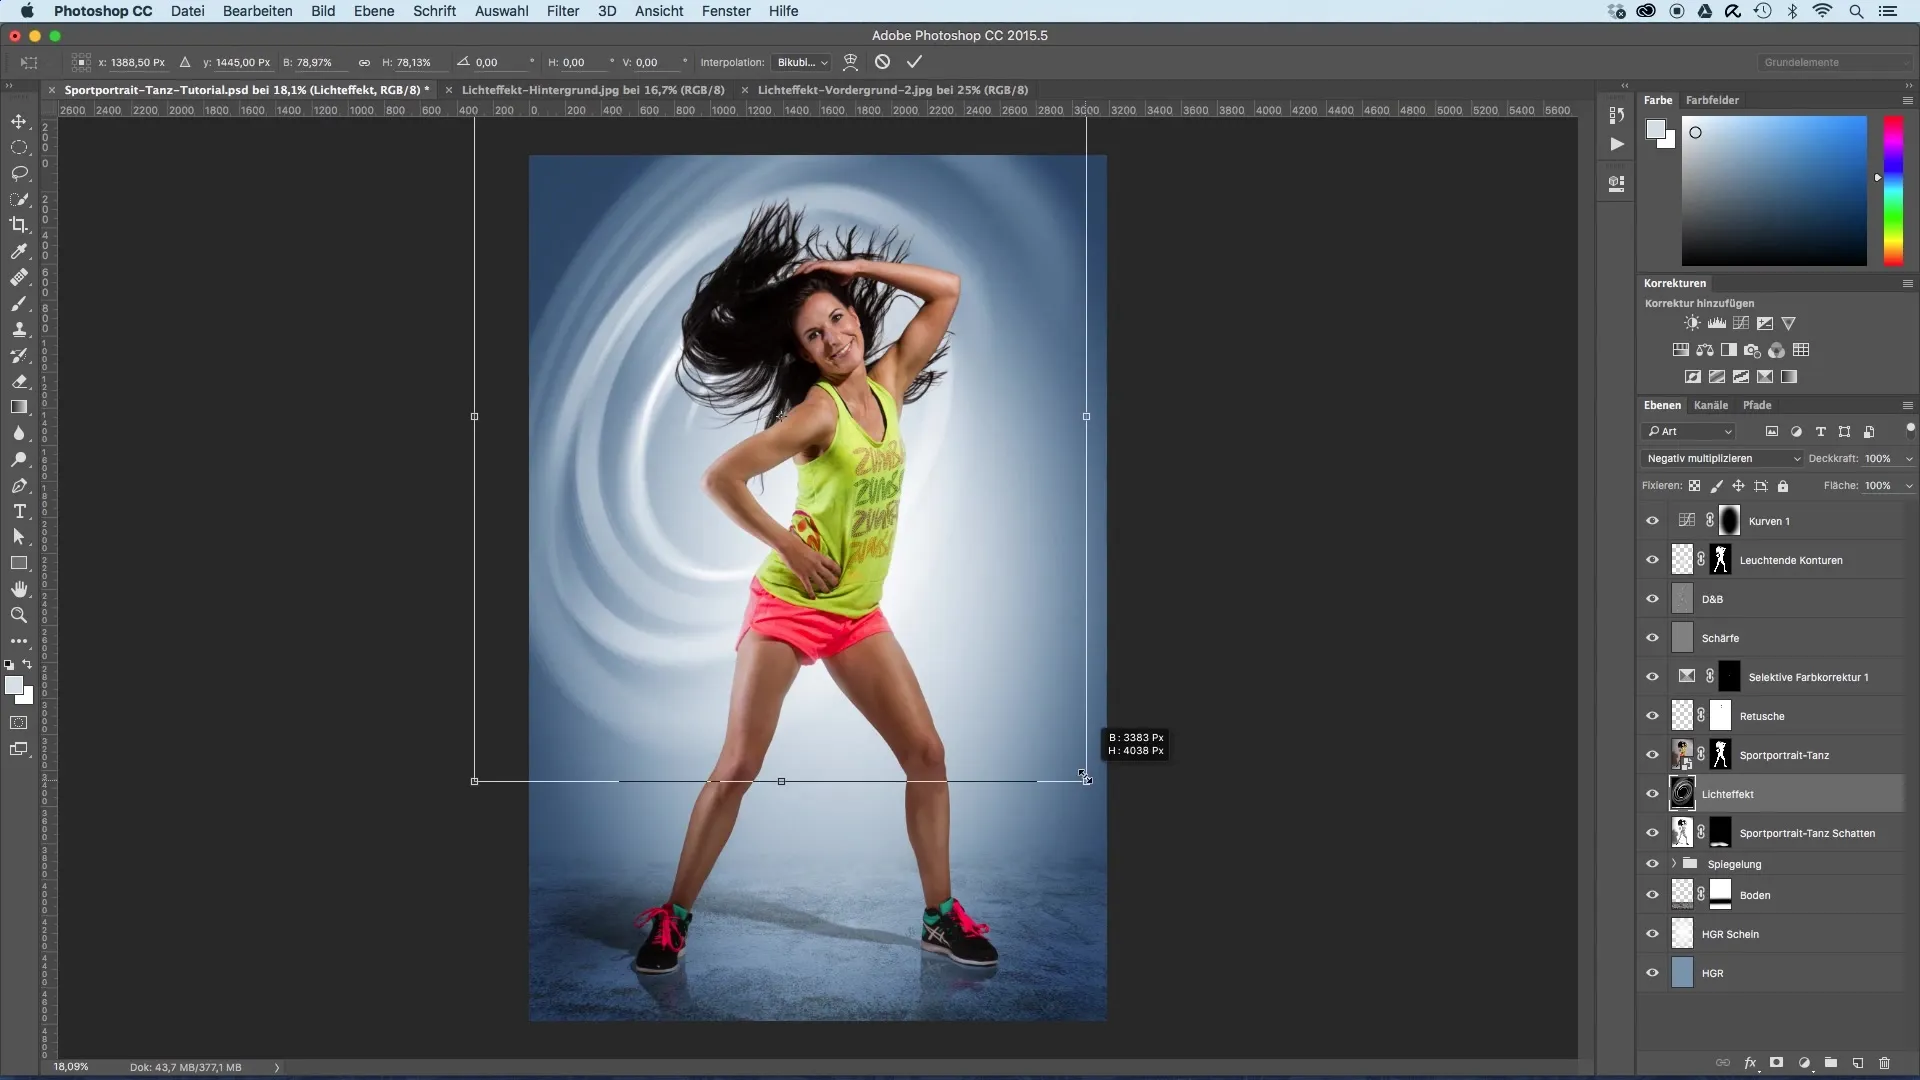
Make sure the spiral continues to follow the movement of the model, especially towards the head and body rotation. This orientation will support the dynamics of the movement. It is also important that the end of the spiral does not abruptly end at the edge of the image but either remains in the image or extends beyond it.
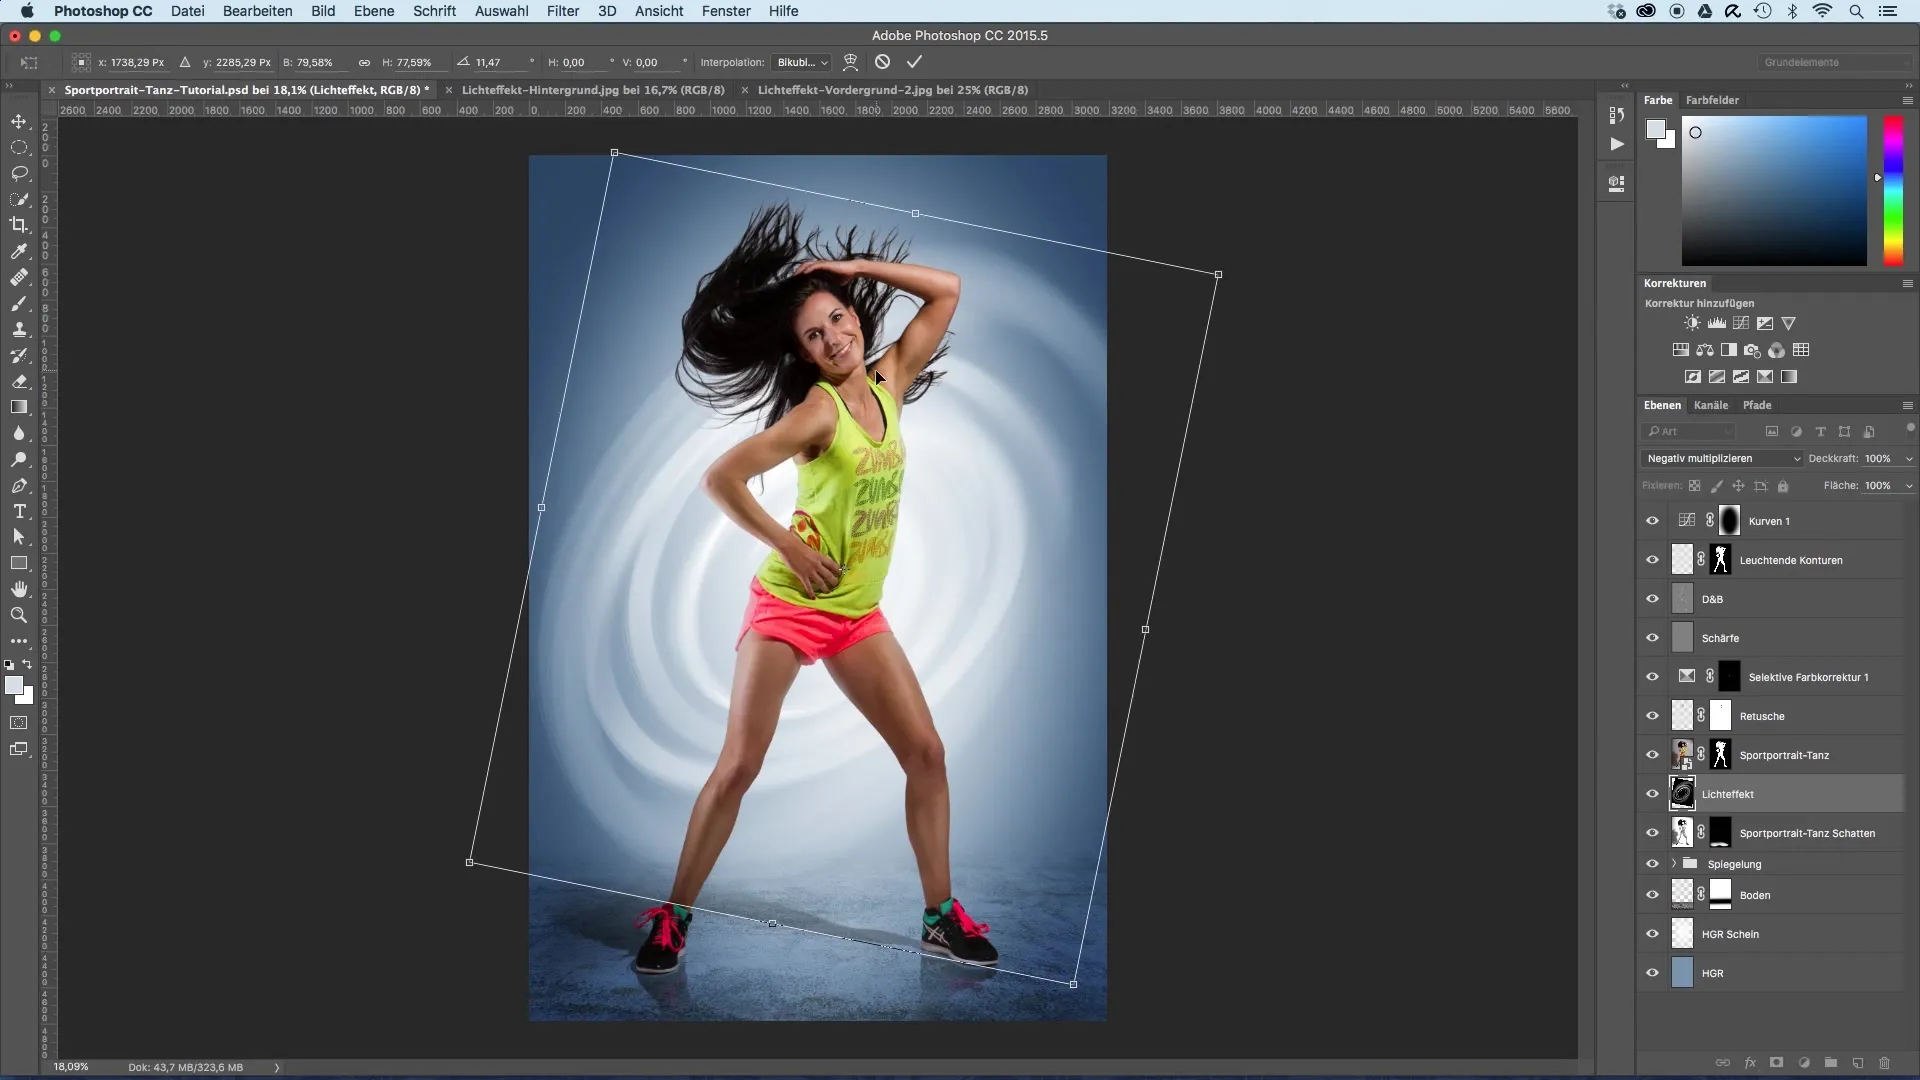
Confirm the transformation with a double-click and observe how the background appears more vibrant.
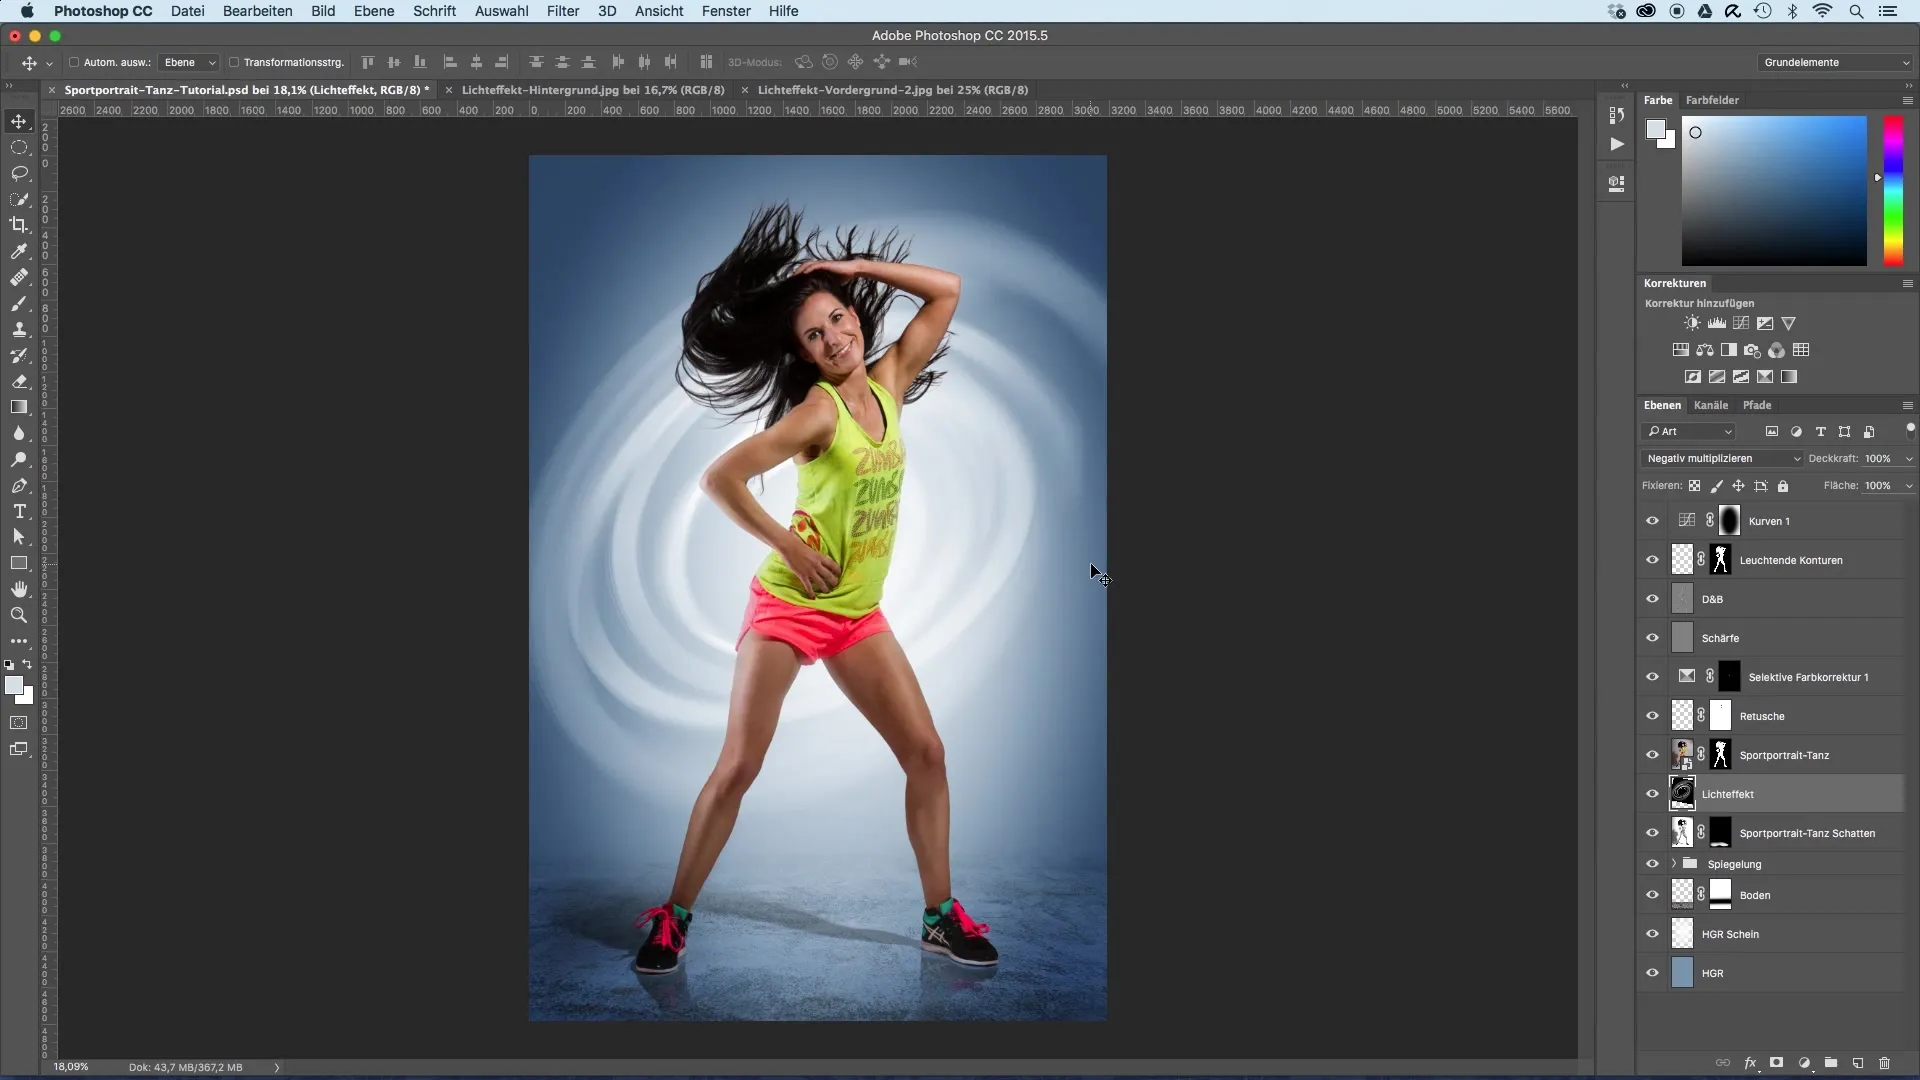
Now the second light effect comes into play, which is intended for the foreground. You also drag this light effect into your image and place it above the model. Set this effect to the “Negative Multiply” layer mode as well.
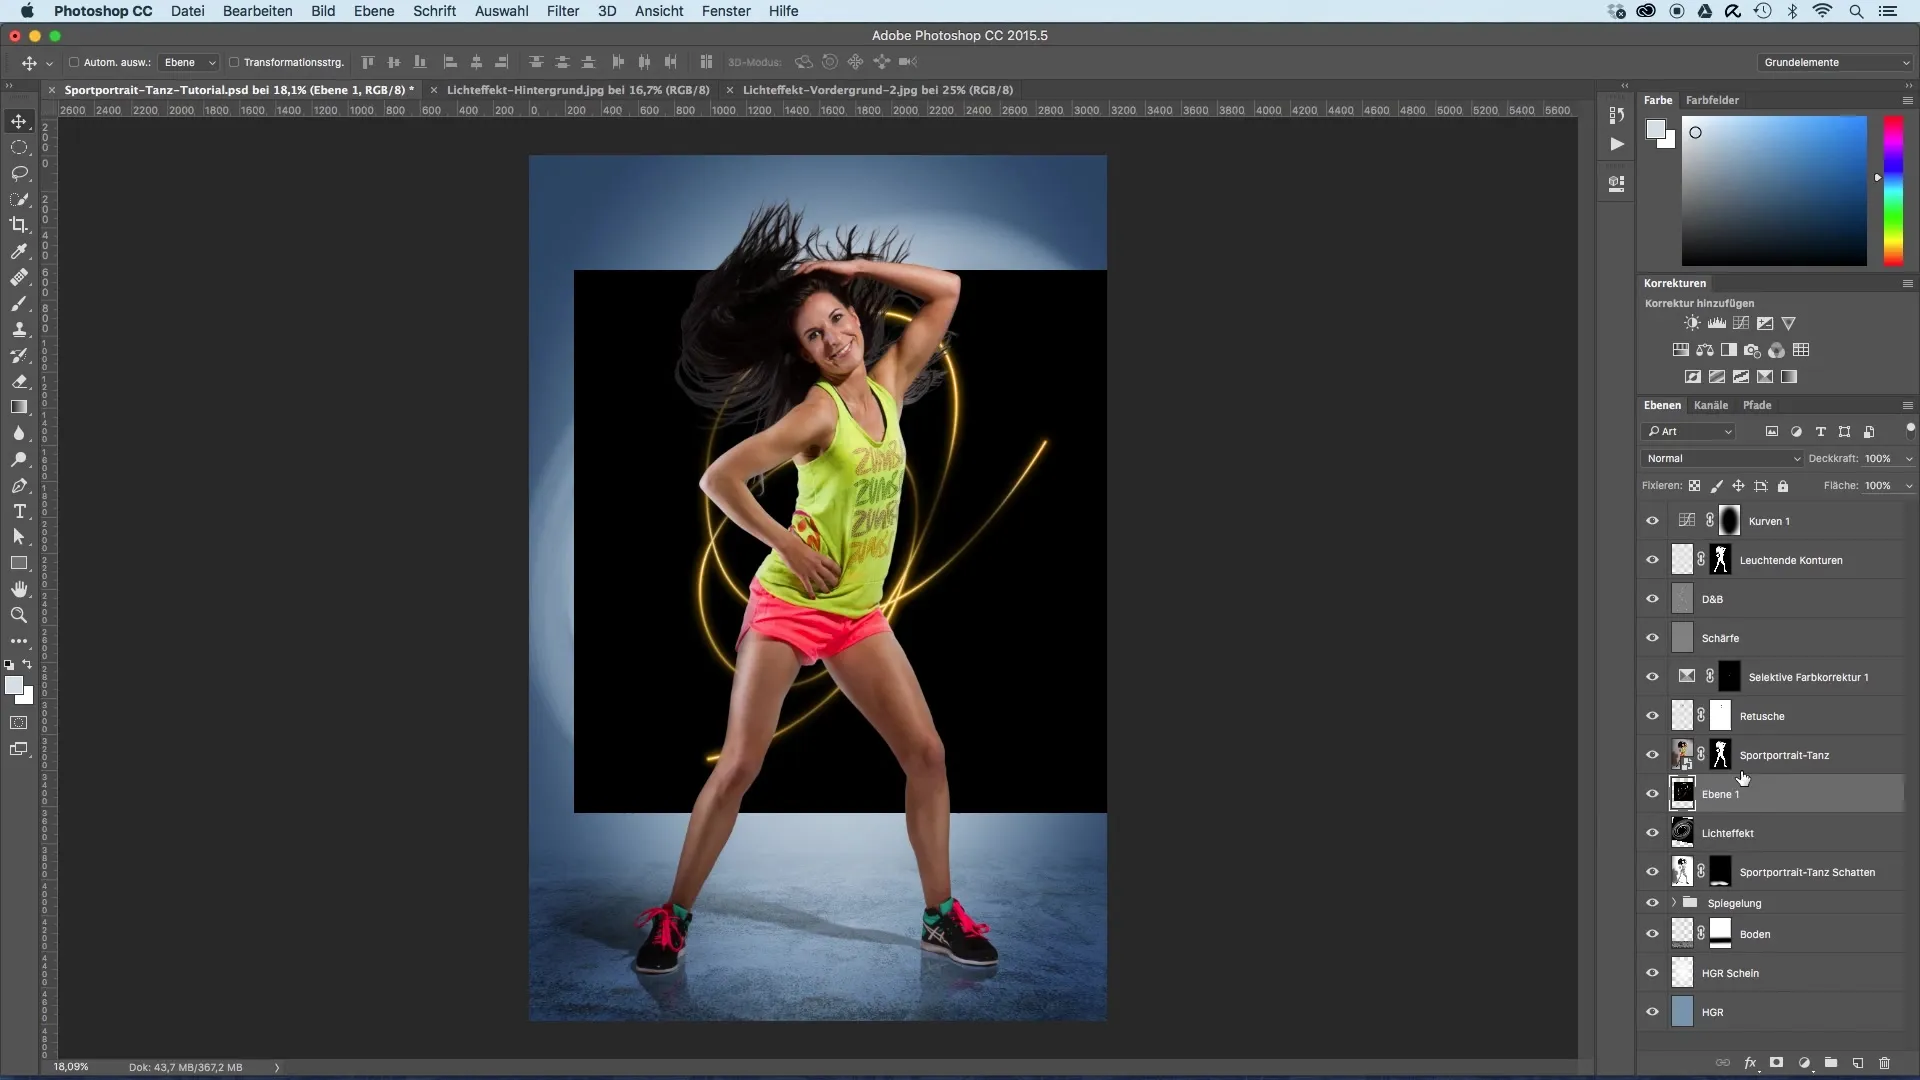
Enlarge this effect slightly and position it so that it follows the movements of your model. Pay attention to details such as the alignment of the elbow and the hip. These details are crucial for the overall perception of movement.
Confirm this update as well with a double-click and then create a layer mask to give yourself the necessary flexibility when working with this effect.
With the layer mask, you can cover specific areas that might be overlapped by the light effect and appear distracting. Set the foreground color to black and select a brush with high opacity to make precise adjustments.
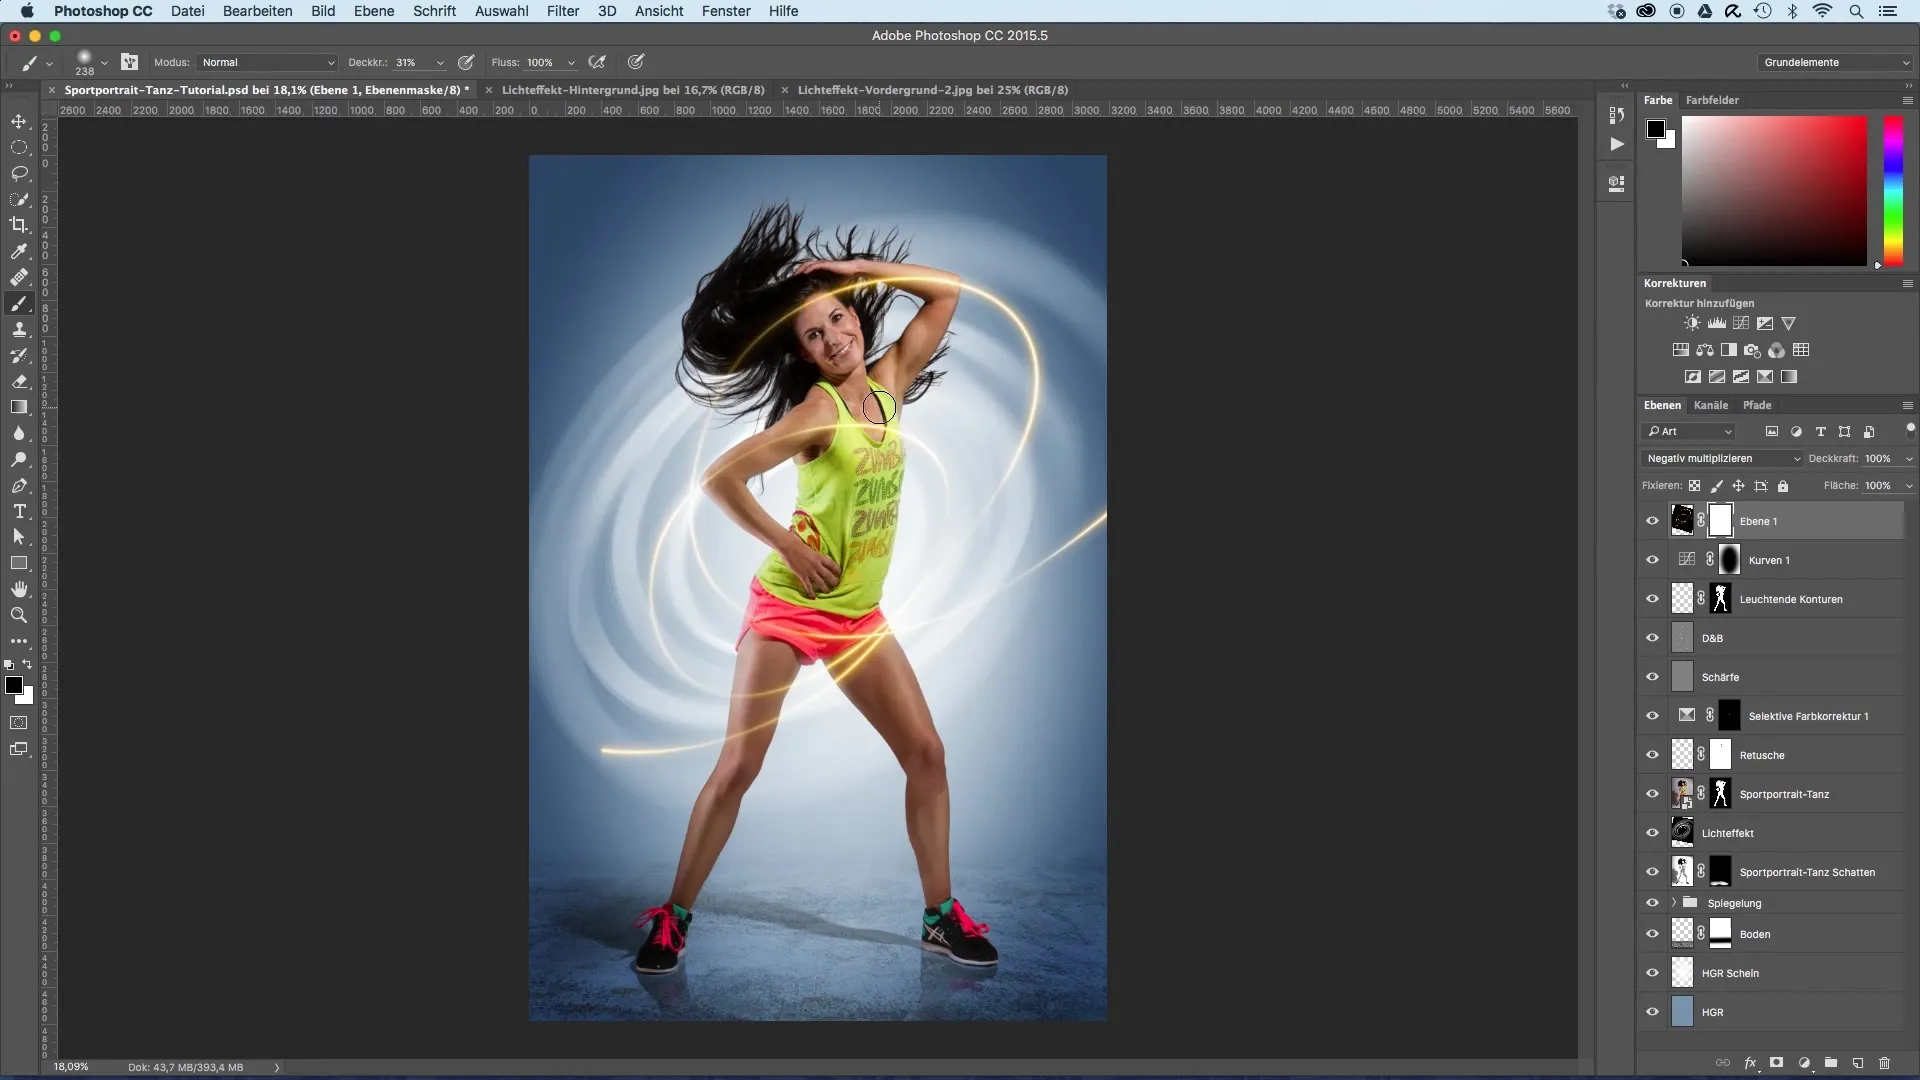
Now you will specifically address the distracting elements. Remove or reduce the intensity of areas that extend beyond your model to optimize the effect. Particularly on the pants and over the leg, you can tone down the light effect so that the movement of the model can be properly highlighted.
Fading transitions are beneficial: let the effect gently fade into nothing to enhance the impression of movement. Here too, perhaps reduce the tip of a light effect to improve the dynamics of your representation.
Summary - Image Optimization of Sports Portraits with Light Effects
Incorporating light effects into your sports portraits is an effective way to create dynamism and emphasize the movements of your model. Through targeted adjustments and skillful use of layer masks, you can minimize unwanted effects and enhance your image. Use the tips from this guide to give your images more expressiveness.
Frequently Asked Questions
How do I transform light effects in my image?Use the transform tool to adjust the size, rotation, and distortion of the light effects.
Which layer mode should I choose?The “Negative Multiply” mode is well suited to harmoniously integrate light effects into the existing image.
How can I cover distracting elements?Use a layer mask and paint with a black brush over the areas you want to cover.
Which tool is best for adjusting light effects?The move tool and the transform tool are ideal for positioning and adjusting light effects.
What color should I choose for the brushes when masking?Set the foreground color to black to fade out distracting effects over the model.
