An impressive sports portrait is characterized not only by its composition and lighting but especially by the sharpness of the details. In this tutorial, we will show you how to use the “Reduce Blur” filter in image editing to effectively sharpen the details of your images. It is an effective method to enhance contrasts and give your sports portraits the finishing touch.
Key insights
- The “Reduce Blur” filter is excellent for sharpening details in images.
- A precise adjustment of the sliders can further improve the result.
- The ability to work with layers allows for easy control over the level of sharpness.
Step-by-Step Guide
To sharpen the image using the “Reduce Blur” filter, follow these steps:
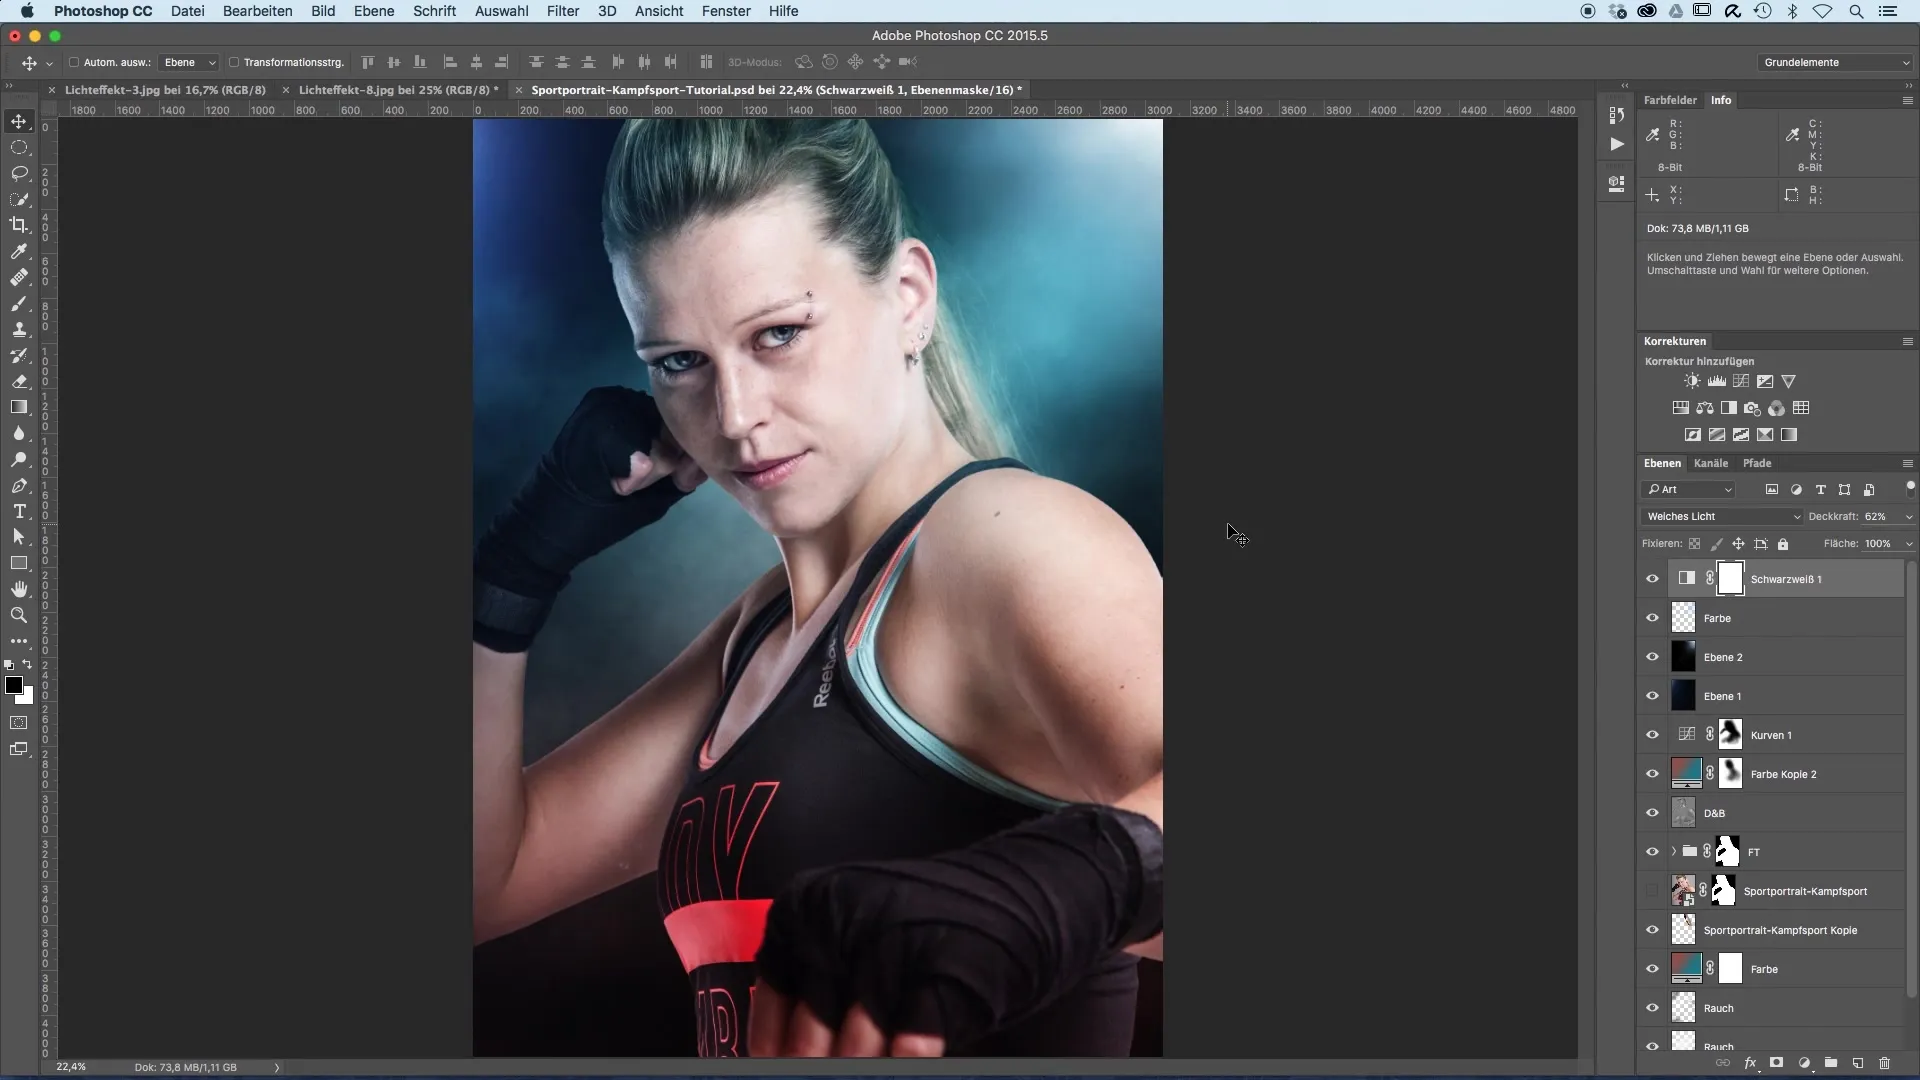
First, reduce all visible layers in your image to a single layer. You can do this by using the shortcut “Command + Shift + E.” After this command, you will have a new layer that consolidates all previous layers. This layer-based editing is important to ensure that the sharpening is applied to the entire image.
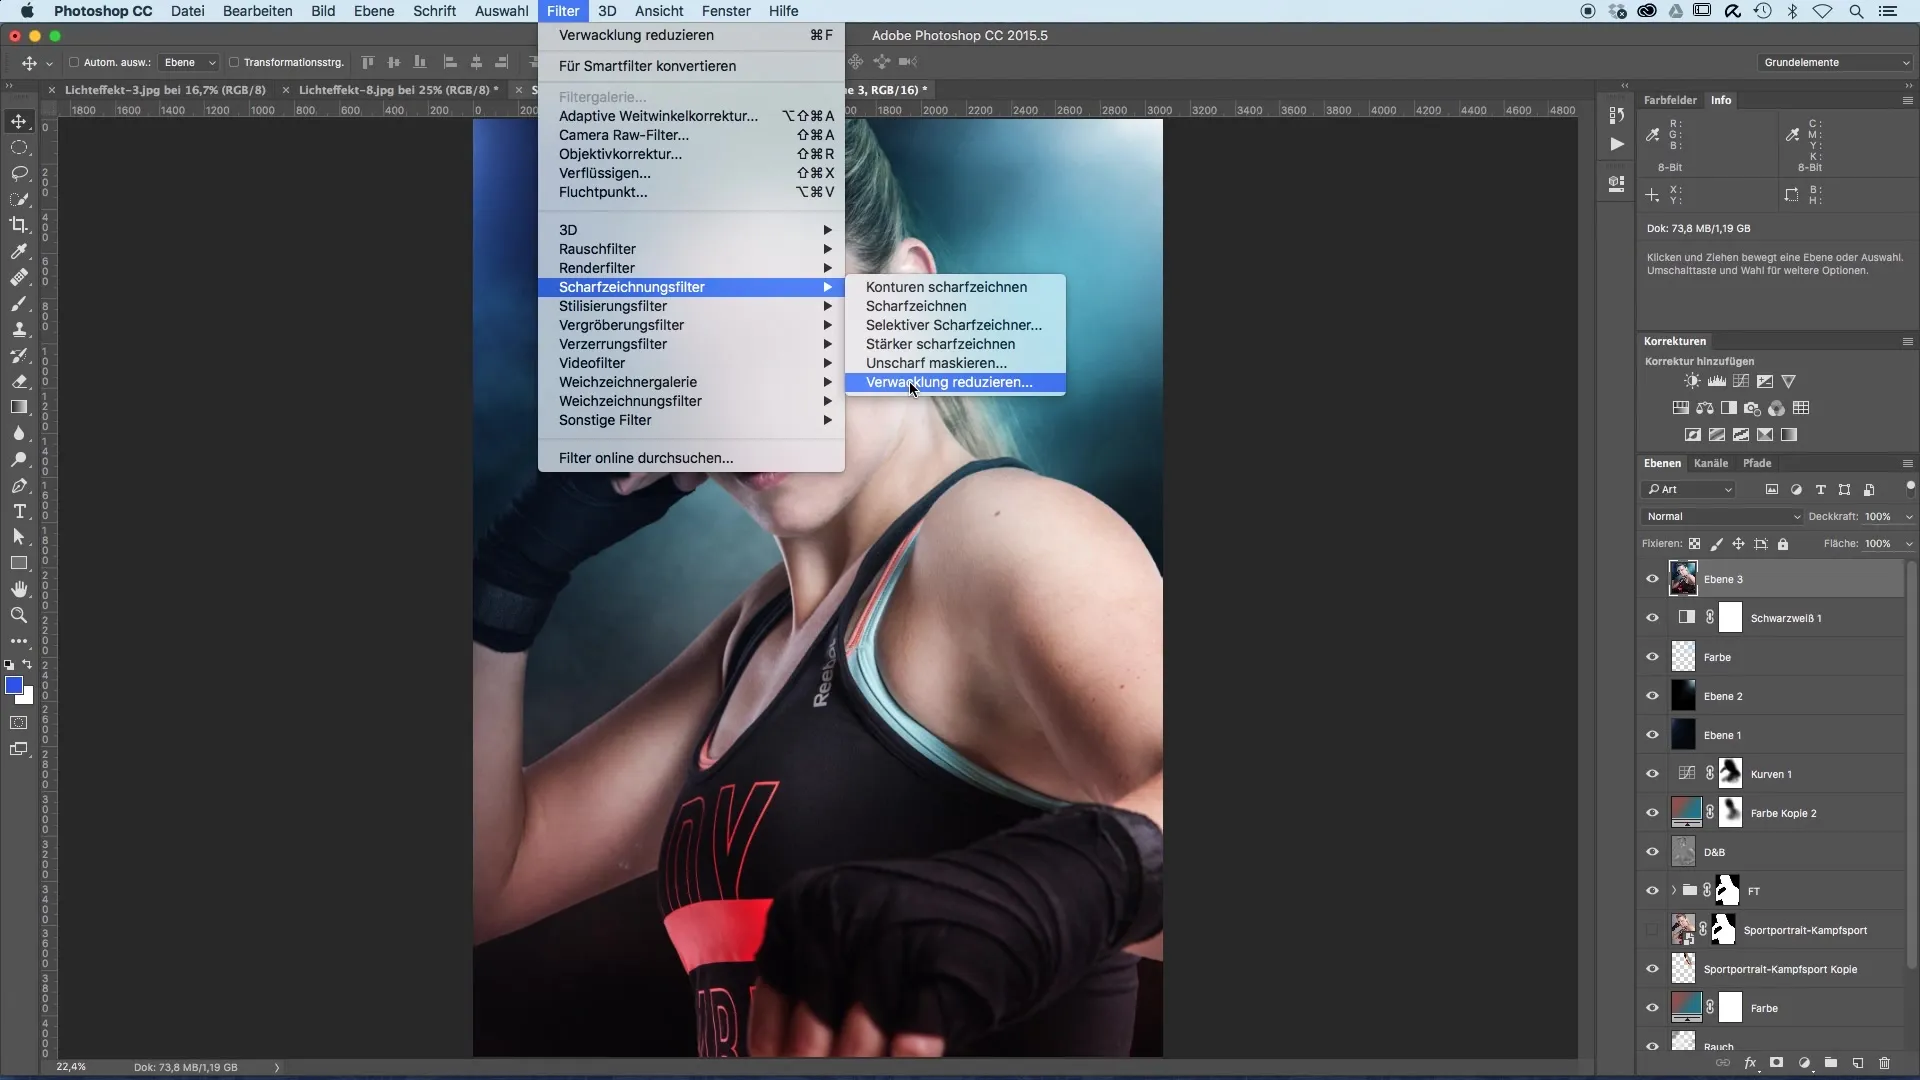
Now you have the option to sharpen the image further. Go to the "Filter" menu and select the sharpening filter “Reduce Blur.” This special filter is designed to correct image blurriness and can help you present the subject more clearly.
After selecting the filter, a new editing window will open. Here you will see a preview of your image in the main window. First, zoom in on the areas that are especially important to you, such as the eyes or the mouth of your model. This allows for a more precise adjustment of the sharpness.
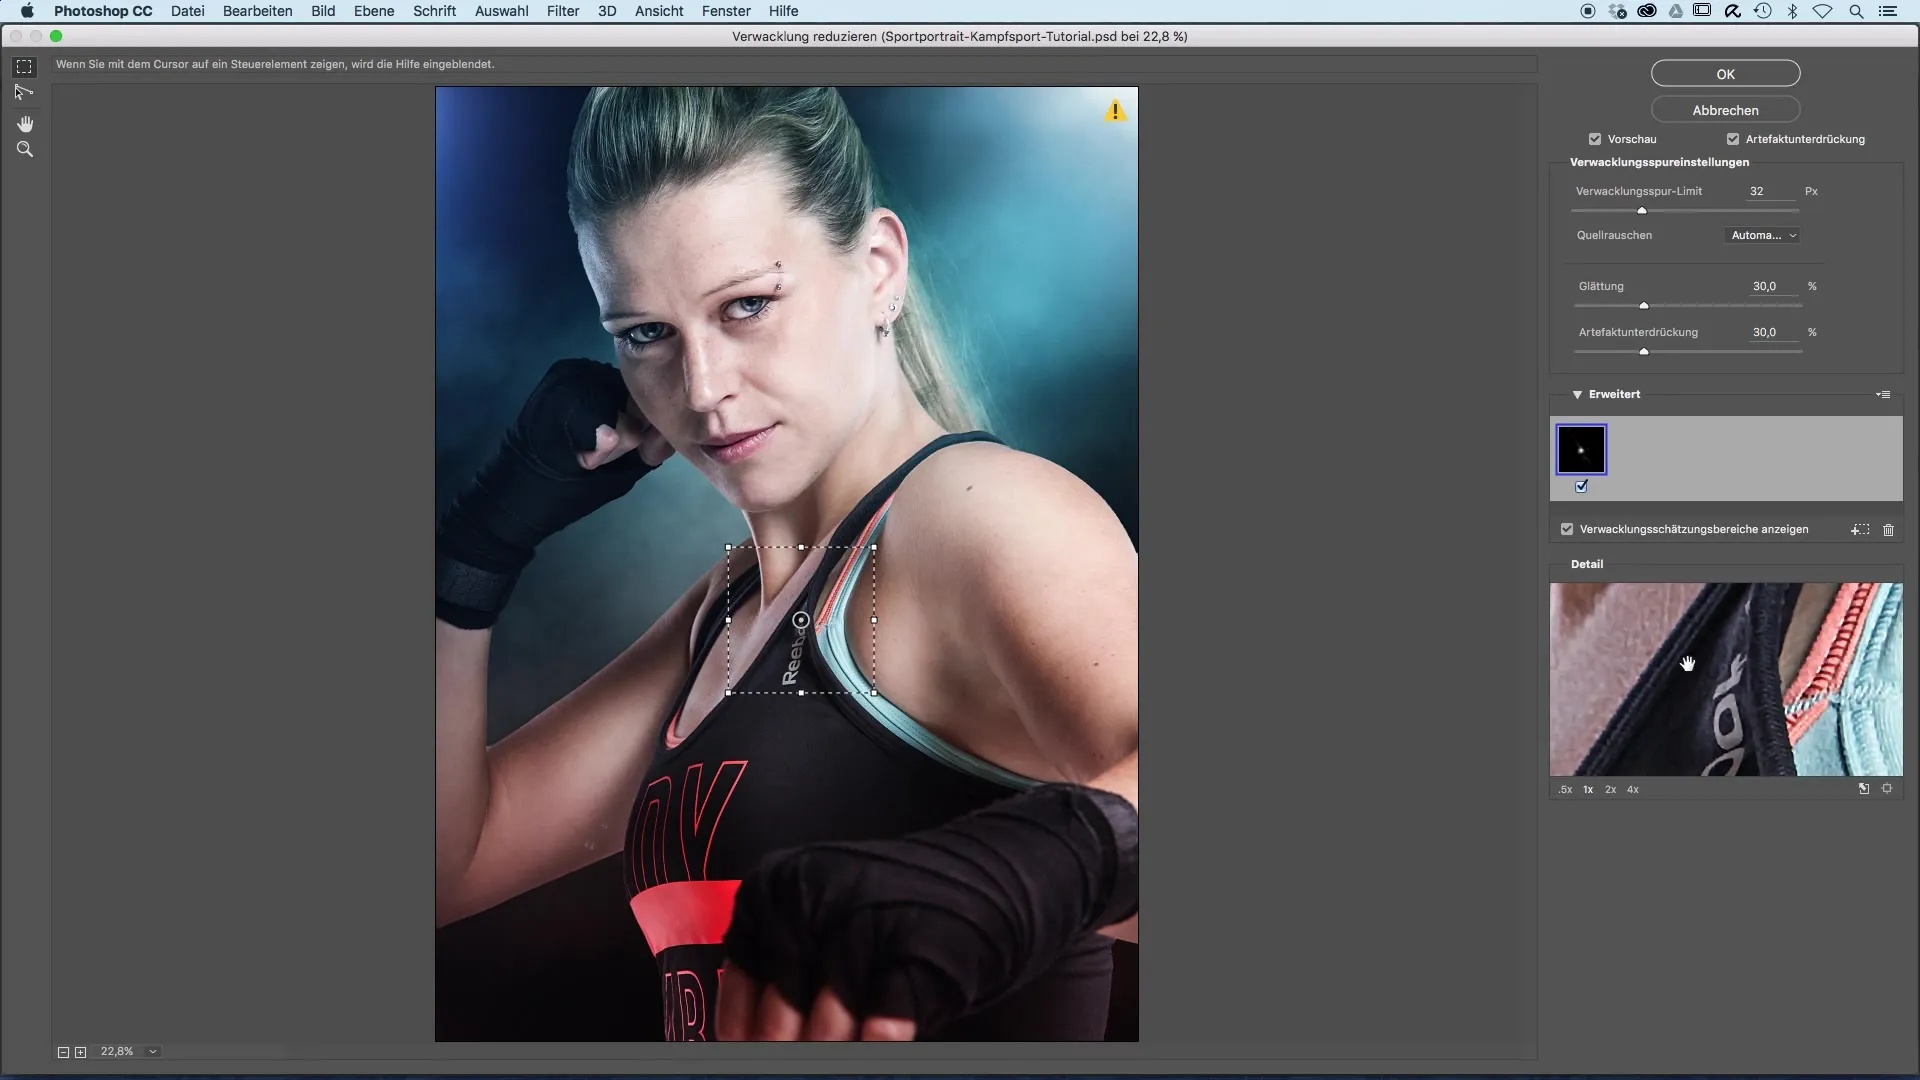
As you hover over the image, you can immediately see the effects of the sharpness adjustments. Hold the mouse over the desired areas and observe how the sharpness is changed by the different sliders. It is impressive how quickly the details can be refined.
Now you have the option to customize the sharpness settings individually. At first, the sharpening may seem too strong, but you can easily adjust the values to achieve the perfect result. Experiment with the sliders for “Blur Limit,” “Smoothness,” and “Artifact Suppression” to find the best sharpness level for your image.
The “Blur Limit” slider helps you reduce the intensity of the sharpening. It is essential that this value is well-adjusted to avoid over-processing. Additionally, you should be careful when adjusting the smoothness to prevent the image from looking unnatural.
A before-and-after comparison at this step is immensely helpful. It gives you a clear comparison and shows you how the sharpness correction has improved the image quality. The result can be breathtaking!
After adjusting, confirm the settings with “Okay.” Now the image is sharpened. To ideally match the adjustment to your image, decrease the opacity of the new layer. A setting of 50 to 60% can often create a harmonious look without the sharpness appearing exaggerated.
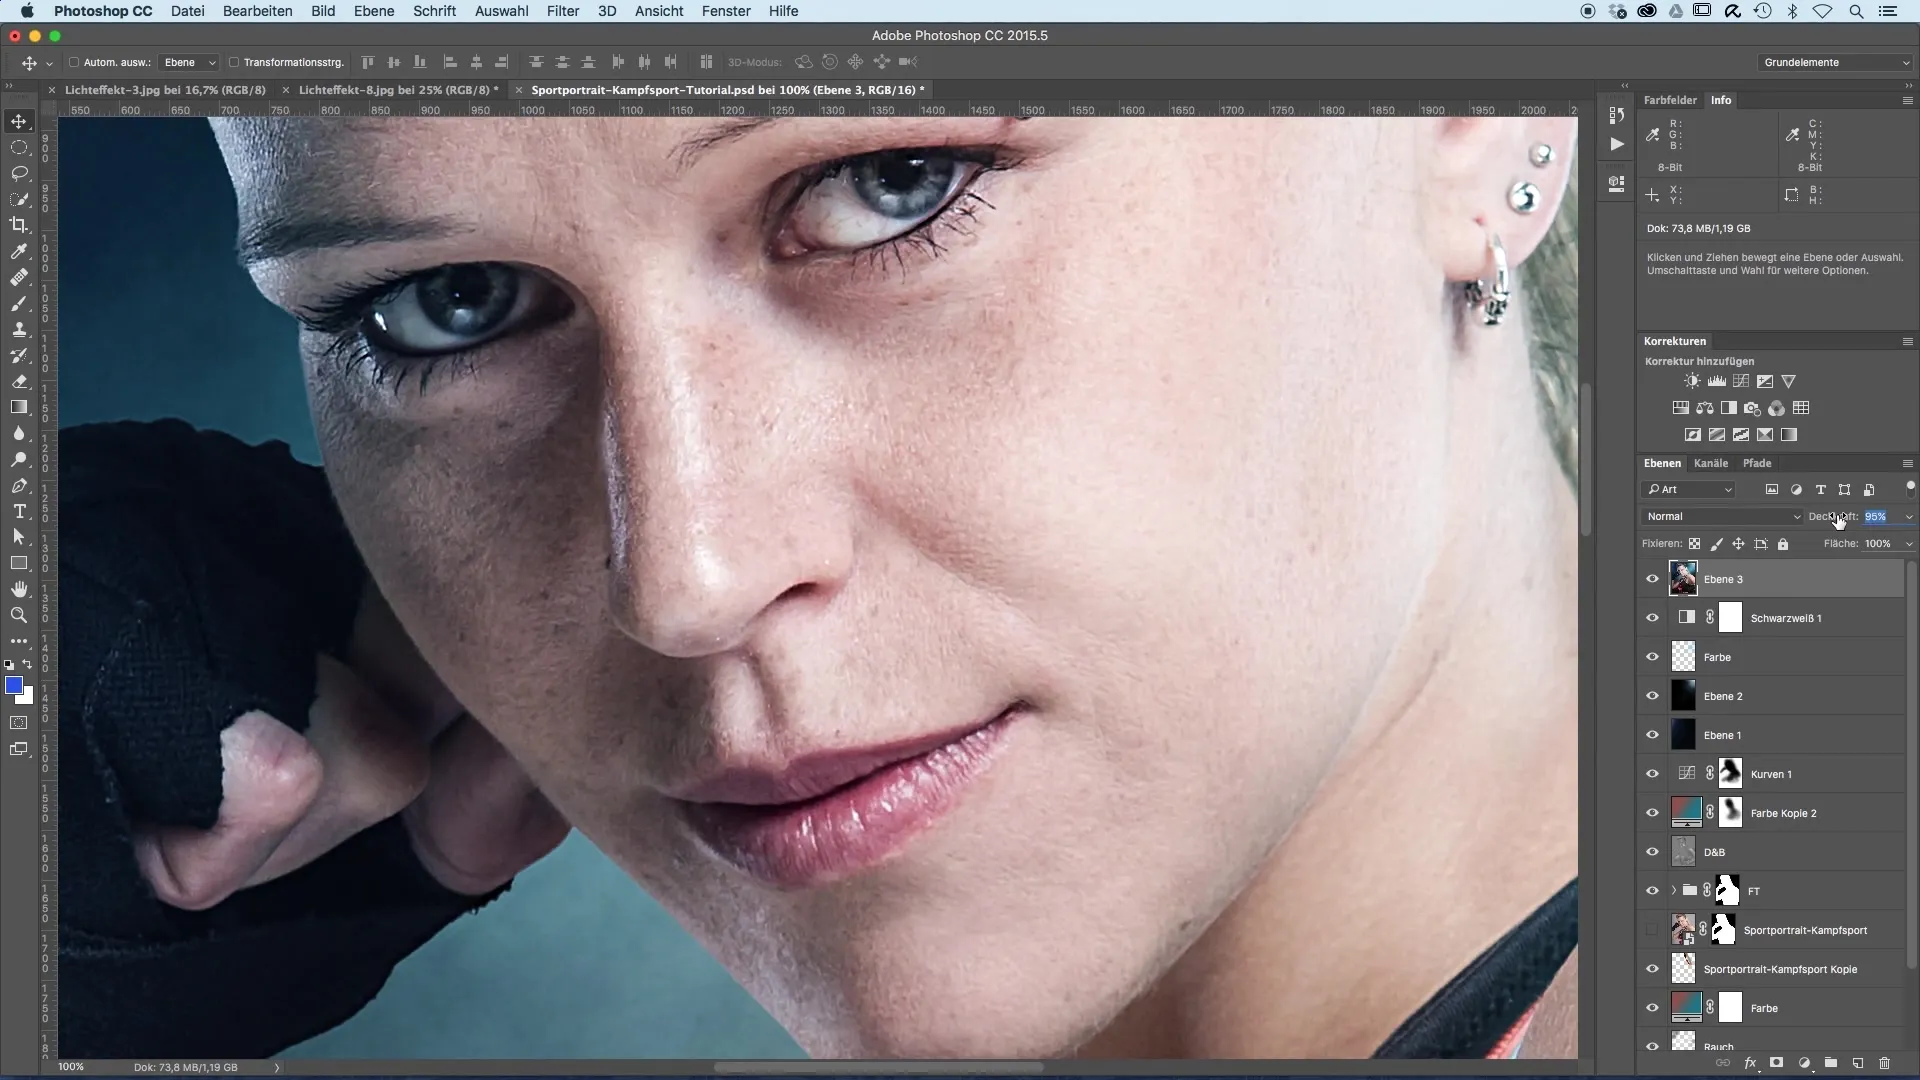
Finally, check the areas of the image that are especially important to you. Pay attention to how the sharpening directs the viewer's gaze, particularly in the eyes and around the mouth. These details give the entire image more life and expression.
Now you are ready to try the technique on your own images and discover the benefits of the filter for yourself!
Summary – Image Optimization of Sports Portraits: Sharpening with Intellect
Sharpening your sports portraits is a crucial step that greatly enhances the impression of your photo. By specifically working with the “Reduce Blur” filter and carefully adjusting the sliders, you achieve optimal results. However, you should be careful to ensure that the sharpness does not appear exaggerated to maintain a natural look.
Frequently Asked Questions
What software is used in this tutorial?This tutorial uses an image editing software that offers the “Reduce Blur” filter.
How can I apply the sharpening filter to my image?Reduce all layers into a consolidated layer and select the sharpening filter “Reduce Blur” from the filter menu.
What can I do if my image looks too artificial after sharpening?Adjust the sliders for “Blur Limit” and “Smoothness” and reduce the opacity of the sharpened layer.
Are there alternatives to the Reduce Blur filter?Yes, there are various sharpening filters, such as the High Pass filter, which yield different results.
How often should I apply sharpening?It depends on the image; however, you should be careful not to overuse or exaggerate the sharpening.
