A good image doesn't have to be expensive. If you want to start with little money, a simple LED lamp from an online mail-order retailer, sold together with a softbox and a tripod, is often enough. Such sets usually cost 30 to 50 € and consist of a tripod, a softbox with a lampshade, and a light bulb. The quality is modest, but with the right placement you can already achieve a usable look.
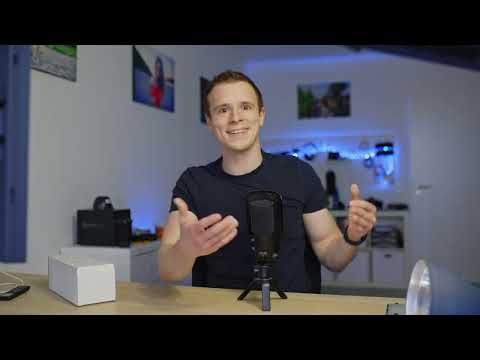
The video is only loaded from YouTube when you play it – data (including your IP address) is then transmitted to YouTube/Google. More in the privacy policy
In this guide, I'll show you what to look out for when buying, how to set up the kit, and why a single light source often works better than two placed symmetrically. You'll also learn how to spot color deviations and adjust your camera to the new lighting situation.
Key Takeaways
An inexpensive set provides a controllable, evenly burning light source that works independently of daylight. With the simple models, the brightness usually can't be adjusted, but the position can. A single lamp placed to the side of the face creates more depth than two symmetrically placed lamps. When buying, pay attention to the color temperature and expect that two lamps from the same batch may have slightly different color tones. Start small, gain experience, and only expand your setup once you know what you're missing.
Step-by-Step Guide
Step 1: Finding the Right Lamp
Search for terms like "video light LED" or "softbox set video". The cheapest variants often look very similar to the more expensive models, but differ in build quality and color accuracy. Before buying, read the specifications on power and color temperature. A model with about 55 watts is sufficient for many simple shots.


Step 2: Checking the Contents and Stability
A typical set consists of a tripod, a softbox with a built-in socket, and a bulb. The tripod often feels wobbly with the cheaper models. Therefore, place it on a firm, level surface and be careful not to knock it over accidentally. With more expensive tripods, the weight sits in the base, so they stand much more stably and extend higher. With an inexpensive set, you should therefore move carefully, because parts can easily break, especially when rearranging.


Step 3: Inserting the Bulb
The softbox has a socket inside, into which you screw the included bulb. Theoretically, other light sources will fit too, but to start, I recommend using the included bulb so that you have a defined starting point. Screw it in firmly, switch on the lamp, and check whether it lights up evenly.


Step 4: Understanding Color Temperature
The included bulb is designed for about 5500 Kelvin. This roughly corresponds to daylight and is a good starting point for video. The specification is often clearly stated on the packaging, but not always exactly on the product itself. With inexpensive lamps, the color can vary slightly between two units. Therefore, if possible, place several lamps next to each other and compare them before using them together.


Step 5: Checking the Color Cast on the Monitor
Switch on the lamp and look at the image on your monitor or reference screen. A slight green cast is often noticeable, especially if the softbox is smaller than the comparison lamp. This isn't due to your camera, but to the light source itself. With a reference monitor or a gray card, you can make the color cast visible. With a budget setup, you have to work with what you have, because brightness and color can hardly be changed on the lamp.


Step 6: Accept the brightness and work with the position
Many cheap lamps only have an on and off switch. So you don't adjust the light intensity on the device, but through the distance to the subject. The closer the lamp is to the face, the brighter the image becomes. Also try to place the lamp not directly in front, but to the side. This creates shadows that give the face structure.


Step 7: Rely on one light source instead of two
If you have bought a two-piece set, it is tempting to set up both lamps symmetrically on the left and right. However, this leads to a flat, boring result, because the face is lit evenly and hardly any shadows are created. Instead, set up only one lamp to the side. This difference is clearly noticeable in the before-and-after view, and the face immediately looks more three-dimensional.


Step 8: Adjust the camera
With an automatic ISO setting, the camera constantly reacts to changes in brightness, which can lead to an unsteady image. Therefore, set the ISO manually and adjust the aperture or shutter speed until the image looks right. Afterwards, also check the white balance, since the lamp has its own color temperature. Only once you have fixed the camera settings can you reliably judge the effect of the lamp.


Step 9: Expand the setup step by step
You don't have to spend several hundred euros right away. Many beginners only realize after a few videos which features are important to them, such as a more stable mount, a larger softbox, or a lamp with adjustable brightness. Start with a single lamp, make a few test recordings, and then decide what makes sense next. This way you avoid bad purchases and build a setup that suits your working style.


Summary – Cheap video light: A softbox setup for a small budget
A cheap LED set with a softbox, tripod, and bulb is enough to get started with video lighting. You get a controllable light source that works independently of daylight. You adjust the brightness through the distance, not through the device itself. A single lamp to the side of the face provides more structure than two symmetrically placed lamps. Watch out for color deviations, set the camera manually, and only expand your setup once you know exactly what you need.
FAQ
Do I really need a two-piece set?Not to get started; a single lamp to the side of the face usually creates a better look than two set up symmetrically.
Can I adjust the brightness of the cheap lamp?Most entry-level models only have an on and off switch. You control the brightness through the distance to the subject.
Why does my image look greenish?Many cheap lamps have a slight green tint. Check the image on a good monitor and adjust your camera's white balance.
Is a cheap tripod safe enough?A budget tripod often feels wobbly. Place it on a solid surface and move carefully, especially when rearranging.
Which camera setting is important?Turn off automatic ISO so that the image doesn't constantly fluctuate. Set the aperture or shutter speed manually as appropriate.


