A single light is often enough to make videos look like they were shot in a studio. If you have been working with a weak lamp or ceiling light so far, you will see a clear difference with this setup. The combination of a dimmable continuous LED light and a large, round softbox is quick to set up, easy to transport, and delivers soft, flattering light. You don't need a big budget or complicated technology for it.
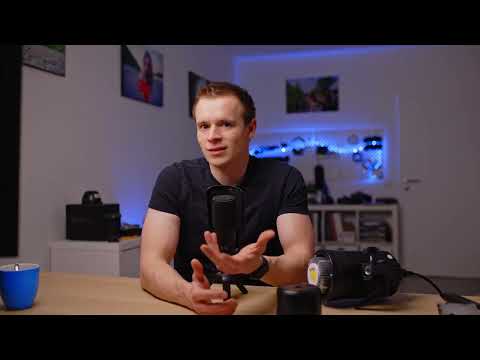
The video is only loaded from YouTube when you play it – data (including your IP address) is then transmitted to YouTube/Google. More in the privacy policy
In this guide, you will learn which components you need, how to position them correctly, and what to pay attention to regarding the background and ambient light.
Key Takeaways
A one-light setup consists of a dimmable continuous LED light and a large softbox or umbrella placed as close to the subject as possible. The light should come slightly from the side and somewhat from above. The background stays dark if you keep enough distance from it. Turn off disruptive ceiling light so the colors look right. A colored background light can give the video additional character.
Step-by-Step Guide
Step 1: Choose the Right Light Source
Start with an LED lamp that provides continuous light. The video uses a 60-watt lamp. Unlike a studio flash, continuous light shows you in real time what the image looks like before you record. Also make sure the lamp is continuously dimmable. In the video, it is set to ten percent power, and this is exactly why adjustability is so valuable: you adapt the brightness to your environment and your camera sensor without rebuilding the setup.
A practical tip: many of these lamps have a fan. During operation it is usually barely audible, but when recording in a very quiet environment it can be noticeable. If you are recording audio, you should test this beforehand.


Step 2: Select the Softbox
The softbox determines the quality of the light. The video mentions sizes between 90 and 120 centimeters. What matters most is that the shape is large and round. A large light surface diffuses the light strongly and creates soft transitions on the face. An umbrella is a simple alternative to the classic softbox. It can be set up and taken down much faster, which is especially helpful for mobile jobs or client appointments.
Setting up a softbox takes some time, since the fabric has to be fitted and parts such as the white front diffuser are attached with Velcro fasteners. Allow for these minutes if you are working with it for the first time.


Step 3: Place the Softbox Close to the Subject
The most important trick lies in the distance. Place the softbox as close as possible to your subject without it being visible in the frame. The closer the light source, the larger it appears from the subject's point of view, and the softer the light becomes. In the video, the box is so close that it can almost be touched.
Additionally, a position slightly to the side and somewhat above the face helps. It doesn't have to aim exactly at the center of the lamp. Since the light diffuses strongly, a slightly higher position hardly matters. The box doesn't have to be placed extremely to the side; a moderate position is often enough and is easier to set up.


Step 4: Keep the Monitor Out of the Light Path
When you work at the computer, the lamp can easily shine directly onto the screen. Then you can hardly see anything and can't check any edits. Therefore, set up the setup so that the monitor is not in the light cone. The position presented is deliberately chosen for tutorials in the field of image editing, because it enables both: good light for the camera and a clearly visible screen.

Step 5: Move the Background Further Away
To keep the background dark, leave as much distance as possible between the subject and the wall. The farther away the background is, the less light falls on it, and it fades pleasantly into darkness. This makes the lit subject stand out clearly. This step is inconspicuous, but it greatly changes the result.

Step 6: Control the Ambient Light
A common mistake is the existing ceiling light. It casts additional shadows and distorts the colors, so the entire setup loses its impact. Therefore, turn off the ceiling light and work only with your light source. The color rendering then stays consistent. The video also shows that the ceiling light noticeably ruins the colors, even if the image still looks usable at first.

Step 7: Use Background Light Deliberately
Once the main light is in place, you can illuminate the background with a second, small light source. Here you have creative freedom. A color complementary to skin tone, such as blue, looks modern and high-contrast. Orange, on the other hand, creates a warm, cozy mood. A subtle color accent light gives the video depth and prevents the background from looking lifeless. However, use the accent sparingly so that the subject stays in the center of attention.

Step 8: Use the Setup as a Standard
The One-Light setup is particularly well suited as a starting point because it delivers a significantly better result than a low-budget lamp with little effort. After a little practice, setup takes about two minutes. The softbox can be folded up small, which makes transport easier. In the video, it is referred to as a go-to setup, that is, as a foundation for many productions. Almost any camera works with it, whether a smartphone or a professional camera.

A look ahead: There are ways to improve this setup further. The next section of the course covers these enhancements.

Summary – One-Light Setup for Videos: Positioning Softbox Light Correctly
A One-Light setup with a dimmable continuous LED lamp and a large, round softbox produces soft, professional light. You place the softbox close to the subject, slightly to the side and from above. You keep the background dark through distance, you turn off the ceiling light, and a colored accent on the background brings atmosphere to the picture. The setup is quickly done and works well for mobile use.
FAQ
What lamp do I need for a One-Light setup?You need a dimmable continuous LED lamp, for example a 60-watt lamp. Continuous light shows you the result in real time, and the adjustability helps you adapt the brightness to the environment and camera.
What softbox size is ideal?The video mentions 90 to 120 centimeters. More important than the exact size is that the shape is large and round, because it diffuses the light softly.
Is an umbrella a good alternative to the softbox?Yes. An umbrella can be set up and taken down more quickly and is particularly suitable for mobile use.
Why should the softbox be as close as possible to the subject?The closer the light source is to the subject, the softer the light becomes. Just make sure the box is not visible in the frame.
What do I do if the ceiling light is a problem?Turn it off. Ceiling light casts additional shadows and distorts the colors, so the setup loses quality.
How do I keep the background dark?Increase the distance between the subject and the background. The less light reaches the background, the darker it looks.
What color is suitable for the background light?A color complementary to skin tone, such as blue, looks high-contrast. Orange creates a warm and cozy mood. Use the accent subtly.
How long does setup take?With a little practice, the setup can be put together in about two minutes.


