A face that looks flat and a background that merges with the person are typical signs of lighting with just one lamp. With a single light source from the side, you can create little depth. The classic three-point lighting setup solves this problem by combining three light sources, each with its own job: a key light, a fill light, and a light from behind. This guide walks you through the setup, shows you typical pitfalls, and explains when you're better off skipping the effort.
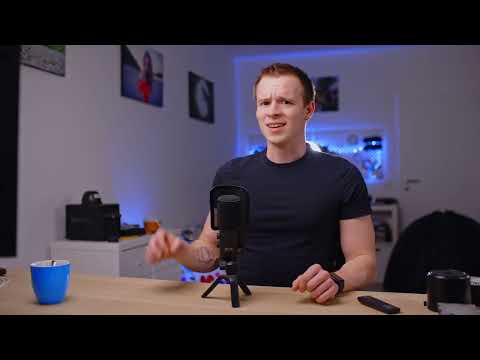
The video is only loaded from YouTube when you play it – data (including your IP address) is then transmitted to YouTube/Google. More in the privacy policy
Key Takeaways
- The key light is your main light source. Set it up to the side and choose the softest light source possible.
- The fill light prevents the shadow side of the face from becoming too dark. A reflector is usually the simplest solution for this.
- The hair light (also called a rim light) comes from behind and separates you from the background. It should be small and directional.
- The lamps should be positioned outside the frame. Visible light edges show you where your movement limits are.
- Not every situation needs maximum lighting. When there is a lot of movement, a slimmer variant is often more practical.
Step-by-Step Guide
Step 1: Setting the Key Light as the Main Light
Start with your key light. Place it to the side, for example on the right side of your subject, and choose the softest light source possible. Soft light creates gentle transitions on the face and looks more flattering than a harsh, point-like lamp. Make sure that one half of the face is clearly brighter than the other. It is exactly this difference in brightness that makes the face look three-dimensional. Your starting point doesn't have to be perfect yet, because the following steps will correct the image.

Step 2: Keeping an Eye on the Shadow Side
Now take a closer look at the dark side. Depending on the size of the softbox or lamp, the other half of the face quickly ends up too dark. Check this on the monitor and don't rely only on your impression in the room. You have two options: a second, weaker lamp that only brightens slightly, or a reflector. For most situations, the reflector is the quickest solution, because it doesn't create additional light but bounces back the existing key light. The difference in brightness is thus preserved; it is merely softened.

Step 3: Placing the Reflector Outside the Frame
Place the reflector on the dark side, and do so in such a way that it is not visible in the frame. Approach it slowly. Even a few centimeters can make the difference between a gentle fill and far too harsh lighting, which you will see immediately on the monitor. A reflector doesn't have to be permanently mounted. With adhesive tape or a clamp holder, it can quickly be fixed temporarily if necessary and fine-tuned. Check the camera image after every change until the shadow side is only gently filled in.

Step 4: The Alternative with a Second Lamp
If you want to control the fill light more precisely, you can use a second lamp instead of the reflector. The advantage lies in the adjustability: via the power setting, you determine exactly how much light reaches the shadow side. The disadvantage is the larger setup and the higher heat buildup in the room. A white surface also works as an alternative to the reflector. In any case, what matters is that the fill light remains significantly weaker than the key light. Otherwise the dimensionality disappears, and the face looks flat again.

Step 5: Setting the Hair Light from Behind
The third light source comes from behind and lifts your subject off the background. This is the point where the separation is created. Don't use a large softbox for this as with the key light, but a small lamp with a directional light shaper. The light is aimed so that it lightly catches the hair and shoulders. The beam should not fall directly into the camera lens, as this leads to unwanted reflections and glare.

Step 6: Using the Light Shaper Correctly
A small reflector or a honeycomb grid in front of the lamp focuses the light and makes it more targeted. Slide the light shaper so close to the lamp that the light cone stays narrow. A honeycomb grid is optional here. If you don't have one, the standard reflector that usually comes with the lamp is enough. The result can already be improved significantly with simple means. Make sure that the lamp itself is not visible. The lighting effect on the subject should work in the image, but the spotlight behind it should not.

Step 7: Finding the Right Height and Alignment
Ideally, the hair light comes from above, for example via a boom stand, and shines diagonally downward onto the subject. This keeps the lamp out of the frame. If you don't have a boom stand, you can also set the stand lower, as long as the angle is right. The light cone should hit the shoulder and the hairline, not the forehead or the face. Try out several heights until the contour is cleanly defined.

Step 8: Checking the Light Edge and Freedom of Movement
Move in front of the camera and observe where the hair light lands. As soon as the light becomes visible behind you and the lamp moves into the frame, the problem shows up immediately. A slight light edge along the border of your body is intended, however, and looks high-quality as long as it sits cleanly. Make sure the light stays directed at your subject and that your range of movement stays limited. Experiment with position and angle until the edge lies where you are positioned. This takes some patience, but it is worth it for the overall impression.

Step 9: Realistically Assessing the Effort
Not every video needs the full setup. For talk formats with lots of movement, with heat in the room, or with limited space, a simpler variant is often more practical. Even a key light with a reflector delivers a significantly better result than a single lamp. Additional effects such as colored RGB light in the background are possible, but only help if you use them purposefully and sparingly. The goal is a dimensional, calm image, not an overloaded setup.

Summary – Three-Point Lighting Setup for Videos Explained Simply
The three-point lighting setup consists of three clearly separate tasks. The key light shapes the face through soft light falling from the side. The fill light, usually a reflector or a weaker second lamp, softens the shadow side without destroying the dimensionality. The hair light from behind separates you from the background. What matters are dosage, alignment, and position outside the frame. Anyone who observes these three points and regularly checks the result on the monitor achieves a professional interview image with manageable effort.
FAQ
What advantage does the three-point lighting setup offer over a single lamp?Through the difference in brightness, it creates dimensionality in the face and cleanly separates the subject from the background with the hair light.
Can I replace the reflector with a white surface?Yes, a white surface works similarly. The effect depends mainly on the size and distance from the subject.
Do I absolutely need a honeycomb grid for the hair light?No, the lamp's standard reflector is sufficient. A honeycomb grid additionally focuses the light and makes it more targeted.
Why shouldn't the hair light lamp be visible in the frame?A visible spotlight looks distracting and unnatural. Only the lighting effect on the subject should be perceptible.
How high should the hair light be positioned?Ideally diagonally from above, for example via a boom stand, so that the lamp stays out of the frame and the light hits the shoulders and hairline.
Is colored RGB light useful?It can accentuate the background, but should be used sparingly so that the subject remains in the foreground.


