Anyone who edits photos and videos at a desk and also sits in front of the camera themselves knows the dilemma: What is good for the monitor often doesn't work for recording, and vice versa. This is exactly where this guide comes in. You follow a complete rebuild, from the problem to the finished solution. Along the way you'll see why an office setup rarely turns out perfect on the first try and why step-by-step optimization is the better approach.
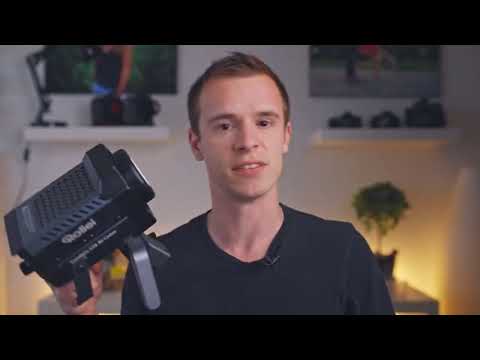
The video is only loaded from YouTube when you play it – data (including your IP address) is then transmitted to YouTube/Google. More in the privacy policy
You'll learn how to coordinate window light, desk position, camera distance, video light, and background lighting so that your workspace is suitable for both purposes. The steps are deliberately practical, so you can transfer them to almost any room.
Key Takeaways
- Plan every setup from two perspectives: image editing at the computer and filming.
- Lots of light from behind and little from the front is the most common mistake in video recordings.
- Distance from the background creates depth and blur, so that you stand out from the room.
- A monitor that isn't directly in the sun makes it easier to judge colors.
- Modular elements such as a rotatable desk and a freely movable monitor save you a lot of time with every rearrangement.
Step-by-Step Guide
Step 1: Identify Sources of Interference at the Window
Before you rearrange anything, look at where the light is coming from. In the example, the sun shines through a direct window, and that is exactly where the view onto the monitor falls as well. A screen that is washed out by backlight distorts your color judgment. Note down such sources of interference before you start setting up, because they determine where you can sit.

Step 2: Consider Both Perspectives at the Same Time
Split your planning into two viewpoints. On the one hand, ask yourself how you work at the computer and where the monitor stands. On the other hand, you should ask yourself how the camera sees you. An angle that is ideal for tutorials can be unfavorable for a cinematic shot. Therefore, check every change against both requirements.

Step 3: Remove the Desk as an Obstacle
As long as the desk stands between the camera and you, it is hardly possible to film properly. It blocks the line of sight and restricts your freedom of movement. The desk should therefore be moved so that the camera can be pointed at you unobstructed. This is the starting point for all further steps.

Step 4: Mount the Monitor So It Moves Freely
Instead of leaving the monitor standing rigidly on the desk, it floats on a mount. This way, you only have to turn the keyboard and turn around to switch from the image editing station to the camera side. Fine-tuning comes later, but the basic position is already set.

Step 5: Find the Right Light Balance for Image Editing
Sit neither directly in the sun nor in the darkest corner of the room. In the first case, the sun washes out the monitor completely; in the second case, the screen looks too glaring by comparison. Both lead to you editing photos incorrectly: with a very bright monitor and a dark environment, you quickly make images too dark. The perfect mix of both is crucial. Also calibrate your monitors regularly, because outdated color matching distorts every decision.

Step 6: Angle the Camera and Create Distance from the Background
Cinematically, the rule is: the more distance between you and the background, the better. The distance creates depth and helps render the background out of focus. In the video, filming is done at aperture f/14, and the background still doesn't look very blurred. So you often need more space than you initially think. A slightly angled camera helps additionally, because you don't always have to hit exactly the same position. The line composition suffers a little as a result, but in practice flexibility is often more important.

Step 7: Place the video light above the setup
The basic problem with video lighting: light that falls on the monitor from the side interferes with the screen view. That is why you place the light above, at an angle from the right, so that it illuminates your face without overpowering the screen. Make sure the background stays darker than you are. This way you stand out clearly from the room. Where there is space toward the wall, it may also be a bit brighter there, because the light travels in that direction.

Step 8: Route cables neatly under the table
Attach a long cable to the underside of the table with cable ties. A shared connection supplies either the monitor or the video light, so you don't have to lay new cables with every change. Add a power strip within reach and remove devices that aren't needed there. This way the cable clutter disappears, and the setup stays organized. Make sure the wiring is tested before the final installation.

Step 9: Fine-tune the light via app
The Candela series can be controlled via an app. You can then see on your monitor whether you need more or less light, and you don't have to constantly walk back and forth between the camera and the light. Fine-tuning is always part of the process. Just a few centimeters in the light's position decide whether your face is evenly lit or unpleasantly glaring.

Step 10: Use background light deliberately
A lightly lit background looks lively and shows depth. In the example, light accents in the background ensure that the image doesn't look empty. You can enhance the effect by using a second light from the back right. However, make sure your monitor doesn't unintentionally pick up light as a result, because otherwise the screen display suffers.

Step 11: Consciously weigh cinematic effect against screen view
The question of whether you want to film cinematically or see something on the screen can't always be answered optimally at the same time. A light that illuminates you perfectly can create reflections on the monitor. Therefore, decide depending on the purpose whether a tutorial or a cinematic clip is being made, and adjust the setup accordingly.

Step 12: Use the entire room with the setup
The rotatable table makes it possible to work and film from both sides. Unplug the power cable, rotate the table, and the space is available to you. The light and the camera can stay where they are, as long as the area isn't needed for something else. This way you use the room fully instead of limiting yourself to one viewing direction.

Step 13: Prepare the setup for livestreams
Livestreams can also be implemented well with this setup. Cables for power, camera, and HDMI hang under the table, so you can get the setup ready quickly. Only the variant facing sideways is less suitable, as the comments are then hard to keep an eye on.

Step 14: Hide distracting elements and create symmetry
A door in the background quickly looks busy and distracts from the subject. Therefore, choose a layout in which the door doesn't end up in the frame and the overall image looks more symmetrical. A modular setup stays more relaxed because you can leave it standing and don't have to clear everything away each time.

Summary ??? Video Light Setup: Modular Lighting for Film and Image Editing
A good office setup for image editing and video recording doesn't come from a single purchase, but from step-by-step optimization. You start with an analysis of the sources of interference, plan from both perspectives, and create space by removing the desk and mounting the monitor so it can move freely. Then you place the video light above and at an angle, route the cables neatly under the table, and adjust the light via app. Background light provides depth, and a rotatable table allows you to use the room fully. If you take these principles into account, you end up with a setup that is modular, flexible, and equally suitable for tutorials and recordings.
FAQ
Which lamp is used in the setup?A video light from the Candela series that can be controlled via an app and makes fine-tuning easier for you.
Why shouldn't the video light be positioned too far to the side?Light from the side quickly falls on the monitor and disrupts the screen view. A position above and slightly angled is usually the better choice.
How much distance do I need from the background?As much as possible. Distance creates depth and blur, and often more space is needed than you initially assume.
What should I do if the monitor causes glare during video recordings?Check the position of the light and the monitor, avoid direct backlight, and adjust the screen brightness appropriately.
Is this setup suitable for livestreams?Yes, the cables for power, camera, and HDMI are prepared. However, the variant with a view to the side is less suitable for livestreams.


