Your video is sharp and the camera is good, yet the image looks flat? Often it comes down to the lighting. This guide shows you how to build a setup with minimal equipment that noticeably improves your footage. At its core, all you need is one main light, some distance from the background, and optionally a fill light. Above all, the right placement is what matters.
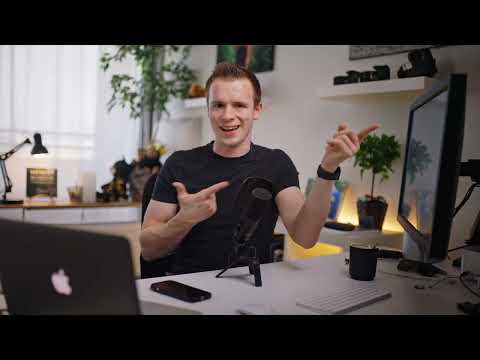
The video is only loaded from YouTube when you play it – data (including your IP address) is then transmitted to YouTube/Google. More in the privacy policy
Key Takeaways
- Natural light is the foundation. Without it, the image quickly looks sterile and lifeless.
- An ordinary, slightly warm lamp is enough. RGB lights are not necessary.
- Distance from the background results in a darker, blurrier background.
- The main light is positioned to the side and slightly above, about 30 to 45 degrees off the camera axis.
- A large, round-looking light source, optionally with a honeycomb grid, creates soft light and beautiful catchlights in the eyes.
- A weaker fill light on the opposite side softens harsh shadows.
Step-by-Step Guide
Step 1: Use natural light as a foundation
If possible, start with daylight. Position yourself so that some window or outdoor light falls into the frame. This looks more vivid than pure studio light, which quickly looks clean and cold. If you don't have this light, you can compensate for it to some extent with an artificial lamp.

Step 2: Use a warm additional lamp
If no daylight is available, an ordinary lamp with slightly warmer light is sufficient. You don't need to buy a system like Philips Hue for this. What matters is simply that the light is neither too cool nor too colorful. Switch the lamp off once and then on again. You'll immediately see how much atmosphere it brings to your image.

Step 3: Create distance from the background
You can also film directly in front of a plain wall, but with distance the image looks significantly more professional. The farther you are from the background, the darker and blurrier it becomes. This makes you stand out more clearly visually. If your camera allows it, use a wide-open aperture for this.

Step 4: Place the main light to the side and slightly above
This step is the most important in the entire setup. Place the large lamp next to the camera axis, about 30 to 45 degrees to the left or right, and let the light come from slightly above. It shouldn't shine directly onto the background, but fall on your face from the side. This way you get enough light from the front, and the setup stays simple.

Step 5: Use a honeycomb grid for more targeted light
Optionally, you can attach a honeycomb grid to the lamp. It focuses the light and prevents it from spreading uncontrollably around the room. This keeps the wall behind you from getting too bright. You don't need an expensive model for this. An inexpensive video light with neutral light is completely sufficient to start with.

Step 6: Look for a round-looking light source
A large, round-looking light source creates soft light. You can especially tell by the light reflections in the eyes. A device with many corners also looks round enough. The larger the lamp is in relation to your subject, the softer the shadows will be.

Step 7: Bring the lamp and camera closer to you
If space allows, move closer to the camera and bring the lamp a bit closer and lower. A monitor or desk between the camera and you would make this difficult, so this step isn't possible in every environment. This makes the light even softer and the background darker. A clear effect results: soft light on the face and a gentle shadow on the side that makes the image look more three-dimensional.

Step 8: Place a fill light on the opposite side
With a second, weaker light on the opposite side, you balance out the shadows from the main lamp. Your fill light doesn't have to be as bright as the main light. A slight shadow can remain so that the face retains contours. The fill light is optional, but it makes a noticeable difference with harsh shadows.

Step 9: Check the result
Finally, check the angle and the effect. If the main lamp sits between 30 and 45 degrees to the side and slightly above you, and there is enough light on your face, the setup works. Test it directly with your smartphone or your camera. The difference is just as visible there as in big productions, and the result looks professional on YouTube, Instagram, and in other formats.

Summary – Video light setup: Simply professional with one lamp
Convincing video lighting doesn't require complicated equipment. You start with natural light or a warm lamp and place it to the side and slightly above, about 30 to 45 degrees next to the camera. Distance from the background creates depth, and a large, soft-looking light source provides soft shadows. An optional fill light balances out overly harsh shadows. With these few steps, you achieve a consistent look that you can reproduce at every shoot.
FAQ
Question: Do I need expensive RGB lights for good videos?Answer: No, a normal, slightly warm lamp is completely sufficient to get started.
Question: How far to the side should the main lamp be placed?Answer: About 30 to 45 degrees to the left or right and slightly above, so that it doesn't shine directly onto the background.
Question: What does the distance from the background do?Answer: The greater the distance, the darker and blurrier the background looks, and you stand out better visually.
Question: Is a fill light mandatory?Answer: No, it is optional, but it softens harsh shadows and is worthwhile if the contrast looks too strong.
Question: Does the setup also work with a smartphone?Answer: Yes, the difference is just as visible with a smartphone as with larger cameras.


