
Do you want to make water look as smooth as glass in daylight while still rendering clouds, houses and sky cleanly? Then an exposure time of around 5.5 minutes is worthwhile. However, such times are significantly more demanding than a normal shot. The exposure changes during the shot, colors shift, and every little vibration shows up in the image. In this guide, I will show you step by step how to determine the exposure time with an ND filter, adjust it via ISO, set up the camera and then check the result.
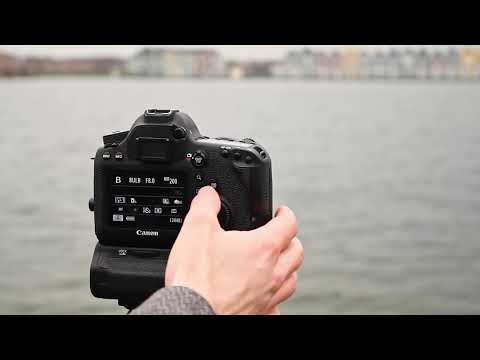
The video is only loaded from YouTube when you play it – data (including your IP address) is then transmitted to YouTube/Google. More in the privacy policy
Key Takeaways
The order of multiple ND filters does not matter; only their combined effect is decisive. With the Fotopilz app you determine the required exposure time, and via aperture or ISO you can shorten it in steps. The longer you expose, the more uncertain the result becomes, because the light can change during the shot. In addition, as the exposure time increases, a blue cast intensifies, which you can correct in post-processing. A tripod, remote release and mirror lock-up are mandatory at such times, and if you shoot in RAW format, you have the most room to maneuver in post-processing.
Step 1: Combine ND filters
Before you even go to the camera, you have to decide on the filters. You can screw several ND filters on top of each other, for example one with 6 stops and one with 10 stops. It makes no difference at all in which order you mount them, because the effect always adds up the same way. In this example, you use a 15-stop filter, which drastically reduces the amount of light.

Step 2: Determine the exposure time with Fotopilz
Now open the Fotopilz app. Based on your basic settings, it calculates the exposure time that is necessary with the filter in use. Make sure that aperture, ISO and metering remain unchanged, otherwise the calculation will not be correct. With the 15-stop filter, the app shows you about 10 minutes and 55 seconds here. That is too long for the desired result, so you have to readjust.

Step 3: Shorten the exposure time via ISO
Now the physics of exposure comes into play. Each stop halves or doubles the amount of light, and the same applies to the ISO value. If you increase the ISO value from 100 to 200, the sensitivity doubles and you only need half the exposure time. In this case, the time drops to about 5 minutes and 28 seconds. You can implement this value well without the image noise becoming unpleasant.

Step 4: Set up the camera and start the shot
Now set the camera's shooting mode to manual mode, i.e. M. Set the ISO to 200 and set the exposure time to 5 minutes and 30 seconds. The small deviation from the 5 minutes and 28 seconds from the app is unproblematic. Make sure that you trigger the shutter with the remote release and not directly on the camera body. As soon as everything is set, you start the shot.

Step 5: Plan for uncertainties during the exposure
While the camera is exposing, you should be aware that the calculation is only a snapshot. If clouds move in front of the sun, your image can become significantly too dark. If the cloud cover breaks up, it quickly becomes overexposed. Street lamps that switch on during the shot can also suddenly brighten your subject. You cannot prevent these influences, so you should check results several times. If you are shooting in the afternoon and it gets darker during the exposure, you may have to compensate for the time via ISO, aperture or a longer exposure time.

Step 6: Understand and treat the blue cast
The longer you expose, the stronger a blue cast becomes in the image. If you compare a normal exposure with one of 1.5 minutes and one of 5.5 minutes, the shift becomes immediately visible. Although the white balance remains fixed, the color impression still changes due to the long exposure. It is therefore best to set the camera to the warmest white balance, such as Shade, so that you have more reserves for the later correction. The color cast can be corrected well in post-processing, provided you shoot in RAW format.

Step 7: Ensure Sharpness and Stability
With such a long exposure, stability determines the quality. The camera should stand on a solid surface, and a sturdy tripod is a must. Also use the remote release, mirror lock-up, and, if necessary, a timer so that no vibrations occur. Check the sharpness at one spot in the image at 100 percent magnification, because with five or six minutes something can always vibrate. The houses in the example stay sharp despite the long exposure time because all precautions were taken.

Step 8: Check the Histogram and Correct the Exposure
After the shot, it's worth taking a look at the histogram. With the normal exposure, the values sit nicely in the middle. At 1.5 minutes, the histogram shifts slightly toward the bright areas, and at 5.5 minutes it moves noticeably to the left, so the image becomes darker overall. The blue cast contributes to this impression, because blue appears darker than yellow at the same brightness. If you notice that the histogram sits too far to the left, extend the exposure time a bit, for example to 6 minutes, so that the values move back more toward the middle.

Step 9: Shoot in RAW Format
Finally, you should set the file format. Shoot in RAW format if possible, because it gives you the most information in post-processing. A JPEG is also possible, but especially with elaborate long exposures, valuable reserves are lost with that format. Note that RAW files must be developed before sharing. You can do this with the software of your choice, and in return you gain significantly more latitude in brightness, white balance, and colors.

Summary – Daytime Long Exposure: Planning 5.5 Minutes Correctly
With an ND filter, the Fotopilz app, and a targeted adjustment of ISO or aperture, you can achieve an exposure time of around 5.5 minutes. Plan the shot carefully, because weather, sunlight, and street lighting can change the result during the exposure. A stable tripod, the remote release, and mirror lock-up ensure sharpness. Watch out for the increasing blue cast and check the histogram so that your shot doesn't turn out too dark. Shoot in RAW format, and then you can cleanly implement all corrections in post-processing.
FAQ
Why is the exposure time inaccurate with long exposures?The camera calculates the exposure only once at the beginning. During a multi-minute shot, however, the light can change due to clouds or street lighting.
Does the order of the ND filters matter?No, the order doesn't matter. The effect of the filters adds up regardless of which one is in front or behind.
Why does the image become bluish with longer exposure?With long exposure times, a blue cast caused by the lighting conditions intensifies. It can be corrected well in post-processing in RAW format.
Which white balance should I choose for long exposures?It's best to set a warm white balance such as Shade. This gives you more reserves for correction later.
How can I shorten the exposure time without changing the filter?You can increase the ISO value or open the aperture. Each stop halves or doubles the required exposure time.
Why is a remote release necessary?When triggering by hand, vibrations can occur that cause visible blur with long exposure times. With the remote release, you avoid this.
Should I shoot in JPEG or RAW format?RAW is recommended because it provides you with significantly more information in post-processing. JPEG is possible but offers less latitude.


