
Photography course: Long exposures from A to Z

- Long exposure in photography explained from A to Z: technique, methods and inspiring sample images!
- Be there from the set-up to the shoot when atmospheric day and night photos are taken
- Image reviews: Fields of application for long exposure, including clouds, water and thunderstorms
- Equipment: what you need, what you can do without and which apps will help you
- When shooting: how to choose the location, set up your equipment, find the right settings
- Tips and tricks for image optimization in Lightroom
Don't just set the exposure to seconds or minutes, but use a targeted approach to take effective photos with the long exposure!
34 Videos, 215 minutes
Intro to the video tutorial
What you can expect in the photography course "Long exposures from A to Z"
Find out what you will be able to do after the "Long exposures from A to Z" photography course.
What are long exposures used for?
Long exposures from A to Z: 1.1 Introduction
Welcome to the video training "Long exposures from A to Z". Let me welcome you briefly and say a few words about myself so that you know why I'm the right person to teach you about long exposures.
Long time exposures from A to Z: 1.2 Let clouds drift
First of all, let's take a look at what you can use long exposures for. In this video, I'll show you how a long exposure can affect the sky in your image using two example images.
Long exposures from A to Z: 1.3 Smoothing water
Next, I would like to illustrate the effect of long exposures on water in your photos and again show you two example images.
Long exposures from A to Z: 1.4 Removing people
You can also use long exposures to make a place or a scene empty of people! I'll show you how to do this in this video using two example images.
Long exposures from A to Z: 1.5 Softening shadow edges
Softening shadow edges is also a legitimate, albeit rarely used, application for long exposures. To ensure that you are fully informed on the subject, I would like to explain this option with an example image.
Long exposures from A to Z: 1.6 Photographing thunderstorms
The penultimate example of photos that benefit from long exposures is taking pictures of thunderstorms. Because the longer you expose, the greater the chance that you will get a flash in the picture.
Long exposures from A to Z: 1.7 Astrophotography
Finally, I would like to show you a few sample images on the subject of astrophotography. In astrophotography, you also use long exposures to collect the faint light from the stars and make it more visible. But be careful: To ensure that stars are still in focus, the exposure time must not be too long!
The right equipment
Long exposures from A to Z: 2.1 Tripods/tripod legs
Let's start our discussion of equipment with the tripod and, more specifically, with the tripod legs, which form the basic framework for a stable camera.
Long exposures from A to Z: 2.2 Tripods/tripod heads
Next, the tripod head is important, as it holds the actual weight of the camera and should therefore have a certain buffer in order to be able to hold heavier weights stably and without any problems. The design also differs and is designed differently depending on the application.
Long exposures from A to Z: 2.3 Tripods/center column
Many tripods have a center column, but ideally you should stay away from it, because an extended center column reduces the stability of a tripod enormously. It can only be used for weighting, but there are a few things you should bear in mind here too.
Long exposures from A to Z: 2.4 Tripods/quick-release plates
With the quick-release plates, it is possible to quickly use different cameras on one tripod. You should therefore make sure that all your tripods use the same quick-release system so that all your quick-release plates can be attached to all tripods.
Long exposures from A to Z: 2.5 Tripods/special shapes
In addition to the classic tripods, there are now a whole range of other tripods or mounting options for your camera. I would like to introduce you to a few alternatives in this lesson, especially for light luggage.
Long exposures from A to Z: 2.6 The camera
Now it's finally time to find out what requirements your camera needs to fulfill so that you can get the most out of your long exposures. It doesn't necessarily have to be a DSLR or system camera, but some points are necessary so that you can really get into the field of long exposures.
Long exposures from A to Z: 2.7 Remote release/cable release
The remote shutter release allows you to expose very precisely for well over 30 seconds. The most sensible version of such a device is actually still the wired version, which I show you in this video.
Long exposures from A to Z: 2.8 Remote shutter release/apps
Another variant of the remote shutter release is to use a smartphone app designed for this purpose. Although these apps still require a cable connection to your camera, they can boast a huge range of functions. On the other hand, you can then no longer use the smartphone for other things during the exposure.
Long exposures from A to Z: 2.9 Gray filter/basics
Let's now turn our attention to the topic of gray filters. In this section, I will first explain what a gray filter actually is. In the following lessons, you will then learn all about the names, applications and differences.
Long exposures from A to Z: 2.10 Gray filter/filter information
When it comes to filter specifications, there is always confusion between the extension factors, the aperture values and the ND values. In this lesson, we will therefore take a closer look at the various specifications so that you don't get confused by them.
Long exposures from A to Z: 2.11 Gray filters/variable gray filters
Variable gray filters are supposed to save you from having to use different filters. But is this really always such a good idea? In this short chapter, I want to tell you about variable gray filters and briefly explain why they are rather unsuitable for photography.
Long exposures from A to Z: 2.12 Gray filter/screw filter
First of all, I'll explain the different mounting systems for filters. The so-called "screw-in filters", which are the subject of this lesson, are often used to start with.
Long exposures from A to Z: 2.13 Gray filters/plug-in filters
Following on from the screw-in filters, this lesson now looks at the plug-in filter systems, which are easier and quicker to use in some respects, but are also more expensive to purchase.
Long exposures from A to Z: 2.14 Gray filter/helper apps
The last lesson on equipment is all about helper apps that are designed to make your life with gray filters easier, primarily by helping you calculate exposure times. As an example, I'll introduce you to my app of choice, which I use to calculate my times on the go and which you can use too.
The shooting
Long exposures from A to Z: 3.1 Finding the right location
Before we can really start taking photos, we need to find the ideal location for our subject. Helper apps can help you with this again.
Long exposures from A to Z: 3.2 Setting up the background/camera
Once you have found the perfect place to take photos, the next step is to set up and align the camera and tripod.
Long exposures from A to Z: 3.3 Lens selection
The lens is initially irrelevant for a long exposure. However, you should of course choose a lens that suits your subject and allows you to capture your subject as you imagine it.
Long exposures from A to Z: 3.4 Composition of the image
Before we start screwing on filters and calculating new exposure times, we first need to compose our photo. In this lesson, I'll give you a few more tips and we'll go through the camera settings step by step, which you should definitely set manually to get the most out of your long exposure.
Long exposures from A to Z: 3.5 Camera settings
Now it's time to set up our camera correctly, measure the exposure times and calculate them with our filter settings. Then we can take the first comparison photos and see what effect the long exposure has on our subject.
Long exposures from A to Z: 3.6 Long exposures during the day
Now it's time for the really long exposure times! In this lesson, we take a picture with an exposure time of 5.5 minutes and compare the effect with the previous photos.
Long exposures from A to Z: 3.7 Long exposures at night
In addition to the long exposures during the day, for which we naturally need our gray filters, very long exposure times can also be achieved even without filters in the evening and at night. I changed location once for this. I'll show you a few more impressions of the long exposures at dusk and their special features.
Long exposures from A to Z: 3.8 Practical tips
To conclude the practical part of this course, I have some practical tips and tricks for you that can make your shoots a little more pleasant and comfortable.
Image discussion
Long exposures from A to Z: 4 Image review
Now let's take a look at the resulting images together and compare the effects that the different exposure times have on the images.
Image editing
Long exposures from A to Z: 5.1 Daytime exposure
Now we finally come to the image processing. First, we'll take the daytime shot and transform it from a bluish long exposure to a minimalist, artistic image!
Long exposures from A to Z: 5.2 Night photography
The second image we want to edit is the long exposure from the night. In addition to the techniques from the daytime processing, we will also be correcting sensor spots and aligning and transforming the image to give the photo the finishing touches.
Final words
Long exposures from A to Z: 6 Final words & useful tips
You've done it! Over 3.5 hours of video training are behind you and you now definitely know everything I know about long exposures. Thank you so much for taking part! I hope you enjoyed it.
Examples of use
-
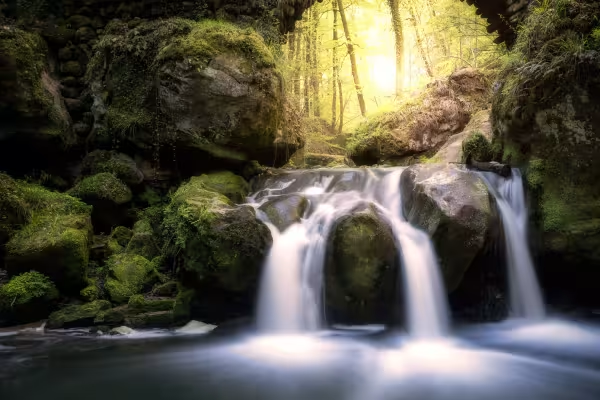 Example: Use the long exposure to smooth out flowing water - a silky-smooth look!
 -
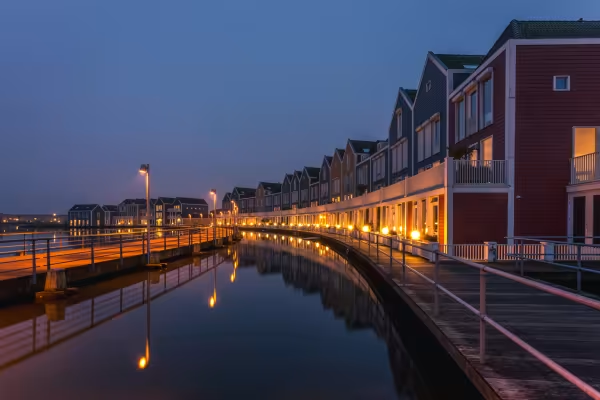 Example: When night falls, you go big - your tool: the long exposure.
 -
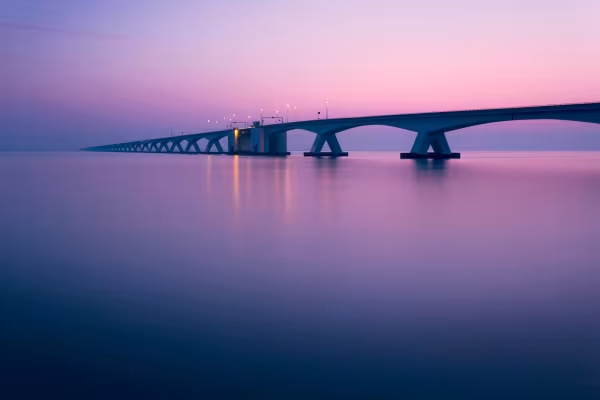 Example: Long exposure makes it possible - here the water nestles against the sky.
 -
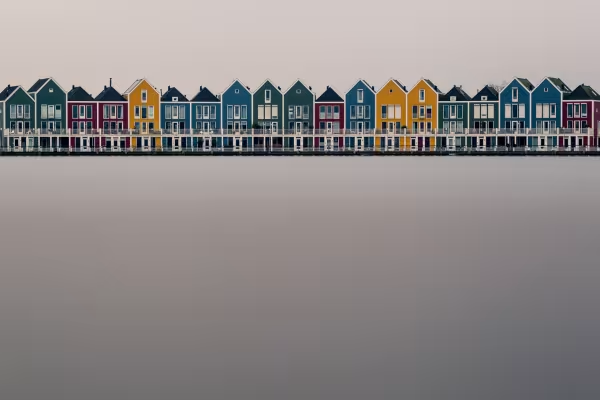 Example: Equipment & procedure - everything you need to know about long exposures.
You might also like

More style, more power, more templates!

Full power, more inspirations, maximum WOW effect!

Photo editing & image composition

Save time with artificial intelligence
Comment now „Photography course: Long exposures from A to Z“