
Photographing dog portraits - photo shoot in the studio

- Preparation: How to set up an effective studio with just a few resources and what equipment you need.
- During the shoot: the right camera and flash settings, the right way to handle the dog.
- Post-processing: Get to know retouching techniques, create backgrounds and create exciting image looks.
For dog portraits that also elicit a "wow" from the owner: Draw on the wealth of experience of a professional photographer, adopt their workflow or use specific approaches.
15 Videos, 137 minutes
Intro to the video training
What you can expect in the video training course "Photographing dog portraits - photo shoot in the studio"
You will learn how to take dog portraits from the wealth of experience of a professional photographer.
What you can expect in the video training course "Photographing dog portraits - photo shoot in the studio"
1 min OpenSettings and shooting
Step by step: dog portraits in the studio - 1 The equipment
Here you can find out what equipment you need to take impressive dog portraits in the studio. You don't have to have your own home studio, all the equipment is inexpensive and easy to buy and allows you to have a professional shooting setup with you at all times.
Step by step: Dog portraits in the studio - 2 The camera settings
Here I explain all the settings you should make on your camera and flashes to achieve the best possible result. The settings are made manually on the camera and the flashes are also controlled manually. However, once the settings are set, they no longer need to be changed during the shoot.
Step by step: dog portraits in the studio - 3 The studio set-up
Here I show you the setup of our small home studio. You'll see exactly where I place the background and the flashes to achieve the best results later on. You'll also get tips on how to work with large and small dogs.
Step by step: dog portraits in the studio - 4 The shoot
Now the photos are being taken! Here you'll get an insight into the shoot itself and how we worked with Max the Labrador. Then you'll find out the best way to handle the dogs and how to get your dog to give you their full attention.
Image editing
Step by step: Dog portraits in the studio - 5 Import & organization in Lightroom
The first step in image editing should be good organization of the image files. That's why you can find out here how to use Lightroom to organize your images and create a pre-selection from the shoot.
Step by step: Dog portraits in the studio - 6 Basic editing in Lightroom
Also in Lightroom, we will give one of the images a basic edit to prepare it for later processing in Photoshop. Lens correction and the reduction of contrasts are particularly important here.
Step by step: Dog portraits in the studio - 7 preparatory steps in Photoshop
In Photoshop, we will first remove all distracting elements from the image. To do this, we use the repair brush as a tool to remove and replace individual elements from the image.
Step by step: Dog portraits in the studio - 8 Create your own textures
In this chapter, I'll explain how you can create your own textures and backgrounds from scratch in Photoshop, which you can customize to suit your image. This way, you'll always have the right background or texture to hand when you need to insert something.
Step by step: Dog portraits in the studio - 9 Insert background
Now we can insert the new background into our picture. You will learn that it is much easier to insert a color-coordinated background than a background of a different color. The background is then selectively edited.
Step by step: Dog portraits in the studio - 10 Dodge & Burn
The next step is to make the first adjustments to the image look. First, the contrast on the dog is selectively increased with a dodge-and-burn layer and areas of the image that are too light or too dark are adjusted.
Step by step: Dog portraits in the studio - 11 Adjusting the image look
Various further adjustments to the image look will now follow. In this way, the foreground and background merge more and more into a uniform image. Colors and contrasts are adjusted and selectively highlighted.
Step by step: Dog portraits in the studio - 12 Sharpening
The final step in image processing is sharpening. There is a technique for this in Photoshop that can sharpen completely without artifacts. With this technique, you can achieve impressive sharpness in your image.
Step by step: Dog portraits in the studio - 13 final adjustments
Finally, we take another look at the image in Lightroom. Here we can make a direct comparison with the unprocessed image and see what we have changed in the image. If necessary, final corrections can also be made here in Lightroom.
Step by step: Dog portraits in the studio - 5 Import & organization in Lightroom
15 min OpenClosing words
Step by step: Dog portraits in the studio - 14 Final words & useful tips
You've made it! Now you know everything there is to know about dog photography in the studio. And that's why I'd like to take this opportunity to thank you and refer you to my Facebook group on the subject of dog photography. And at the end you'll receive a little surprise!
Examples of use
-
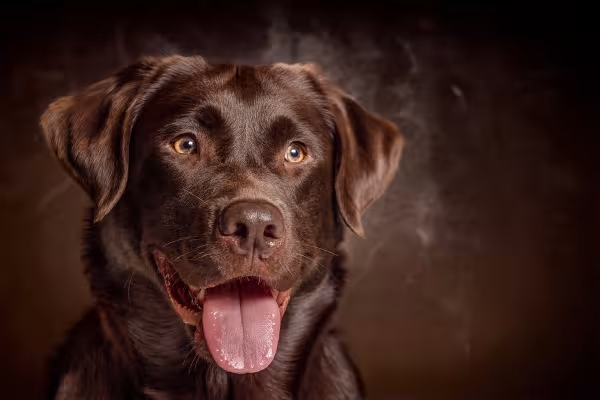 Learn how to take such characterful dog portraits yourself in the course.
You might also like

Full power, more inspirations, maximum WOW effect!

Save time with artificial intelligence

Photo editing & image composition

More style, more power, more templates!
Comment now „Photographing dog portraits - photo shoot in the studio“