
Imagine your dog portrait is technically perfect, but the background doesn't match the mood. Isolating fine fur is tedious and error-prone. In this tutorial, I'll show you a way that takes most of this work off your hands: you choose a background that matches your dog in color, and you work with a soft mask. Afterwards, you adjust the background with a smart filter and selectively blur it.
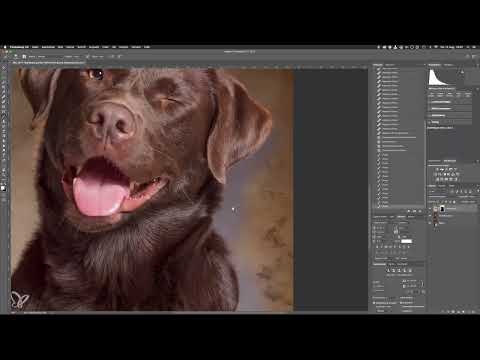
The video is only loaded from YouTube when you play it – data (including your IP address) is then transmitted to YouTube/Google. More in the privacy policy
This tutorial is aimed at everyone who edits their dog portraits in Photoshop. You need basic knowledge of working with layers, masks, and the brush tool. A graphics tablet is helpful, but not essential.
Key Takeaways
- A background that matches the dog in color is much easier to insert than a high-contrast one.
- The blend mode "Overlay" only works reliably with medium gray as the base for the texture.
- With a white layer mask and a soft brush, you can work roughly, since the transition looks natural thanks to the soft edge.
- Smart filters such as the Camera Raw filter or the Gaussian Blur can be adjusted or hidden at any time afterwards.
- A graphics tablet speeds up masking, but is not a requirement.
Choosing the right texture
The first step determines the result more than any later action. Look through your texture collection and make sure that color and brightness match your dog. In my example, the dog's fur is rather warm and medium brown. A very dark scratch texture would therefore be too far off, as you would have to brighten it considerably later. A classic paper texture with a slight gradient, on the other hand, works well.
If you have found a texture that fits in its basic tendency, you can also rotate it. A paper texture with a darker area at the top edge can be rotated by 180 degrees. This creates a natural vignette that draws the eye to the dog.


Inserting and adjusting the texture
Drag and drop the texture into your Photoshop document. It lands in the center of the image. To make it cover the entire area, scale it by the corners. Hold down the Shift key to keep the proportions. The Alt key also helps: it makes the object scale evenly from the center. So the center stays the center, and you can drag the texture large enough that it extends beyond the edges.
Then rotate the texture via right-click and the option "Rotate 180°" if the dark area isn't at the top yet. Confirm the transformation with Enter. Rename the new layer immediately, for example to "Background Paper". This saves you from searching for the right layer later.


Activating the blend mode "Overlay"
To see the dog portrait again, you change the blend mode of the texture layer. In the Layers panel, select the mode "Overlay". Now you can already see how the background will look. The texture merges with the photo, and the dog stays in the foreground.
However, this mode only works with a gray background. Black or white areas show no usable effect. So make sure your texture has a neutral gray in the middle area.
Roughly masking out the dog
Isolating fur is considered one of the most demanding tasks in image editing. With this technique, you don't have to do it perfectly. The trick lies in the choice of color: if the background matches the dog in color, a kind of rim light forms along the contours that looks natural, as if light were falling on the fur from behind.
Create a mask for the texture layer using the "Add layer mask" icon at the bottom of the Layers panel. In the mask, white means visible, black means hidden. So with black paint on the mask, you paint out the areas that the texture should not show, and there you see the layer underneath again.
Select the brush with the B key and set the hardness to 0 percent. Use a size that roughly fits the dog. With the D key you reset the colors to black and white, and with the X key you swap them. Make sure the mask is active, and paint around the dog roughly with black. For the first pass, this doesn't need to be precise.


Touching up and refining the contours
In the first pass, you probably masked out a bit more than necessary. This creates a gray edge around the dog. Zoom to about 50 percent, make the brush smaller, and switch to white with X. Now paint the background back in from the outside toward the inside, up to the edge of the head or body.
It's not a problem if you paint slightly over the edge. The rim of light then looks like natural incident light. However, make sure not to make the brush too small. The soft edge grows with the brush size, and precisely this soft edge ensures the natural transition to the fur. A medium size is usually completely sufficient.
When you zoom in and look at the result, the photo with the new background should look seamless. You can show and hide the layer to check.


Why a graphics tablet helps
You can also create the mask with a mouse or touchpad. However, a graphics tablet makes the work more pleasant. With a pen, you draw lines faster and more precisely. In addition, you don't have the problem of having to lift the mouse again and again. With a tablet, the pen position corresponds directly to the position of the mouse pointer on the screen, which saves a lot of time, especially with larger movements.

Adjusting the background image with the Camera Raw filter
Now you adjust the background in color to match your image. When you pasted it, the texture automatically became a Smart Object. You can recognize this by the small icon in the layer's thumbnail. This is important, because filters on Smart Objects can be changed at any time afterward. On a rasterized layer, on the other hand, the effect could no longer be corrected.
Select the texture layer and go to "Filter", then "Camera Raw Filter". In the Camera Raw window, you'll find the same sliders as in Lightroom, but in a different arrangement. The advantage: these settings affect only the background and not the overall look of the image.
First, you'll see that the background looks redder because of the blend mode. So darken it a bit by reducing the exposure or the shadows. You can also lower the highlights somewhat so that the background becomes more neutral. Then you specifically add a bit of yellow and red until the tone looks warm and brown, which matches the fur.


Readjusting saturation and hue
If you're not yet satisfied with the result, open the Camera Raw filter by double-clicking its entry below the layer. The previous settings are still there, and you can keep changing them. A common case: the background looks too red. In that case, you reduce the saturation a bit and check whether the red cast disappears. Often a small correction of the color temperature is enough.


Selectively blur the background
The background may appear somewhat softer so that the dog stands out more in the foreground. Select the background layer and open "Filter", then "Blur Filter" and "Gaussian Blur". The default value is 15; for this background I recommend a value of about 10. Confirm with OK.
Since you have already created a mask, the blur only affects the background. The dog stays sharp. The Smart Filter is recalculated with every change, so showing and hiding it can take a little while. But that is exactly the advantage of Smart Filters: You can check and adjust their effect at any time.


Use the before-and-after comparison
Show and hide the Smart Filters one after another to check the result. You will see that the colors between the dog and the background now harmonize. Before, the transition was slightly noticeable; after the adjustments, it is hardly noticeable anymore that the background was inserted.

Finally, refine the overall look
The background is now finished. In the next step, you can give the entire image a coherent color look, specifically bring out the contrasts, and finally sharpen the image slightly. These steps can also be controlled again via Smart Filters or adjustment layers.

Summary – Replacing the background of a dog portrait in Photoshop without precise cutout
With a background that matches in color, you avoid the difficult cutout of fur. You choose a texture that suits the dog, place it over the image using the blend mode "Overlay," and roughly mask the dog with a soft brush. Then you adjust the background with the Camera Raw filter and blur it with the Gaussian Blur. Smart Filters allow you to correct any change later. A graphics tablet makes working easier, but is not necessary.
FAQ
Do I really not have to mask out the dog precisely when cutting it out?Not with a background that matches in color. The soft edge and the resulting light edge look natural, even if the mask is rough.
Why doesn't the blend mode "Overlay" work with a black or white background?The mode needs a medium gray as a base. Black and white do not produce a usable effect.
What do white and black mean on a layer mask?White makes the layer visible, black hides it.
Why shouldn't I choose a brush that is too small?The soft edge gets larger with the brush size. This soft edge ensures a natural transition between fur and background.
What is the advantage of a Smart Object?Filters applied to a Smart Object can be edited at any time afterwards and their strength can be changed.
How can I adjust the background afterwards?Double-click the Camera Raw filter or the Gaussian Blur in the Layers panel to change the settings.
Is a graphics tablet necessary?No, you can also work with a mouse or touchpad. However, a graphics tablet allows more precise and faster lines.


