
A sports car rolls slowly past you, the light falls at an angle onto the paint, and all you have is a camera in your hand. By the end of the training, this exact scenario should no longer be a coincidence for you. The intro video by Florian Haizmann is the starting point of this video training on automotive photography. It lasts about 100 seconds and gives you a first overview: who will guide you through the course, what the structure looks like, and which topics await you.
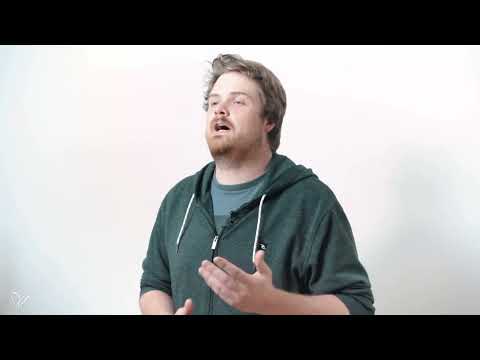
The video is only loaded from YouTube when you play it – data (including your IP address) is then transmitted to YouTube/Google. More in the privacy policy
This guide summarizes the content of the intro and organizes it into steps for you. That way, even before the first chapter, you know what to expect and where you should start with your camera.

Key Takeaways
- Florian Haizmann is an engineer and professional automotive photographer with about three years of professional experience in this field.
- The training consists of three chapters, ranging from a simple introduction to demanding lighting setups.
- In the first chapter, you learn how to achieve a convincing image without much equipment.
- The second chapter is devoted to dynamic shots, that is, capturing motion.
- All shoots take place on location, meaning neither in a studio nor at exotic places, but at spots that you can easily reach yourself.
Step-by-Step Guide
Step 1: Getting to Know the Instructor
Before you look at the technique, it is worth taking a look at the person behind it. Florian Haizmann comes from Stuttgart and works full-time as an engineer. Photography began for him about ten years ago as a pure hobby. About three years ago it became a profession. For you, this means: the course does not come from someone who only talks about automotive photography in theory, but from a photographer who regularly works on client assignments. While watching, pay attention to how he explains technical relationships, because his engineering background often shows in his structured approach.

Step 2: Understanding the Structure of the Training
The training is divided into three chapters that build on one another. Each chapter covers its own topics and techniques. So you don't have to master everything right away, but can make progress step by step. It is best to plan on working through the chapters in the given order, even if you already have some experience. The individual lessons build on the knowledge of the previous ones.

Step 3: Chapter 1 – The Basics Without Much Equipment
The introduction is deliberately kept simple. In the first chapter, Florian shows you how to get a good car image without elaborate equipment. This is an important message: an impressive photo is not created by expensive gear alone, but by the right eye for perspective, composition, and surroundings. If you work through this chapter, you lay the foundation for everything that follows. So take your time to really internalize the basics before moving on to more complex setups.

Step 4: Chapter 2 – Dynamic Shots
Cars are built to be driven, and that is exactly where the second chapter picks up. It is about dynamic shots, that is, images that make motion visible. Florian explains various techniques with which you can capture this dynamism in a single image. This is a discipline that demands patience and practice, because motion shots rarely succeed on the first try. Plan enough time for your own attempts in this chapter and document your settings so that you learn from every attempt.

Step 5: Chapter 3 – Flashes and Targeted Artificial Light
The third chapter is the most technically demanding. Here you work with multiple flashes directly on location. The goal is to create a special look with targeted artificial light that goes strongly in the direction of commercial photography. This means that the images not only look beautiful, but also meet professional advertising standards. Before you tackle this part, you should know the behavior of your flash well. Practice placing and aiming the flashes until you can reliably assess the effect on paint and chrome.

Step 6: The Principle of Shooting on Location
A central idea of the entire training is working on location. All shoots take place at real locations and not in a studio. This has a practical advantage: you don't need an expensive studio space to try out the techniques. At the same time, you learn to deal with changing light, backgrounds, and distracting factors, which don't occur in a studio. Make sure to consciously observe the surroundings during every shoot, because they are a creative element of your image.

Step 7: Finding Locations Right on Your Doorstep
You can recreate most of the subjects used in the training yourself, because they are located in your immediate surroundings. Florian explicitly emphasizes that the locations are accessible to everyone. So before the first shoot, take a moment to look for suitable places near you. Parking garages, industrial areas, country roads, or residential neighborhoods can offer exciting backdrops. Make a note of possible locations so you can reach them quickly when needed.

Step 8: Getting Started with the Training
At the end of the intro, Florian wishes you a lot of fun with the training. This moment marks your starting point. You now have an overview of the instructor, structure, content, and way of working. The best next step is to watch the first chapter and start right away with simple shots. Remember that progress in photography comes above all from practice. Switch on the camera, go outside, and try out what you have learned.

Summary – Learning Automotive Photography: Getting Started with Florian Haizmann
The intro video lays the foundation for a comprehensive training on automotive photography. Florian Haizmann introduces himself as an engineer and professional photographer and explains that the course runs in three chapters that build on each other. The first chapter teaches the basics without much technical effort, the second is devoted to dynamic shots, and the third introduces working with multiple flashes and targeted artificial light. All shoots take place on location, and the subjects are easily accessible to you. With a clear plan and regular practice, you are well prepared to make use of the course.
FAQ
How long is the intro video?The intro video lasts about 100 seconds and gives you a first overview of how the training works.
Who is Florian Haizmann?Florian Haizmann comes from Stuttgart and works full-time as an engineer. He has been a professional automotive photographer for about three years; photography began for him as a hobby around ten years ago.
How is the training structured?The training is divided into three chapters. Chapter one covers basics without much equipment, chapter two covers dynamic shots, and chapter three covers the use of multiple flashes with artificial light.
Do I need a studio for the exercises?No, all shoots take place on location. A studio is not necessary, and according to Florian, the locations used can be found nearby.
Which techniques will I learn in the second chapter?In the second chapter, Florian explains various techniques for capturing the dynamics of a moving car in a single image.
Is the training also suitable for beginners?Yes, the first chapter deliberately begins with simple basics. The more technically demanding content only follows in the later chapters.

