
Before the first shutter clicks, it's worth taking a close look at the vehicle. After driving over dirt roads, through puddles and between locations, almost every car looks different after a day in the field than it should look in the photo later. This is exactly where Florian comes in with this tutorial. He shows you his personal cleaning workflow step by step and explains why a car doesn't have to be completely flawless for a successful picture.
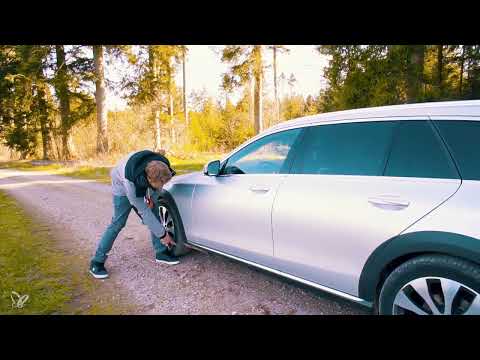
The video is only loaded from YouTube when you play it – data (including your IP address) is then transmitted to YouTube/Google. More in the privacy policy
In this guide, you will learn how to check the condition of your vehicle, which areas should definitely be cleaned, and which traces you can deliberately leave. You will also learn which products are suitable and why thorough preparation saves you a lot of time in post-processing.
Key Takeaways
A thorough pre-cleaning at the car wash forms the basis. On location, a quick refresh with glass cleaner and a microfiber cloth is then enough.
You must remove small dust particles, fingerprints and water spots on paint, chrome and high-gloss surfaces, because they are very time-consuming to retouch in post-production.
Dirt on plastic parts, wheel arches and lower skirts can stay. It underlines the off-road character of the vehicle and looks authentic.
Always work with simple cleaning agents and avoid aggressive or harsh chemicals that could damage the paint.
Step-by-Step Guide
Step 1: Assess the initial situation on location
When you arrive at the location with the vehicle, first do a complete walk-around. Pay attention to heavy dirt that has accumulated from driving, scouting locations or the weather. Florian had washed the car beforehand, but quite a bit of dirt had still accumulated after the drive there. So always plan for a cloth and a cleaner so that you can touch things up spontaneously.

Step 2: Carry out the walk-around systematically
Walk around the vehicle completely once and decide where to start. Florian begins at the front, where a mosquito was already stuck to the bumper. Don't let yourself get distracted by details before you have seen the entire car. This way you avoid lingering too long on one spot and overlooking other areas.

Step 3: Remove heavy dirt first
Start with coarse blemishes such as insects, bird droppings or dirt splatters. On the hood, a quick wipe and a brief look are often enough to spot areas that would be distracting in the picture later. It is important that you don't just wipe over it superficially. Small spots that are overlooked when working quickly create significantly more effort in Photoshop than an additional pass with the cloth.

Step 4: Choose the right cleaning agent and microfiber cloth
Florian recommends microfiber cloths, which bind dust and dirt well and don't scratch the paint. A simple glass cleaner or another mild product is sufficient as a cleaning agent. Don't use aggressive or harsh chemicals on the paint. For the usual dirt after a drive, a gentle product is completely sufficient. Work with light pressure and change the cloth as soon as it is heavily soiled, so that you don't spread dirt across the paint again.

Step 5: Clean the front section, radiator grille and license plate
The radiator grille, the star and the license plate are among the places where insects particularly like to gather. Proceed in a targeted way here and wipe these areas thoroughly. Especially on the grille and the star, you can see dirt very clearly as soon as you have run the cloth over it once. You should also clean the license plate, because it attracts flies and quickly stands out in the picture.

Step 6: Consciously assess lower sections and off-road elements
In the lower area of the front and on the sides, you can work more relaxed. You can safely leave the black plastic skirts at the tires as they are. Subtle dirt splashes emphasize the off-road character of the vehicle and look credible with this subject. So recognize exactly which dirt fits the subject and which absolutely has to go.

Step 7: Remove splashes from the wheels
Splashes that kick up from the tire are normal when driving through puddles or mud. Remove them where they have settled on the sides in the front area. These can usually be wiped away easily with a quick swipe. Florian works quickly and purposefully here, because the splashes are not difficult to remove from painted surfaces.

Step 8: Polish exterior mirrors, chrome, and windows
High-gloss surfaces such as chrome parts, windows, and mirror housings reflect every fingerprint and every drop of water. Pay particular attention to insect residue on the exterior mirror and wipe chrome and glass carefully. You will notice that these surfaces make the biggest difference. A clean chrome trim stands out immediately when it is dirty.

Step 9: Check black surfaces and tinted windows
Black surfaces and tinted windows show every speck of dust and every streak. Therefore, check the areas around the door handle, fingerprints on the body, and the windows especially carefully. Florian points out that in one spot you can even tell whether the door was pulled shut by the handle. Wipe such surfaces thoroughly and use only a little cleaner while doing so.

Step 10: Deliberately leave wheel arches and traces of dirt
You don't have to dust the black wheel arches down to the last spot. Subtle traces from driving on dirt tracks often suit the character of the vehicle well. Decide consciously here as well which dirt supports the subject. This saves you time and at the same time makes you look more authentic.

Step 11: Clean the rear systematically
For the rear as well, start at the top and work your way down. First wipe the roof spoiler and the black high-gloss elements, then the rear window and the windshield wipers. Florian recommends starting at the top first so that you don't let dirt fall onto surfaces that have already been cleaned.

Step 12: Watch out for dirt-track dust on the rear
On dirt tracks, every bit of fast driving kicks up more dust, which then settles on the rear. Therefore, drive slowly when you take your car into dusty surroundings for a shoot. This reduces the effort required for the final cleaning. If dust has nevertheless collected on the rear, remove it specifically with the microfiber cloth.

Step 13: Finish the bumper, exhaust trim, and diffuser
The black bumper may be a little dirty, because it emphasizes the off-road look. However, pay attention to the chrome and silver parts such as the exhaust trim and the diffuser. These should shine, because they stand out clearly in the picture. Florian shows that the impression during the work often looks worse than the end result. After this cleaning, the rear was clean and polished again.

Step 14: Finish the second side and check the result
Then turn to the second side of the vehicle and repeat the same steps there. At the end, you should look at the car once more as a whole. A final check from different angles shows you whether you have overlooked something. This effort pays off, because a thorough final cleaning saves a lot of work later in Photoshop.

Step 15: Pre-cleaning at the car wash and touch-up on site
Plan the cleaning before the shoot. Drive the car to the car wash some time beforehand and have it thoroughly cleaned there. When you arrive at the location, a quick touch-up with some glass cleaner and a microfiber cloth is enough. This way the vehicle is optimally prepared and ready for the shoot.

Summary ??? Car Photography: Final Cleaning and Condition Check Before the Shoot
A good car shot starts with a carefully prepared vehicle. First, you check the condition at the location, remove coarse dirt, and thoroughly take care of the paint, chrome, windows, and high-gloss black surfaces. You can deliberately leave dirt on off-road elements, wheel arches, and the bumper, because it supports the subject. With a microfiber cloth and a mild glass cleaner, you work gently and afterwards save a lot of time in image editing.
FAQ
How long does a final cleaning before the shoot take?In the video, cleaning the rear takes about two to three minutes, and according to Florian, the entire final cleaning moves along quickly overall.
Which cleaning agent is suitable for the paint?A simple glass cleaner or another mild cleaning agent is enough; you should avoid aggressive or harsh chemicals.
Which cloth should I use?Microfiber cloths pick up dust well and do not scratch the paint, which is why Florian explicitly recommends them.
Does the car really have to be completely clean?No, subtle traces of dirt on off-road elements, wheel arches, and the bumper can make the subject look authentic.
Why is thorough cleaning so important?Every overlooked spot, fingerprint, or speck of dust has to be laboriously removed later in image editing, so the effort on site is worthwhile.
When should I go to the car wash?Take the car to the car wash before the shoot so that the basic cleaning is done, and only do a quick touch-up at the location.


