
A portrait only looks convincing when small blemishes disappear without the face looking artificial. This is exactly what Gabor shows in this tutorial on a movie poster in the style of Preacher. He edits three portrait photos with subtle basic retouching and explains why he chooses certain tools and how he uses them. The video lasts just under eight minutes, and you can apply the workflow directly to your own shots.
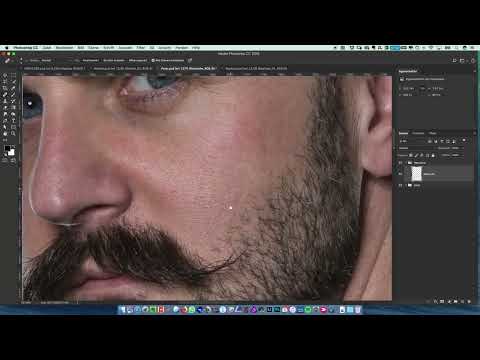
The video is only loaded from YouTube when you play it – data (including your IP address) is then transmitted to YouTube/Google. More in the privacy policy
Key Takeaways
- Create each retouch on its own empty layer so you can make corrections at any time.
- The Healing Brush blends brightness and texture with the surroundings and usually delivers cleaner results than the Clone Stamp.
- When selecting the source, always enable the "Current & Below" option, otherwise nothing happens.
- The Spot Healing Brush is ideal when you don't want to set a source and just want to paint over an area.
- With men, retouching is generally more restrained than with women. Focus on large blemishes first.
- You can balance out differences in brightness later with Dodge and Burn.
- Edit each file separately using the same workflow and save it as a PSD.
Step-by-Step Guide
Step 1: Get the Document Organized
Start with a clear structure in the Layers panel. Create a group and name it "RAW". This is where the unchanged original photo goes. Then create a second group and call it "Retouching". In this group, create a new, empty layer on which you will make all corrections later. This leaves the original image untouched, and you keep an overview when editing multiple people.

Step 2: Set Up the Healing Brush Correctly
Instead of the Clone Stamp, reach for the Healing Brush. Reduce the brush size so that it matches the structure of the skin, and leave the hardness at about 80 percent. These values give you a soft transition without visible edges. Make sure to adjust the brush to the size of the spot you want to remove.

Step 3: Sample the Source Correctly
Before you retouch, you need to set the source. So that Photoshop can access the original image, enable the "Current & Below" setting in the Healing Brush's options bar. If you select only the current layer, nothing happens when you paint, because the empty layer contains no image information. With the option enabled, you can then choose the source and correct the spot.

Step 4: Why the Healing Brush Is Superior to the Clone Stamp
The Clone Stamp transfers pixels one-to-one from the source to the target spot. Brightness information is often lost in the process, and unsightly transitions appear. The Healing Brush, on the other hand, matches the brightness and color of the surroundings. This very difference makes it so practical for skin retouching. You only have to choose the source and paint over the spot, and Photoshop calculates the result automatically.

Step 5: Set the Source with the Alt Key
Hold down the Alt key and click on a spot with a suitable texture to serve as the source. Release the key and then brush over the area you want to remove. After you release the mouse button, Photoshop blends the transitions and delivers a much cleaner result. Choose the source as close to the target spot as possible so that light and shadow match.

Step 6: The Spot Healing Brush for Quick Corrections
If you don't want to select a source, use the Spot Healing Brush. Simply brush over the spot that bothers you, and Photoshop automatically calculates the surrounding pixels. This tool is especially suitable for small blemishes. Here, too, the following applies: The "Sample All Layers" option must be enabled, otherwise the correction won't work.

Step 7: Decide Deliberately What Gets Removed
Go through the face piece by piece and think about which areas really bother you. Gabor recommends retouching men with restraint, while women usually need more corrections. He first removes the large, coarse blemishes and leaves the fine skin textures in place. You can still work on these details later during the fine-tuning, and the skin keeps its natural look this way.

Step 8: Check the retouching and hide layers
To check your progress, hold down the Alt key and click the eye icon of the retouching layer. This displays only that layer, and you can clearly see what you have already corrected. The biggest advantage of this method is its flexibility: if you don't like a correction, you simply hide the layer or delete individual areas selectively.

Step 9: Clean up the jacket and neck
Clothing sometimes needs attention too. On the jacket, you remove lint and small imperfections, making sure to keep an even texture at the transitions. For the crease on the neck, it helps to first test the tool over a large area. If the result isn't perfect, you undo the step and try a different source or a different brush stroke.

Step 10: Select pixels yourself and work irregularly
If the Healing Brush doesn't work quite reliably, you can choose the source manually and deliberately change the brush direction. Gabor also goes over areas twice to strengthen the effect. The stroke should remain irregular so that the skin doesn't look too uniform. An artificially smooth surface quickly stands out negatively on posters.

Step 11: Even out brightness differences and soften transitions
You can even out remaining brightness differences with the Dodge and Burn tools. For areas where the Healing Brush doesn't help, the Clone Stamp is suitable. For this, take a source from the contour of the jacket or the shirt. If a transition seems too harsh to you, you smooth it with a soft brush until it looks natural.

Step 12: Clean up the hairline and transitions on the head
At the top of the head, individual hairs are distracting, and you can remove them with the Healing Brush. Gabor selects the source directly from the surrounding area and paints over them. If the spot doesn't immediately turn perfectly gray, that's not a problem, because you can still refine the correction later. Pay special attention to the contour, because it determines whether the cutout looks clean later.

Step 13: Before-and-after comparison and fine-tuning
Turn the retouching layer on and off repeatedly to check the difference from the original. If you overdo the editing, the face quickly looks artificial. At the end, you can touch up smaller details in the Liquify filter, for example to slightly adjust the position of individual areas. Save the file afterwards before you move on to the next subject.

Step 14: Apply the workflow to the other people
The work steps remain the same for all people. You open the two other PSD files and carry out the same retouching. With Nadin, the correction on the forehead was somewhat more extensive. Comparing with Rafael shows that only little was changed on him, and mainly the hair on the head was removed. These differences are normal, because every portrait requires its own assessment.

Step 15: Fine details for symmetrical eyes
With Nadin, it was noticeable that the eyes are not quite symmetrical. To fix this, create a selection around the eye, move it slightly upward, and match it to the other eye. Such small adjustments seem inconspicuous at first glance, but they clearly improve the overall picture. Make sure the shift remains unobtrusive.

Step 16: Save all files as PSD
Edit each of the three PSD files separately and stick to the same workflow. This keeps the retouching consistent, even if the results vary depending on the person. Save all files as PSD so you can reopen them at any time later and refine them. After that, we continue with cutting out the subjects and designing the poster.

Summary ??? Photoshop Retouching: Cleaning Up Portraits with the Healing Brush
With a clean layer structure, the Healing Brush, and a subtle approach, you can achieve natural-looking portraits. The retouching stays on its own layer, so you can go back at any time. The Healing Brush blends brightness and texture, while the Spot Healing Brush takes care of quick corrections. Make sure to be more restrained with men and somewhat more targeted with women, and keep the fine skin textures. Apply the same workflow to all people and save each file as PSD.
FAQ
Do I really have to do the retouching on a separate layer?No, but it is highly recommended. On an empty layer, you can hide, change, or remove corrections at any time without losing the original photo.
Why isn't the Healing Brush working for me?The most common reason is that the "Current & Below" option is not activated. If necessary, you should also check whether you have set the source correctly.
How does the Healing Brush differ from the Clone Stamp?The Clone Stamp transfers pixels exactly, while the Healing Brush adapts brightness and color to the surroundings. This creates softer transitions.
When should I use the Spot Healing Brush?It is suitable for small blemishes where you don't want to set a source. You simply brush over the spot, and Photoshop calculates the surrounding pixels.
How much retouching makes sense for a movie poster?Too much smoothing quickly looks artificial. Above all, remove distracting blemishes and preserve fine skin textures so the portrait stays lively.


