
A dog sitting in the grass, beautiful light, and then you notice a frayed thread of cloth in the picture, along with a few stains in the fur. Details like these often spoil an otherwise successful photo. Lightroom quickly reaches its limits when it comes to removing such distractions, while Photoshop offers significantly more tools for the job. In this tutorial, I will guide you step by step through cleaning up a photo of a dog outdoors, from opening the image to fine-tuning the frayed edges.
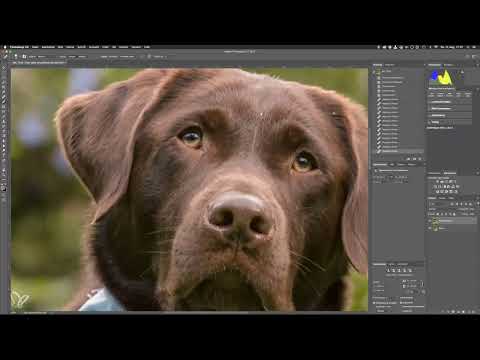
The video is only loaded from YouTube when you play it – data (including your IP address) is then transmitted to YouTube/Google. More in the privacy policy
Key Takeaways
- Open your image from Lightroom in Photoshop as a Smart Object so that your develop settings are preserved.
- Work with the embedded color profile to stay in the largest possible color space throughout the entire editing process.
- Duplicate the layer before you change anything, and rasterize the copy so that you can work with the retouching tools.
- With the Healing Brush, reset the source point by holding down the Alt key as soon as you work on larger areas.
- Remove frayed edges first with the Lasso and the "Content-Aware Fill" function, and proceed in small steps.
Step-by-Step Guide
Open the Image from Lightroom in Photoshop
The path to Photoshop leads through Lightroom. To do this, right-click on your image, choose "Edit In," and then "Open as Smart Object in Photoshop." You should definitely use this option, because the image then ends up in Photoshop as a Smart Object. All the settings you made in Lightroom thereby remain editable afterwards. If you later want to change something about the tonal gradient or the colors, you can do so directly from within Photoshop.


Keep the Embedded Color Profile
When opening, a dialog window about the color profile may appear. Always choose the top option here, "Use the embedded profile." This way you stay in the largest possible color space during editing. Only when you export the image from Lightroom is it converted into a smaller color space optimized for the web. This approach prevents unnecessary color loss while you work on the details.

Secure and Duplicate the Layer
Before you make the first correction, create a copy of the layer. The original layer remains unchanged and serves as a backup that you can return to at any time. You create all retouching on separate layers. This way you can later re-edit individual steps or undo them selectively. You create the copy with Ctrl + J on Windows or Cmd + J on Mac.

Rasterize the Layer and Give It a Meaningful Name
Retouching only works on a rasterized layer; Smart Objects cannot be edited this way. Therefore, right-click the top layer and choose "Rasterize Layer." The small Smart Object icon then disappears. Also give your layers meaningful names by double-clicking on the layer name. Especially with multiple retouches, this helps you keep track of what happened on which layer.

Working Efficiently with Zoom and Navigation
Zoom to 100 percent so that you can assess the details cleanly. With Ctrl/Cmd and Plus you zoom in, with Ctrl/Cmd and Minus you zoom out. Ctrl/Cmd and Zero shows you the entire image again. To move around within the image, hold down the spacebar. The cursor then turns into a hand with which you can shift the image. As soon as you release the spacebar, you land back in the last-used tool without having to switch each time.


Set Up the Healing Brush
For removing small distractions, the Healing Brush is my personal favorite tool. You can find it with the J key. Set the hardness to about 40 percent. The quickest way to adjust the brush size is with a key combination: Hold down Ctrl or Control and Alt, click with the left mouse button, and then move the mouse left or right to change the diameter. Moving up or down changes the hardness. You should definitely remember this combination, because it makes the work considerably more relaxed and faster.


Setting the Source Point Correctly
The Healing Brush works with a source point. To set it, hold down the Alt key until the cursor turns into a small crosshair, and click on an area you want to use as a template. Release the Alt key and then paint over the blemish. The image content is copied from the source point to the target area. The crosshair moves along with the brush, and this is exactly the most important point when working with this tool: the source point moves along, and everything it passes over is copied too.


You can see this clearly when you move the source point too far. As soon as the source point drifts into the fur area, you suddenly transfer hairs onto a smooth surface. For larger areas, therefore, always lift the brush repeatedly, hold down the Alt key again, and define a new source point near the spot you want to repair.
Removing Spots in the Fur and in the Background
Now it's time for the actual retouching. Work your way through the image piece by piece and remove all elements that bother you: small spots, dots, and individual hairs in the fur or in the background. Always apply the brush only on small sections and redefine the source point each time the structure changes. This way you avoid unsightly repetitions and ensure that the transitions look natural.

Removing Frayed Threads with the Lasso and "Content-Aware Fill"
The Healing Brush is less suitable for the frayed threads on the cloth, as it blends the colors and thereby creates blurry transitions. Try the "Content-Aware Fill" function first. It doesn't always work, but it is very fast and often the best solution. Use the Lasso (key L) to select an area around the thread. Make sure the selection also includes a bit of the cloth so that Photoshop recognizes what should be changed there. Then go to "Edit" and "Fill". Under "Contents" choose "Content-Aware", activate the "Color Adaptation" checkbox, and set Mode and Opacity to "Normal" and 100 percent.


The keyboard shortcut Shift + F5 opens the same dialog directly, and with Ctrl/Cmd + D you deselect the selection again. For most frayed threads, this gives you a smooth transition to the fur and the cloth.
Fine-Tuning in Small Steps
Not every spot works right away. For very small or unusually shaped threads, you should make the selection in small steps. So don't mark all the frayed threads at once, but one after the other. Sometimes the result is still not perfect. This is completely normal at a magnification of 100 percent, because at the usual viewing size such small imperfections are hardly noticeable. If a spot is truly unsatisfactory, you can rework it later with the Healing Brush or with a more advanced technique.


Checking the Result
In conclusion, a comparison is worthwhile. Toggle the edited layer on and off and look at the areas where you retouched. You will notice that the image looks tidier and cleaner immediately, even at normal viewing size. A few difficult spots sometimes remain, and that is exactly where it's time for more advanced retouching techniques.


Summary ??? Cleaning Up Outdoor Dog Photos in Photoshop
With Photoshop, distracting elements in dog photos can be removed much more precisely than in Lightroom. Open your image as a Smart Object, stick with the embedded color profile, and work on a backed-up, rasterized copy. The Healing Brush is suitable for spots and hairs, as long as you reset the source point regularly. Frayed threads are best removed using the Lasso and "Content-Aware Fill", where small steps lead to cleaner results. With this workflow, your editing remains traceable and can be corrected at any time.
FAQ
Why should I open an image as a Smart Object from Lightroom?Because your Lightroom settings remain editable afterwards in Photoshop, and you can make adjustments at any time.
Which color profile should I choose when opening?Always choose the top option "Use embedded profile" so that you stay in the largest possible color space during editing.
Why do I need to rasterize the layer?Retouching tools such as the Healing Brush only work on rasterized layers; Smart Objects cannot be edited with them.
How do I set a source point for the Healing Brush?Hold down the Alt key until the cursor becomes a crosshair, and click at the desired spot.
Why does the Healing Brush sometimes alter fur in the wrong places?The source point moves along as you paint with the brush. Therefore, reset the source point regularly for larger areas.
How do I change the brush size quickly?Hold down Ctrl or Control and Alt, click with the left mouse button, and move the mouse left or right.
When do I use "Content-Aware Fill"?Use this function for frayed threads that you have previously outlined with the Lasso. It is fast and often very effective, but doesn't work in every case.
How do I deselect a selection?Press Ctrl or Cmd and D.
What do I do if the result is not perfect?Touch up in smaller selections or use more advanced retouching techniques for the remaining areas.
Why should I name the layers?Meaningful names help you keep track when doing multiple retouches and know exactly which layer changes what.


