
A good dog photo thrives on contrast, mood, and a clear focus on the fur and the eyes. That's exactly where this tutorial comes in. You'll edit an outdoor portrait in Photoshop step by step: you'll build up contrast, control the brightness of individual color channels, add a vignette that can be dosed precisely, and add sunshine that looks real. Finally, I'll show you a sharpening method that works without the typical bright edges around the contour.
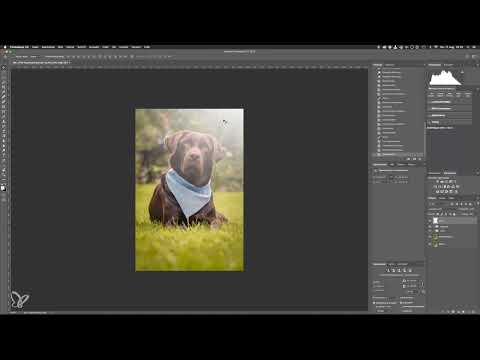
The video is only loaded from YouTube when you play it – data (including your IP address) is then transmitted to YouTube/Google. More in the privacy policy
This tutorial is aimed at readers who already have a basic understanding of layers, masks, and layer styles. If you use the keyboard shortcuts for Mac, you can usually find the Windows versions by replacing Command with Ctrl.
Key Takeaways
Key Takeaways
- The Black & White adjustment in "Soft Light" mode delivers powerful contrast, which you fine-tune via the opacity and the color channel sliders.
- A vignette with a Curves adjustment and a layer mask can be controlled in brightness and strength at any time.
- A light glow in "Linear Light" mode looks natural if you reduce the fill instead of the opacity.
- Sharpening via the combination of duplicate, Linear Light, inversion, and "Unsharp Mask" avoids halos.
Step-by-Step Tutorial
1. Build up contrast using the Black & White adjustment
Place a "Black & White" adjustment layer above your image. At first this looks like a mere conversion to grayscale, and that's exactly the trick: the layer brings brightness information that you'll use in a moment. For now, though, the image stays gray.

2. Set the blend mode to "Soft Light"
Set the blend mode of the Black & White layer to "Soft Light". Very strong contrast now appears immediately, making your image look dramatic, but quickly also overdone. This is not a mistake, but the starting point for the fine-tuning. So you have two ways to tame the effect: reduce the opacity or adjust the individual color channels in a targeted way.

3. Dose the opacity and introduce contrast selectively
Reduce the opacity of the layer. At around 25 percent you usually reach a balanced value that noticeably lifts the contrast without eating away at the fur. While adjusting, pay attention to the shadows: they should retain structure and not turn into a black area.

4. Selectively lighten and darken color channels
The Black & White adjustment offers sliders for every color range, and that's exactly what makes it so valuable. If you darken the blue tones, the sky or a blue background becomes darker and the saturation looks more intense. With the yellow tones you can control the brightness of the fur, and with the red tones you raise or lower the highlights in the fur. Try out each slider individually and switch the layer off in between so you can see the difference.
5. Dose the look group and check the interim result
Combine all the layers so far in a group so you can control them together. Then reduce the opacity of the group to about 20 percent. That's enough, because you still want to keep detail in the image. If individual areas have become too dark again, lighten them selectively with a layer and a soft mask in "Color Dodge" mode.
Switch the group on and off to check the before-and-after difference. The image looks more present, more dynamic, and the colors stronger, without being unnatural. You should save this interim result before you continue.

6. Create a vignette with a Curves adjustment
For a vignette that you can control precisely, create a new group named "Vignette" and within it a "Curves" adjustment layer. Pull the middle of the curve downward until the edge is clearly darkened. The center of the image doesn't matter yet, since the darkening is initially the same everywhere. In this step, decide only on the strength you have in mind for the edge. A curve that is too strong can be weakened later via the opacity.

7. Painting the dog free on the layer mask
Select the mask of the Curves adjustment layer and take a large, soft brush with a hardness of 0 percent. Make sure black is active as the foreground color. Then carefully paint over your dog so that the darkening disappears there again. Work slowly and with only a few brush strokes so that a soft transition is created.

8. Duplicate the mask, invert it, and brighten the center
Here lies the real trick. Duplicate the Curves layer with Command + J and invert the mask of the copy with Command + I. The copy now brightens the center, while the original darkens the edge. Pull the curve of the copy upward until the center appears pleasantly bright again.
Now you can show and hide both areas independently of each other. This makes the vignette very precise, because you control the edge and the center separately.

9. Readjusting the vignette via opacity
If the edge seems too strong to you, simply reduce the opacity of the corresponding layer. In a portrait, a subtle darkening usually looks better than a heavy shadow. At the end, check whether your dog stands out clearly in the center and whether the brightness there is right.

10. Setting a glow of light with a white brush
For the sunshine, create a new layer called "Light". Choose the brush, set the foreground color to white by pressing D and then X, and set the brush to be very large. A single click in the center or slightly beside it is enough to create a bright spot. This is our raw material for the glow of light.

11. Transforming and positioning the glow of light
Activate the transformation with Command + T and hold down the Shift key while dragging at the corners so that the proportions are preserved. Enlarge the light spot to roughly four times its size. Place the center point of the transformation at the edge of the image so that the glow takes effect from there. Confirm with Enter so that Photoshop recalculates the layer.

12. Using Linear Light and Fill
Set the blend mode of the light layer to "Linear Light". The decisive step follows after that: do not reduce the opacity, but the fill. As a result, the shadows that are covered by darker areas disappear first, and the brighter areas remain visible longer. A natural selection is created that looks as if real light were falling on the subject.
Think beforehand about where the light should come from. Pay attention to your dog's shadows and to the bright background area. In this example, light from the upper right fits, because the shadows run to the left. If the glow of light is too large, transform it again and make it a little smaller.

13. Coloring the sunlight with Color Overlay
Double-clicking the light layer opens the layer styles. There you activate the "Color Overlay" option and choose a warm orange tone. A slight yellow tint often looks too cool, so it is worth taking a step toward orange. Adjust the opacity of the layer until a subtle shimmer of color appears. At around 15 percent you are usually close, but you decide the fine-tuning on the image itself.

14. Final sharpening without artifacts
Sharpening can quickly create bright halos around contours. To avoid this, you work with a copy of the entire image. Press Command + Alt + Shift + E to merge all visible layers into a new layer. Then duplicate it, set the blend mode of the upper copy to "Linear Light" and invert it with Command + I. Reduce the opacity of this layer to exactly 50 percent.
Then apply the "Unsharp Mask" filter under "Filter" and "Blur Filters". A typical value is a radius of 5 and a threshold between 50 and 55. Choose the sharpening to be somewhat stronger, because you can reduce it later via the opacity. The calculation takes a little longer, which is normal.

Afterwards, merge the two layers by selecting both, right-clicking, and choosing "Merge Layers". Set the blend mode of this layer to "Overlay" so that the sharpening becomes visible. Compare the results at 50 percent zoom, especially in the cloth and in the dog's face. You will see that the sharpness looks precise, without side effects.

15. Saving and Returning to Lightroom
Save your image with Command + S or via "File" and "Save". The PSD file will then automatically end up back in your Lightroom catalog, right next to the original photo. There you can compare the edit or refine it further.

Summary ??? Sharpening Dog Photos in Photoshop: Look, Vignette, and Light Effect
You have seen how to build up contrast with the black-and-white adjustment in "Soft Light" mode and control it via opacity and color channels. With a curves adjustment, an inverted mask, and a precise brush, you create a vignette that can be controlled in all areas. The glow of light in Linear Light mode, reduced via the fill and refined in color with a color overlay, looks like real sunlight. The final sharpening via duplicate, inversion, and "Unsharp Mask" delivers clear contours without the typical bright edges. Pay attention to the direction of light with every effect so that the image remains coherent.
FAQ
Do I need prior knowledge of Photoshop?Basic knowledge of layers, masks, and blend modes will help you a lot, because the tutorial builds on them.
Can I also use the black-and-white adjustment without a blend mode?Without "Soft Light," the strong contrast that particularly distinguishes this technique is missing, so the mode is the core of the look.
Why do I reduce the fill instead of the opacity for the glow of light?The fill makes shadows and highlights disappear in a natural order, while the opacity only weakens the effect uniformly and thereby makes it look washed out.
How do I avoid over-sharpening?Work with the sharpening layer in "Linear Light" mode, invert it, and set the opacity to 50 percent so that you can fine-tune the effect at any time.


