
A portrait only truly works in the style of a fantasy series when light and shadow sculpt the face. That is exactly what this chapter is about. You will work with Dodge & Burn, adjust contrast and exposure using a Camera Raw filter, and finally apply strong sharpening that gives the image its frosty character. The tutorial is aimed at anyone who has already mastered basic retouching and now wants to tackle the final look.
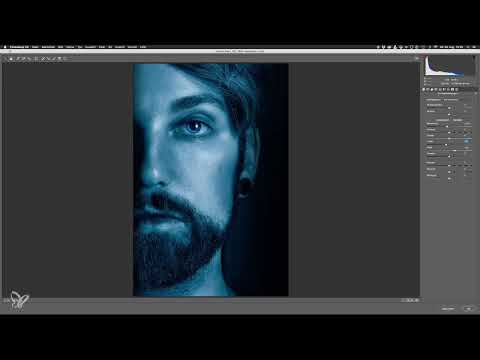
The video is only loaded from YouTube when you play it – data (including your IP address) is then transmitted to YouTube/Google. More in the privacy policy
Key Takeaways
- Letting Dodge & Burn work on a layer in Soft Light mode is non-destructive and can be corrected at any time.
- Highlights in the eyes, cheekbones, and on the nose, as well as targeted shadows, shape the face more strongly than any filter.
- A Camera Raw filter on a Smart Object layer is ideal for fine-tuning exposure, shadows, blacks, and hue.
- The High Pass filter with a very small radius creates the typical over-sharpening with fine bright outlines on hair and beard.
Step-by-Step Guide
Step 1: Preparing the Dodge & Burn Layer
First, create a new layer by pressing Shift and F5 and setting the fill to 50% gray. Then set the blend mode of this layer to Soft Light. Next, select the Dodge and Burn tool by pressing the O key. With the Alt key, you can switch between lightening and darkening at any time. Make sure to work with a low exposure so that you build up the shadows step by step.

Step 2: Setting Highlights in the Eye
Begin with the light edges in the eye, which are also clearly visible in the original movie posters. Specifically emphasize the light edges on the lower side and on the left side of the eye. Work with small brush movements and short clicks so that the highlights don't fray. Then lightly darken the surrounding areas. This makes the gaze more intense, and the eye moves into focus.

Step 3: Fine-Tuning the Eye Reflection and Surroundings
The eye reflection should move to the lower corner of the eye, just like on the posters. Therefore, shift it gradually and check the result again and again. Then darken the area around the eye so that the light reflection stands out more precisely. The more precisely you work on the section, the stronger the face will look later.

Step 4: Using the Original Posters as a Guide
A helpful approach is to open the original movie posters as a reference. Look at where the lights and shadows lie in the face there, and transfer this pattern to your image. Darken the cheek to emphasize the cheekbone. At the same time, the lights on the opposite side become more visible. An important highlight lies on the cheekbone and in the outer corner of the eye, so you should work on these spots especially carefully.

Step 5: Making the Nose Look Narrower
Place a shadow on the left side of the nose. This trick makes the nose look narrower without you having to change its shape. While working, focus only on the nose and then check the effect in the overall image. Lighten the spot to the right of it slightly so that the transition remains harmonious.

Step 6: Darkening the Chin, Lip, Neck, and Forehead
In the chin area, you should darken slightly while the highlights on the lower lip are retained. You can darken the neck significantly, since little happens there in the original image. However, leave a narrow strip of light in the middle so that the neck doesn't look unnaturally flat. On the forehead, you extend the darkening so far that only the existing highlights remain.

Step 7: Working Out the Eyebrow and Eye Area
Under the eyebrow it should become significantly darker, apart from the highlights already set. You can also darken the eyebrow itself slightly. A bit more shadow may also form under the eye. In the corner of the eye, you emphasize the small light reflection again so that the gaze stays alive.

Step 8: Switch between Darkening and Lightening
While working, you keep switching between darkening and lightening with the Alt key. This way you keep an eye on the balance between light and shadow. Pay particular attention to smooth transitions, for example between the shadow and the skin on the cheek. Then compare the state before and after the editing by showing and hiding the layer. You will see that the face looks significantly more present and more three-dimensional.

Step 9: Editing the Whites of the Eyes
Altering the whites of the eyes is normally considered taboo in portrait retouching. In this case, however, it is part of the look. Place a white reflection in the eye that makes the overall image more present. Then slightly darken the rest of the whites of the eye and raise the areas that should stay bright again. Always check the result in the overall view so that the eye does not look artificial.

Step 10: Darkening the Overall Image Afterwards
When you view the image scaled down, you notice that some areas are still brighter than in the original. Darken them in a targeted way and then check whether the image looks too bright overall. In this case, an additional adjustment using the Camera Raw filter is worthwhile. To do this, create a new layer by pressing Cmd, Alt, Shift and E. Name it, for example, Exposure, convert it into a Smart Object and then apply the Camera Raw filter to it.

Step 11: Adjusting Exposure, Shadows and Blacks in the Camera Raw Filter
First, reduce the exposure slightly until the brightness matches the original posters. Then slightly increase the whites to emphasize the highlights more. Next, lower the shadows and the blacks. Since the shadows are better suited here, the greatest effect shows up there. Also adjust the tone to be somewhat more neutral. The original image is slightly softer in color on the skin, so at the end you reduce the vibrance a little.

Step 12: Checking the Result of the Contrast Adjustment
Turn the Camera Raw layer on and off to see the difference. The image now looks darker and softer overall. The tone matches the original image much better. Make a note of places where you would like to crop the framing a bit tighter later. You can do that at the very end, once the look is established.
Step 13: Preparing the Sharpening
Sharpening is a central component of the look, because the film posters are clearly oversharpened. This creates prominent hair and visible skin pores. To simulate the effect and to be able to better see later where you still need to retouch, create a new layer with Cmd, Alt, Shift and E. Name it sharpen, set the blend mode to Linear Light and convert the layer into a Smart Object. This way you can readjust the sharpness at any time.

Step 14: Setting the High Pass Filter Correctly
Go to Filter, Other and High Pass. Your image initially looks normal afterwards, but the effect is active. Zoom in closer on the face, to about 50%, to see the effect well. A radius of 1 px already shows strong sharpening, especially on the eyelashes and the beard contours. If you increase the value to 2 px, the result becomes exaggerated and no longer looks like a poster. A value of around 1.2 px is usually a good compromise. Confirm with OK.

Step 15: Viewing the Before-and-After Result
Compare the sharpening by showing and hiding the layer. Hair and beard in particular change greatly. A similar effect also appears on the eyebrow. Fine bright halos form at the tips of the hair, giving the impression that the hair is covered in frost. This very effect fits the look of the image perfectly, because it conveys coldness. The image looks razor sharp at every zoom level.

Step 16: Group the adjustments and plan the next step
Combine the layers so far into a group and name it, for example, Contrast adjustment. This way you keep an overview in the Layers panel, and you can call up the before-and-after comparison at any time. The overall look is already very far along. Contrast, hue, and sharpness generally match, but some fine details are still missing. The Night King as an eye reflection, the snow in the foreground, and the lettering will be added in the next chapter.

Summary ??? Game of Thrones Look in Photoshop: Dodge & Burn, Contrast, and Sharpening
With Dodge & Burn you shape the face, with the Camera Raw filter you balance exposure and hue, and with the High Pass filter you create the frosty sharpening. Work step by step, check repeatedly with the before-and-after comparison, and use smart objects so you can readjust at any time. This produces a portrait that looks like a still from a fantasy series.
FAQ
Why should I create the Dodge & Burn layer in Soft Light mode?Soft Light allows you to lighten and darken with gray without destroying the original colors. You can correct the layer at any time.
What is the Alt key used for with the Dodge and Burn tools?With the Alt key you switch between lightening and darkening without leaving the tool.
Why do I convert the layers into smart objects?Smart objects make it possible to edit or remove filters such as Camera Raw or the High Pass filter later.
Which radius is suitable for the High Pass filter?A value around 1.2 px usually provides a good compromise. Higher values quickly look exaggerated and unnatural.
Why is the white of the eye edited in this look?On the movie posters, the white of the eye is deliberately emphasized. A slight reflection enhances the presence of the gaze.
What does sharpening with the High Pass filter do?It creates fine light halos on hair and beard, which convey the impression of frost or cold.


