
The Game of Thrones look thrives on details that you only notice on second glance. That is exactly what decides whether an image merely looks similar or looks almost like a perfect copy. In this tutorial, I will walk you through the last 20 percent of the editing: the eye reflection, the crop, the fine color adjustments with Photo Filter and Saturation, dodging and burning, and the fine corrections on the lips.
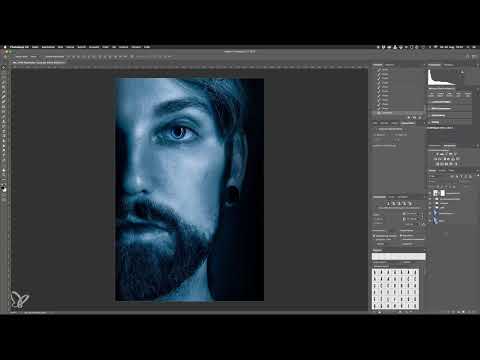
The video is only loaded from YouTube when you play it – data (including your IP address) is then transmitted to YouTube/Google. More in the privacy policy
Key Takeaways
- The last 20 percent of an edit usually take the most time, but make the decisive difference compared to the reference.
- A reflection can be worked into the eye precisely using a layer mask and a soft black brush, without destroying the original.
- A Photo Filter as an adjustment layer allows you to finely dose the blue tone via opacity and readjust it at any time.
- With Hue/Saturation in the shadows and highlights, you can tone down unwanted color fringes.
- Dodge and Burn on a neutral gray layer in Soft Light mode shapes the face and texture without you changing pixels directly.
Step 1: Preparing the Nightking Reflection
Start by dragging the eye reflection as an image file into your document. The file is a cut-out PNG that you simply drag and drop onto your canvas. This creates a separate layer with the cut-out eye, which you use as a base. Then zoom to 100 percent so you can clearly see the edges and details.

First, roughly position the eye in the right place. You can still enlarge or reduce it if needed. The only important thing is that the reflection looks coherent in proportion to the original. Then confirm the transformation with the Enter key.

Step 2: Revealing the Reflection with a Layer Mask
Now create a layer mask by clicking the layer mask icon. You get a white mask, which initially leaves the image completely visible. With a soft black brush, you can now selectively hide the areas that don't belong to the reflection.
You activate the brush with the B key. Set the size rather small at first and make sure the hardness is at 0 percent. This creates soft transitions instead of hard edges that would be noticeable later.

For the colors, you need black and white. Press the D key to reset the default colors. With the X key, you switch between foreground and background color. Make sure that black is active as the foreground color and that the mask, not the image layer, is selected before you paint.

Step 3: Painting the Mask Cleanly
Now paint away with black on the mask the elements that don't belong to the reflection. Be especially careful along the edges. Your goal is to leave only the Nightking's reflection visible. It's better to work in several small steps than to remove too much at once with a large brush.

One advantage of this reference is the elongated reflection of the strip light softbox. The light shape in the original sits in the same place as your new reflection. As a result, you hardly need to adjust anything, and the reflection settles into the image almost automatically. At the end, check whether the difference from the original image is clearly visible.

Step 4: Refining the Crop
The crop has an enormous influence on the poster's impact. Choose the Crop tool and make sure the 2:3 aspect ratio is maintained. The composition is easier to judge in the grid. Pull the top edge down a little so the head sits tighter in the frame. You can also shorten the bottom edge, since the chin disappears in the dark area anyway.

Note that Photoshop recalculates all filters after cropping. This may take a moment. Afterwards, you will see the result with the new crop.

Step 5: Adjust the blue tone with a photo filter
Instead of using a solid color fill, you can also control the blue tone with a photo filter. The advantage: the filter can be finely adjusted at any time via opacity or density. Open the Photo Filter entry via the icon for adjustment layers. In the selection menu you will find several cooling filters. Try them one after another and compare which hue best suits your subject. The first filter has a very harsh bluish effect, the second has a slight magenta component, and the third has a stronger green component. In the example, stick with the first filter and first reduce the density to 0, then slowly increase it.

Step 6: Soften the bluish edge in the shadows
With higher density, a bluish edge quickly appears in the shadows that is not present in the original. To mitigate this effect, open a Hue/Saturation adjustment layer. In the Hue menu, select the Shadows option. With the slider between yellow and blue, you can specifically neutralize the shadows or tint them slightly yellowish or greenish.
Test the values in small steps. Move the slider back and forth until the edge no longer looks so harsh. In this example, it is enough to shift the shadows minimally toward yellow. Afterwards, the overall blue tone recedes somewhat, so you have to apply the photo filter a bit more strongly again. Alternate between the two settings until the interplay is right.

The highlights can also be readjusted in the same way. Even a minimal shift toward red clearly intensifies the blue tone in the highlights. Such nuances are not a must, but they can provide the final finishing touch.
Step 7: Bundle fine corrections in a group
Place all previous color adjustments in a layer group and name it, for example, Fine Corrections. This way you keep an overview, and you can show and hide the effect of the group at any time. You will then see immediately how the look has changed overall.
In the example, too much red remains in the image. To fix this, open another Hue/Saturation adjustment layer, select the Reds range, and reduce the saturation completely. Do the same with the magenta tones. This ensures that no disturbing color remains in these areas. You can also check the blue tones with the saturation slider, but they do not necessarily have to be changed.

Step 8: Dodge and Burn for more depth
Next, you shape the face with light and shadow. To do this, create a new layer, fill it with 50 percent gray, and set the layer mode to Soft Light. The keyboard shortcut Shift + F5 opens the Fill window, where you can set the gray.
With a Dodge tool you selectively brighten, with a Burn tool you darken. In the example, the areas on the forehead, the eyebrow, and under the eye are too bright. Darken them slightly, but make sure no detail is lost. On the beard, you only reduce the brightness minimally so the structure is preserved. On the neck, the hair, and the side of the nose, you can add extra shadow. The bright light reflection at the edge, on the other hand, you should deliberately leave as it is.

Step 9: Make the lips even
The lips often look uneven because they have many slight differences in brightness. If you brighten them with the Dodge and Burn brush and darken the areas in between, a more even surface results. Think in grayscale: different red tones often look the same in black and white, and that is exactly what you are evening out. Take care not to lose the highlights on the lip.

Step 10: Check the overall image and readjust
Zoom out of the image regularly to assess the overall impression. Darkening often intensifies the blue tone in the shadows. Therefore, go back into the Photo Filter and reduce the density a little. The advantage of layers is that you can change every adjustment later as well, without having to edit the image again.

Once the look fits, the color grading is complete. In the next step, the snow texture and the lettering are added. You apply these two elements at the very end, when the image is completely finished.
Summary ??? Game of Thrones Look in Photoshop: Mastering the Night King Reflection and Color Finish
You have seen that the final finishing touch consists of many small steps. You apply the Night King reflection via a layer mask, you refine the crop in the 2:3 format, and you control the blue tone via a photo filter. Hue/Saturation helps you soften edges and neutralize red and magenta tones. Dodge and Burn on a gray layer in Soft Light mode gives the face depth, and you adjust the lips specifically. Always work with adjustment layers and groups so that you can readjust at any time.
FAQ
Do I absolutely have to apply the eye reflection with a layer mask?No, you can also work with an eraser. However, the layer mask is more flexible because you can undo corrections at any time.
Why should the brush hardness be set to 0 percent?A soft brush creates smooth transitions. Hard edges would quickly look artificial in the reflection.
Can I also use the photo filter without an adjustment layer?That is possible, but then you lose the option to freely adjust density and color later. An adjustment layer is therefore recommended.
What does the layer group do for fine corrections?The group bundles all color adjustments. You can show and hide it with one click and thus directly compare the effect of the corrections.
Which gray level do I need for Dodge and Burn?You need 50 percent gray. In Soft Light mode, neutral areas remain unchanged, while bright areas are lightened and dark ones are darkened.
Why should the snow and the lettering only come at the very end?Both elements strongly change the overall impression. Only when color and light are right can you judge how they look best.


